Never used tinkercad what’s it like to useView attachment 1818123
********************************
Okay, the original Jumanji was in 1995.
Here are the files for the board itself. No dice or tokens.
Enjoy!
*********************************
Free for personal use.
You are using an out of date browser. It may not display this or other websites correctly.
You should upgrade or use an alternative browser.
You should upgrade or use an alternative browser.
Prop Replica STL files Section Free Personal Use
- Thread starter Jintosh
- Start date
Never used tinkercad what’s it like to use
It uses basic shapes to make more complex shapes. It's based off the idea of an old toy called "Tinkertoy"
Attachments
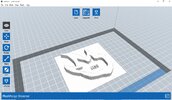
I am not an immersed user but have far too many decades of using then avoiding 3d software. My view is normal cad is just copying your measurements into a 3d program and you not only need to be highly versed in cad but in the exactness of your measurements. Whereas, tinkercad is like sitting down in my craftroom with boxes of shapes and putting something together, actual creation. Regular cad and solidworks types need precise input from what you already designed. Tinkercad is the designing but is not likely to ever be in replacement to cad. And then there is the 3rd kind, sculpting software like virtual versions of real hands on sculpting. Totally different beast. And finally the AI version which for the most part would be similar to tinkercad where you give instructions and mess about with finer instructions until you have a passable but not precise creation.It uses basic shapes to make more complex shapes. It's based off the idea of an old toy called "Tinkertoy"
And after all that drivel, has anyone used the Miraco scanner yet?
I will have one to borrow in the coming months to work on the screen version of Wyatt Earp's deputy badge in Tombstone. I purchased a legit replica of known badges that is scannable but the letters need changed. Any pointers on going from stl to photoshop or merging my fonts to the face of my scanned badge? If this needs to be in a different thread, let me know. I can make the fonts easy enough but want the real curves of the badge from the scan.
Oddly, they never produced the movie badges in bulk and that version does not seem to exist historically. Making one seems the only path.
Last edited:
I am not an immersed user but have far too many decades of using then avoiding 3d software. My view is normal cad is just copying your measurements into a 3d program and you not only need to be highly versed in cad but in the exactness of your measurements. Whereas, tinkercad is like sitting down in my craftroom with boxes of shapes and putting something together, actual creation. Regular cad and solidworks types need precise input from what you already designed. Tinkercad is the designing but is not likely to ever be in replacement to cad. And then there is the 3rd kind, sculpting software like virtual versions of real hands on sculpting. Totally different beast. And finally the AI version which for the most part would be similar to tinkercad where you give instructions and mess about with finer instructions until you have a passable but not precise creation.
And after all that drivel, has anyone used the Miraco scanner yet?
I will have one to borrow in the coming months to work on the screen version of Wyatt Earp's deputy badge in Tombstone. I purchased a legit replica of known badges that is scannable but the letters need changed. Any pointers on going from stl to photoshop or merging my fonts to the face of my scanned badge? If this needs to be in a different thread, let me know. I can make the fonts easy enough but want the real curves of the badge from the scan.
Oddly, they never produced the movie badges in bulk and that version does not seem to exist historically. Making one seems the only path.
I am reluctant to tell you my way, because I use so many programs in concert with each other.
1. Make what you want to say with your font in Photoshop. Save as solid black ink and JPG.
2. Use free 3D-builder program from Microsoft to easily turn the 2D font into 3D font.
3. Use a 3D program that has smoothing (I use Zbrush) to smooth out the area of the badge that has the incorrect text.
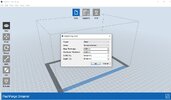
4. Import the badge (with text erased) into Tinkercad.
5. Import 3D text into Tinkercad.
6. Align the text onto the badge.
7. Make a copy of the badge, and then turn the copy into a "hole" AKA a negative shape.
8. If you align the negative shape of the badge with the surface of the 3D text, and then merge the negative badge shape with the 3D text, it will curve the text in the same curve of the badge.
Seemingly complex, but requires little training. There are no doubt other ways that take less steps, but this has each step easy, instead of complex manipulation.
If your badge isn't curved, then skip 7 and 8.
Last edited:
JPH
Sr Member
I am not an immersed user but have far too many decades of using then avoiding 3d software. My view is normal cad is just copying your measurements into a 3d program and you not only need to be highly versed in cad but in the exactness of your measurements. Whereas, tinkercad is like sitting down in my craftroom with boxes of shapes and putting something together, actual creation. Regular cad and solidworks types need precise input from what you already designed. Tinkercad is the designing but is not likely to ever be in replacement to cad. And then there is the 3rd kind, sculpting software like virtual versions of real hands on sculpting. Totally different beast. And finally the AI version which for the most part would be similar to tinkercad where you give instructions and mess about with finer instructions until you have a passable but not precise creation.
And after all that drivel, has anyone used the Miraco scanner yet?
I will have one to borrow in the coming months to work on the screen version of Wyatt Earp's deputy badge in Tombstone. I purchased a legit replica of known badges that is scannable but the letters need changed. Any pointers on going from stl to photoshop or merging my fonts to the face of my scanned badge? If this needs to be in a different thread, let me know. I can make the fonts easy enough but want the real curves of the badge from the scan.
Oddly, they never produced the movie badges in bulk and that version does not seem to exist historically. Making one seems the only path.
I have uses the Jintosh method to make several 2d items into 3d.
Depending on how many levels the item has, make a black and white version, with grey for intermediate levels jpg
If you want something written on it, just do it in a shade of grey that raises it or depresses it into the level it is on.
Open it in FlashForge or Cura and it will ask if you want white thicker or black/darker thicker. It even lets you decide how thick you want the thickest portion of the image.
And VIOLA! IT will make a flat 3D version of whatever you want
Check my Kosh Play or The Expanse coms the Easy Way, threads.
If you want it curved, I would consider making a mold of it, then bending it after the casting material is no longer runny. I made Scarlett Witch tiaras like that. Made a flat mold out of silicone, the poured the molding material and bent it to my liking after it began to cure
Attachments
Last edited:
ribeiroorafael
Member
That “73-89” code?Well !!! All this just might come in handy very shortly, does anybody know what font it is on the side of the shock collar?
Attachments
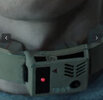
Yes it’s on the side plate embossedThat “73-89” code?
ribeiroorafael
Member
On itYes it’s on the side plate embossed
ribeiroorafael
Member
Its OCR-A font, I've uploaded it on gdrive: OCR-a.ttfYes it’s on the side plate embossed
Brilliant got it downloaded, your a starIts OCR-A font, I've uploaded it on gdrive: OCR-a.ttf
ribeiroorafael
Member
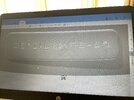
That’s awesome!This is what I get and I think it will do, thoughts before I call an end to it ?
Door file doesn't workView attachment 1818123
********************************
Okay, the original Jumanji was in 1995.
Here are the files for the board itself. No dice or tokens.
Enjoy!
*********************************
Free for personal use.
Door file doesn't work
Thank you for checking. Please see if it is fixed.
***************
Jumanji board files have been revised. Please download new files.
you will need 4 x 8mm x 2mm round magnets for the collar catch, and a 60mm m4 nut and bolt for the hinge, I haven't time to reprint it as other work calls for my attention, if I get chance I will reprint it and make it up in a build thread.
ask questions if you have any, please show me a pic if you make one
I've scaled it round my neck about 42cm if your smaller neck then your ok if your larger then scale it up before you print
You will also need 3 small screw at the back of the main housing to fix the front on when and if you install electronics
Thanks people x
Attachments
Last edited:
Similar threads
- Replies
- 1
- Views
- 979