Pixelworks
Active Member
Hi all,
after a VERY long break, with all the curves and waystops that life likes to put in your way, I am slowly getting back into my modeling mode. I will be taking up in the threads that I left off with, but beforehand I wanted to do something more simple to get back into the swing of it. This time around I will be doing the Babylon 5 Space Station from Revell.
To be honest, other than other builds and a couple fan-based materials, there really is not a lot of reference pictures of the Babylon Station... and I have found nothing in a halfway decent resolution to allow one to zoom in on the fine details. If anyone out there has any information or sources, I would be more than happy for any tips.
Now, as any of you who know me know, I have a love/hate relationship with Revell/Monogram (keywords: Galactica, Star Destroyer, X-Wing, the list goes on.) but the Babylon 5 kit is really not that bad. Of course there is the overall lacking in detail but in Revell's defense, it is a kit from the 90's, so I cannot be too picky there. After my first inspection of the parts, I did notice a slight molding fault on the front of one of the habitation pieces (I will get a picture up on that later tonight), but other than that the molding looks quite good.
Where am I going with this: Well, of course I will be doing a lot of detail work on her... it just would not be me if I didn't. But along those lines I will be stepping outside the comfort of "screen-correctness". Just to give a bit more flavor on the whole, I want to add a bit more texture to the hull that is at least implied in 2D on the decals. Of course this will have to be done so as not to completely bust the scale. I have a couple ideas that I want to try to see how they look, and I will go from there.
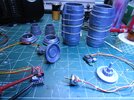
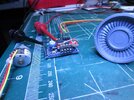
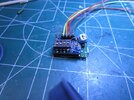
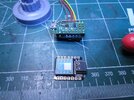
I do not think Paragrafix has a product for B5, so that means that even though they have become quite expensive, I will probably invest in the Green Strawberry photoetch kit. Naturally I will be using an arduino for lighting the station up with LEDs and fiberoptics. In the show you see a lot of navigation lights and of course the landing bays are lighted, but I have only found one reference picture that actually shows living quarter windows. Well, to give it that "lived-in" look. I also want to do windows... I mean what space station does not have at least a couple windows?!?
The highlight of the whole build will be that I want to motorize the centerfugal habitat module. I have read many builds where the poster claimed it "could" be possible, but I have not found any examples of someone actually motorizing the B5. I am not quite sure yet how to best place the hardware to achieve this, but in any case I will be needing to transfer power/signal from the non-moving part to the moving part which means a type of slip-ring will be needed somewhere.

Well that is all for now. Here a couple details about the Revell kit as well as some specs on the station itself...
The Babylon Project: Babylon 5
Class: O´Neil Deep Space Station
Length: 8,064.5 meter (5 Miles) *
Diameter: 840 meter
Mass: 9.1 billion metric tons
Power: 8 Fusion Reactors
Crew: 2,500
Troop: 15,000
Civilians: Unknown (The station's life support system is capable of supporting over 250,000 entities in variable gravities)
Fighters: 48 Starfury fighter craft
Weapons: Twin Particle arrays
Particle Laser Cannon
Pulse Cannons
Plasma Cannons
Defenses: 8 - 12 meter armored hull
Mk. II Defense Grid
Babylon 5 was the fifth and final space station in the Babylon Project, Located at the L-5 point in a binary star system between a star and a planet named Tigris & Euphrates, in a 33,000 kilometer orbit around a planet called Epsilon Eridani III, coordinates: "Grid Epsilon" at 470/18/22 (see "Fun Fact" below) located 10.67 light-years from Earth near the local jumpgate where it could serve as both trade station and strategic command post. Unlike Babylon 4, Babylon 5 was immobile and only had maneuvering thrusters for orbit corrections.
* The total length is somewhat disputed, the 8064 meters (or 5 miles) is stated as the overall length in some sources and in others it is the length of only the cylindrical habitat module. [EDIT]: The Babylon 5 station was originally designed to be one mile wide and eleven miles long: only the centrifuge (the main rotating cylinder, containing the Garden and Green and Red sectors) was going to be 5 miles long, with the forward command sphere and the rear power section and the front cargo arms adding the remaining length. However, in-episode dialogue constantly refers to the whole station being five miles long. This creates inconsistencies since the CGI in the Garden sequences (particularly the end of the episode The Fall of Night, the Season 2 finale) clearly shows a much wider station than the 0.45 miles it would have been to keep the scaling correct.
Fun Fact: Straczynski used the "GEnie Online message board" to communicate with fans starting back in 1991 and those who were part of JMS discussion of Babylon 5 back when it was still referred to as "That Which Cannot Be Named", referred to themselves as The Grid Epsilon Irregulars. Grid Epsilon was the original location of GEnie's Science Fiction Roundtable. The numbers "470" by "18" by "22" are taken from Category 470, Forum 22, Topic 18 of the original GEnie forum. JMS named the location of B5, Epsilon 3, in honor of this group.
The Revell model scale is somewhat controversial (never heard that before, right?") ) but depending on what measurement you use, it comes in at about 1:26100 and is 44cm high and 14cm wide.
) but depending on what measurement you use, it comes in at about 1:26100 and is 44cm high and 14cm wide.

.jpg")
after a VERY long break, with all the curves and waystops that life likes to put in your way, I am slowly getting back into my modeling mode. I will be taking up in the threads that I left off with, but beforehand I wanted to do something more simple to get back into the swing of it. This time around I will be doing the Babylon 5 Space Station from Revell.
To be honest, other than other builds and a couple fan-based materials, there really is not a lot of reference pictures of the Babylon Station... and I have found nothing in a halfway decent resolution to allow one to zoom in on the fine details. If anyone out there has any information or sources, I would be more than happy for any tips.
Now, as any of you who know me know, I have a love/hate relationship with Revell/Monogram (keywords: Galactica, Star Destroyer, X-Wing, the list goes on.) but the Babylon 5 kit is really not that bad. Of course there is the overall lacking in detail but in Revell's defense, it is a kit from the 90's, so I cannot be too picky there. After my first inspection of the parts, I did notice a slight molding fault on the front of one of the habitation pieces (I will get a picture up on that later tonight), but other than that the molding looks quite good.
Where am I going with this: Well, of course I will be doing a lot of detail work on her... it just would not be me if I didn't. But along those lines I will be stepping outside the comfort of "screen-correctness". Just to give a bit more flavor on the whole, I want to add a bit more texture to the hull that is at least implied in 2D on the decals. Of course this will have to be done so as not to completely bust the scale. I have a couple ideas that I want to try to see how they look, and I will go from there.
I do not think Paragrafix has a product for B5, so that means that even though they have become quite expensive, I will probably invest in the Green Strawberry photoetch kit. Naturally I will be using an arduino for lighting the station up with LEDs and fiberoptics. In the show you see a lot of navigation lights and of course the landing bays are lighted, but I have only found one reference picture that actually shows living quarter windows. Well, to give it that "lived-in" look. I also want to do windows... I mean what space station does not have at least a couple windows?!?
The highlight of the whole build will be that I want to motorize the centerfugal habitat module. I have read many builds where the poster claimed it "could" be possible, but I have not found any examples of someone actually motorizing the B5. I am not quite sure yet how to best place the hardware to achieve this, but in any case I will be needing to transfer power/signal from the non-moving part to the moving part which means a type of slip-ring will be needed somewhere.
Well that is all for now. Here a couple details about the Revell kit as well as some specs on the station itself...
The Babylon Project: Babylon 5
Class: O´Neil Deep Space Station
Length: 8,064.5 meter (5 Miles) *
Diameter: 840 meter
Mass: 9.1 billion metric tons
Power: 8 Fusion Reactors
Crew: 2,500
Troop: 15,000
Civilians: Unknown (The station's life support system is capable of supporting over 250,000 entities in variable gravities)
Fighters: 48 Starfury fighter craft
Weapons: Twin Particle arrays
Particle Laser Cannon
Pulse Cannons
Plasma Cannons
Defenses: 8 - 12 meter armored hull
Mk. II Defense Grid
Babylon 5 was the fifth and final space station in the Babylon Project, Located at the L-5 point in a binary star system between a star and a planet named Tigris & Euphrates, in a 33,000 kilometer orbit around a planet called Epsilon Eridani III, coordinates: "Grid Epsilon" at 470/18/22 (see "Fun Fact" below) located 10.67 light-years from Earth near the local jumpgate where it could serve as both trade station and strategic command post. Unlike Babylon 4, Babylon 5 was immobile and only had maneuvering thrusters for orbit corrections.
* The total length is somewhat disputed, the 8064 meters (or 5 miles) is stated as the overall length in some sources and in others it is the length of only the cylindrical habitat module. [EDIT]: The Babylon 5 station was originally designed to be one mile wide and eleven miles long: only the centrifuge (the main rotating cylinder, containing the Garden and Green and Red sectors) was going to be 5 miles long, with the forward command sphere and the rear power section and the front cargo arms adding the remaining length. However, in-episode dialogue constantly refers to the whole station being five miles long. This creates inconsistencies since the CGI in the Garden sequences (particularly the end of the episode The Fall of Night, the Season 2 finale) clearly shows a much wider station than the 0.45 miles it would have been to keep the scaling correct.
Fun Fact: Straczynski used the "GEnie Online message board" to communicate with fans starting back in 1991 and those who were part of JMS discussion of Babylon 5 back when it was still referred to as "That Which Cannot Be Named", referred to themselves as The Grid Epsilon Irregulars. Grid Epsilon was the original location of GEnie's Science Fiction Roundtable. The numbers "470" by "18" by "22" are taken from Category 470, Forum 22, Topic 18 of the original GEnie forum. JMS named the location of B5, Epsilon 3, in honor of this group.
The Revell model scale is somewhat controversial (never heard that before, right?
) but depending on what measurement you use, it comes in at about 1:26100 and is 44cm high and 14cm wide.
Last edited: