TryChick
Well-Known Member
Getting more work done...slowly. Been busy studying for final in JAVA , working two helmets and working around Thanksgiving and guests :wacko
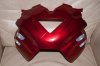
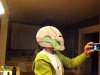
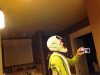
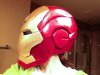
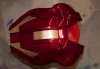
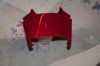
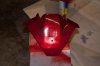
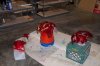
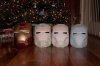
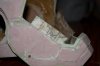
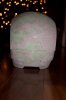
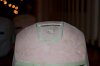
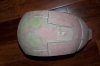
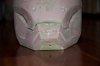
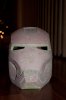
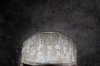
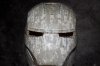
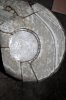
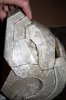
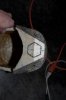
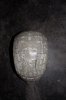
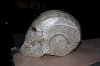
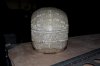
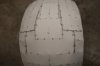
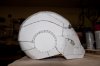
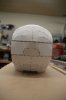
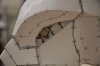
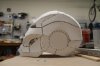
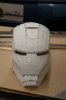
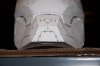
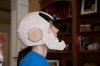
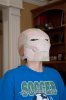
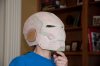
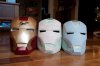
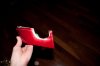
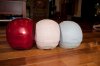
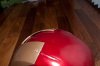
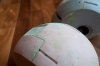
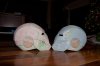
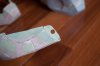
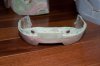
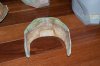
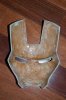
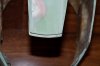
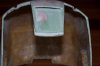
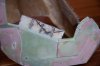
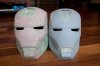
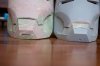
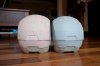
Wanted to have the magnets connecting the bottom piece with the rest of the helmet totally surrounded with fiberglass/bondo so they couldn't pop out/break off. The magnets on my first helmet stick up out of the lip I made and it has always worried me that they might break off/come unglued. So I tucked the magnets tightly in the corners of the bottom piece on either side of the tab that sticks up. Well, I had to cut up the lip to remove them and put them up higher them because they were too close to the edge and I couldn't get the corresponding magnets where they needed to be on the main part of the helmet so they matched up with the ones on the bottom piece. So more fiberglass/bondo to remedy that. Also am putting the magnets on the front of the bottom piece where the tab I created extends into the cheek. On my original helmet, I had the magnets in a different spot and I didn't like them there either. Did a better job on helmets 2 & 3 as far as aligning everything. The faceplates on the two newer ones fit much better than my first one. Haven't put the screw details in the .95 scale yet, and am wondering if anyone actually uses the spots where the screw details on the sides of the faceplate are to actually hold the screws for their hinges.:confused It would make sense...my hinges on the first helmet are in about that spot and are Chicago screws which were fiberglassed into the inside. That was a real pain getting them aligned installing them that way. Wondering if it would make sense/be easier to actually have functioning screws there for the hinges. Made sure the sides of insides of both new helmets are as even as possible since I have issues on the first one I did where the hinges rub against the edges because I made the edges so thick that they protrude in and don't offer a flat surface for mounting.
Wanted to have the magnets connecting the bottom piece with the rest of the helmet totally surrounded with fiberglass/bondo so they couldn't pop out/break off. The magnets on my first helmet stick up out of the lip I made and it has always worried me that they might break off/come unglued. So I tucked the magnets tightly in the corners of the bottom piece on either side of the tab that sticks up. Well, I had to cut up the lip to remove them and put them up higher them because they were too close to the edge and I couldn't get the corresponding magnets where they needed to be on the main part of the helmet so they matched up with the ones on the bottom piece. So more fiberglass/bondo to remedy that. Also am putting the magnets on the front of the bottom piece where the tab I created extends into the cheek. On my original helmet, I had the magnets in a different spot and I didn't like them there either. Did a better job on helmets 2 & 3 as far as aligning everything. The faceplates on the two newer ones fit much better than my first one. Haven't put the screw details in the .95 scale yet, and am wondering if anyone actually uses the spots where the screw details on the sides of the faceplate are to actually hold the screws for their hinges.:confused It would make sense...my hinges on the first helmet are in about that spot and are Chicago screws which were fiberglassed into the inside. That was a real pain getting them aligned installing them that way. Wondering if it would make sense/be easier to actually have functioning screws there for the hinges. Made sure the sides of insides of both new helmets are as even as possible since I have issues on the first one I did where the hinges rub against the edges because I made the edges so thick that they protrude in and don't offer a flat surface for mounting.
Attachments
-
 20131201-100841--DSC_7616.jpg84.7 KB · Views: 132
 -
 20131201-192201--DSC_7644.jpg67.2 KB · Views: 114
 -
 20131201-101000--DSC_7618.jpg81.6 KB · Views: 92
 -
 20131201-101116--DSC_7620.jpg89.5 KB · Views: 100
 -
 20131201-101136--DSC_7621.jpg80.1 KB · Views: 95
 -
 20131201-101442--DSC_7624.jpg73.4 KB · Views: 109
 -
 20131201-101854--DSC_7635.jpg78.7 KB · Views: 100
 -
 20131201-101821--DSC_7634.jpg85 KB · Views: 109
 -
 20131201-101812--DSC_7633.jpg72.9 KB · Views: 85
 -
 20131201-101758--DSC_7632.jpg89 KB · Views: 104
 -
 20131201-101746--DSC_7631.jpg85.1 KB · Views: 92
 -
 20131201-101714--DSC_7630.jpg81 KB · Views: 87
 -
 20131201-101708--DSC_7629.jpg79.9 KB · Views: 93
 -
 20131201-101652--DSC_7628.jpg80.5 KB · Views: 100
 -
 20131201-101617--DSC_7627.jpg80.6 KB · Views: 97
 -
 20131201-101538--DSC_7626.jpg91.1 KB · Views: 87
 -
 20131201-101515--DSC_7625.jpg88.7 KB · Views: 100
 -
 20131201-102248--DSC_7640.jpg68.2 KB · Views: 99