bryant2305
New Member
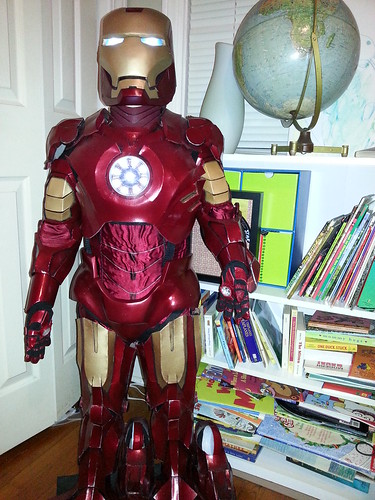
your son look amazing in the iron man suit
Last edited:
Your final paint is awesome!! But it goes a b c e d f... Is it in order or in order by the letter.. And do you use adhesive promoter before your clear coat?
Oh, my.... I just noticed that! Wow... hope that didn't mess anyone up! :lol
It's now fixed! :$
")
I was wondering, which color plasti dip do you recommend and are there different color adhesion promoters? Or is it just clear? Because your black cap on yours is throwing me off..
thumbsup:thumbsupThere was no surface prep on the eva foam before adding plastidip, correct?
and the foam pieces: now that some time has passed, how has everything held up? anything falling apart or paint coming loose, etc?
one last thing: how was the flexibility/cracking/creasing on the foam pieces after painting? extreme? not so much?

 thumbsup
IF, on the other hand, you want to invest your time and money into an adult suit that you will wear and display for a long time, you might want to consider something more durable. Excessive wear and tear on foam will eventually rip high-torque or high-stress places (like around joint). Hardening those areas with re-enforcing material and epoxy or resin (like I did) might help, but it will likely all need to be serviced from time to time and repaired regularly.
For my newest build (Victorian Age Ironman), I'm planning to use pva glue and then smooth-cast plastic coating over thicker foam. This should provide me with fairly hardened pieces that will be much, much more durable over the long-term than just plasti-dip and paint over eva foam.
Whichever method you select, I'm sure you'll have a blast - I know I did!
thumbsup:thumbsuphey hello one question , how do u put on the helmet?? like this?? Iron man Mk3 helmet fitting tutorial - YouTube i also found this http://i922.photobucket.com/albums/ad70/kagn/h9.jpg but in the image how does it attach ? magnetos ???
:thumbsup and i thinkl i will attach the cirlces to the helmet it seems more complicated if the circles come off