Henry's Radio (Firewatch)

This project has been on my list of things to make since the game came out. The other night I finally re-opened the model files and got to work splitting it up for 3D printing.

Here is the primary reference I am using, from the game:

Ref_RadioPrimary.jpg

(radio)

Ref_BaseStation.jpg

(base station)

Note that Henry has giant monster hands, with a really long index finger, it seems. My hand pose below is not quite the same, but I think I got the size of the radio itself pretty close. It feel nice to hold, which is the primary goal for me.


Here is what I've done so far in Blender:

RenderFlat.jpg
RenderWire.jpg
RenderLit.jpg


For rev1, it's just going to be a "stunt prop" in so much as it will not have any articulated parts or working electronics of any kind. The dream version of this is a pair of working 2 way radios and a charger/docking station. This would in theory require FCC approval, so I might just buy a cobra or similar and move the parts over into this shell. We'll see, it is ambitious.

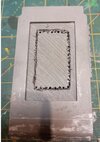
Here are the test prints (masked):

TestPrintedPartsMasked.jpg


For the front red light, I managed to kind of saw the tip of a 5mm LED off, and I think I will just glue it in place. It will give the correct light scattering and diffusion I am looking for.

Since this is a non-articulated version (no turning knobs, no bending antenna, no pushable button), I plan to fasten the top parts (knobs and antenna) using brass rod stock and epoxy.

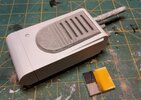
Here is a picture of a loose "gravity as glue" assembly in hand. It feels about right, so I think I am going to smooth and sand and search for the right paint colors.

TestLooseAssembly.jpg


I imagine I will opt for a very smooth resin top coat before wet sanding and painting. I want it to feel like a "heavy duty" plastic radio to the touch. And I might add some weights in the back before gluing on the back battery pack part, to give it some good heft. There's supposed to be a speaker magnet and battery in there, so I reckon it should weight a few hundred grams.

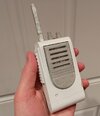
While doing research, I learned that Panic (the publisher of the game) actually commissioned the creation of a handful of radios for a fan event. This is the best photo I have so far of those:


Ref_WalkiesFromPanicEvent.jpg


This project will be a slow burn, but something I am looking forward to being a finished object I can hold in my hand. Should be fun!
 
This project has been on my list of things to make since the game came out. The other night I finally re-opened the model files and got to work splitting it up for 3D printing.

Here is the primary reference I am using, from the game:

View attachment 1762592
(radio)

View attachment 1762591
(base station)

Note that Henry has giant monster hands, with a really long index finger, it seems. My hand pose below is not quite the same, but I think I got the size of the radio itself pretty close. It feel nice to hold, which is the primary goal for me.


Here is what I've done so far in Blender:

View attachment 1762593View attachment 1762595View attachment 1762594

For rev1, it's just going to be a "stunt prop" in so much as it will not have any articulated parts or working electronics of any kind. The dream version of this is a pair of working 2 way radios and a charger/docking station. This would in theory require FCC approval, so I might just buy a cobra or similar and move the parts over into this shell. We'll see, it is ambitious.

Here are the test prints (masked):

View attachment 1762597

For the front red light, I managed to kind of saw the tip of a 5mm LED off, and I think I will just glue it in place. It will give the correct light scattering and diffusion I am looking for.

Since this is a non-articulated version (no turning knobs, no bending antenna, no pushable button), I plan to fasten the top parts (knobs and antenna) using brass rod stock and epoxy.

Here is a picture of a loose "gravity as glue" assembly in hand. It feels about right, so I think I am going to smooth and sand and search for the right paint colors.

View attachment 1762598

I imagine I will opt for a very smooth resin top coat before wet sanding and painting. I want it to feel like a "heavy duty" plastic radio to the touch. And I might add some weights in the back before gluing on the back battery pack part, to give it some good heft. There's supposed to be a speaker magnet and battery in there, so I reckon it should weight a few hundred grams.

While doing research, I learned that Panic (the publisher of the game) actually commissioned the creation of a handful of radios for a fan event. This is the best photo I have so far of those:


View attachment 1762599

This project will be a slow burn, but something I am looking forward to being a finished object I can hold in my hand. Should be fun!
Amazing work! If you're looking for more pics of the commissioned recreations made for Pax, there's a bunch of pics with them here:
 
Amazing work! If you're looking for more pics of the commissioned recreations made for Pax, there's a bunch of pics with them here:

Ahhh, yes, thanks for linking. This is great! :) I have learned a lot more about their interpretation of the game's radio! By the end of those shots it looks like a couple of the radios were pretty broken apart (some electical tape and holes and stuff). It looks like they used off the shelf components (smart!) for the antenna, one of the pots, and what appears to be a momentary button.
 
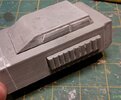
It's been a while since the last progress update, but I am rounding the bend on overall fit and finish of the parts. I've done some basic sanding, then applied a layer of epoxy resin over top of everything, then sanded again.

One thing I noticed when holding the radio is that it felt fake (because it is! hah).

KindOfSmoothedAssembly.jpg Front.jpg

So I wanted to go ahead with adding weight to it. I cut two slugs of 1" x 1/8" steel bar, lightly filed them, and traced them on the back of the radio where the battery pack thing attaches to it.

To add the slugs inside the model, I just scored through the first few layers of filament with a knife, then used my tiny hobby drill to make holes on 3 sides. Then I used a needle file to "crack" the layers of filament underneath and pry up the back.

BackCutoutForWeight1.jpgBackCutoutForWeight2.jpg

Once they were fit, I used a tiny amount of hot glue inside to secure them (so they don't waggle when the radio moves), then again on the removed backing piece so it was flush with the original surface. I then secured the battery pack piece to the radio


BackCutoutForWeight3.jpg AssembledBack.jpg


I gave the main body a coat of primer just to help evaluate current finish quality. Found some good paint color matches as well, for later.

DryFit1.jpg DryFit2.jpg

There are some definite issues with the finish that I am not happy about so I will be taking the time to wet sand these areas until the whole thing is as smooth as I want it to be.

FinishIssues1.jpgFinishIssues2.jpgFinishIssues3.jpg

The radio feels like a great size and the weight from the steel bar slugs makes it feel like a real radio. I am really happy with how this is going, and I think once it's all done it will be what I wanted it to be. The antenna and little knobs on top are really feeling secure and strong with the brass rod. I drilled slightly undersized in the body of the radio beyond the printed hole depth, so the rods are an interference fit. I wouldn't want to really bend them hard, but they won't just get bumped and snap off, which is all I really need.
 
It's been a while since the last progress update, but I am rounding the bend on overall fit and finish of the parts. I've done some basic sanding, then applied a layer of epoxy resin over top of everything, then sanded again.

One thing I noticed when holding the radio is that it felt fake (because it is! hah).

View attachment 1788534 View attachment 1788535

So I wanted to go ahead with adding weight to it. I cut two slugs of 1" x 1/8" steel bar, lightly filed them, and traced them on the back of the radio where the battery pack thing attaches to it.

To add the slugs inside the model, I just scored through the first few layers of filament with a knife, then used my tiny hobby drill to make holes on 3 sides. Then I used a needle file to "crack" the layers of filament underneath and pry up the back.

View attachment 1788536View attachment 1788537

Once they were fit, I used a tiny amount of hot glue inside to secure them (so they don't waggle when the radio moves), then again on the removed backing piece so it was flush with the original surface. I then secured the battery pack piece to the radio


View attachment 1788538 View attachment 1788539


I gave the main body a coat of primer just to help evaluate current finish quality. Found some good paint color matches as well, for later.

View attachment 1788540 View attachment 1788541

There are some definite issues with the finish that I am not happy about so I will be taking the time to wet sand these areas until the whole thing is as smooth as I want it to be.

View attachment 1788542View attachment 1788543View attachment 1788544

The radio feels like a great size and the weight from the steel bar slugs makes it feel like a real radio. I am really happy with how this is going, and I think once it's all done it will be what I wanted it to be. The antenna and little knobs on top are really feeling secure and strong with the brass rod. I drilled slightly undersized in the body of the radio beyond the printed hole depth, so the rods are an interference fit. I wouldn't want to really bend them hard, but they won't just get bumped and snap off, which is all I really need.
Will you make these files available for us to print at any point?
 
Will you make these files available for us to print at any point?

This project has been slow going, but yes that's the plan :) I still need to work out some of the assembly stuff so that other people have a good time while printing and assembling (for example I might make the steel weight cutout built into the print)
 

Your message may be considered spam for the following reasons:

If you wish to reply despite these issues, check the box below before replying.
Be aware that malicious compliance may result in more severe penalties.
Back
Top