Sorry for taking so long FuzzyDrawings. I've had a number of personal things come up that needed attention. I will try to answer your questions the best I can.
1. I actually mostly use my rotary tool or Dremel(brand name). Dremel has bits that are made for carving, sanding and etching. It will say on the package. If you want me to list their numbers I can. I would at some point like to use wood carving tools.. but I did ok with the rotary tool. It can get a little unwieldy if you don't have a steady hand. I generally us my thumb as my guide when moving it around. Just remember to create a pattern for the etching and get it the correct size to fit before drawing it on the plastic. You can use a lead pencil and eraser, but like any lead pencil when you rub you hand over something repeatedly can can smear it or rub it off. Not as much as chalk, but you may have to go back an touch it up as you are carving.
There is a bit by Dremel they make in 4 different sizes so you can carve from big to tiny etchings. Just realize you have to go back and use sand paper to smooth out the inside of the carving. Some times the dremel can leave it rough. I use a brush attachment that Dremel makes for polishing and then go back with sandpaper.
When using Pvc glue to fuse the pieces of pvc plastic together don't use too much. If for some reason you do.. and you can tell because after it sets you can touch it an it's soft… let it sit for another day or two. This will make sure the glue is completely dry and that the residual chemical has evaporated. You don't want to carve into it when it is soft. It becomes choppy like a brownie when you cut into it. Cake like. You want it completely dry so you can get stiff and defined edges.
2. I used a mannequin I have as an anvil.. just like metal smiths use anvils. Now since I've had enough experience with messing with the pvc I can gauge how much pressure to put where. But I recently made a pieces with a hard edge in the center to lay on the mannequin to help with the roundness of the front of the chest. It's not quite right but it is getting there. I really need to make a wooden buck in the shape of the chest to get a more specifically defined shape. Wooden bucks or bucks made of other materials are used in vacuum forming.. but my vacuum former will not work with something that big.
I generally like to cut out a pattern for the chest plate then cut the pvc from it and then heat and form onto the chest. Again since I have a mannequin that muscles in it.. I don't press down in the muscles since that is not what this time of armor is. I mostly get it to curve around the the chest. With pvc forming that size you worry about the center first. The edges can be done with a heat gun. I prefer my oven for the largest porting.. then heat gun for the edges.
Now you have treat the plastic like you are folding paper when you do curves like the neck and shoulder holes and forms like the shoulder and breast. Paper crumples when you try to wrap it around something like a curve. Plastic acts the same way unless you leave space and push it with your hand. If you are vacuum forming or thermo-forming.. you don't have to worry about this because it's pressure and stretching. But when doing by hand… you sometimes have to leave excess and mold the form first, then remove it or add in a cut in. (removal of a small piece to help with pushing the curving.)
Here is a link to some videos I did some years ago to show a handful of friends what I did when working with pvc. Apologize for the crude quality of the videos. I am considering redoing them with updated equipment. There is like 9 of them.
Making Armor 1 - YouTube
That bottom section you are talking about.. was a pain in the butt. One thing it can do is create an air pocket in between layers so, be very careful when you glue it with pvc glue. I usually glue it and use clamps to hold each section together. And then go back and rivet it. But on my mannequin there are defined pectoral muscles. I flipped the plastic around, reheated the bottom and formed it onto the pectoral muscles using the mannequin's defined nature as the edge. It allowed me to force it in the other direction. I've done the same thing before when doing ridges in armor. Heat the area with heat gun and use an object like an axe or something that has the definition of the curve and pressing it into that shape. Here is a pic of ridges I did on the dragon age armor build I did with heat and the curve of an axe.
dragon Age II: Hawke- greavesc by teranmx on deviantART
That is my way of handling it. I really should shoot a video for this and the next part.
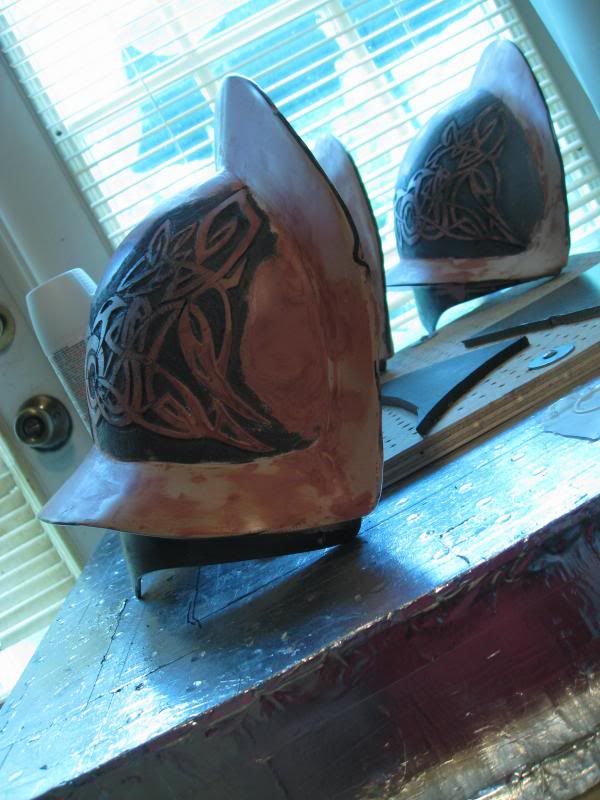
3. Well all 3 sets I've done are done the same except between 1 and 2 I used a larger bowl. And between 2 and 3 I was able to get that last curve in that the inside pieces do. They curve from inside back out instead of straight up like #2. I don't have #3 up because the customer for that one is suppose to be sending me some pictures soon. He and his fiancé did wedding engagement photos in costume. In the picture below.. # 2 is in the back right, #3 is in the front left. You can see the other inside curving outward.
I really need to do a video, because this might get confusing.
A. I took a bowl that was 9 1/2 inch diameter and with no lip and vacuum formed it with PVC plastic.


If I vacuum formed styrene I would have to use a whole different series of methods that cost me more right now. I have yet to figure out how to carve into styrene. It doesn't have that open celled structure. Pvc can be vacuum formed. It's just... really tricky.
Let me know if any of this is confusing and I will try to clarify.
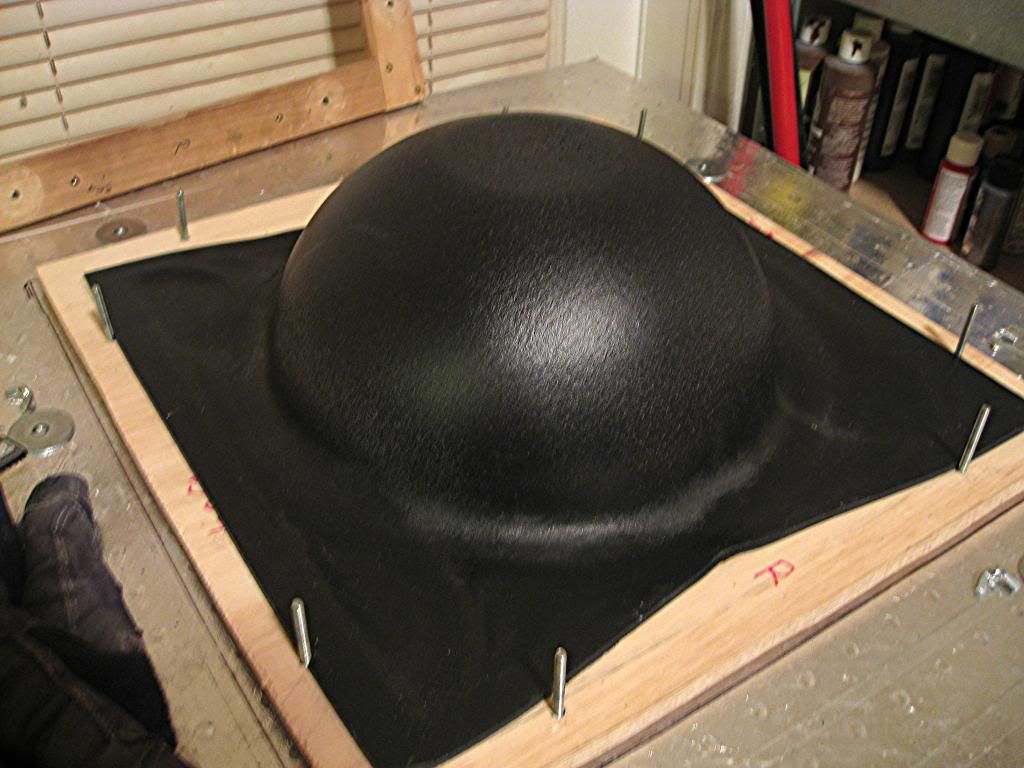
So after vacuum forming I have a flat area in the center. You don't want that. You want curve. So I use a heat gun and something else round and shape it curved like the rest of the piece. I mark a line at about the 2/3 mark on the curve and I cut it with a utility knife. This gives me two pieces. I take the bottom piece and cut it in three spots to help hold it when I pvc glue it to the top pieces. Basically I am using this one vacuum formed piece to make the majority of the body of the spaulder and the bottom lip on it as well. Keeps me from wasting materials. Bottom left of this picture you can see where I've cut it into two pieces.

I Glued the two pieces together with pvc glue and riveted them in a spot that would be covered with auto body filler such as Bondo. I cut a slit at the top of the shoulder and use a heat gun to weekend the edges to bend the top lip back into the spaulder. This is also glued into place. I then cut out another piece to fit inside of it to create the very bottom flange. I heat it in oven and form it to the inside of the spaders and glue it and rivet it on.
With the top curve.. I cut a slit across the top, heat the sides where the slit begin and then push it into the other piece..glue and then sometimes rivet it on depending on if it needs it.


And then after the glue dries.. I used the auto body filler to cover some of the inside, create a angular smooth section where the two pieces meet to make it look like one on the bottom and top and then a little in that flange under the the bottom lip. Confused yet. =)
This is very confusing. I will try to get some more supplies soon and do a step by step on it.=)


")


