You are using an out of date browser. It may not display this or other websites correctly.
You should upgrade or use an alternative browser.
You should upgrade or use an alternative browser.
Functional Jedi Utility Belt Pouches Prop Replicas - Project is done.
- Thread starter the.rebel.agent
- Start date
bleyd
Sr Member
Re: Functional Jedi Utility Belt Pouches Prop Replicas
Yeah, that's exactly what I was talking bout. Looks great and they're functional!
You have a point. The earth magnets I used for the hook pouch, which are the ones displayed next...
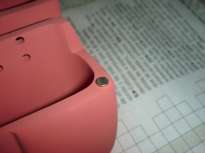

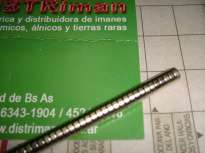
...are 4mm x 1.5mm tall. Smaller but stronger. So, I will be able to conceal them inside a 3mm wall or less. Thanks for your feedback. Magnetic method is winning the debate.:love
Yeah, that's exactly what I was talking bout. Looks great and they're functional!
the.rebel.agent
Sr Member
Re: Functional Jedi Utility Belt Pouches Prop Replicas
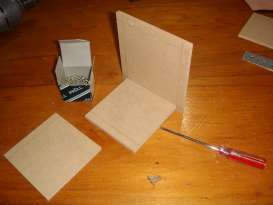
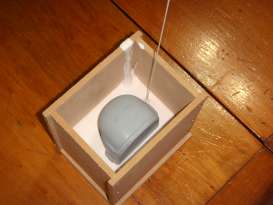
As usual this "post" is to keep you "posted" about this project. Since the models are ready to be molded, last week I did the mold boxes and some other details that you will be able to see here:
http://www.theforce.com.ar/Scripts/WebFormsLibrary/MainContainerForm.asp?iAction=2&lNewsId=210
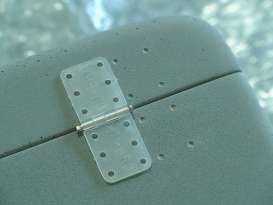
I will be doing the silicon rubber molds this week. Still waiting for the bigger hinge, so the comlink mold will have to wait. Don't want to do it without the hinges marks. So, If you have any question, don't hesitate in contact me.
As usual this "post" is to keep you "posted" about this project. Since the models are ready to be molded, last week I did the mold boxes and some other details that you will be able to see here:
http://www.theforce.com.ar/Scripts/WebFormsLibrary/MainContainerForm.asp?iAction=2&lNewsId=210
I will be doing the silicon rubber molds this week. Still waiting for the bigger hinge, so the comlink mold will have to wait. Don't want to do it without the hinges marks. So, If you have any question, don't hesitate in contact me.
the.rebel.agent
Sr Member
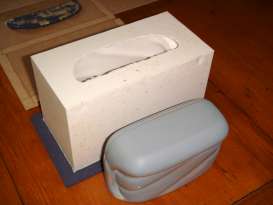
I just pulled out the first cast from each mold and put them together for the photo shots. But, first is first. I will show you how I did the molds and later, how the final cast looks like. Because it was a lot of information I split the post. The first one is titled Mold Making and the second one will be pulling out the first cast.
You will be able to see how I did the molds, the methods I used for, and some secrets that I revealed. Have in mind that I had to wait 24 hs before used the mold after I poured the silicon rubber and 24 hs more after that to pour the resin. Added to this post some boring videos enjoy them. Here is the first link:
http://www.theforce.com.ar/Scripts/WebFormsLibrary/MainContainerForm.asp?iAction=2&lNewsId=211
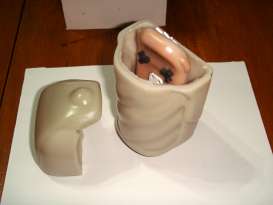
Once I had all the molds and 1 bottle of resin ready to use, poured the polyester resin inside them. I rotated the molds once the resin was inside to create the pieces you are going to see. This time added some cool videos and will demonstrate how functional they are and what they will be able to store beneath them. Have in mind that they were just a test: You will some air bubbles here and there, but the molds are just perfect. They don't have any defect inside. Here is the second link:

http://www.theforce.com.ar/Scripts/WebFormsLibrary/MainContainerForm.asp?iAction=2&lNewsId=212
I want to thank you all for the help, feedback and support provided. They are finally true. Wanted to have them since 2005, but have to wait until now. Each post contains a Spanish tutorial describing in very detail what I did, so I you dare to read it, and translate it, will learn something useful. I am very proud of the final result. I am almost ready to start a run. If you have any doubt about the process or the materials don't hesitate in contact me.
PS: Don't miss the comlink demostration video!
You will be able to see how I did the molds, the methods I used for, and some secrets that I revealed. Have in mind that I had to wait 24 hs before used the mold after I poured the silicon rubber and 24 hs more after that to pour the resin. Added to this post some boring videos enjoy them. Here is the first link:
http://www.theforce.com.ar/Scripts/WebFormsLibrary/MainContainerForm.asp?iAction=2&lNewsId=211
Once I had all the molds and 1 bottle of resin ready to use, poured the polyester resin inside them. I rotated the molds once the resin was inside to create the pieces you are going to see. This time added some cool videos and will demonstrate how functional they are and what they will be able to store beneath them. Have in mind that they were just a test: You will some air bubbles here and there, but the molds are just perfect. They don't have any defect inside. Here is the second link:
http://www.theforce.com.ar/Scripts/WebFormsLibrary/MainContainerForm.asp?iAction=2&lNewsId=212
I want to thank you all for the help, feedback and support provided. They are finally true. Wanted to have them since 2005, but have to wait until now. Each post contains a Spanish tutorial describing in very detail what I did, so I you dare to read it, and translate it, will learn something useful. I am very proud of the final result. I am almost ready to start a run. If you have any doubt about the process or the materials don't hesitate in contact me.
PS: Don't miss the comlink demostration video!
Stilgar
Well-Known Member
Congratulations on finishing this project!
AFAIK these are the first functional Jedi Pouches which look dead on (once painted) and work like the screenused should have... (and are not made out of wood or foam)
They were looking great before but the hollow cast is like sugar on top.
I guess time to start saving some credits")
Love the videos btw :thumbsup
AFAIK these are the first functional Jedi Pouches which look dead on (once painted) and work like the screenused should have... (and are not made out of wood or foam)
They were looking great before but the hollow cast is like sugar on top.
I guess time to start saving some credits
Love the videos btw :thumbsup
the.rebel.agent
Sr Member
Thanks, I guess Jedi Knights costumers deserved something like this :love. And yes, painted will look even better.Congratulations on finishing this project!
AFAIK these are the first functional Jedi Pouches which look dead on (once painted) and work like the screenused should have... (and are not made out of wood or foam)
They were looking great before but the hollow cast is like sugar on top.
I guess time to start saving some credits
Love the videos btw :thumbsup
About the videos: did not you hear a chicken at the background?
the.rebel.agent
Sr Member
:lol Dogs are mine!And dogs, and....
I can't wait for these!
the.rebel.agent
Sr Member
Ordering information here:
http://www.therpf.com/showthread.php?p=817168#post817168
http://www.therpf.com/showthread.php?p=817168#post817168
the.rebel.agent
Sr Member
They are finally done. I finished the first run of them and I am presenting to you the final result. Since I wrote in Spanish, I will translate a little bit for you. I am just explaining that took me 6 months to do them, how many molds I did and how the original sculpts were made. Most of this detailed in previous posts.
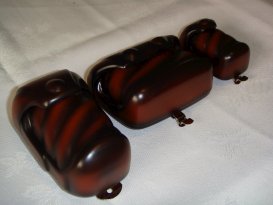
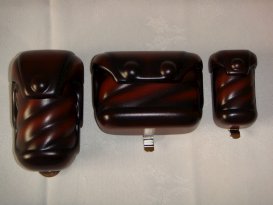
So, don´t forget to click in each photo to get a high resolution one. Those ones have magnetic closure, but some of them were made with Velcro.
http://www.theforce.com.ar/Scripts/WebFormsLibrary/MainContainerForm.asp?iAction=2&lNewsId=231
What do you think?
So, don´t forget to click in each photo to get a high resolution one. Those ones have magnetic closure, but some of them were made with Velcro.
http://www.theforce.com.ar/Scripts/WebFormsLibrary/MainContainerForm.asp?iAction=2&lNewsId=231
What do you think?
bcstanding
Well-Known Member
FANTASTIC work! I can't wait to get mine. You've outdone yourself on these!
I just got mine in - these are FANTASTIC! Another great job Diego, take a bow man, you did it.
I almost didn't see the magnets for the closure, they are that small and don't detract from the pouch at all
For those of you that missed this run, get on the next run, these are worth it!
Dave
I almost didn't see the magnets for the closure, they are that small and don't detract from the pouch at all
For those of you that missed this run, get on the next run, these are worth it!
Dave
Last edited:
the.rebel.agent
Sr Member
Thanks guys. I did my best.
BrandoCalrision
New Member
Are you still doing these?
Similar threads
- Replies
- 20
- Views
- 657
- Replies
- 34
- Views
- 1,593
- Replies
- 0
- Views
- 490
- Replies
- 4
- Views
- 602