First time mask making:

I'm back on this again.

Been spending the past few days looking at molding techniques and know what tiny changes I need to make for my mask.

It is summer, time off from work, and I will have some time to actually spend on this during summer! Yay!
 
I'm back on this again.

Been spending the past few days looking at molding techniques and know what tiny changes I need to make for my mask.

It is summer, time off from work, and I will have some time to actually spend on this during summer! Yay!
Glad to see that thread alive again(y)(y)
 
So, I've been going over my supply of things that could or could not be used when making the mold and casting the face.

I will go over the sculpt one more time as a few dents have come in the past year since I really worked on it last.. and I've learned a lot more.
I'll also go over the ears and teeth and prep all the different parts.

But: Back to molding:

I have the following products at home:
  • Modelling plaster, 5 kg
  • Plaster bandages
  • Dragon Skin 10 Fast 1,8 kg
  • Thi-Vex 30 ml
  • Silicone Thinner 0,4 kg
  • Rebound 25 1,8 kg
  • Acmos 82 Aerosol
  • Aerosil, 0,5 kg
  • Compat 45, 16 kg
Since I have a lot of Compat45 (I accidentally bought it twice..) I'm thinking I should make the mold of the outside with Compat 45 instead and not having to worry about Dragon Skin 10 sticking to the Rebound 25.

Either that, or I'll make a solid mold. But if I make a solig mold, what should I use to catch the details? Would modelling plaster be enough or would you recommend something else?

If I'd go with Compat45, the drying time is long, obviously, but after a first coat, could I possibly thicken it with Aerosil?

Last year I had a set idea in mind of how I wanted to do things, but now before taking the plunge I'll humbly take any advice.

My basic plan is to make a mold of the front, fill it with 4mm clay, and pour a plaster buck on the inside. Registration keys, naturally.

I still haven't worked out how to properly fill the mold when I cast it. I'd like to avoid having any pour spouts or vents on the face of the mask and having them on the inside, if possible. I might need several pour spouts.. and might need to use a large syringe to push the silicone in there...

But back to the mold:
-Use the Compat45 and use that to make the mold from the clay sculpt?
-Use the modelling plaster and make a solid mold?
-Use something else I don't have?
 
Either that, or I'll make a solid mold. But if I make a solig mold, what should I use to catch the details? Would modelling plaster be enough or would you recommend something else?
Plaster picks up detail as well as any other material for molding and casting if used correctly. This is, that your splash/detail coat is liquid enough (and not too liquid too) and is correctly applied. But I don´t know this particular plaster. If I was to mold it in plaster it would be stone plaster such as UC30 or similar. With softer plaster some details could be damaged after the first pull or by accident cleaning the mold etc.
If I'd go with Compat45, the drying time is long, obviously, but after a first coat, could I possibly thicken it with Aerosil?
From Smooth On´s website:
"Thickening Compat™ 45 for Brush On Applications - To thicken Compat™ 45 for brush on applications, only use URE-FIL™ 11 filler. Recommended starting proportion: Mix 1 part URE-FIL™ 11 with 1A:1B of Compat™ 45. Add more in small amounts if necessary. DO NOT USE URE-FIL™ 9 (CAB-O-SIL) WITH COMPAT™ 45.".
Anyway, I don´t like to thixotrope rubbers with fillers in general. They loose properties. But, no, Aerosil doesn´t seem as a good one.
I think this a job for a rigid mold. Not saying flexible won´t work, but sounds better rigid to me. Epoxy9+fiberglass, Acrylic resin+fiberglas or other reinforcement materials, stone plaster, PU resins that can be brushed (smootcast 65d or polytek´s version of that (can´t remember the name now) or polyester resin that you will have to post cure to avoid inhibition).

I'd like to avoid having any pour spouts or vents on the face of the mask and having them on the inside
Most probably you won´t need them, moreover If it´s just half a mask. But first choose the material and then you can go over how the mold will be done.
 
Plaster picks up detail as well as any other material for molding and casting if used correctly. This is, that your splash/detail coat is liquid enough (and not too liquid too) and is correctly applied. But I don´t know this particular plaster. If I was to mold it in plaster it would be stone plaster such as UC30 or similar. With softer plaster some details could be damaged after the first pull or by accident cleaning the mold etc.

From Smooth On´s website:
"Thickening Compat™ 45 for Brush On Applications - To thicken Compat™ 45 for brush on applications, only use URE-FIL™ 11 filler. Recommended starting proportion: Mix 1 part URE-FIL™ 11 with 1A:1B of Compat™ 45. Add more in small amounts if necessary. DO NOT USE URE-FIL™ 9 (CAB-O-SIL) WITH COMPAT™ 45.".
Anyway, I don´t like to thixotrope rubbers with fillers in general. They loose properties. But, no, Aerosil doesn´t seem as a good one.
I think this a job for a rigid mold. Not saying flexible won´t work, but sounds better rigid to me. Epoxy9+fiberglass, Acrylic resin+fiberglas or other reinforcement materials, stone plaster, PU resins that can be brushed (smootcast 65d or polytek´s version of that (can´t remember the name now) or polyester resin that you will have to post cure to avoid inhibition).


Most probably you won´t need them, moreover If it´s just half a mask. But first choose the material and then you can go over how the mold will be done.
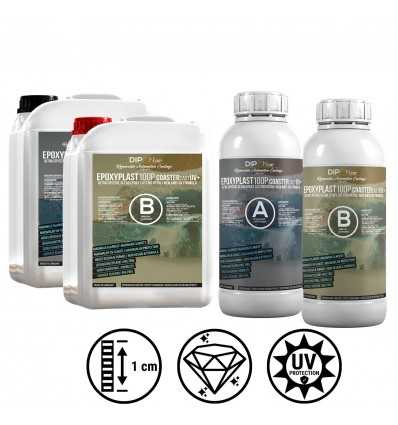
Right! I forgot to mention my 22.5 kg of Epoxyplast 100P epoxy resin I have as well.
I got this really cheap and it is a nice clear resin with low viscosity. Maybe I can use this to create the mold?


I can totally understand that this would most likely be overkill, but I already have it, and it is right now just sitting there...
 
I'm back on this again.

Been spending the past few days looking at molding techniques and know what tiny changes I need to make for my mask.

It is summer, time off from work, and I will have some time to actually spend on this during summer! Yay!
YEAHHHHH!!!!

Welcome Back!

I like Rebound 25 for soft part o mask, then use FreeForm Air for the harder, outer shell.

Be sure to apply mold release.

*****Be sure to check molds and resins and silicone compatability before you mix! You dont want to make a beautiful sculpt into a burn victim that never completely cures. *****
 
So, when I left this guy about a year ago, this is what he looked like:
20cc9387-c9d2-438e-844c-b5c8ce3df039-jpeg.jpg


After about a year of neglect, moving, turning 50 and a lot of other events, it was time to pick this up again.
There were some minor damage to the sculpt:

IMG_0824.jpg
IMG_0823.jpg
IMG_0825.jpg


So, in all not a lot of damage, but still, I wanted to make some improvements needed to be made.

So, fixing the errors, I also did some resculpting of the forehead to start and get my hands dirty again.

Hopefully I've improved slightly upon the sculpt:
surtand_ny.png
 
Last edited:
Epoxyplast 100P epoxy resin
Take in account you will need to buy or prepare a gelcoat for making the mold.
Gelcoat is the first brush on copy layer that will register the details. It must be thixotroped so it doesn´t run down when brushing on. Without it you will get lotś of air pockets. Usually one layer is enough, if you want to make sure or have very intricate surface you can brush two layers of that. After that you go with plain resin and fiberglass to reinforce the mold part.
You can prepare your own by adding cab-o-sil (very toxic, respirator and ventilated area). I´d recommend mixing it in by hand. Doing it with a mechanical mixer heats up the batch and it might kick. Happened to me once or twice with epoxy (not with polyester).
The other option is buying a premade gelcoat. Probably better option if you have never made it yourself as the premade one will come in the correct consistency. Not too thick, not too liquid and runny.
One example:
most likely be overkil
Maybe, it´s a clear epoxy for what I see. But as you say, if it´s hanging there for no other use...

Have you laminated fiberglass before?, made fiberglass molds before?.
If not, I think stone plaster would be better. One bag is not that expensive and you should be able to get several molds out of there. You´ll move faster with it. Also, only water involved, no solvents for cleaning nor fumes or smelly stuff. Epoxy is not the worst in that though.
In any case if it´s the first time make some small practice molds before molding your sculpt (which is coming out nicely by the way) to get the feel of the materials, whatever you choose. Laminating can be tricky at first and one has to be familiar with plaster tempos too.
Let us know what your choice is and and we can help out once you decide.
 
Last edited:
I've used EpoxAcoat for detail, with a layer of freeform air, and then a layer of fiberglass for strength. Makes a really nice mold, but very expensive to buy the materials and a higher learning curve and chance for failure.

I really like Compat 45 for molds I plan to cast Dragon Skin or Ecoflex in. No issues with silicone bonding at all, easier to clean clay from the sculpt out of than EpoxAcoat and really good detail. I haven't tried it for brush on application or thickened it, though. Along with udog I don't love adding fillers or thickeners.

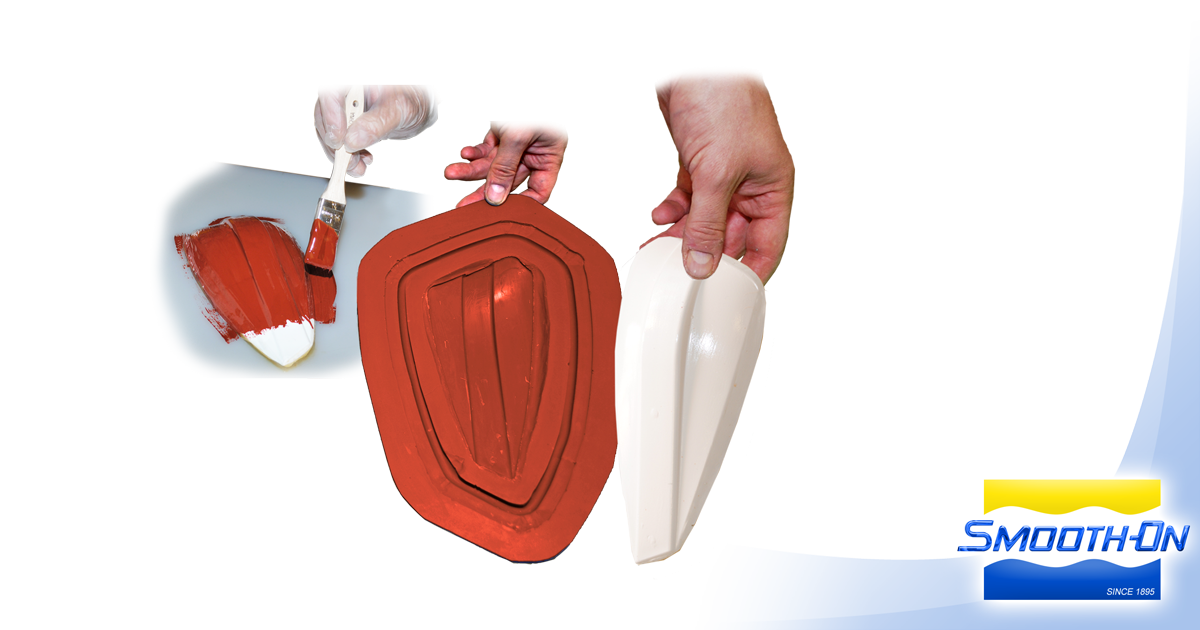
For a mask like this, I saw someone at the Reynolds store lightly cover a sculpt with a thin layer of water-based clay, then make a mother mold on top with freeform air or plaster leaving a small pour hole. He then removed the mother mold, cleaned the water-based clay from the sculpt, put the sculpt back in the mother mold and poured Compat 45 in the gap through the pour hole on top. This was a fantastic idea, sort of working backwards, made a relatively cheap mold and avoided any fillers. I was very impressed! As a hobbyist, if I can make a flexible mold instead of a rigid mold, I do.

Here's a link to the mask he made...

I think this might be a good option, especially if you have Compat 45 on hand. The guy who made this works at the Reynolds Advanced Materials in Atlanta if you wanted to call and ask for advice.

If you do use Compat 45 in the above manner, make sure your mother mold doesn't have any leaks before pouring the Compat 45. I've had that stuff leak out of a mold before and it is a mess to clean up all over a table and floor.
 
I saw someone at the Reynolds store lightly cover a sculpt with a thin layer of water-based clay, then make a mother mold on top with freeform air or plaster leaving a small pour hole. He then removed the mother mold, cleaned the water-based clay from the sculpt, put the sculpt back in the mother mold and poured Compat 45 in the gap through the pour hole on top.
That´s an option. It´s called "cavity pour mold". The good thing about this kind of mold is that there´s no chance layers could delaminate and it results in a longer lasting working mold for production. When I have used this method it has been with hard material models, with a clay sculpt one must be careful not to damage it in the process. But can be done.
 
Thank you all for very helpful and insightful comments.

I think I feel more comfortable with a cavity pour mold with compat45. It sounds as something I can pull off... (literally)..
But, I will make a test with my first initial attempt of making Saurfang as I've kept the old one as well.

I've started working on the ears again.
After going over them, polishing them up and adding some skin texture, I realized I was not happy with them. At all.
IMG_0985.jpg


They look ok, but when going back to Saurfang ref pics, his front top ear is almost folded over the back, so I've started making new ears from scratch.

After blocking out some basic ear shape, I tested against the sculpt to see how the size compares:

IMG_0987.jpg

IMG_0990.jpg


Looks decent enough to start with, so I've cleaned them up and added some detailing to them.
IMG_0998.jpg

IMG_0999.jpg


I am MUCH more happy with this shape and might consider his left ear done.
Now I only ned to replicated what I did with the other side...
 

Attachments

  • IMG_0996.jpg
    IMG_0996.jpg
    62.6 KB · Views: 46
  • IMG_0997.jpg
    IMG_0997.jpg
    65.2 KB · Views: 47
After spending the past 48 hours in the stroke ward (not kidding) hooked up to various machines and had x-rays done and basically been a human pin cushion, I got some time on my hands to go back to the source material (youtube videos) and reflect on the sculpt again.

(It was a scare and I was investigated for a stroke, but fortunately, there was no bleeding or clogging, and most likely it was a bad local migraine attack around my left temple that spread down to my face and teeth where I had almost no sense of touch for a few hours).

Bottom line: I am well! Really!

Anyway, I went back and redid the shape of my ears, as I came to the conclusion that they were a little bit too pointy!

At this rate I should start naming the versions like I used to do the files when I was making music 20 years ago.

So: I give you:

"Saurfang_Ears_v3.2_final_really_v2_finished_1.1"
First off: Cut away a few centimeters of the top of the ear.
IMG_1035.jpg


IMG_1036.jpg


Then smooth it all out and apply some skin details and tiny scars again..

IMG_1037.jpg

IMG_1038.jpg


These feel a lot better and much more like the ones from the World of Warcraft cutscenes. I am really a lot happier with these.

Then, apply the same thing on the other ear:

IMG_1040.jpg


Iwill let these guys sit for a day or two and get back to the sculpt, and go through some closeups and see how I can make the sculpt of the head even better.

It takes time, but good for me to work on my patience and looking at the fine details. I'm learning every time I sit with these.

Reshaping the ears only took a little over an hour, so I am learning...
 

Your message may be considered spam for the following reasons:

If you wish to reply despite these issues, check the box below before replying.
Be aware that malicious compliance may result in more severe penalties.
Back
Top