FINISHED! Ckings 1/38 scale TIE FIGHTER

Re: BUILD THREAD Ckings 3-D Printed 1/38 scale TIE FIGHTER

Hey, Steve & Steve.

My comment on the fidelity/ resolution on 3D printing was not a criticism of this TIE build.
I think this bird looks great!
I have nothing but respect on your 3D modeling skills SteveStarKiller ( not to mention you seam pretty fast at it too.)
I was just commenting on trends in 3D printing " in general that I have notice on verious sites an build-up
You guys really nailed the TIE which is not easy to do.
I apologize if I wasn't very clear before.
Happy Thanks Giving All !
 
Re: BUILD THREAD Ckings 3-D Printed 1/38 scale TIE FIGHTER

Thanks guys for the kind words and your interest! I'm really sorry it taken me so long to update this thread but building these things as a "family man" certainly is a HUGE difference from how things used to be. Where did I find all that time!!! A huge thanks also goes out to Chris who's been VERY patient with me on this project, I know it's dragin out...


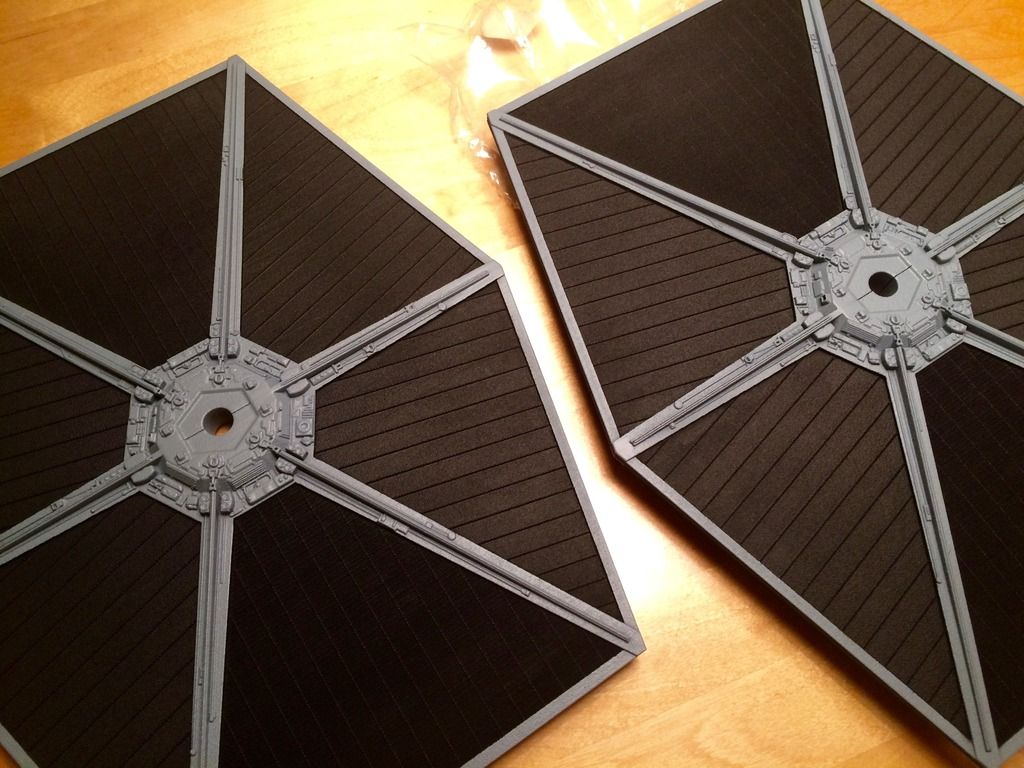
The wings was finished up some time ago and I finally ended up with reverse masking them. I never was able to to get a good result with blocking just the black.
Axlots: Thanks for the tip, but I already tried that with a very poor result. Turned out that the capillarity force actually worked against me sucking up the paint over the edge. This produced a very distorted look. In the end the only way to get a clean lines between black and grey was to let the black run all the way up to the edge of the struts. I know this is not the way it was done on the originals but it actually worked rather well. It's very hard to see that it was done this way. It creates a kind of shadow looking effect.


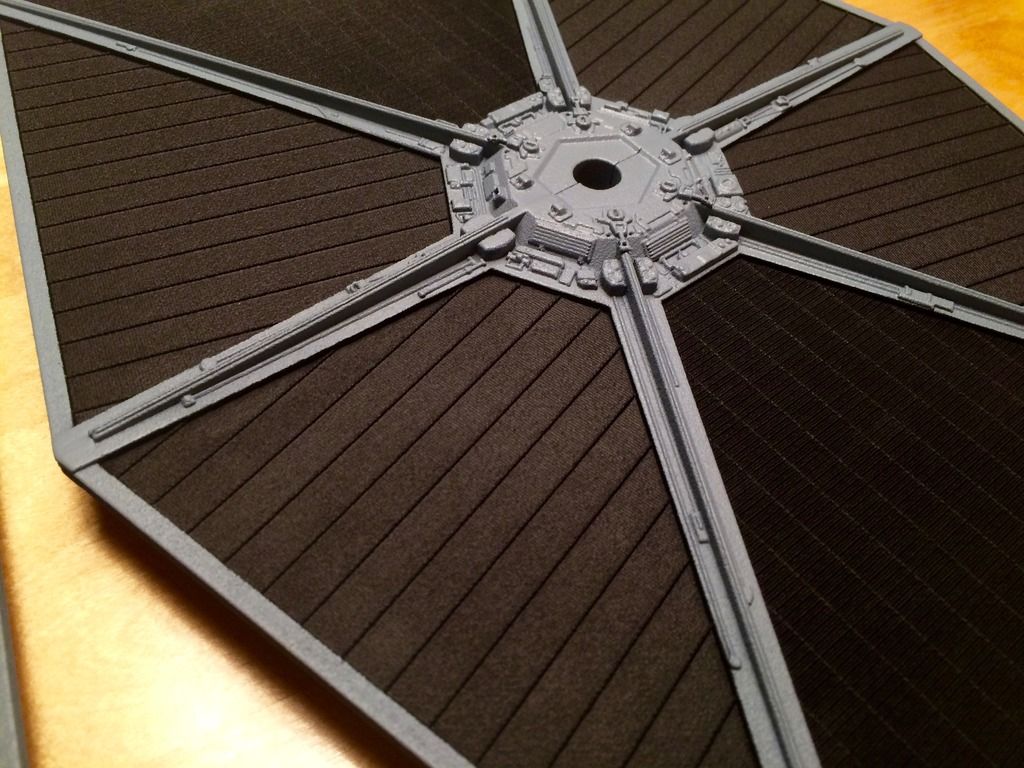
A closer look at the finished wings. The Grey are going to receive a dull coat a long with the rest of the hull.

On to the cockpit!


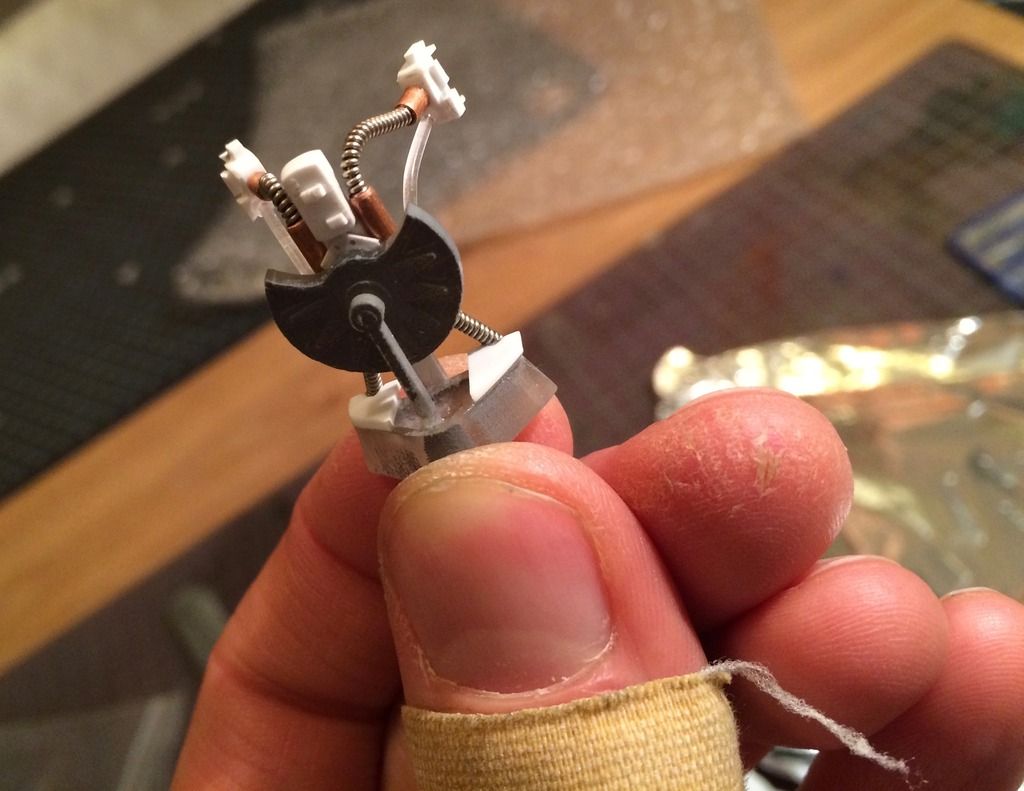
A new steering yoke was built out of the remains of the 3-D printed part and styrene sheets, fiberoptic strands, brass tubes and guitar strings. I tried to base it the best I could to what's seen on the set. This little bugger sure took it's sweet time since I must have broken it at least 3 times! My fingers shows the wonderful effect of to many close encounters with CA glue. Nasty stuff!


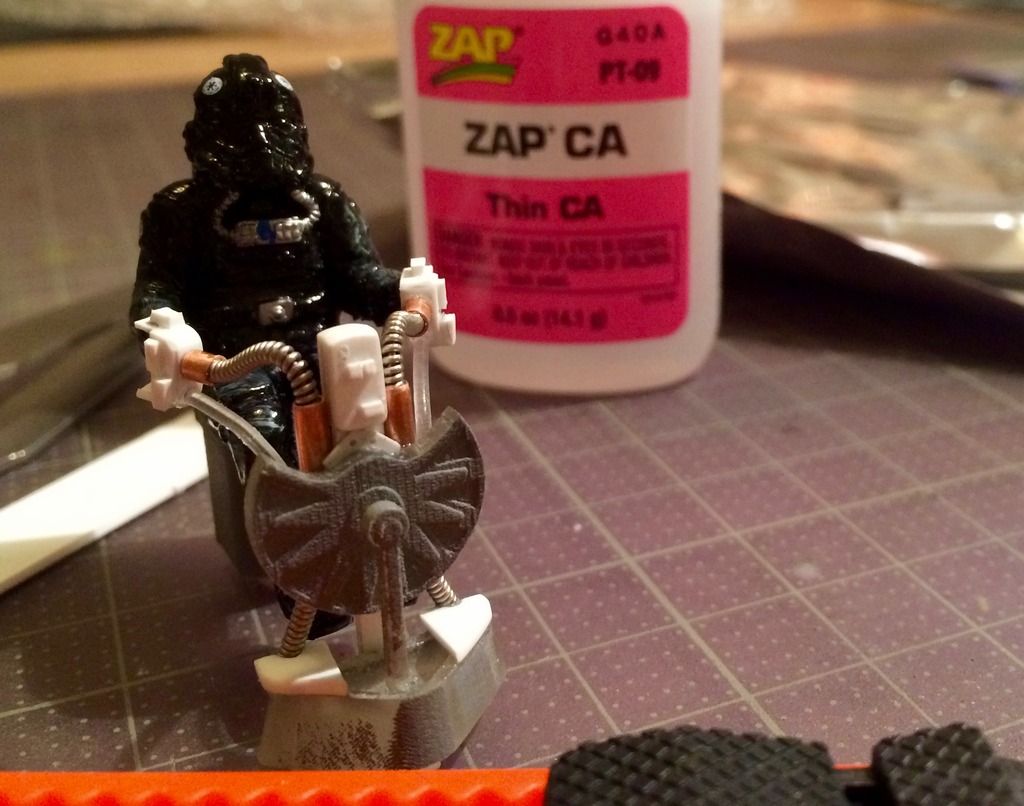
The Revell (Chris correct me if I'm wrong) pilot trying it out for size!


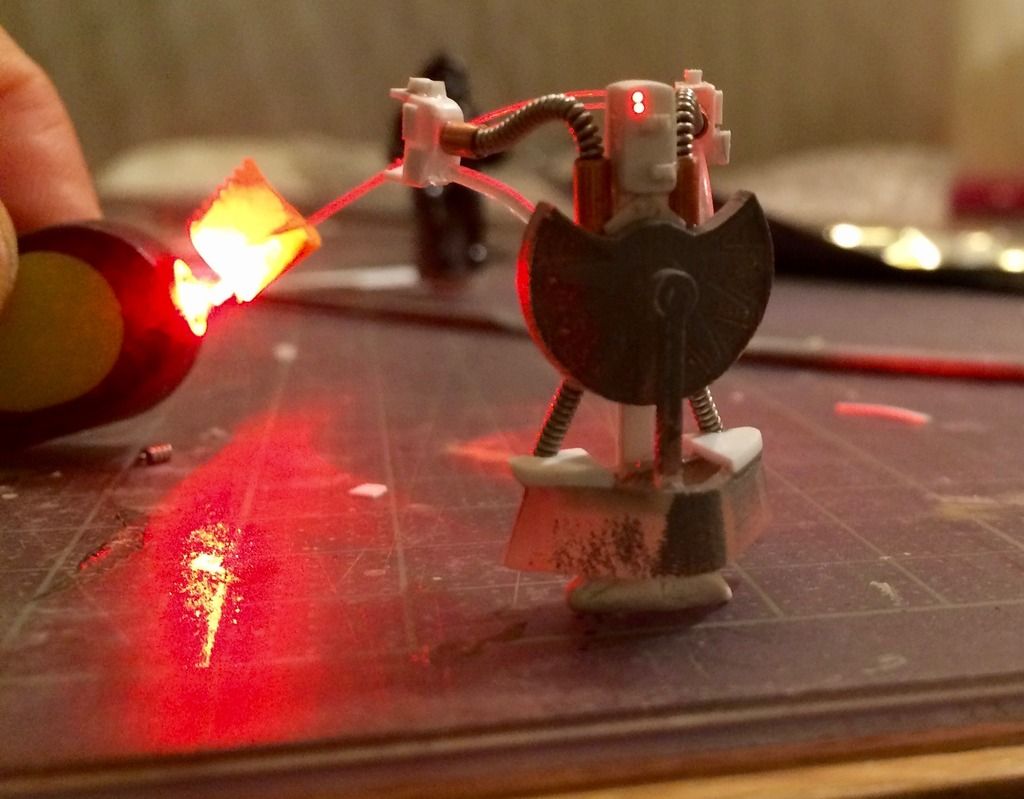
Hooking it up with some 0,25mm fibers


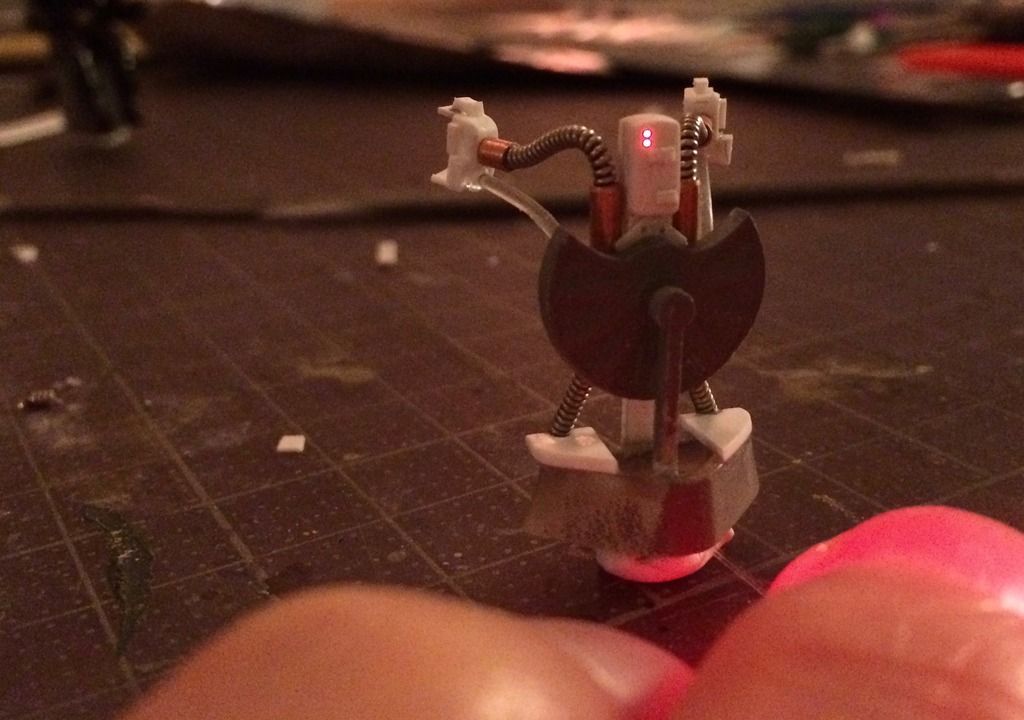
The fibers are all hidden inside.

Greene_gremlin: Thanks for all the info regarding 3-D modeling and printing. This medium is all new to me and so far I can't say that I'm all that impressed. Seems like a rather expensive procedure and IMO that finial parts are not uppto par with what we see on injection kits or resin poured garage kits. I also wonder what's more costly, hiring a model builder to scratch build a prototype or hiring a 3-D modeller to make a computer file. Then pay for Shapeway prints which then has to be shipped and be completed by a model builder. I certainly see a lot of potential but I still think there's a long way to go. Thanks again tough for your input, you clearly know a lot about this subject! It's certainly is the future of model building, no questions about that. I just don't think we're there yet. The price is still to high and the quality of the prints doesn't match the cost IMO.

Until next time!

Steve.
 
Last edited:
Re: BUILD THREAD Ckings 3-D Printed 1/38 scale TIE FIGHTER

Steve! WOW - the steering yoke looks AMAZING. Really great work on that. I wasn't expecting all of those enhancements so I really appreciate the effort and love that you're putting into this. I can't wait to see the next stages of progress when you're able to get time to work on it. Awesome to see the little fiber optics in the steering yoke too. The Revell easy-kit TIE Pilot looks much happier with his accurate controls now! :D
Cheers,
Chris
 
Re: BUILD THREAD Ckings 3-D Printed 1/38 scale TIE FIGHTER


Prepped for primer.


Black an ready for some Valejo acrylics.


Started working on a "free style" dashboard to hide the red LED. I know it's not what was used on the cockpit set but I had to come up with something. The real set wasn't more then a floor, chair, yoke and walls. IMO that looks way to spares on a model.


A smaller console for the right side. I just needed something to hold two 1mm fibers. Thought it would look cool with some red lights here and there.


Time for dry fitting!


Sealing the dash for unwanted light leaks.


Optic fibers and base colors are added. Since the cockpit area will be very dark I used a lighter grey then what's used on set. It will darken a bit when it's washed but I wanted to have some contrast in the cockpit once it's sealed. I know a lot of people put in red LEDS to illuminate the entire cockpit but IMO that throws off that mean look it has. They never appeared that way in the film. Also, the filming set wasn't lit with red lights either, just random red control lights here and there. That's the look I'm trying to achieve.

Cheers,

Steve.
 
Last edited:
Re: BUILD THREAD Ckings 3-D Printed 1/38 scale TIE FIGHTER

Absolutely BEAUTIFUL work Steve. Wow. I can't wait to proudly display this fantastic piece. You have gone WAY over and above what I was ever expecting from this project. Thank you so much for all of your efforts. :)
 
Re: BUILD THREAD Ckings 3-D Printed 1/38 scale TIE FIGHTER

l Now I understand what you meant by "I doing a smaller Tie Fighter" WOW!!!! what a brilliant project. My plan over X-Mass was to sit down and practice some Rhino for 3D Modeling. I would love to be able to print my models in the future. Absolutely ACE job Steve. What Software did you model it in if I may ask?

Vi Hörs
CC
 
Last edited:
Re: BUILD THREAD Ckings 3-D Printed 1/38 scale TIE FIGHTER

l Now I understand what you meant by "I doing a smaller Tie Fighter" WOW!!!! what a brilliant project. My plan over X-Mass was to sit down and practice some Rhino for 3D Modeling. I would love to be able to print my models in the future. Absolutely ACE job Steve. What Software to you model in if I may ask?

Vi Hörs
CC

it was modeled in sketchup, of all things. I should have done it in a more robust program to be honest, but the Steve the Swede is rescuing it beautifully.
 
Re: BUILD THREAD Ckings 3-D Printed 1/38 scale TIE FIGHTER

Cheers SteveStarkiller

I know Alias Auto Studio and Rhino from way back due to what I do for a living, although I must say I am somewhat rusty, actually more then that so as said will try to polish up some of those ol skills over X-Mass.

Brilliant Project you guys are doing there and will follow Steve's Progress on the final build.
 
Re: BUILD THREAD Ckings 3-D Printed 1/38 scale TIE FIGHTER

Love the interior based on the full-size Set
Nice job, both you guys

You nailed the Steering Yoke.
What did you use for the coiled/hose? it came out quite nice
 
Re: BUILD THREAD Ckings 3-D Printed 1/38 scale TIE FIGHTER

Finally an update! I know, I'm painstakingly slow!

Greeble_gremlin. The hoses were made from old guitar strings. They're rather tough to bend but looks rather nice once in place.

Here's some new pics of the cockpit progress. The finished dashboards with 1mm fibers running between them.


Dashboards installed, attaching some wall graphics.


Running fibers to the steering yoke.


Everything in place, hitting the lights!


From above.


In the dark with a slooooow shutter.


Finally a pic of the battery setup. Nothing fancy, just a clip to hold two button cells. Magnets are used to hold the rear hatch/hull pice in place. I had to be careful were to place the magnets so they didn't interfere with the batteries.


Now I need to go back and finish the missing rear "tank tranny" part. Thanks for looking!

Steve.
 
Re: BUILD THREAD Ckings 3-D Printed 1/38 scale TIE FIGHTER

Holy smoke, Steve, this Tie is sweet. The lighting and detail are superb. That darker picture you took really popped! Can I save that image and use it in a Vader digital pic for a friend? I would LOVE to use that as a reflection in Vader's masked eye! Anyway, amazing job!

Lee
 
Re: BUILD THREAD Ckings 3-D Printed 1/38 scale TIE FIGHTER

Beautiful work Steve. The cockpit lighting and detailing looks incredible and the repainted pilot looks much better. Great idea with the magnets to keep the rear hatch in place and it's excellent that we don't need to run any cables down through the mounting pole. Thanks so much for all the dedication and love that you're putting into this project.
Cheers,
Chris
 
Re: BUILD THREAD Ckings 3-D Printed 1/38 scale TIE FIGHTER

Lee, thanks for asking! Feel free to use the pic. Chris, thank you soooo much for still holding out!

Steve
 
Re: BUILD THREAD Ckings 3-D Printed 1/38 scale TIE FIGHTER

OK, the tank tranny didn't come with the 3D kit so a new one was scratched from sheet styrene, stretched sprue and miliput. It was actually rater tricky to get everything to align properly.


Primed and ready for Haze grey. Also, please note the incredible range on the Haze grey color (hull)! It constantly changes depending on the surrounding light sources.


Starting work on the wing/strut assembly. The idea is to have everything going together with screws and magnets for easy assembly and alignment.


Magnetic "hub caps" hides the screws.


Where finally getting there! Now all that's needed is more paint, decals and a working mounting port for the display rod. Please note the 1:48 fine Mold TIE for scale!


I can't believe it's all finally coming to an end! I'm rather sure neither can Chris!LOL

Steve.
 
Re: BUILD THREAD Ckings 3-D Printed 1/38 scale TIE FIGHTER

Love it! Good way to hide all the screws with that plate+magnet trick:)
 
Re: BUILD THREAD Ckings 3-D Printed 1/38 scale TIE FIGHTER

Looks phenomenal Steve! AWESOME to see it fully assembled and looking so "ILM-ish". You have gone way beyond what I was ever expecting for this project. Thanks again for all of your amazing work.

For those who are interested, the scale for this model was determined by taking the ILM studio scale model as being 1/24 (based on the pilot they used). I wasn't interested in all the various sizes that had been published over the years for the ship - in my mind, if a 1/24 pilot was sitting in the cockpit, the scale of the ship should be 1/24 too. Using that logic, all of the sizes from the studio scale model were scaled down to 1/38 to match the size of the pilot used in the Kotobukiya cross section X-Wing that this gorgeous TIE model will be displayed next to in my cabinet.

Cheers,

Chris
 
Last edited:
This thread is more than 8 years old.

Your message may be considered spam for the following reasons:

  1. This thread hasn't been active in some time. A new post in this thread might not contribute constructively to this discussion after so long.
If you wish to reply despite these issues, check the box below before replying.
Be aware that malicious compliance may result in more severe penalties.
Back
Top