Duel Truck

Thank you Mundbuster. I love the Mad Max vehicles and the new Mad Max movie looks like they'll have some interesting trucks and cars in it too. As for the Valiant, I would like to see how StuntmanMike's build turns out. I would like to make the Valiant someday and it looks like his is the best way to approach that car.

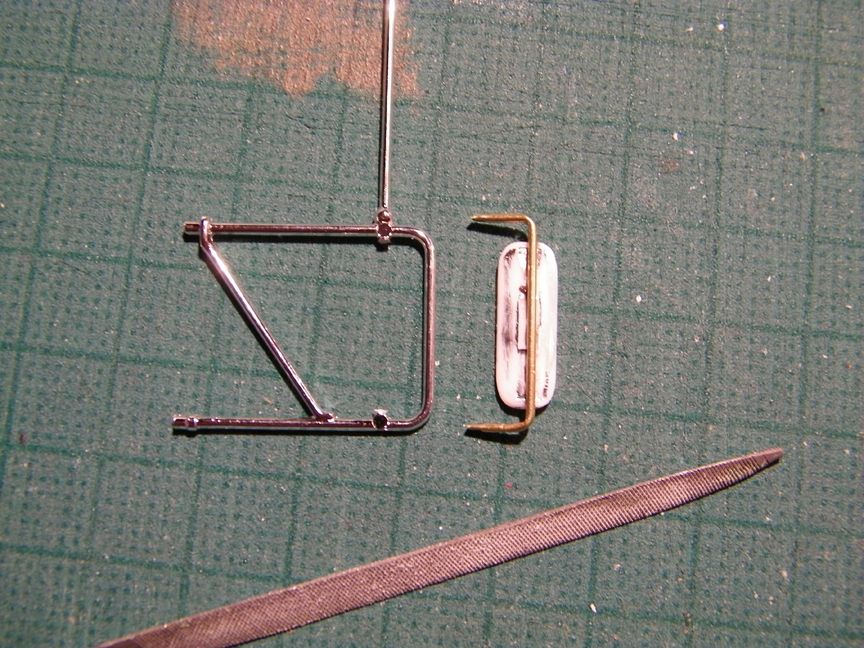
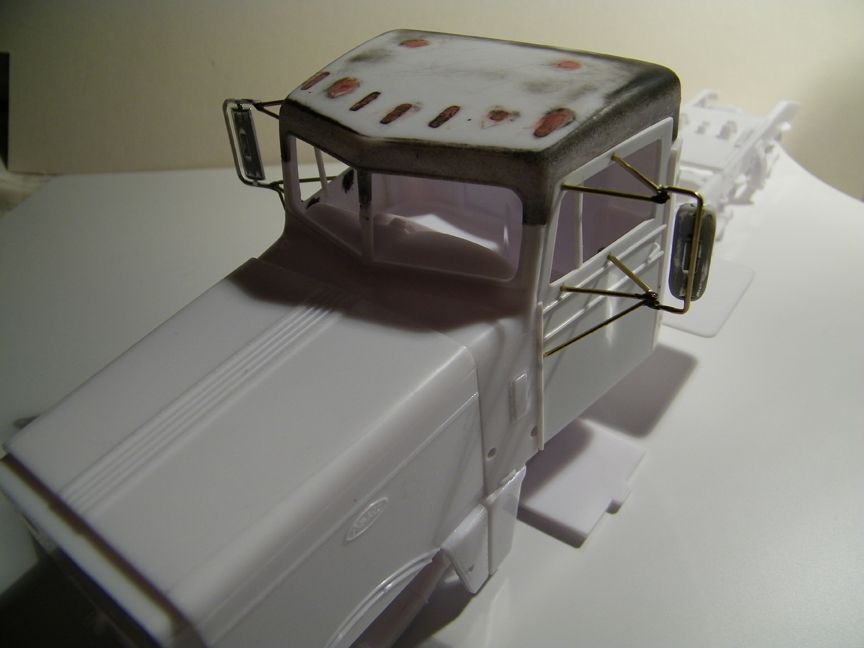
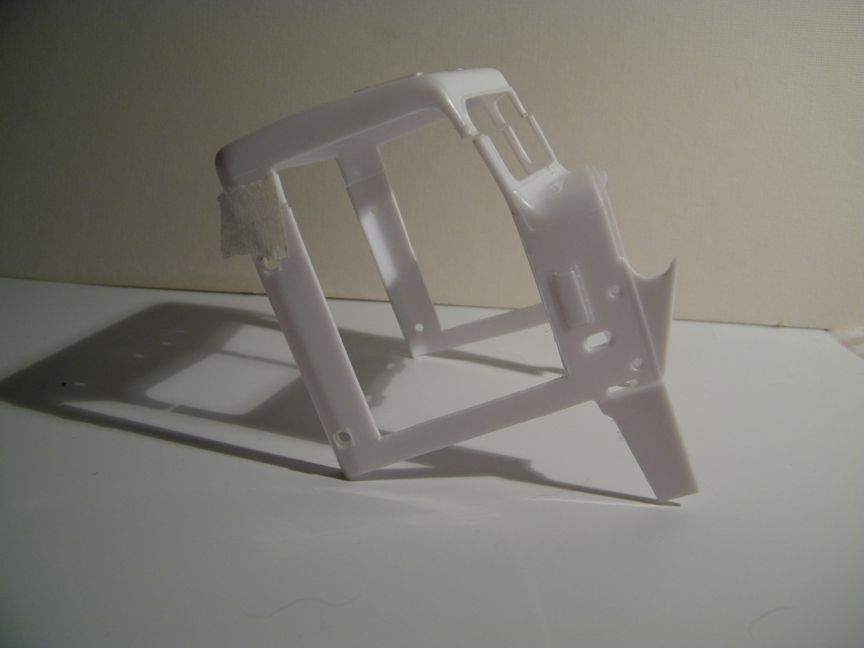
For right now, I've decided to do a simple chop of the roof bringing it down 3 mm. Now the front windshields have a more rectangular shape.

100_5347_zpsebfbfc0e.jpg


100_5345_zps6eb2d99e.jpg


100_5346_zps8d2d4af7.jpg


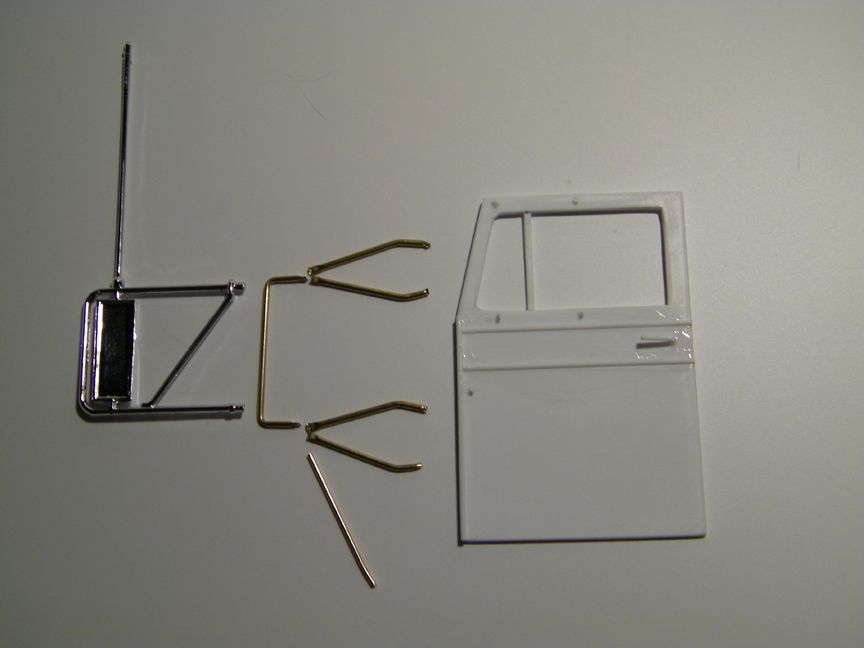
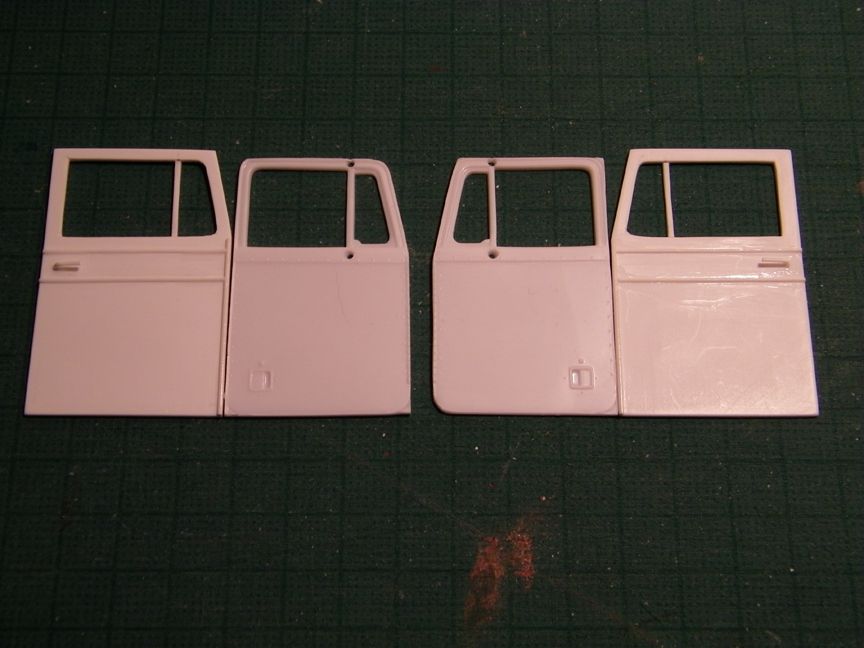
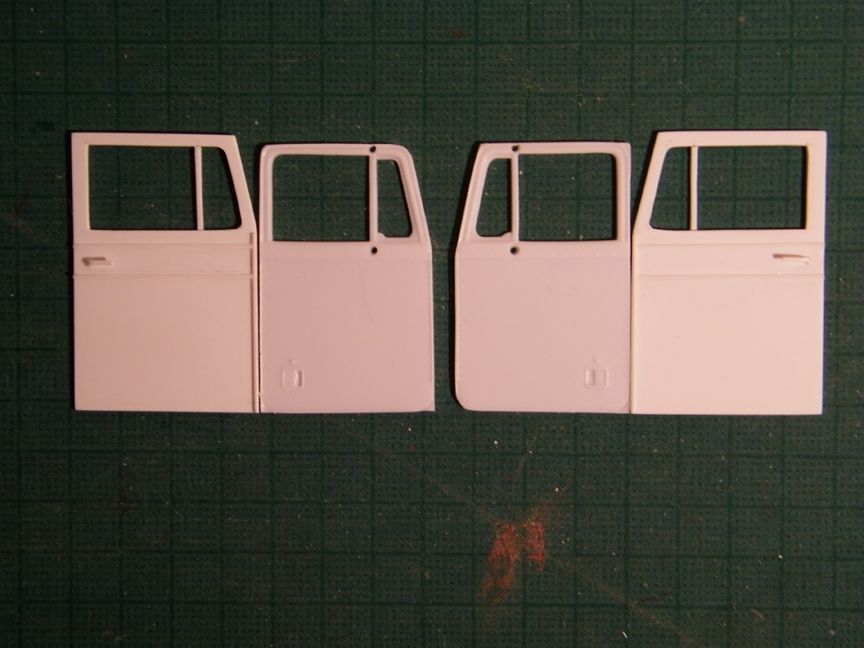
Next, I've spent a long time contemplating on the doors and decided to make them from scratch because on all the images I can find, the older doors look bigger than the modern ones. I first cut out a sample from thin cardboard. It's 2 mm wider and 2 mm longer on the bottom. You can see the outline of the door from the kit on the cardboard door. I also cut the window out accordingly so it ends up having that more rectangular shape. I wanted to try this first before cutting the kits doors.

100_5349_zpsaa27435e.jpg


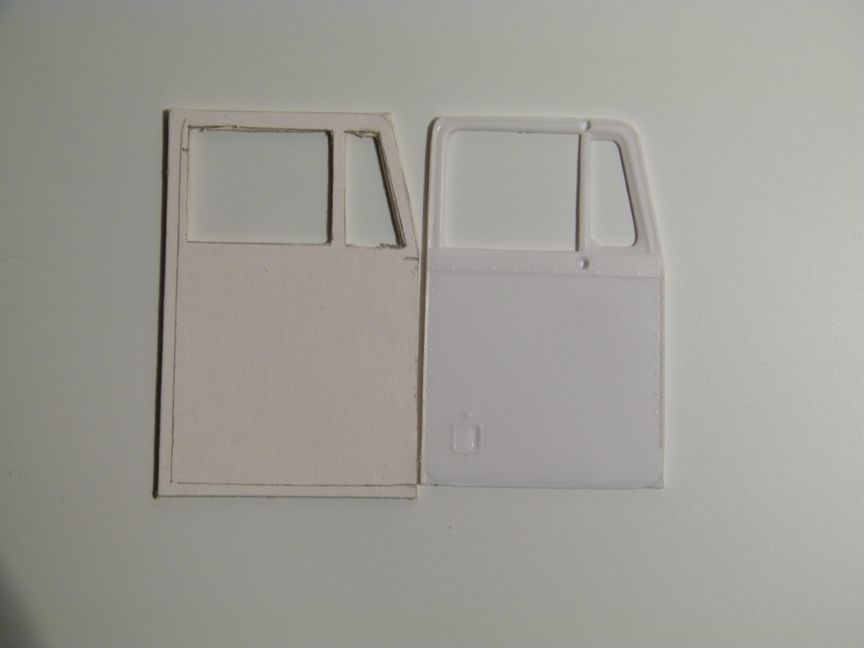
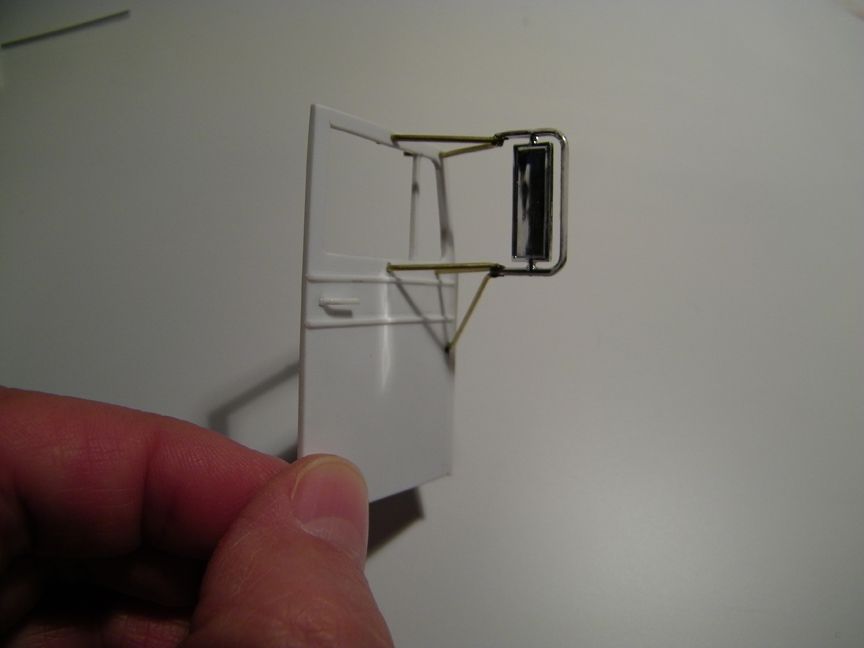
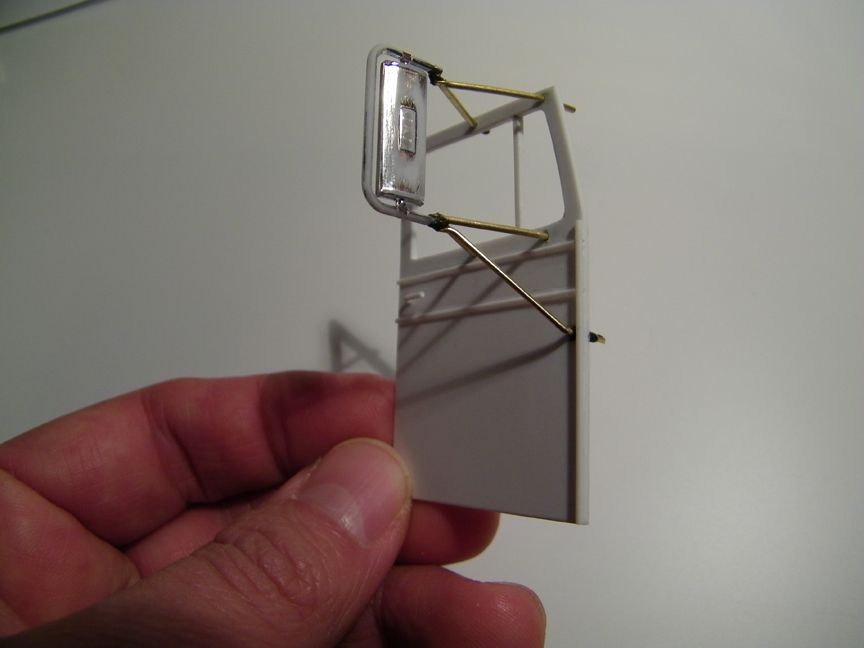
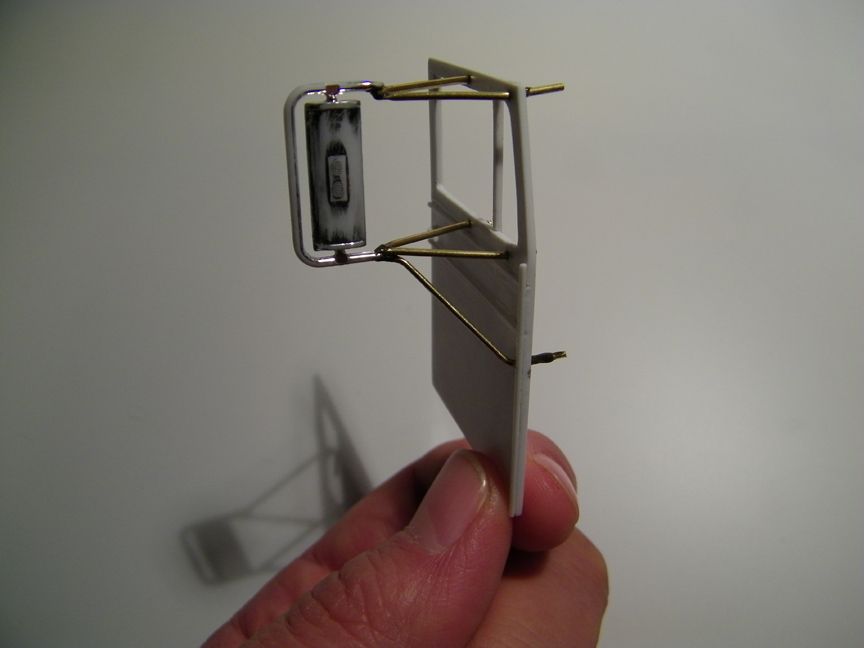
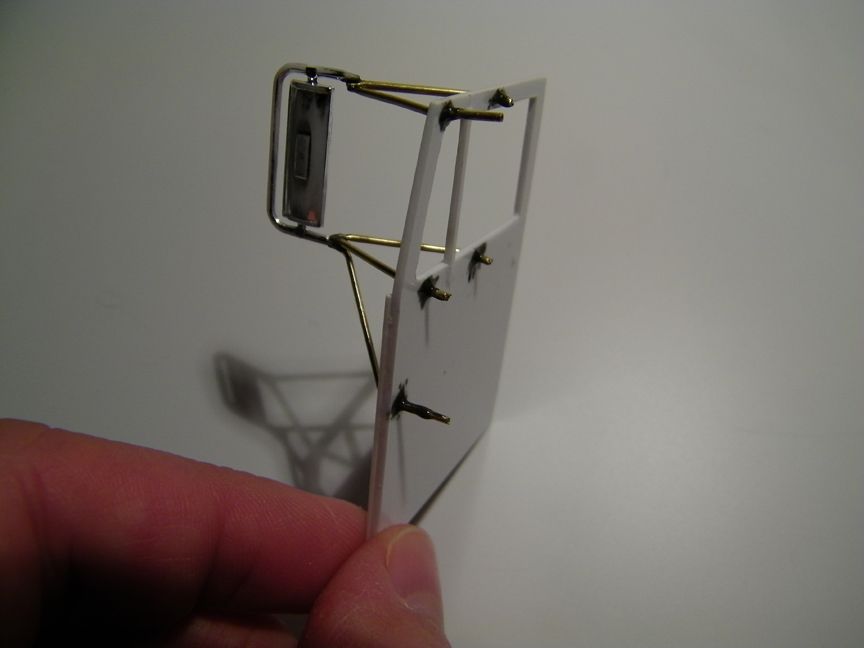
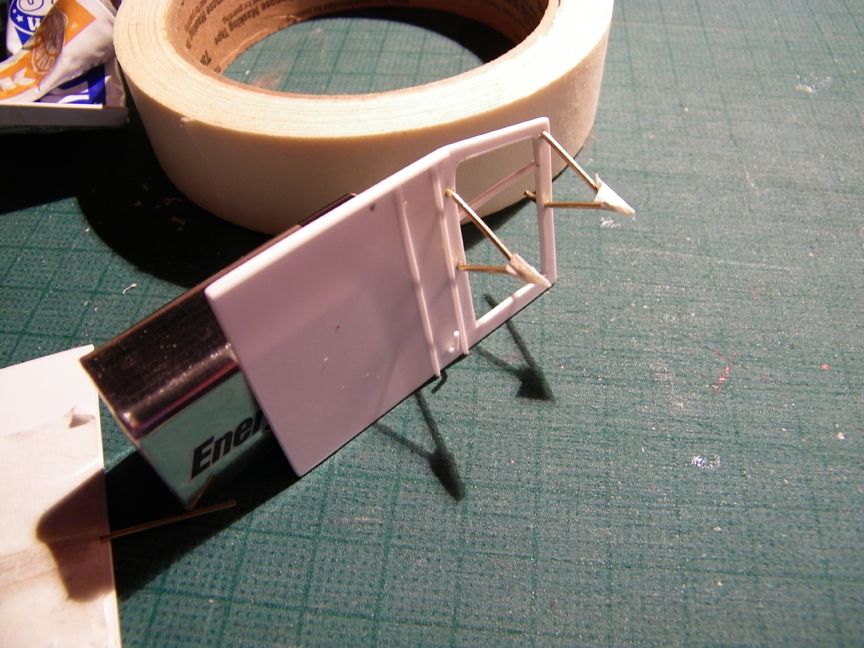
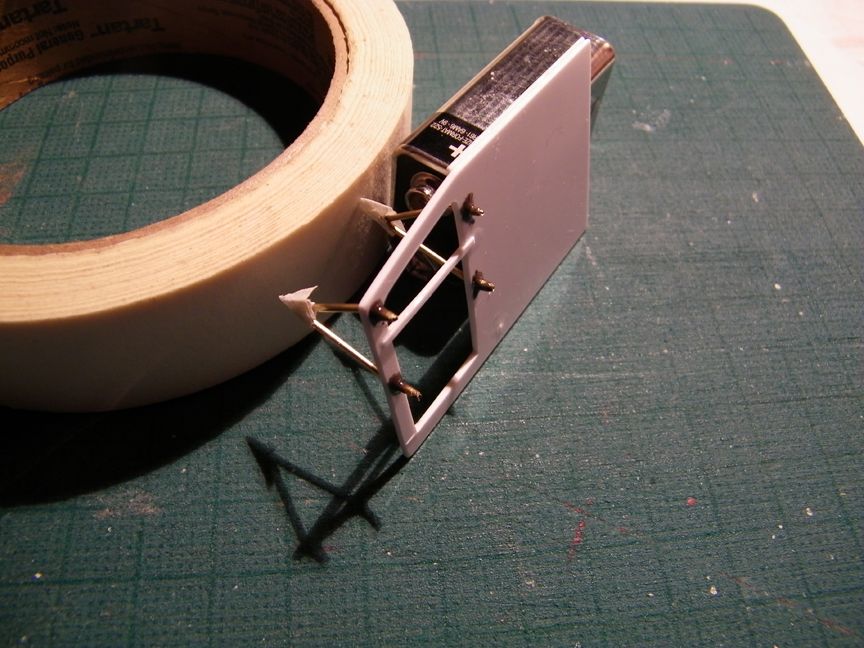
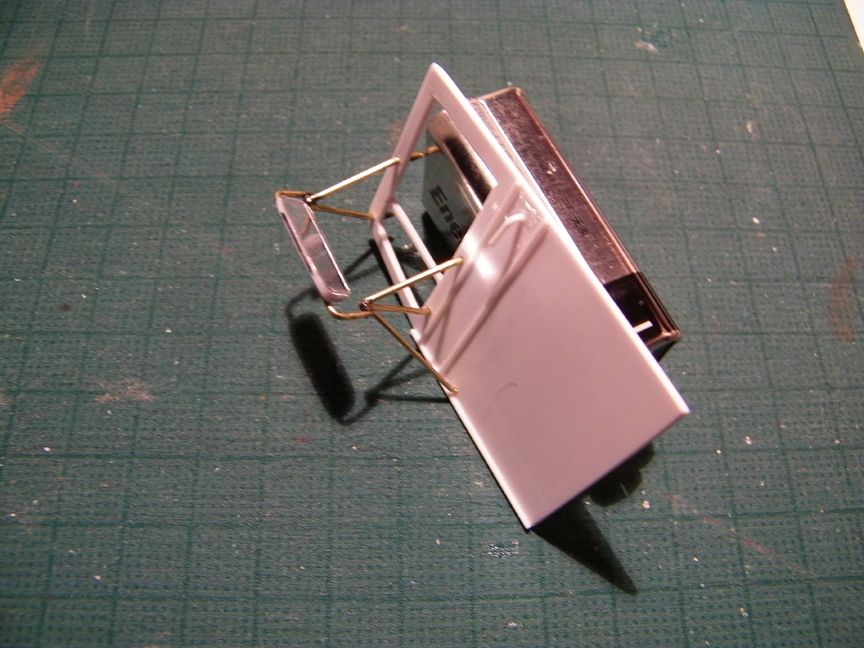
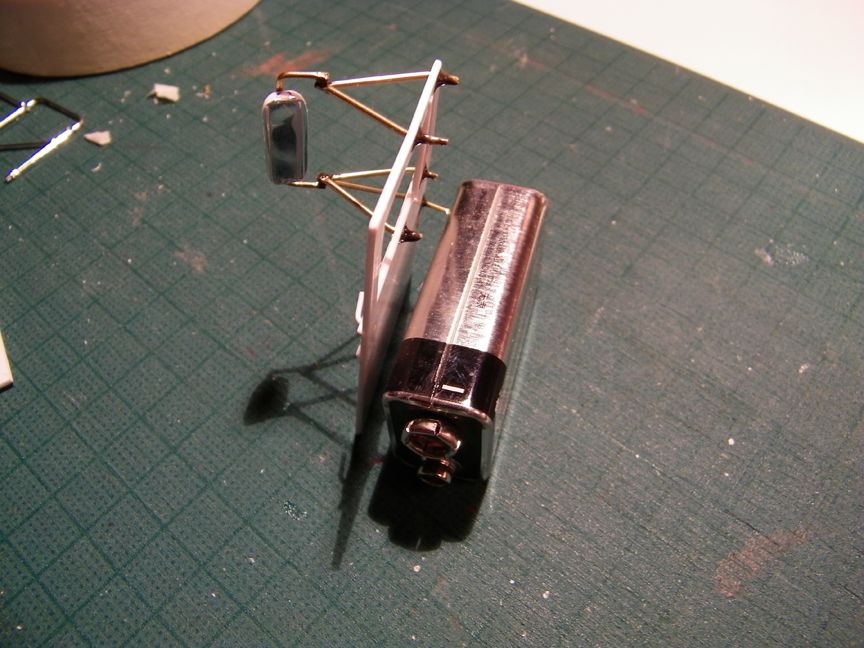
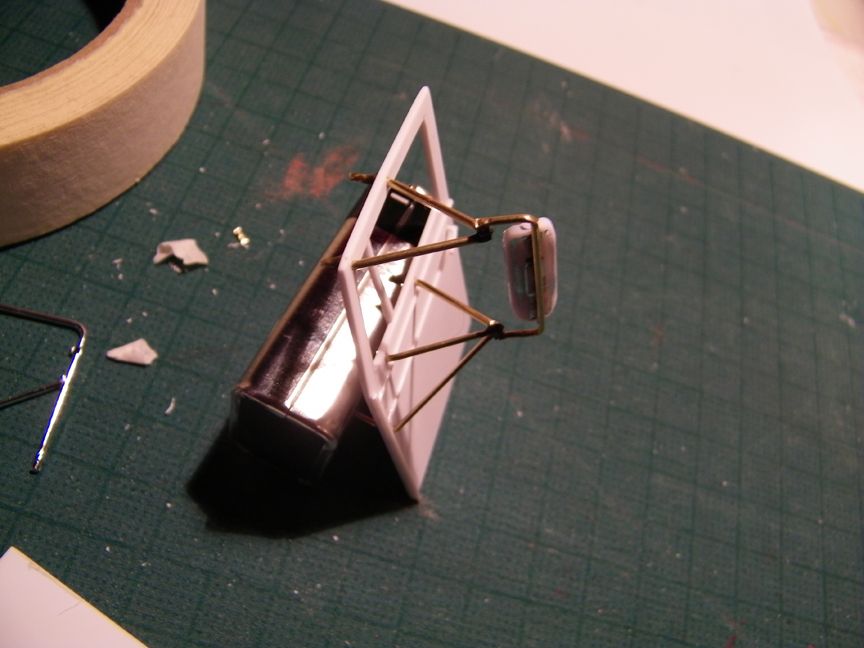
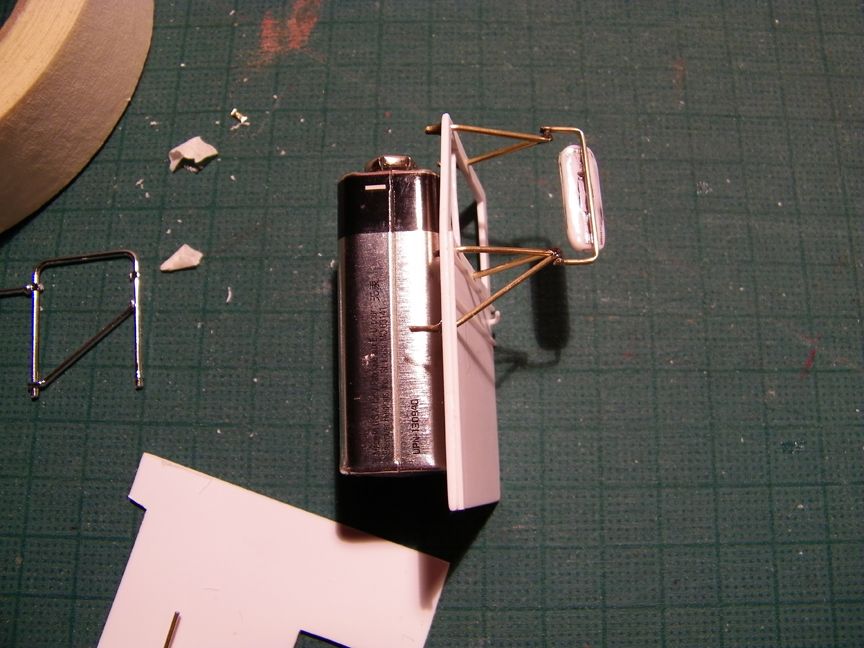
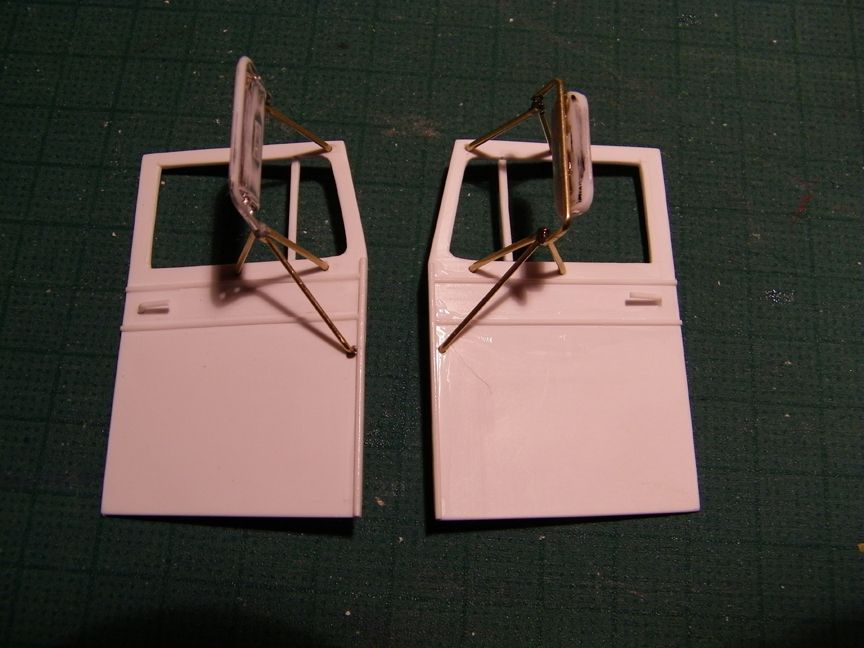
When I was satisfied with that, I cut them out of 1 mm sheet styrene and added thin styrene rods for the horizontal details and the vertical door hinge. On the horizontal rods, I first etched out grooves so the rods could sit "in" the door more so they didn't stand out as much as the hinge.

100_5354_zpsd280822f.jpg


100_5353_zps73dc7fa2.jpg


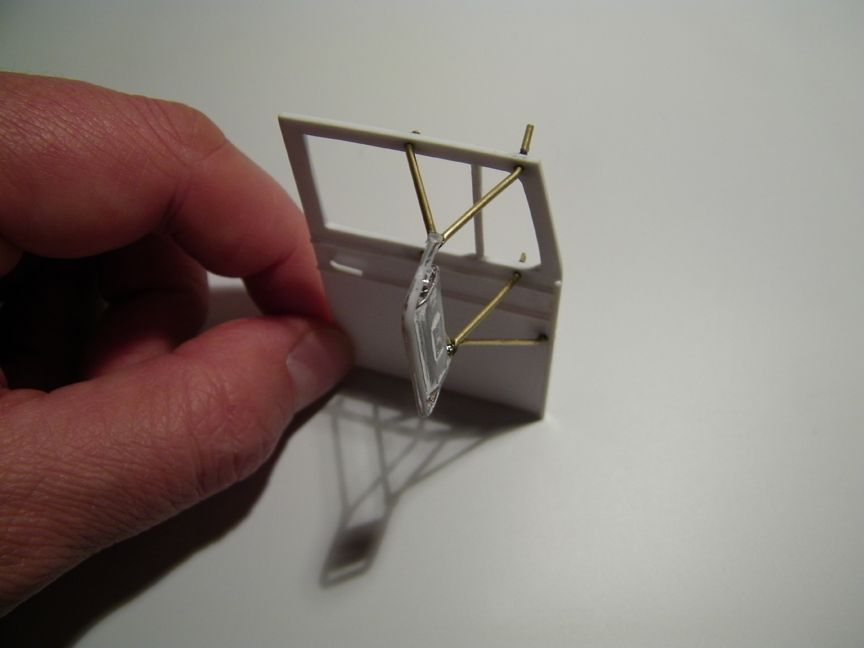
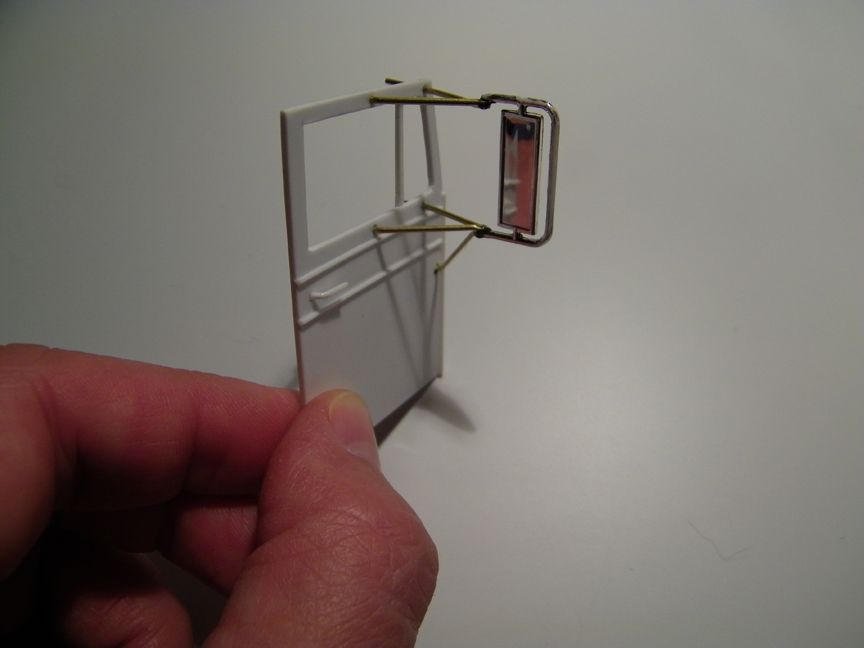
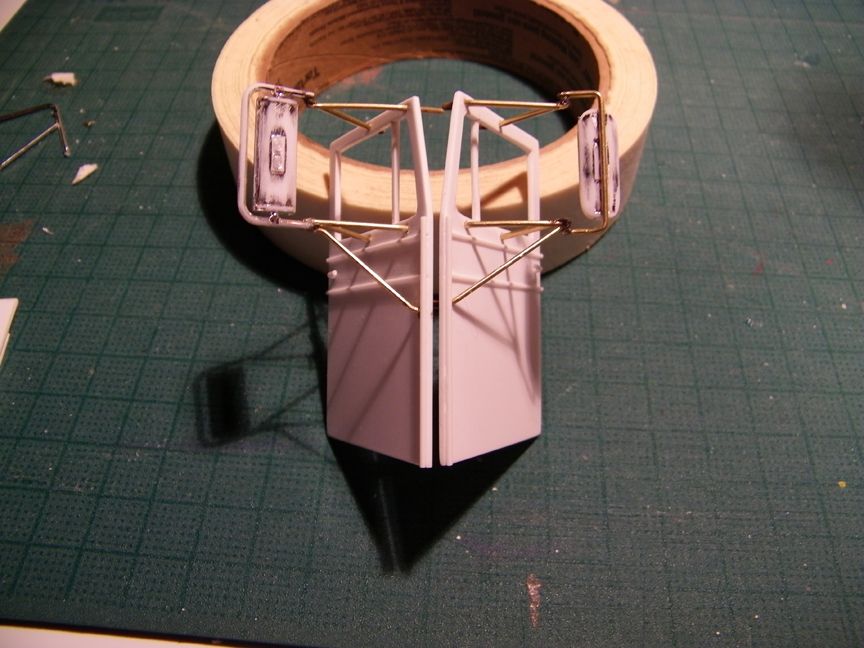
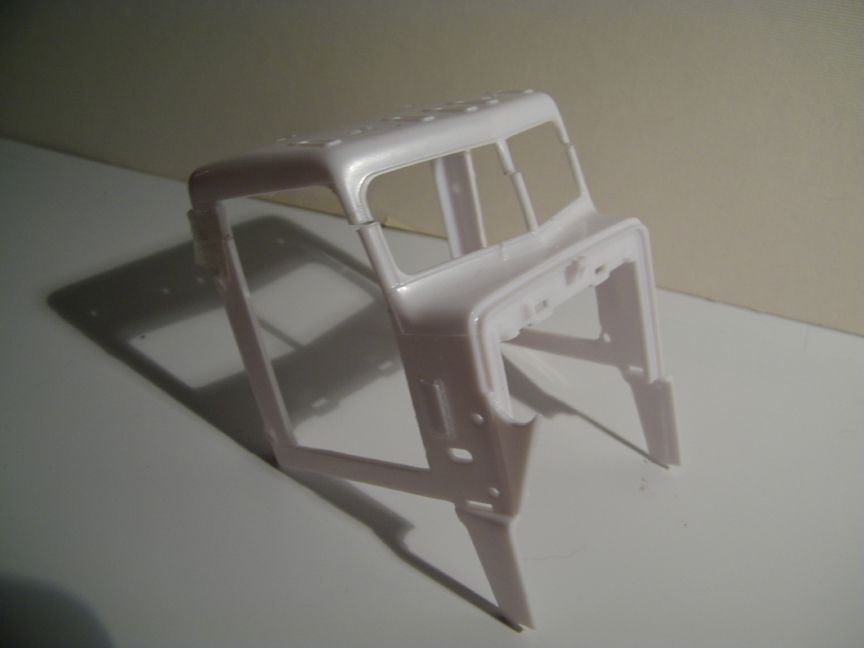
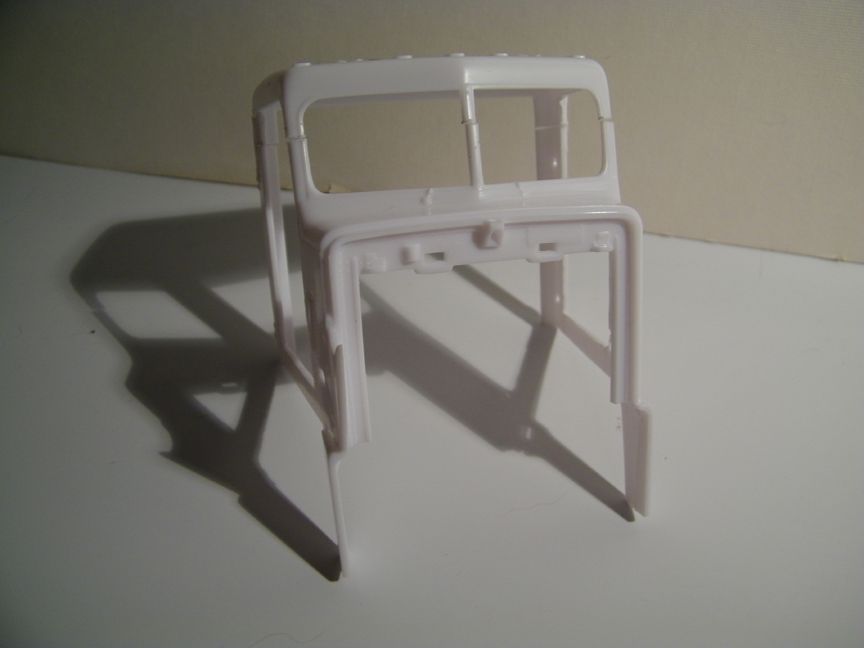
I then decided to completely take out the bottom part of the cab that are under the doors and will remake them later. It's easier for me to do that than carve out the space for the new doors. I also cut away 2 mm of the cab that is behind the doors to make room for the new ones. These photos just shows that mess with a new back part of the cab made from scratch.

100_5351_zps352b6946.jpg


100_5350_zps0e7957e2.jpg


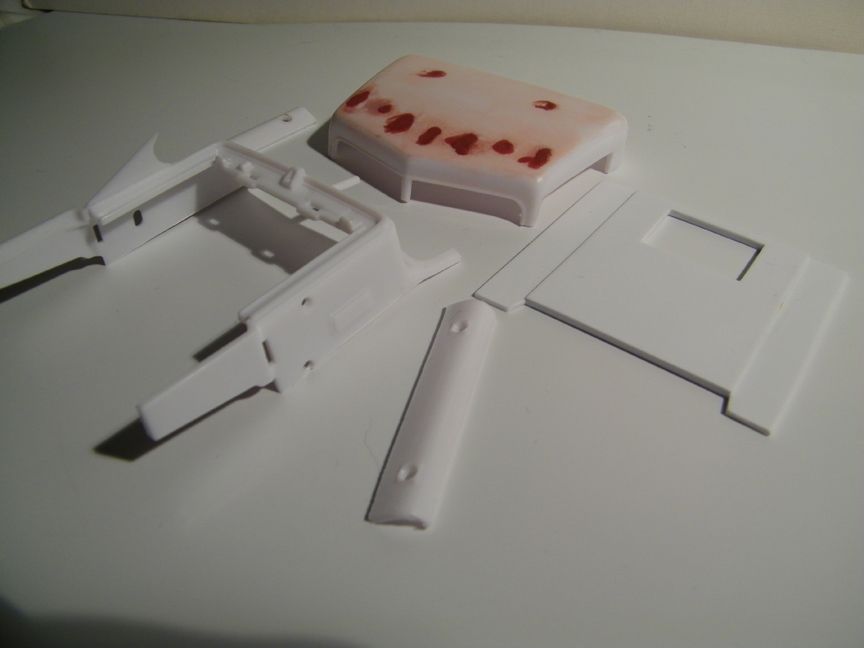
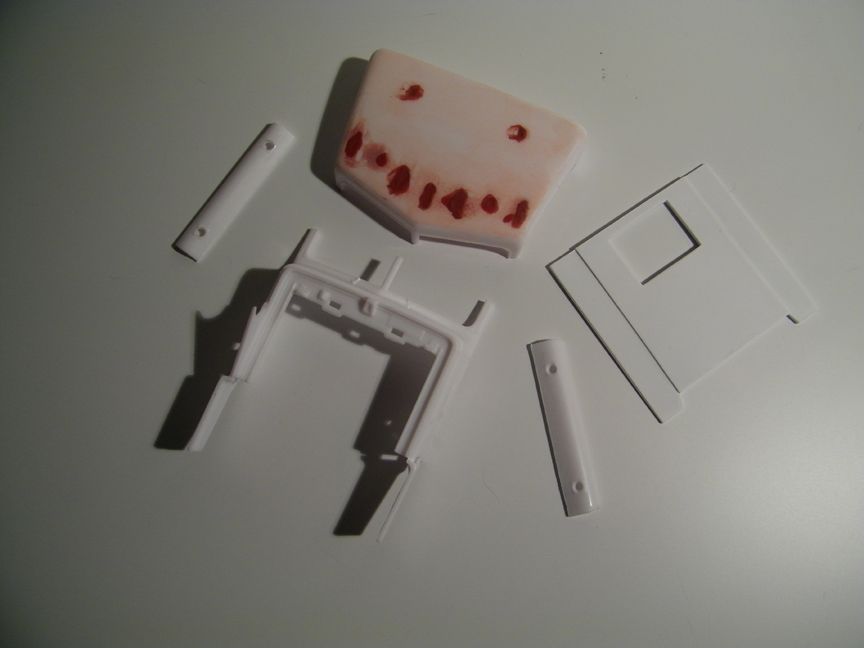
It looks like a mess now but I think this will work out.
 
Looking good so far. I like the scratchbuilt doors. You should use some tape and try to dry-assemble the cab. That´s helpful to find unsuspected things that need to be fixed.

Valiant? As soon as "The Mule" has been finished, I´ll get back to my take on the Valiant. When the body turns out to be accurate, it will be casted in resin.

Looking forward to the next updates.
 
Thanks guys. You are right, Kevin. Dry fitting everything before making major changes is important for me. Thank you for mentioning that. So far, I’ve spent most of the time dry fitting, sitting and staring at this trying to work things out in my head before making any cuts. I’ve been measuring things over and over to see what it will take to get the right look. I’ll try to be as thorough as possible to document all the measurements and changes I’m doing to this kit. Right now the cut outs in the cab for the new doors are just a hair smaller than the doors themselves. I will file and sand the door openings to the proper size when I glue the doors in. I want to make sure to get a tight fit with no gaps.
 
Thank you Katsu-san. Here's a picture of the truck's box.

Box_zps5be3e13d.jpg


This is just the tractor. I know there is a kit available for a tanker trailer but I think too many changes would have to be made to it so I will first try to scratch build the trailer. If that doesn't turn out right, then I may try to modify the kit.
 
I just completed my DUEL tractor and scratch built trailer. Had decals for the license plates made special and am now waiting on decals for the trailer and tractor which should be here soon.
Your work looks great so far. Just remember on the doors, there are no rounded corners. Wish I had seen this post sooner as I have about 10 extra small window cabs I plan on making into various early Pete rigs.
The trailer which is a 1947 Fruehauf was a real bear to scratch build but with time and patience you shouldn't have any problems.
 
Hello skysoldier and welcom to the forum. Thank you for your suggestion and I really like what you're doing with your build of the truck. You have the color and feel I'm going for. I haven't scratch built anything with curves like what the the trailer has so that will be a challenge for me.
 
Thanks Randy13. I do like the way your going about your build. Take your time, check and double check everything. I built my trailer twice and finally on the 2d time got it right. The only thing I had problems with was the undercarriage of that trailer. There aren't many closeup shots of that particular feature from any website I've seen so I had to make guesstimates from the few pics and from the quick shots in the movie.
I guess my trailer is a composite of all 3 rigs used in the movie but I'm happy with how it turned out. I still haven't weathered it yet, waiting for decals so they can get weathered at the same time.
And honestly even tho I have 2 airbrushes, you'll never guess how I painted the rig and trailer... Tamiya spray cans! NATO Brown, Red Brown and Wooden Deck Tan. It's as close to the actual color as I could get and I've heard colors from orange gold to brownish gold.
So just keep on truckin' there.

By the way, Evergreen has sheets of flat styrene in 24" lengths x 12" wide. That's what I used for the trailer so I could only do one wrap layer w/o using putty to fill seams. Made life a LOT easier too.
 
Last edited:
Thank you skysoldier46 for all the info. I have no idea what is going on under that trailer and I'm sure I'll be squinting my eyes a lot at the screen caps trying to pick up on any little detail I can find. Thank you very much for the color info too. I was wondering where to begin on the colors. I also like your idea of going for one single wrap on the trailer.

What I've been working on lately were the side view mirrors. Here's what they look like in the kit.

100_5355_zps1104a248.jpg


Here's the look I want. The passenger and driver's mirrors are different. That means a little more extra work needs to be put into this.

FrontDetails_zps824c656c.jpg


At first I was going to let that go but then I knew it would bother me. So I first started out with the passenger side by cutting and bending the thinnest metal piping I have.

100_5357_zpsfa2e04bf.jpg


I drilled some tiny holes in the doors and it ended up looking like this.

100_5358_zpsc05d71cb.jpg


100_5359_zps45a711fc.jpg


100_5360_zpsf0512289.jpg


100_5361_zps51c5252e.jpg


100_5362_zps2d5cbad6.jpg


100_5363_zps39e159d1.jpg


100_5364_zps0df851c1.jpg


I just used some JB Weld to hold it in place. I'll cut off the excess later. Next was the driver's side.

100_5365_zps33d75a7d.jpg


100_5366_zps54202ea7.jpg


100_5367_zps0105a29e.jpg


100_5368_zpsa152dc13.jpg


100_5369_zpsf40c7c30.jpg


100_5370_zps29146f7d.jpg


100_5371_zpsfda41fd4.jpg


100_5372_zps2717331c.jpg


100_5373_zps6027b392.jpg


Then a dry fit (with the kit's hood) to see how it's coming together.

100_5376_zps8b59992c.jpg


Thanks for looking!
 
I enjoyed your precise work on those mirrors.
Looks very good!:thumbsup And the info about the JB Weld was very valuable.
I didn't know how to fit the plastic and brass till now.
Keep up the good work, sir.

katsu
 
Randy, I found the thickness of those arms on the mirrors was WAY too fat myself so I did the same thing you did except I used .020 Evergreen rod. I can't wait to see the finished Tractor. Good luck or should I say skill since that is what I'm seeing here... skill!
 
...ive never used jb weld is it an epoxy resin glue??
J-B Weld now makes a number of products, but they're all essentially two-part epoxy adhesives that have a wide variety of uses. Several years ago I used their "cold weld, steel reinforced" formula to repair a hole in the oil pan on my '74 Ford Torino; that's how well their products work.
 
J-B Weld now makes a number of products, but they're all essentially two-part epoxy adhesives that have a wide variety of uses. Several years ago I used their "cold weld, steel reinforced" formula to repair a hole in the oil pan on my '74 Ford Torino; that's how well their products work.


ah right yeh we have similar stuff here in the uk , i dont think jb weld is avalible over here

thanks zombie
 
Thank you guys very much! At first I was going to use CA glue for gluing the plastic and metal together but I was using the JB weld on something else and had that near me so I used that instead. Plus I didn’t want to open a new tube of CA glue unless I had a few things to use it on.

Thank you for the compliment skysoldier46 but I don’t see myself as having any skills in this. It’s mostly trial and error for me. I’m doing quite a few things here I’ve never done before so I’m learning as I go along.

Thank you Zombie for explaining the J-B Weld. One of the things I love about this forum is there’s always something new to learn about. I’ve learned two things from your post. 1, the “steel” J-B Weld can fix a hole in an oil pan and 2, you have a ’74 Torino. That’s awesome! Is it red? Also there has to be something equivalent to J-B Weld in the UK.
 
I am loving this build! Great movie!

As a side note, I had heard that Spielberg added the sounds of this truck going over the cliff at the end to the sounds of the shark in JAWS at the end.
 
Thank you King of the Impossible.:thumbsup

That’s some cool info regarding JAWS. As a kid, I found the truck’s sound more scary than any sound from other monsters or creatures at the time. I remember the scared (but fun) feeling I would get when the truck would close in on the little red car and all you see is the truck’s front grille getting closer to the camera and hear the roar of the truck’s engine.

At the time I first saw this movie, it was before Star Wars so my world was consumed by monsters like Godzilla, Rodan, Ultraman and my favorite, Gamera. When I first saw Duel, to me, the truck was like a monster. Instead of legs it had wheels and instead of a monster’s roar, it had a roaring engine with black smoke coming out. And because it was a truck, it seemed more “real”.

Also at the time I first saw this movie, my school was by some big broccoli farm and I would see Peterbilt trucks go by every day. I would always imagine that the driver survived the crash at the end of the movie and he’s driving one of the trucks going by my school.
 
I am loving this build! Great movie!

As a side note, I had heard that Spielberg added the sounds of this truck going over the cliff at the end to the sounds of the shark in JAWS at the end.

Actually, Spielberg (as he says in the interview on the DVD) that the sound was actually a dinosaur roar from an old movie and he chose it because he wanted the truck to be a bit of a monster and wanting it to have a "death cry" as it went off the cliff. When it came to Jaws, he added it at the point where the shark fin comes out of the cloud of blood (much like how the trailer in Duel came out of the cloud of dust) as to connect the two movies (basically, the sound was a means of connecting the two films together, as they were both were about relentless leviathans going after average people. In fact, Spielberg stated that the truck in Duel was basically a land version of the shark from Jaws, and Spielberg also had it in there as a "thank you" to Duel for allowing him to have his big break).
 
This thread is more than 6 years old.

Your message may be considered spam for the following reasons:

  1. This thread hasn't been active in some time. A new post in this thread might not contribute constructively to this discussion after so long.
If you wish to reply despite these issues, check the box below before replying.
Be aware that malicious compliance may result in more severe penalties.
Back
Top