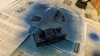
Not bad for your first attempt.
When painting, it is always best to lay down the paint in many light even coats instead of one heavy coat. As you get further along in your model building experience, an air brush is so much easier and gives a much more controlled paint job. I always used a light laquer primer coat before applying color paint. I can't remember the name of it, but it had a train on the front of the label. This stuff laid down beautifully and didn't have a lot of grain to it. Always paint in a well ventilated area. When gluing clear parts, I always used white Elmer's glue as it dries clear. And it doesn't take a lot of glue to make parts stick together. Don't use Krazy Glue on clear parts as it will fog the clear plastic. As someone else said, gently scrape or sand off the chrome plating where you want to glue it. For added realism, I used Bare Metal Foil for working on the molded in chrome trim pieces. It is a thin, self-adhesive backed chrome metal foil that simulates chrome extremely well. Using a new X-acto blade, you can cut a piece of foil just larger than what you want to cover, apply the foil and lightly burnish it down. Use the X-acto blade to gently trim the foil to size and remove the excess. This part is done after painting the car. What I did for the name badges or emblems, is to apply the metal foil before painting the car. That is right before. it can be a bit oversized, but try to trim close to the part being chromed. After painting the car and it has dried, I used a corner of a paper towel that was folded to provide some stiffness to it. The final strip of the piece I was working with was around 1/8" x 2-3". I would dip the end of the strip into some paint thinner so it was wet, but not dripping, and then gently wipe the top of the chromed part to remove the layer of paint. You will end up with scale looking script or emblems. And as you get better with your building and painting skills, you can also get into wet sanding your paint job just like they do with real cars. You have to be so very careful that you don't sand all the way through the paint to the plastic. I used sanding pads that went from around 400 grit all the way to 12,000 grit. Start with the lowest grit and gently sand all of the painted areas. Do this until you get an overall dull finish on your model. Move to the next grit, say 600 grit, and sand until you remove all the scratches caused by the 400 grit pad. Continue moving all the way up to the 12,000 grit where you should end up with a very smooth and glossy paint finish. Then, to top off the paint, I would lightly spray Future floor polish directly through my airbrush to apply a long lasting clear finish on the model. Don't use Future on any water based paints as it will craze the paint. Works great on enamel and laquer paints. I have models that are 20 years old and with a light dusting, look like they were built yesterday. Can't say enough good things about Future. I've heard of people using Future on clear parts to give the part a scale glass look to it. I was never able to do this successfully and have it work. Also, this stuff would be done before assembling your model. Let the paint dry thoroughly as well. When masking, you can use low tack painters tape. Apply a strip of it to a piece of glass and then use a sharp X-acto knife and with a straight edge, trim off one side of the tape. This will get red of the fuzzys normally found along the edge of masking tape as well as removing a bit more of the tackiness of the adhesive.
I know this is a lot of info and it is more for when you become an advanced modeler and painter. Be patient when building and painting models. If you start getting frustrated with something, take a break from it and tackle it at another time. Keep a clean work area, have lots of good light and a set of very good paint brushes for doing the detail work. I used to build car models and compete with them at model shows. I've taken a few first awards along with a best historic vehicle in show which was kind of cool. I got to be a bit fanatical about it by adding plug wires, brake lines, hose clamps, custom interiors and paint jobs, etc. It was also a great bonding experience with my young son at the time.
")