1/72 y-wing

Hey you are moving right along.. Great job!!, the paint looks right on.. Like the colors don't look real bright and then weatherd over like I have seen on some of the FM y-wings.
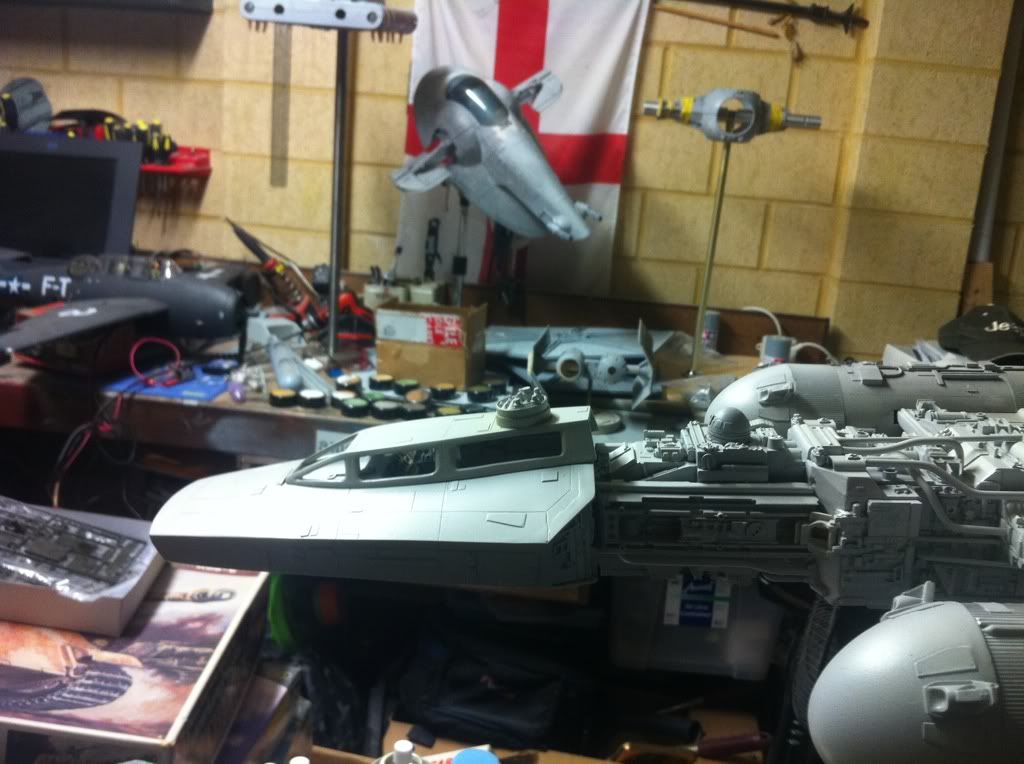
Well I took some pictures of my build my plan is to work up to a light grey having these others colors adding some depth to the model. I will then need to mask and paint the stripes. Then weather with Inidan ink and pastels.. I will also remove paint for the chipping effect.. When finished I will maybe put some more pictures on... Here is where I am at the moment on this build.
Your Y-wing looks really great I hope mine turns out ok and I have learned a lot on this build as everyone I put behind my belt. I also find this hobby fascinating. You will have to get back to work on that falcon.

SAM_0952.jpg


paintcolor.jpg


SAM_0959.jpg


led.jpg
 
Last edited:
Guys these are looking really good. Astroboy, are you/or have you used the same process on the falcon? I have not been over to SSM for a few days, you got pics up?

I believe there is as much skill in the painting as in the building,

ozzy
 
Make no mistake, we all love to laugh. Just not at others expense.

This is looking really good so far, I can't wait to see it done.

What he said..... These are looking great. Looking forward to seeing them finished. I'm gonna be painting my two studio scale y's as soon as the weather gets better so am watching this with interest.

4310b7a4.jpg
 
What he said..... These are looking great. Looking forward to seeing them finished. I'm gonna be painting my two studio scale y's as soon as the weather gets better so am watching this with interest.

4310b7a4.jpg

Oh Lord...

The BIGGEST problem with this place is that inspires jealousy.

Some day I will get a studio scale kit, and I'll totally start with a y-wing. That's a think of beauty
 
Hey...that Panther...that's MINE that is! Gie us it back, ya bastich! :p

Astroboy, your paint job is BEAUTIFUL. Really, really, really nice - great work.

As for trolls (other than those immediately above, lol), try to ignore them. Looks like we have a small sockpuppet invasion going on in the modelling sections right now, so we can possibly expect a bit of disruption until they make themselves obvious enough to qualify for a ban.

Thanks a lot! I think I'm going to attempt a decal today. That's my next challenge. Always hated decals.....
 
Hey...that Panther...that's MINE that is! Gie us it back, ya bastich! :p

Astroboy, your paint job is BEAUTIFUL. Really, really, really nice - great work.

As for trolls (other than those immediately above, lol), try to ignore them. Looks like we have a small sockpuppet invasion going on in the modelling sections right now, so we can possibly expect a bit of disruption until they make themselves obvious enough to qualify for a ban.


You got that type 4 yet????
 
final seal (or sometimes not, if I feel it'll jack up the pastels)
This is a concern of mine. When does a clearcoat NOT jack up the pastels? Seems to me anything chalky will get soaked into the sealer, creating a cloudy area resting a micrometer above where you'd carefully applied it.
 
Forgive the folish question, but when you guys say pastels, do you me common oil pastels? Or are there specialised ones. Because, Pastels always used to darken a few shades when fixitive was applied to any portraits I used to do. So one would have to take that into account while painting on canvas or paper. Is this a concern for these pastels on models?

Looking better with every post guys, watching intently.

Ozzy

I use chalk pastels. Grind em on to some sandpaper then apply it like you would powdered pigments

As for an update, I applied the cowl decal today and it really looks great! I chipped it in all the right places and then tomorrow I'll try some more!

Should I put a top coat on it at this point? I keep hearing about future. Is there something that's really thin? Tips?
 
Work and family has kept me from getting any modeling in.. I will be back at it this weekend. Yes, the pastels I use I bought at Michael's for less than 10 dollars. It's almost like chalk and came in a box of about 8 colors. I usually take an old knife and grind off a bit of dust then use an old brush and mix with a small amount of water and then apply. It gives a nice grime effect that does not look painted on.
So Astroboy, as far as chipping the sticker and getting it to set correctly what did you experience? And also how do you get the pastels to stick?
When I first started this build I attempted to use the sticker on the R2 round top. I used tweezers got it right where I wanted and applied some decal set and I could not get it to lay flat. I put some on got frustrated with figured I would let it set over night and it would stick with more decal set the next day, nope. I ended up painting which turned out great I don't mind tedious painting..

If its cool astroboy I will maybe put some of my pic's on once I get more painting in..

Again, good job I hope I can get the weatherd effect down and keep the colors dull and not bright looking just some good wear and tear on the old ship..

Pleaase..add pics!

I simply brush on the pastels (and most of it blows awayafterward) and then I use a sealer finish.

as far as the decals go, I just used lots of soapy water and then slid around until they were well placed. I haven't donee the R@ yet, so we'll cross that bridge when we come to it.

I know what you mean by too bright. I have so much pait chipping on the back that it's obnoxious. I'm going to try and bring it down near the end of the process
 
Yes, the sealer will darken pastels, but sometimes, ends up looking OK - but there's only one way to find out, unfortunately! :) If it gets too dark, I fix it by drybrushing the section with the primary hull color and reappying pastels. At a minimum, you can get back to your original finish, but usually it looks BETTER, thanks to additional depth and detail afforded by the fix.

Of course, if you like the way it looks without the sealer, and you know it'll be under plexiglass for most of its life...certainly consider skipping the final clearcoat.

-Raj
 
Astroboy, Youngm - fantastic painting skills you both have. So ILM-like.
Jedimaster - TWO y-wings!?? I'm sure I won't wake up the next morning if the wife finds out I bought even just one.
 
Thanks for the complements, guys!

I'm REALLY stoked that this is turning out well. It is quite different than the ILM models. This one is in a lot rougher shape. I think I'll try to blend the back half a bit better when I get a sealant on it. Try to give it that smokey beige look. Right now there's too much contrast with all the paint chipping.

Anyway...two regrets (that I remember a mere second after committing to glue)
1. forgot to put a mounting nut inside on the bottom (I hate the stock fine molds stand)

2. (this one's a biggy) I accidentally....swapped the hood decals. The top is on the bottom and vice-versa
 
This thread is more than 12 years old.

Your message may be considered spam for the following reasons:

  1. This thread hasn't been active in some time. A new post in this thread might not contribute constructively to this discussion after so long.
If you wish to reply despite these issues, check the box below before replying.
Be aware that malicious compliance may result in more severe penalties.
Back
Top