Junkers
New Member
This is my first build thread on the RPF and I am very excited that maybe my props are at a good enough level to be put on here.
Leixia from Soul Calibur 5 was a very fun build for me to try out since I was just really starting to see the extent of what bondo could really do. In any case here is the reference I had to work with. Keep in mind that the majority of this build took place before the game actually came out....so this is all we had to work with.

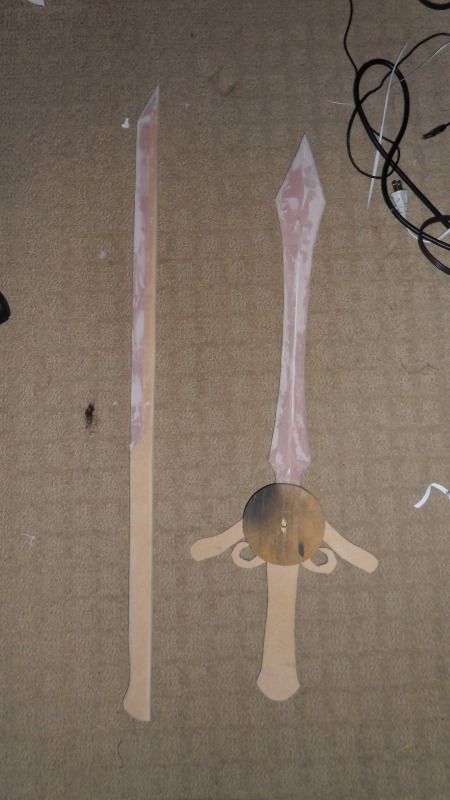
First we cut the sword's shape out of MDF and used styrene to act as a border to guide the bondo's height. Bondo bondo bondo.
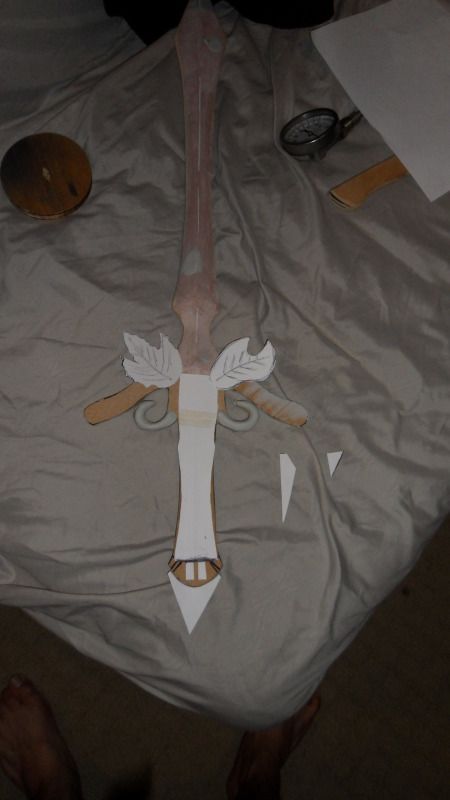
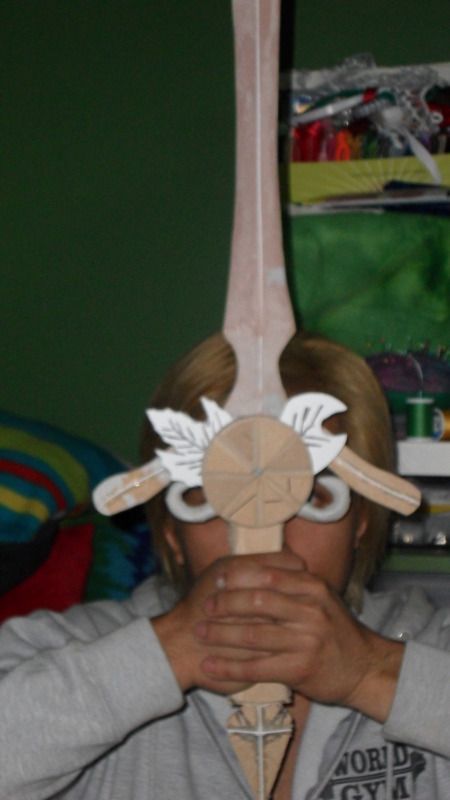
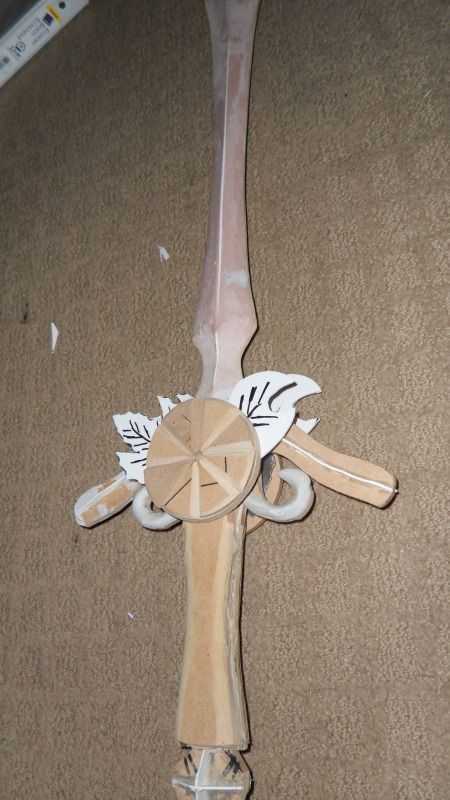
Some smoothing of the bondo was done as well as cutting out the leaf shapes. Additionally I added apoxie sculpt to the horn looking pieces of the handguard to give it a rounded shape. The cardstock here is also for patterning out the rest of the handle which would be eventually fabricated out of MDF and sanded.
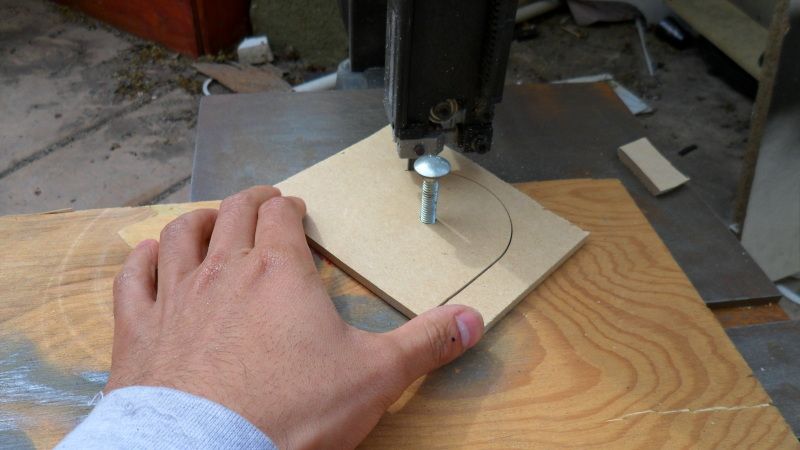
Used my circle cutter contraption on my bandsaw to cut the discs that would make the "pizza" on the sword's guard.
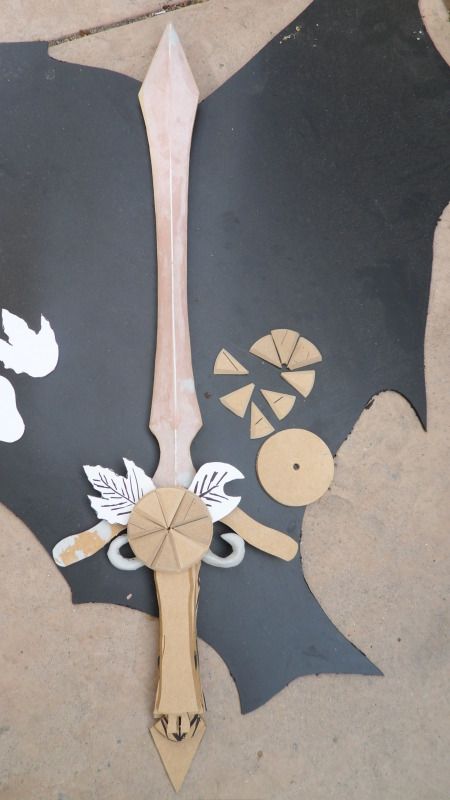
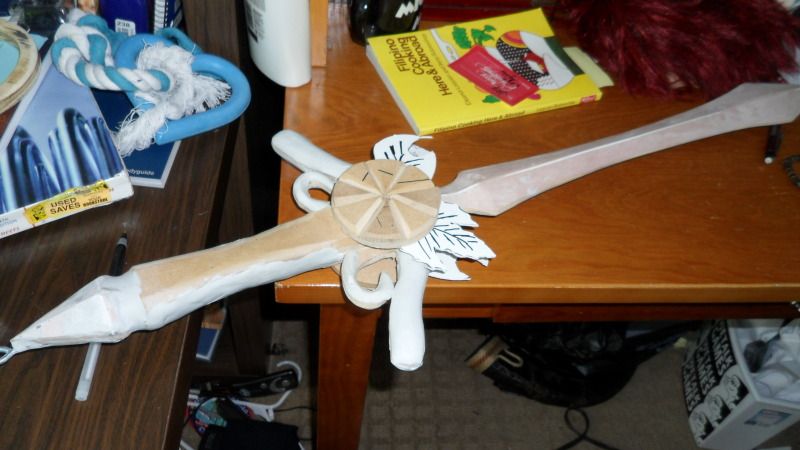
So...I don't have a wood router so I cut up 1 disc, sanded the edges and then glued it to a whole disc. Worked out very well. You can also see how rough the handle is in this shot. It will be apoxie'd over soon enough.
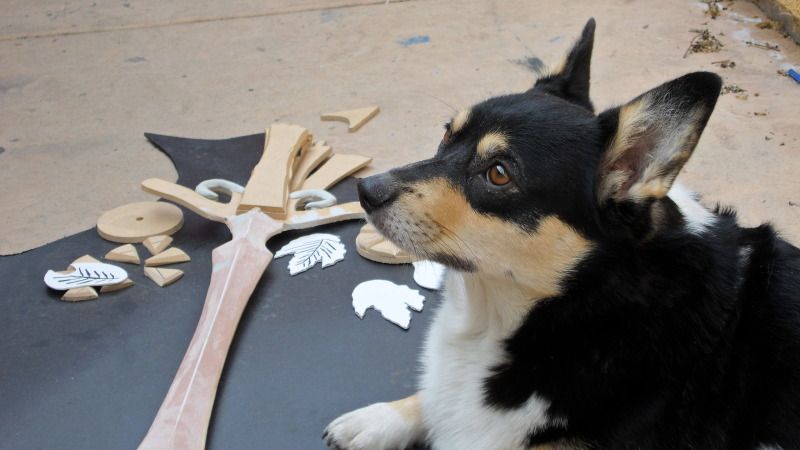
I have a corgi and the hope is that I'll someday be like Volpin hahaha. False hope? Oh well...
Added styrene to the diamond shape on the hilt to guide the bondo that would be laid down.
Added more styrene to the handguard to guide the apoxie sculpt and ensure a uniform height.
LOTS of apoxie sculpt was added to the handle in various spots then sanded like crazy.
After I painted it...I realized 2 things.
1.) My weathering was a bit too "manly" for a princess type of sword.
2.) I totally forgot about the detailing on the leaves...
So I did the awesome thing...and added PUFFY PAINT. I would eventually paint over the puffy paint to give it the correct color as well as weather in the lines with black to make them pop.
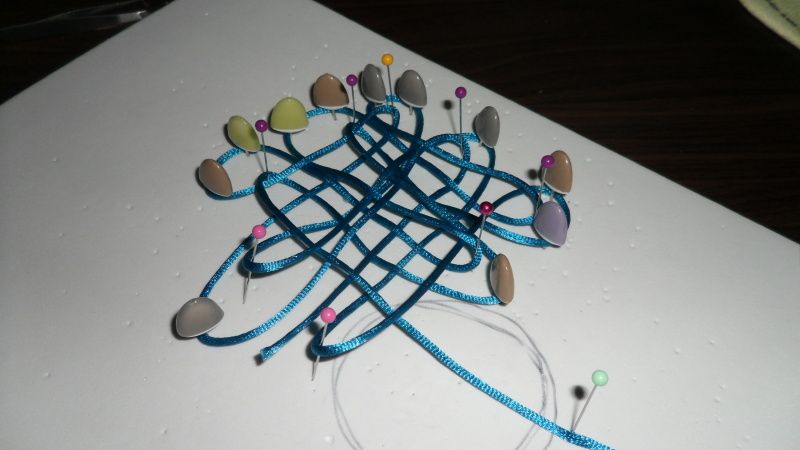
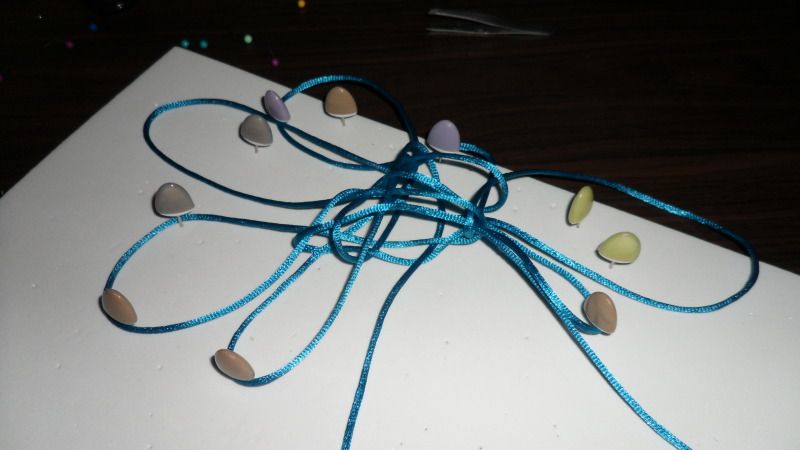
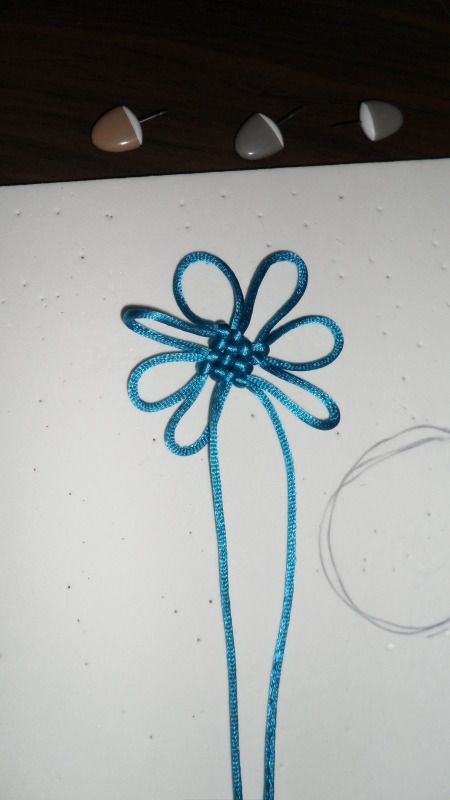
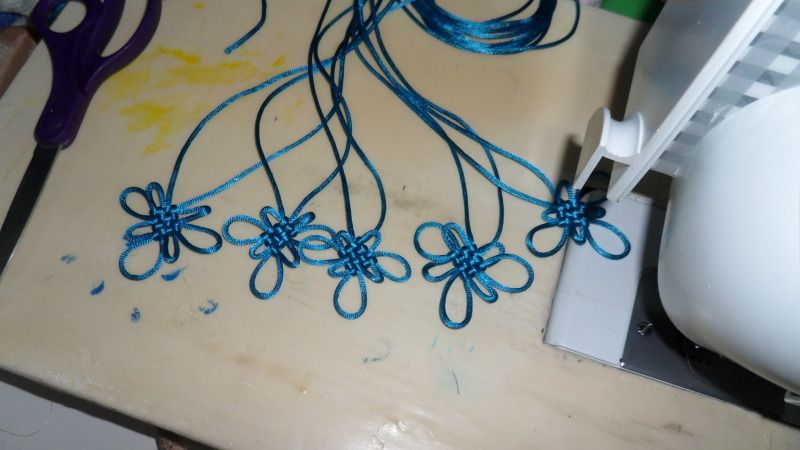
Now that all that manly stuff was done I could focus on making some super sweet knots. I downloaded this file then went to town. It took a couple of days of practice but I got the hang of it. (Sorry that these 2 pictures are actually of 2 different knots, but the steps are the same.)
Then I finally got one to work!!!
Then I somehow got 5 of them!!!
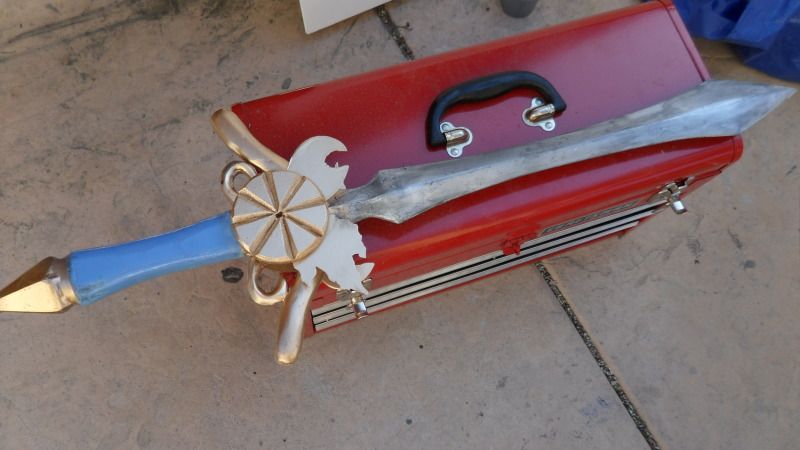
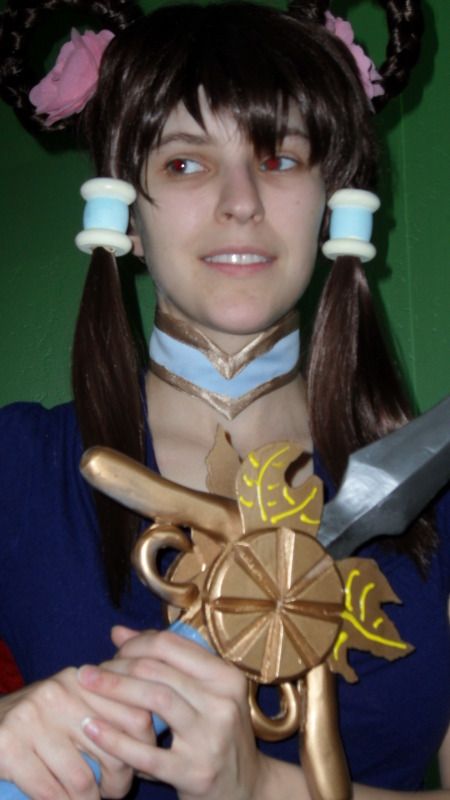
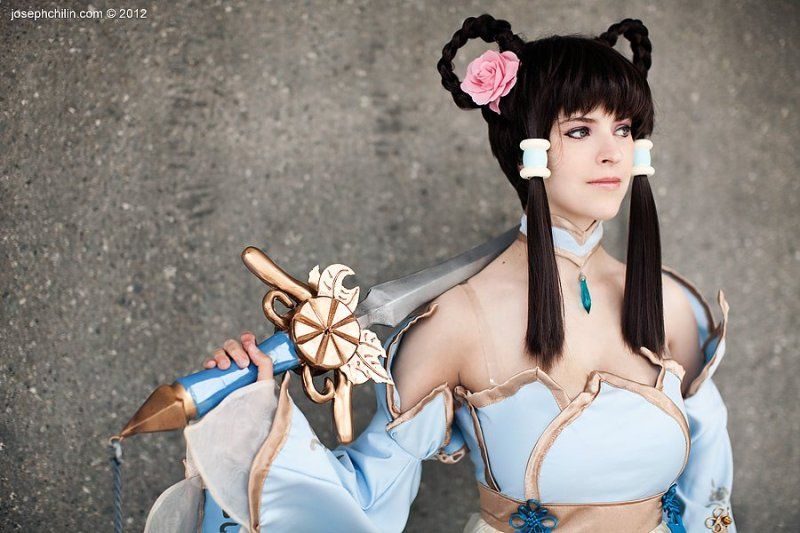
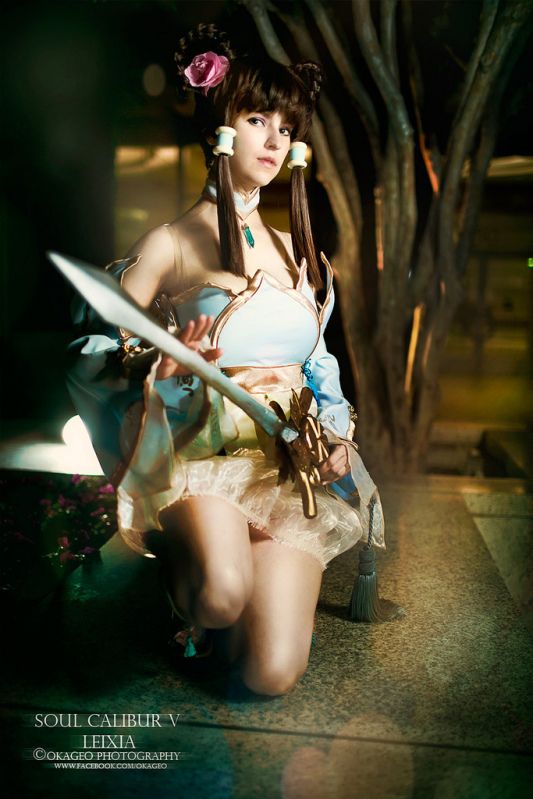
In the end the project came together really well. Check out the final pictures we got of it. Hope it was enjoyable and up to the RPF standard!
Leixia from Soul Calibur 5 was a very fun build for me to try out since I was just really starting to see the extent of what bondo could really do. In any case here is the reference I had to work with. Keep in mind that the majority of this build took place before the game actually came out....so this is all we had to work with.

First we cut the sword's shape out of MDF and used styrene to act as a border to guide the bondo's height. Bondo bondo bondo.

Some smoothing of the bondo was done as well as cutting out the leaf shapes. Additionally I added apoxie sculpt to the horn looking pieces of the handguard to give it a rounded shape. The cardstock here is also for patterning out the rest of the handle which would be eventually fabricated out of MDF and sanded.

Used my circle cutter contraption on my bandsaw to cut the discs that would make the "pizza" on the sword's guard.

So...I don't have a wood router so I cut up 1 disc, sanded the edges and then glued it to a whole disc. Worked out very well. You can also see how rough the handle is in this shot. It will be apoxie'd over soon enough.

I have a corgi and the hope is that I'll someday be like Volpin hahaha. False hope? Oh well...

Added styrene to the diamond shape on the hilt to guide the bondo that would be laid down.

Added more styrene to the handguard to guide the apoxie sculpt and ensure a uniform height.

LOTS of apoxie sculpt was added to the handle in various spots then sanded like crazy.

After I painted it...I realized 2 things.
1.) My weathering was a bit too "manly" for a princess type of sword.
2.) I totally forgot about the detailing on the leaves...

So I did the awesome thing...and added PUFFY PAINT. I would eventually paint over the puffy paint to give it the correct color as well as weather in the lines with black to make them pop.

Now that all that manly stuff was done I could focus on making some super sweet knots. I downloaded this file then went to town. It took a couple of days of practice but I got the hang of it. (Sorry that these 2 pictures are actually of 2 different knots, but the steps are the same.)


Then I finally got one to work!!!

Then I somehow got 5 of them!!!

In the end the project came together really well. Check out the final pictures we got of it. Hope it was enjoyable and up to the RPF standard!

