stapleton13
Well-Known Member
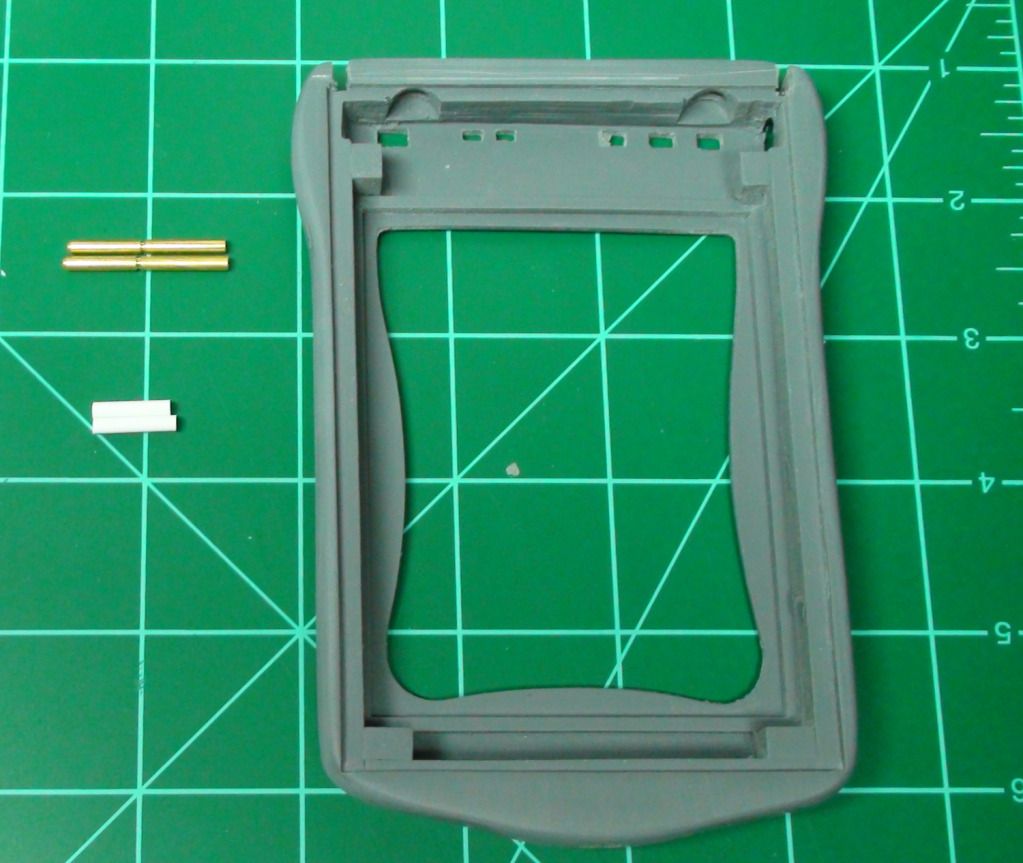
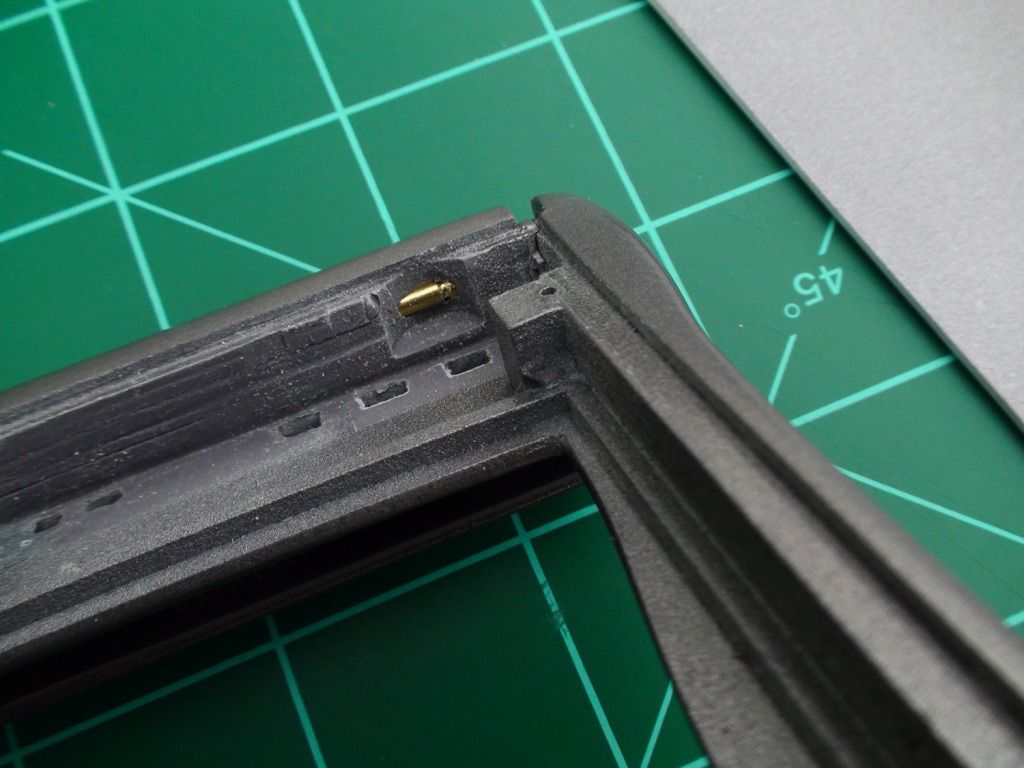
First thing you need to do is remove the back panel, and locate the 2 white plastic pins, and the 2 brass pins.
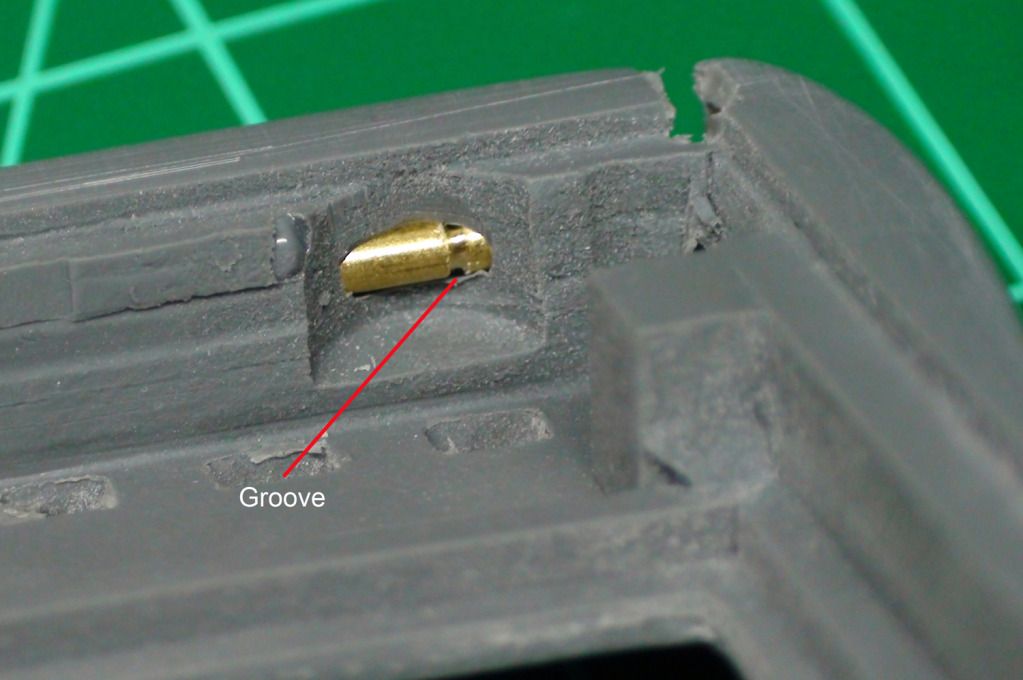
You insert the brass pins into the hole on either side with the tapered end facing out. Push the pin in until you see the small slot on the inside.
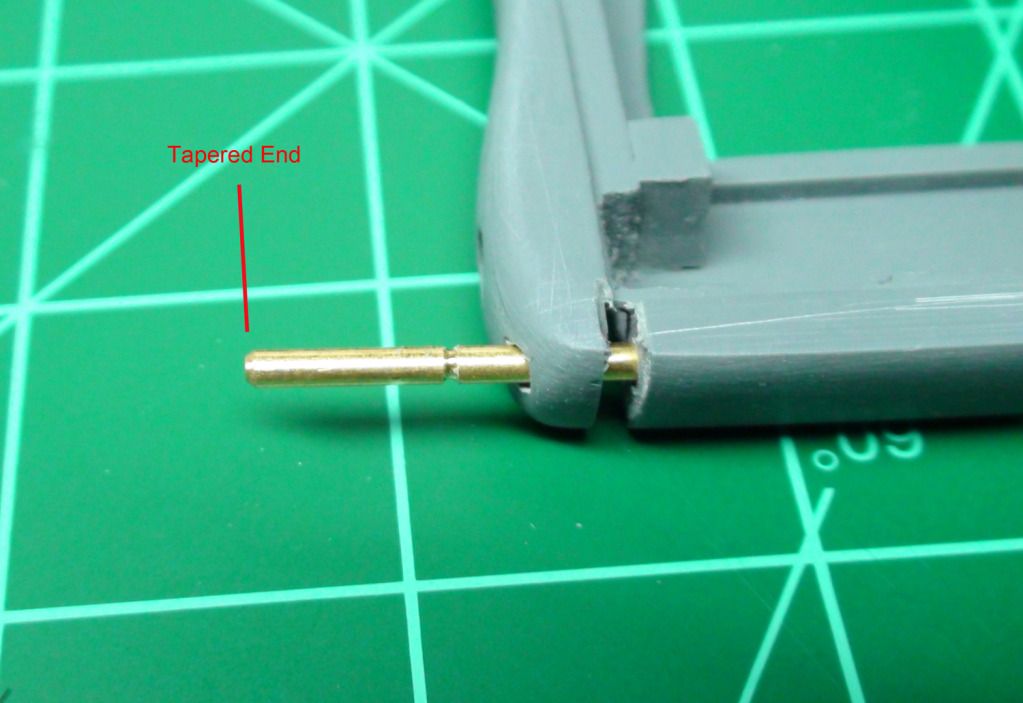
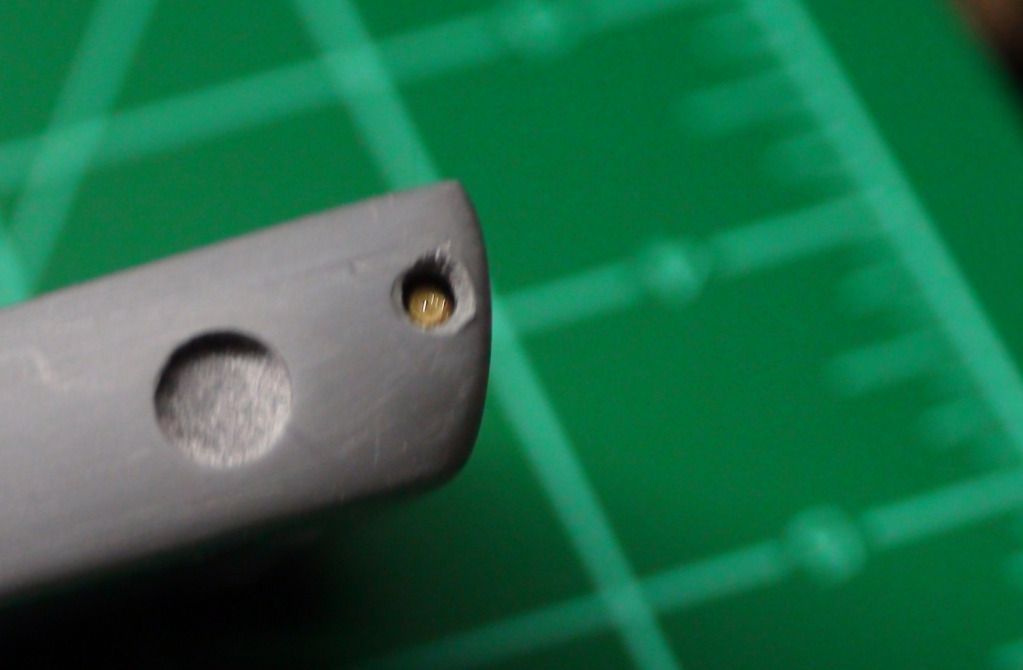
Next you can glue a white styrene pin into the outer hole with superglue. Be careful not to push the brass pin in too far.
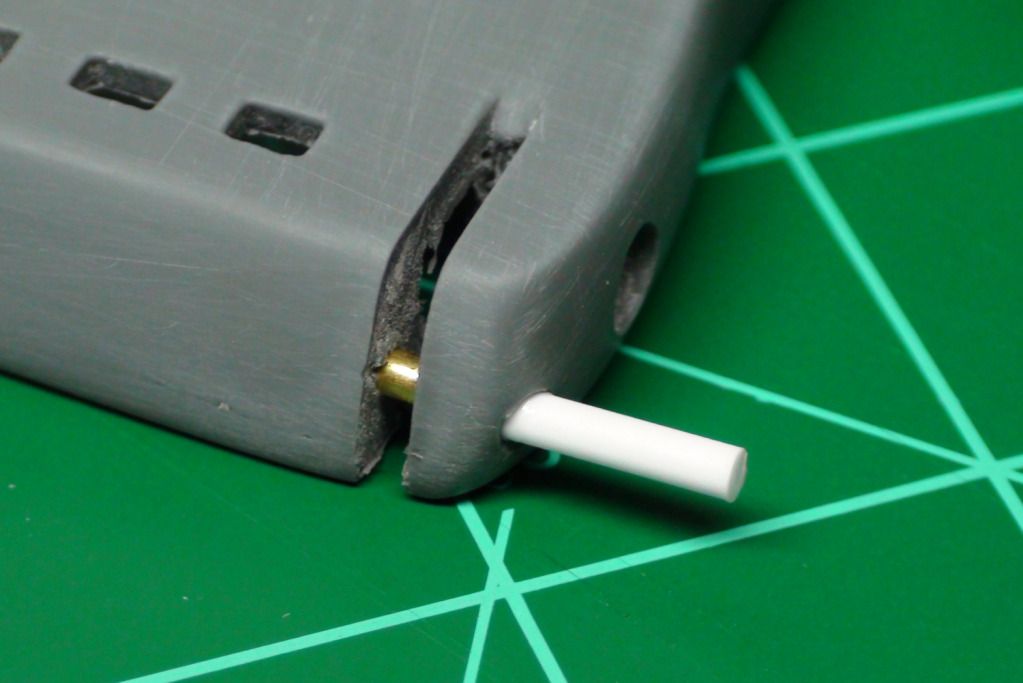
Once the plastic is secured you can cut the excess off, and sand the plug flush. You also may need to apply a little filler to smooth it out.

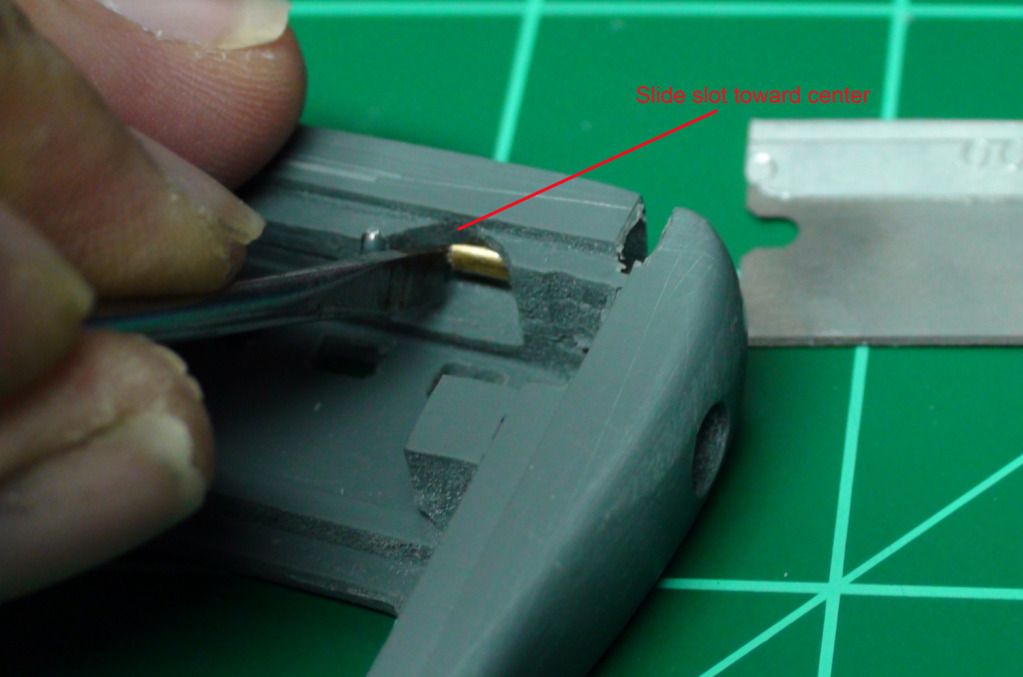
From the inside if the body take a slotted screwdriver, and slide the pin inward so that it can no longer be seen from the slot the head goes into.
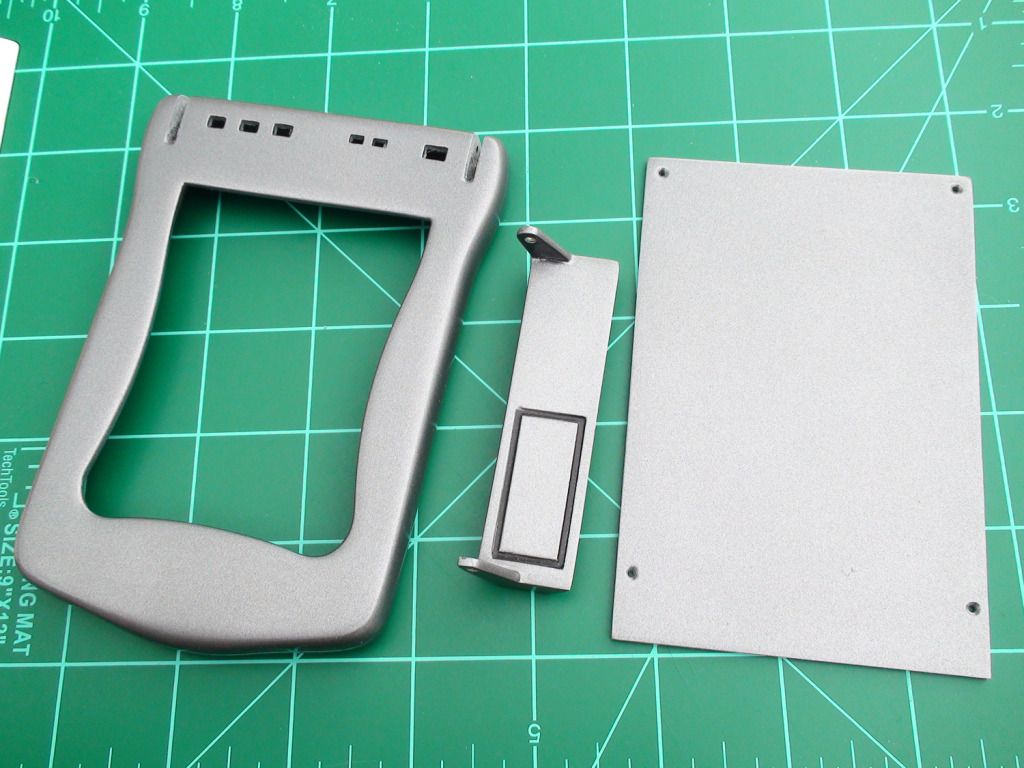
At this point you can prep to prime your parts.

After the primer dries you can sand, and paint the main parts. I use the same color that The phasers are painted. Plasticote 1004 equivalent. Also paint the recess in the scanner head black.
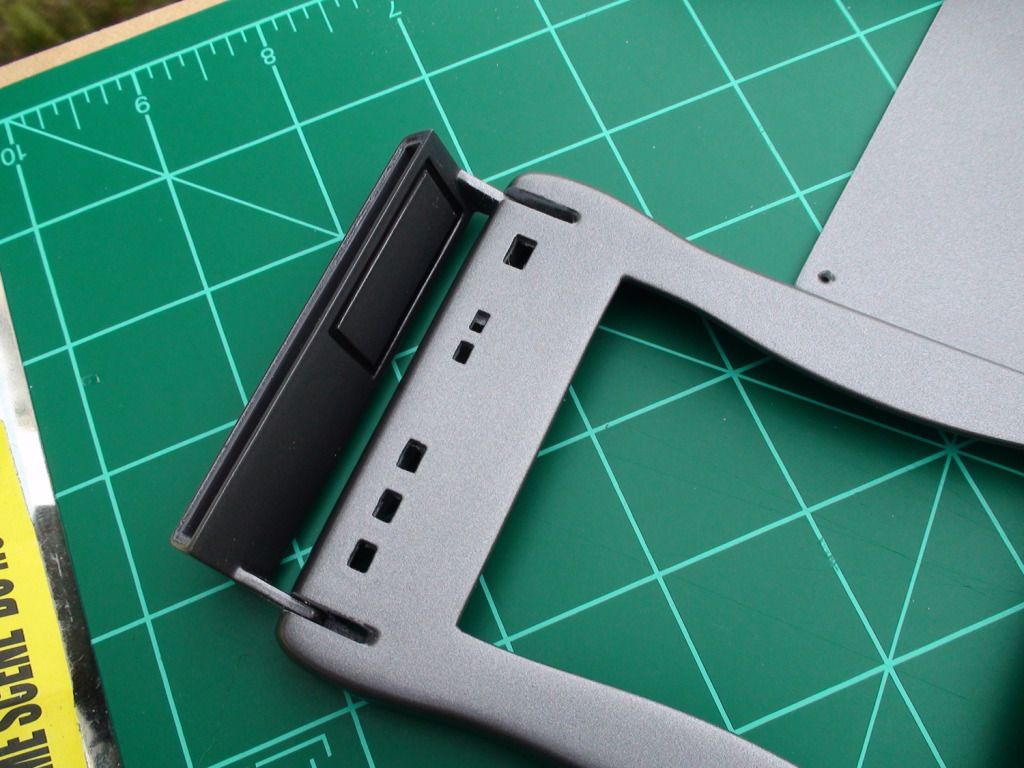
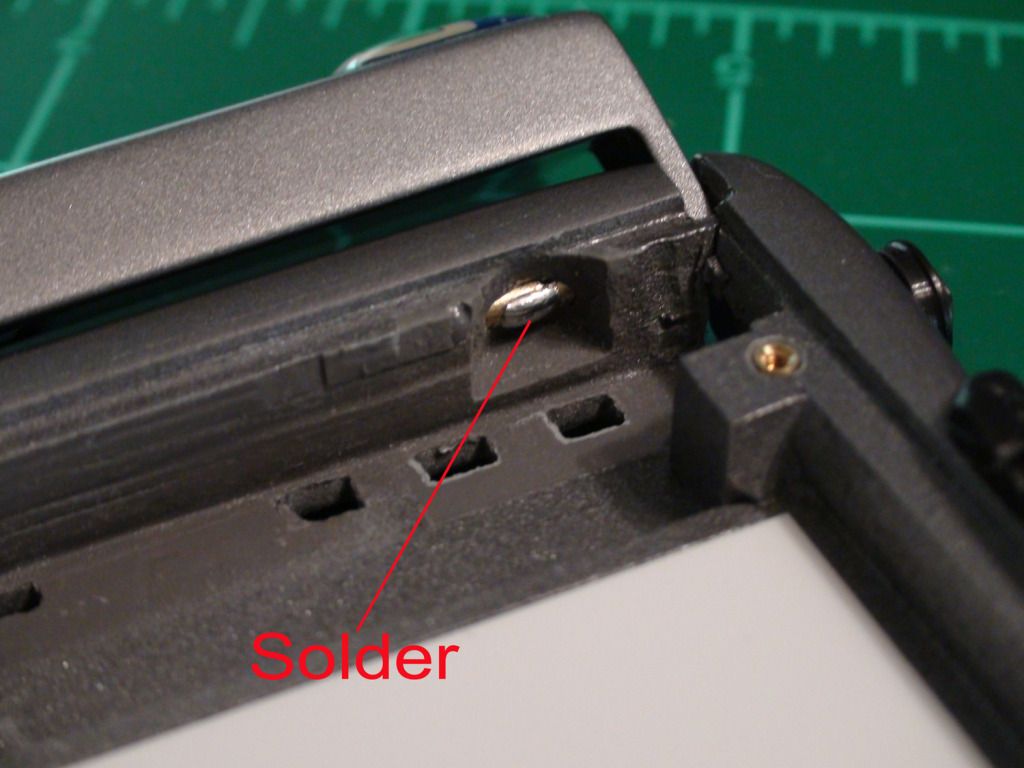
After painting you may need to fine tune the slots for the head so it will move freely. After you get everything to fit. Place the head into its slots, and using the slotted screwdriver again. Push the pin outward until it stops. Note that the fit will be snug between the pin and the hole in the head. This is where the electrical connection will be. Do not try to enlarge the pin holes in the head.
At this point you can put a small glob of solder to the brass pin. This will keep it from moving, and give you a place to attach your circuit in the future.
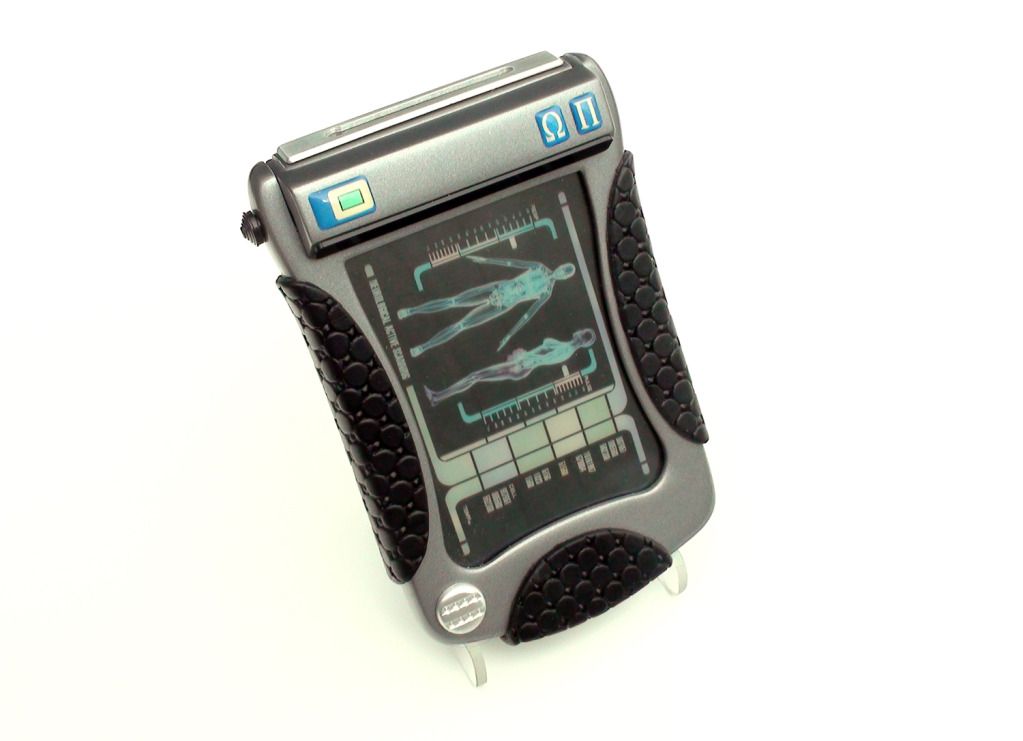
At this point you can remove the blue film off of the screen , and glue it into place. I then just place the graphic into the tricorder, and taped it in place with a cardboard backing. You can then paint, and attach the finishing parts. Note that the lense for the head may require a little sanding to fit. I attached mine with a little double sided tape so that it can be removed once we have electronics to install. You can also cut, and attach the self adhesive graphics to the body.

You insert the brass pins into the hole on either side with the tapered end facing out. Push the pin in until you see the small slot on the inside.
Next you can glue a white styrene pin into the outer hole with superglue. Be careful not to push the brass pin in too far.
Once the plastic is secured you can cut the excess off, and sand the plug flush. You also may need to apply a little filler to smooth it out.
From the inside if the body take a slotted screwdriver, and slide the pin inward so that it can no longer be seen from the slot the head goes into.
At this point you can prep to prime your parts.
After the primer dries you can sand, and paint the main parts. I use the same color that The phasers are painted. Plasticote 1004 equivalent. Also paint the recess in the scanner head black.
After painting you may need to fine tune the slots for the head so it will move freely. After you get everything to fit. Place the head into its slots, and using the slotted screwdriver again. Push the pin outward until it stops. Note that the fit will be snug between the pin and the hole in the head. This is where the electrical connection will be. Do not try to enlarge the pin holes in the head.
At this point you can put a small glob of solder to the brass pin. This will keep it from moving, and give you a place to attach your circuit in the future.
At this point you can remove the blue film off of the screen , and glue it into place. I then just place the graphic into the tricorder, and taped it in place with a cardboard backing. You can then paint, and attach the finishing parts. Note that the lense for the head may require a little sanding to fit. I attached mine with a little double sided tape so that it can be removed once we have electronics to install. You can also cut, and attach the self adhesive graphics to the body.