well It all started with a an idea from a friend, to build a steampunk guitar. We
seen alot of builds in the area, but you could not play them! So, the next thing I know, I'm building one! But I just couldn't make it simple! So about 5 months later, I created this beast!
First I had to find a guitar, that was decent enough too work with. I also was going to make it a point, to do a simple build! The more I got into the build, the more idea's I had. I ended up replacing all the electronics, along with the hardware. It turned out to be a not so settle, or cheap build! I went full tilt!
Below are some pics, of the shape the guitar was in, to the finished piece


As you can see this guitar needed a lot of sanding, putty, and paint work!

I Decided that I needed more room for all the electronic's. So I built a box (of sorts!) that would contain the sound activated circuit's, along with the Piezo preamp, and the Varitone switch

The Idea was to install a Piezo pickup under the bridge, than run that to the preamp, to try and get a acoustic electric guitar sound. In the end it worked out alright, but nothing like what I wanted! Well you can't say I didn't try!!
One of the sound activated circuit's, would make the gauges move, as well as light up, while you play!
The other circuit would light up the vacuum tubes while playing. I used small SMD led's for this task! Which worked great.
I had to drill 2 large holes for the old, but still in working condition gauges to set in. Then I used automotive glazing putty (activated!), to build up enough area, for the gauges to rest flush against the guitar body.


For the paint job, I used Hot Hue's Dupont paint. I used a copper color, which I added some gold metallic toner, to make it more blingy! I then went around the edge's with Hot Hue's Rootbeer Candy, with a little bronze pearl added to the mix. Once again to add some settle bling

Of course I could not resist putting a little airbrush work, of clock work gears. Once I finished all the paint work, I used Dupont 7900 urathane clear, to cover, and protect all the basecoat.

This is where I cut a grove in the bottom of the tune-o-matic bridge, and installed the strip, that is a piezo pickup. I also installed a Dimarzio Tone Zone pickup in the bridge position, and a Gibson Les Paul 490 neck pickup, in the neck position. I wanted to make sure this thing sounded good! I know, I know, why did you put a Dimarzio pickup in it then? Cause I wanted it to scream, as well as weep!

I installed all new wiring, along with new pots, and selector switch. I also had to run a lot wire's through there. So I insulated the inside with copper tape

I felt it was only necessary to apply some leather! I first drilled tiny hole's, all around the area that would be covered. This would give a good start for the tack's, without cracking the finish.

This was the biggest headache of all! Over to the left is the preamp, with volume, and EQ. Than I ran all the circuit wire's, under the copper flat piece, that goes to the sound activated board's. Then I installed vacuum tubes, with small smd led's under them. Which I used springs, too hold them in place! the top right is where I installed the varitone switch. this is a switch that gives different tone option's (from crisp clean notes, to warm notes) while playing

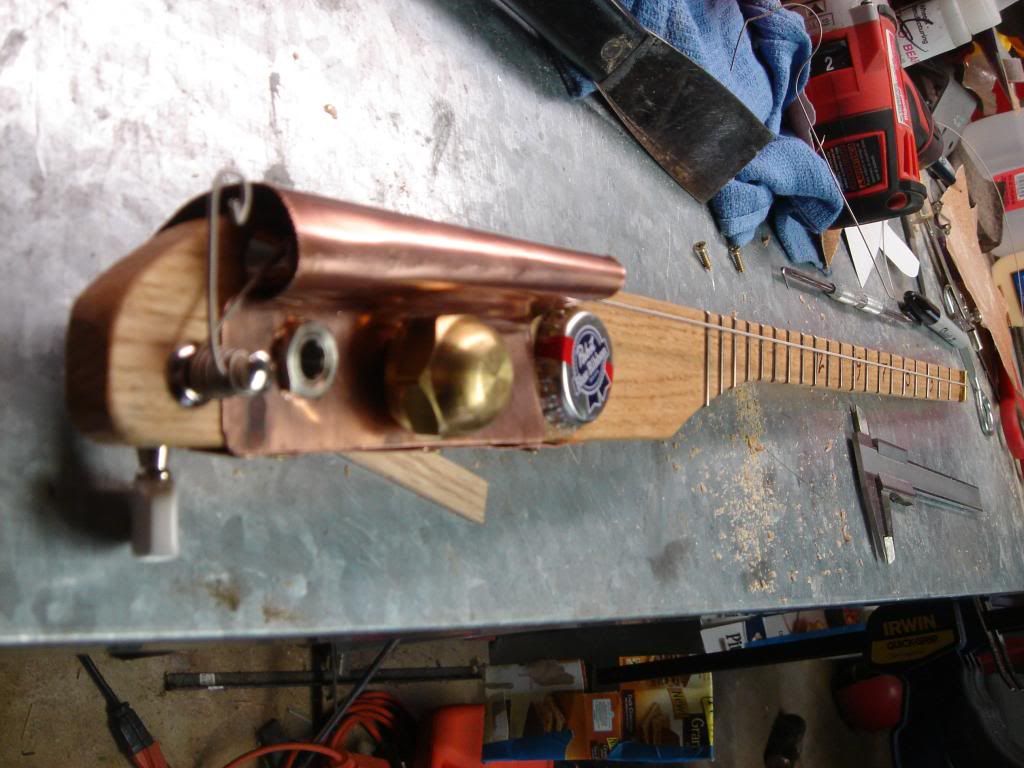
I needed a way too route all those wire's to the guitar. So I used an old copper gas line tube, running from the box, to the guitar body. That, and I thought it added a little bit of madness to the look of the guitar

Going one step further in to insanity, I had too make a steampunk guitar strap! I've been doing some leather work for about a year now, so it was only right to add this finishing little touch! Here I am applying the stain to the stamped leather. Than I added some brass rivets, to finish it off.


It's finished! (well almost. I still need to make a truss rod cover) I felt I had to make an improved guitar stand. So I grabbed an old stand, cut, welded, grinded a little bit, so it would fit the contour of the guitar better. I just took this photo's today! Hopefully within a week, I can get this piggy too the market. I built it too sell, but I can honestly say, It sounds great!

I added a locomotive look to the bottom of the guitar. There is a wheel that could be turned, by the metal arm, and well, I really can't explain! I guess if you see it, you get it!


In the end, I can actually say, that I used every skill (good or bad!) that I know of to create this project. I know alot of steampunk stuff is aged, and tarnished. But I felt with a new beautiful paint job, I just couldn't make it old, and cover everything up. That's why I chose the cleaner, newer look. That and it's alot easier to cover up mistakes, with ageing. What fun is that!
Actually it would have made it much easier!
seen alot of builds in the area, but you could not play them! So, the next thing I know, I'm building one! But I just couldn't make it simple! So about 5 months later, I created this beast!
First I had to find a guitar, that was decent enough too work with. I also was going to make it a point, to do a simple build! The more I got into the build, the more idea's I had. I ended up replacing all the electronics, along with the hardware. It turned out to be a not so settle, or cheap build! I went full tilt!
Below are some pics, of the shape the guitar was in, to the finished piece
As you can see this guitar needed a lot of sanding, putty, and paint work!
I Decided that I needed more room for all the electronic's. So I built a box (of sorts!) that would contain the sound activated circuit's, along with the Piezo preamp, and the Varitone switch
The Idea was to install a Piezo pickup under the bridge, than run that to the preamp, to try and get a acoustic electric guitar sound. In the end it worked out alright, but nothing like what I wanted! Well you can't say I didn't try!!
One of the sound activated circuit's, would make the gauges move, as well as light up, while you play!
The other circuit would light up the vacuum tubes while playing. I used small SMD led's for this task! Which worked great.
I had to drill 2 large holes for the old, but still in working condition gauges to set in. Then I used automotive glazing putty (activated!), to build up enough area, for the gauges to rest flush against the guitar body.
For the paint job, I used Hot Hue's Dupont paint. I used a copper color, which I added some gold metallic toner, to make it more blingy! I then went around the edge's with Hot Hue's Rootbeer Candy, with a little bronze pearl added to the mix. Once again to add some settle bling
Of course I could not resist putting a little airbrush work, of clock work gears. Once I finished all the paint work, I used Dupont 7900 urathane clear, to cover, and protect all the basecoat.
This is where I cut a grove in the bottom of the tune-o-matic bridge, and installed the strip, that is a piezo pickup. I also installed a Dimarzio Tone Zone pickup in the bridge position, and a Gibson Les Paul 490 neck pickup, in the neck position. I wanted to make sure this thing sounded good! I know, I know, why did you put a Dimarzio pickup in it then? Cause I wanted it to scream, as well as weep!
I installed all new wiring, along with new pots, and selector switch. I also had to run a lot wire's through there. So I insulated the inside with copper tape
I felt it was only necessary to apply some leather! I first drilled tiny hole's, all around the area that would be covered. This would give a good start for the tack's, without cracking the finish.
This was the biggest headache of all! Over to the left is the preamp, with volume, and EQ. Than I ran all the circuit wire's, under the copper flat piece, that goes to the sound activated board's. Then I installed vacuum tubes, with small smd led's under them. Which I used springs, too hold them in place! the top right is where I installed the varitone switch. this is a switch that gives different tone option's (from crisp clean notes, to warm notes) while playing
I needed a way too route all those wire's to the guitar. So I used an old copper gas line tube, running from the box, to the guitar body. That, and I thought it added a little bit of madness to the look of the guitar
Going one step further in to insanity, I had too make a steampunk guitar strap! I've been doing some leather work for about a year now, so it was only right to add this finishing little touch! Here I am applying the stain to the stamped leather. Than I added some brass rivets, to finish it off.
It's finished! (well almost. I still need to make a truss rod cover) I felt I had to make an improved guitar stand. So I grabbed an old stand, cut, welded, grinded a little bit, so it would fit the contour of the guitar better. I just took this photo's today! Hopefully within a week, I can get this piggy too the market. I built it too sell, but I can honestly say, It sounds great!
I added a locomotive look to the bottom of the guitar. There is a wheel that could be turned, by the metal arm, and well, I really can't explain! I guess if you see it, you get it!
In the end, I can actually say, that I used every skill (good or bad!) that I know of to create this project. I know alot of steampunk stuff is aged, and tarnished. But I felt with a new beautiful paint job, I just couldn't make it old, and cover everything up. That's why I chose the cleaner, newer look. That and it's alot easier to cover up mistakes, with ageing. What fun is that!
Actually it would have made it much easier!
Last edited:
")