Darth Vader ANH chest box

darienvader

Well-Known Member
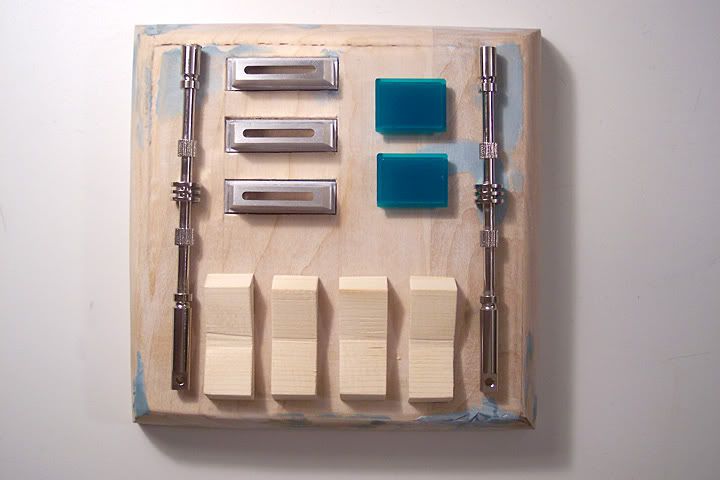
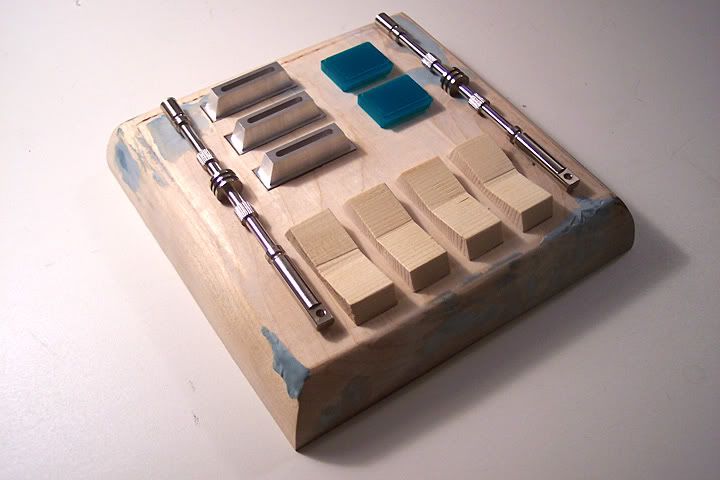
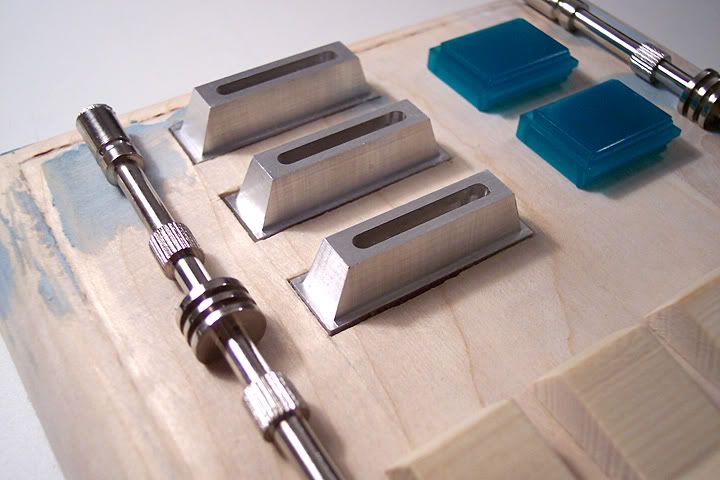
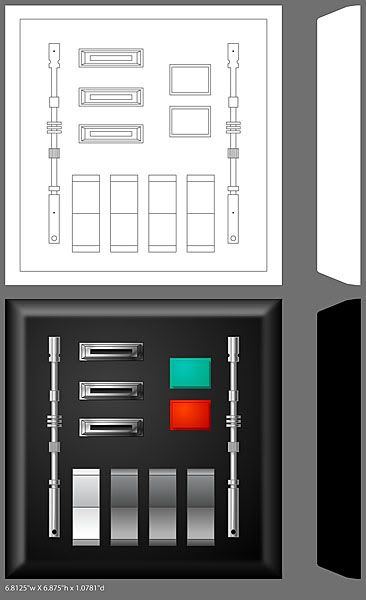
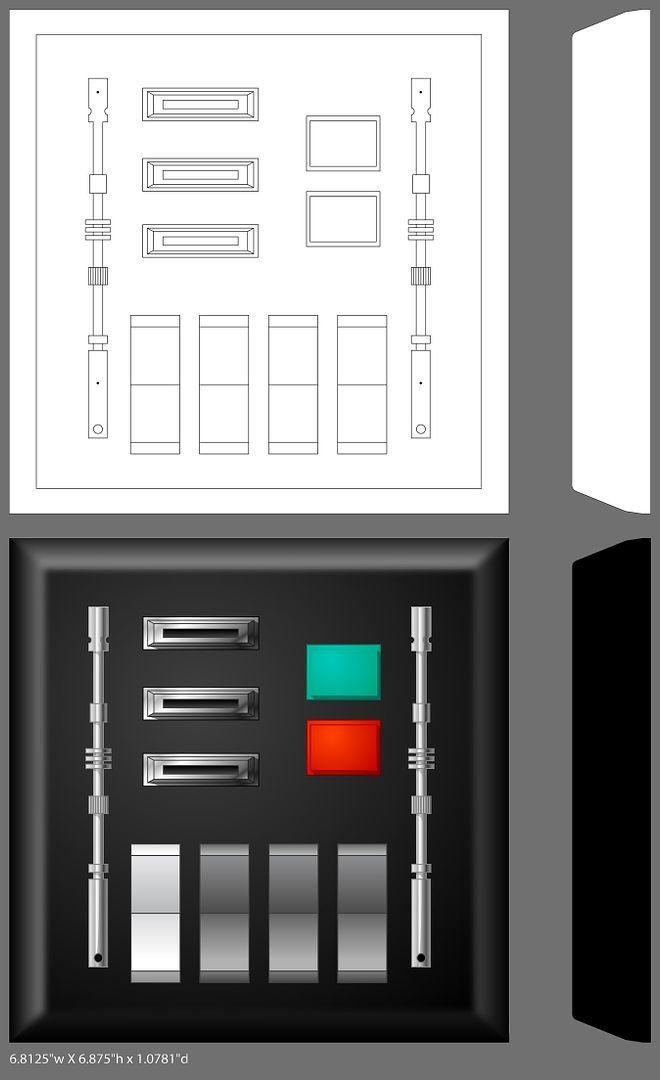
Hello Vader aficionados . . . I've been working on putting together a chest box for my ANH Vader, and have done up some vector illustrations to get exact placement and size proportions down. I have all the parts for it, except for the actual chest box, which I'll be making off this template in maple. I used the physical pieces and took measurements from them to help create this template. The size of the box will be 6.8125" wide by 6.875" high by 1.0781" depth. I'm going to countersink the coin slots and mark some thin lines in the master to help line everything up. I used several screen and production shots scaled up to help create a somewhat accurate template, here. What are your thoughts? Is the angle on the side view good? Mind you, it will have rounded edges on the physical piece. Your opinion on the graphics and placement is greatly appreciated!!!

~Jim

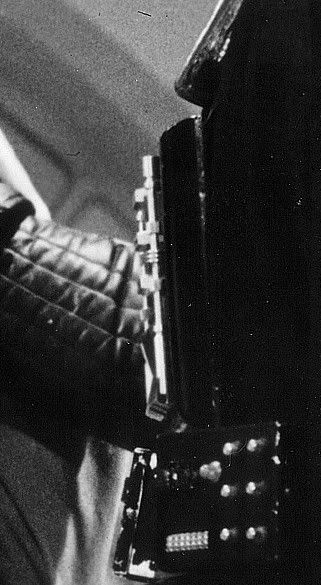
Please click on the image below for a larger view.
 
separator.gif
I'd say that your left hand chest rod needs to be wonkier (is that a word?).
 
Great work!

In my (ongoing) attempt at getting the correct box measurements I have noticed the box is wider that it is tall, I haven't nailed it yet but it's in the range of 1/8 to 3/16 different. How I came to this conclusion is I'd take a perfectly square vector and overlay it on various photos of Vader (screen and non screen shots). I have also noticed that it is slightly out of square as well. This is by no means carved in stone as it is still a WIP for me.

On your profile drawing you have a sharp taper but ref pics I have show a curved taper. Depth looks good.

Doug

So, if I rotate it 90º and reposition a few details like so . . .

Revised_001.gif


Oh, and yes the edges will be rounded including the taper.
 
I'm not sure I follow. . . . Can you elaborate?

Look very carefully at the L/H chest rod. If you look at it, it lists to the right.
It is quite obvious.


Can I suggest you contact or track down Cantina Dude's very accurate diagrams.
You'll see what I mean.
 
Here is what I have so far. Notice the left rod tilt and the back square with slight shift to the left on the bottom putting it out of square. All done as an overlay on picks.


Chestboxlineartrev.jpg


Doug
 
Last edited:
I just noticed on my my drawing I forgot to put the corrected height it is a shorter distance from bottom to the botton of the switches. I will post the corrected version shortly.

edit
added correct file

Doug
 
Last edited:
Don't be fooled by the stills of the chestbox.......the robe hides the last bit of the back of the box due to the shape of the box.........it makes it appear alot thinner left to right than it is.
 
Don't be fooled by the stills of the chestbox.......the robe hides the last bit of the back of the box due to the shape of the box.........it makes it appear alot thinner left to right than it is.

Excellent point! I was using this image to assist on the profile:
6ai9z6g.jpg
 
I was inspired by this thread to actually get it done. Here is my final, I think it's as close as I can get without actually having the real deal in my hands.

Chestbox-bnwweb.jpg


Chestbox-colorweb.jpg


Doug
 
Last edited:
UPDATE

Mood: Encouraged
Listening to: Portishead
Playing: My Sims
Drinking: Mountain Dew Code Red

Some more progress on the box at long last!

Back of the box:
ANH_CB_back.jpg


After the router bit dropped, it was time to get out the drill with the hole bit. Until I get some bondo, I won't be able to cut out the other two coin slots because of the shallow depth created by the router bit slowly dropping. . . .

In order to keep a nice consistent line going on both sides, (since I'm working with angled corners) I needed to cut out a reverse pattern of the arc.
ANH_CB_front1.jpg


Both sides are done! Sanding was done on my wimpy, but effective, vintage Dremel scroll saw with a 3" sanding wheel attachment.
ANH_CB_sidesdone.jpg


One coin slot area finished!
ANH_CB_slotCU1.jpg


A close-up of the coin slot . . . nice and flush.
ANH_CB_slotCU2.jpg


It's coming along . . . next up: bondo!
 
Last edited by a moderator:
I picked up the bondo last weekend, and started refining the box. The back of the box has been filled, and sanded down; I now have a little more to do in the back, but that's only because I'm a perfectionist. I also started to build up the front where I took too much material away and sand that down. There's still more bondo work to be done, and I have to fill in a little bit of the coin slot areas, because they're a bit too high. The depth is good, and the width is pretty spot on. So . . . some photos of the box:

001.jpg


003.jpg


002.jpg


I still have yet to work on the rocker switches. That'll be this weekend.

Have a happy and safe Halloween everyone!
 
This thread is more than 8 years old.

Your message may be considered spam for the following reasons:

  1. This thread hasn't been active in some time. A new post in this thread might not contribute constructively to this discussion after so long.
If you wish to reply despite these issues, check the box below before replying.
Be aware that malicious compliance may result in more severe penalties.
Back
Top