Looks great! Love the idea of the "F" trim. Giving me ideas for the MF light bars
You are using an out of date browser. It may not display this or other websites correctly.
You should upgrade or use an alternative browser.
You should upgrade or use an alternative browser.
Star Wars movie set den build
- Thread starter Amazing DJ
- Start date
dereference
New Member
Very cool.
Amazing DJ
Well-Known Member
This is another day of construction on wall lights. A friend stopped me at Hobby Lobby and asked me when the Star Wars Movie Set Den would be finished. At this pace, I keep coming up with more things to build in it. There's only a couple hours available to work on it per night, so it might be a year longer. At that time, I will host a '77 Star Wars screening, then a room reveal. He's in. Should be fun.

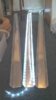
Picked up 3 more 10-foot vinyl gutters today. They have been silvered with the silver metal tape. Testing. Very reflect-y! These will be flipped over for more wall-washing white light. I get the 16-foot rope lights at Wal-Mart. More later.
Picked up 3 more 10-foot vinyl gutters today. They have been silvered with the silver metal tape. Testing. Very reflect-y! These will be flipped over for more wall-washing white light. I get the 16-foot rope lights at Wal-Mart. More later.
Attachments
postmanpat
Sr Member
Looking fantastic!!!
Amazing DJ
Well-Known Member
The "gutter" light installation continues! There was this weird moment when I came home from the store with several 10-foot vinyl gutters. I was bringing them into the house through the front door. My next-door neighbor was giving me a weird look. Who installs 35 feet of gutters on the INSIDE of their house? Me.
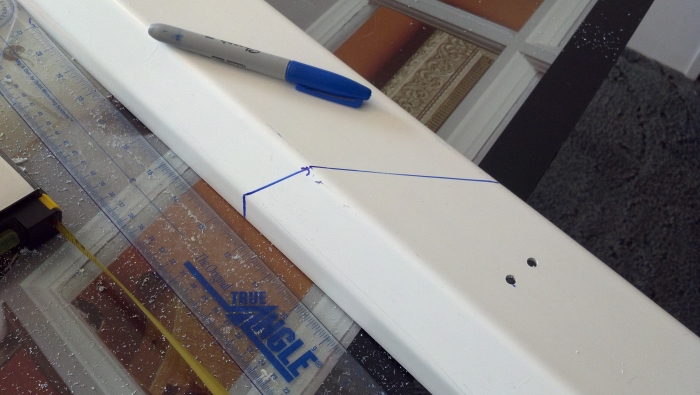
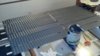
I have only 2 corners to mess with. Here, I'm marking off the 45-degree angle. A Harbor Freight plunge-cut tool is used to cut the soft PVC. It's a piece of cake to use. With that edge-cutting tool, you can cut materials while they are hanging on the wall, or cut them on a bench, either way. It's 10 times easier to cut with than a conventional saw. It's also about a third less accurate, depending on how steady your hand is. But for this project, 100% cutting accuracy isn't necessary. It all gets covered up with silver tape, lenses, edging, and a front "hider" panel.

The corners are being fit together. After assembly, the rope light will be zip-tied in place. These materials are pretty easy to work with. This doesn't take any special skills.
A year ago, my neighbor observed that I was sawing up wood for my Star Wars window covering. He asked me what I was building. I told him I was uhhh, building some cabinets. Yeah, that's it, just some normal cabinets.
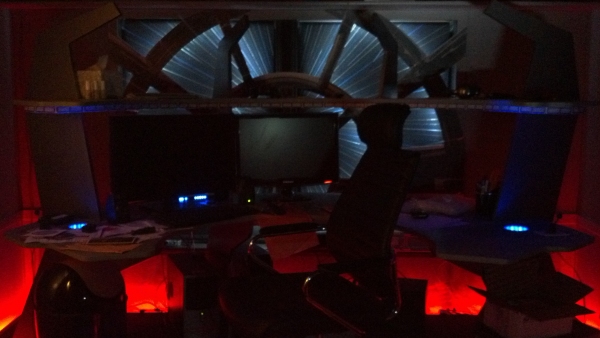
Today I lit the "lightspeed" window shades behind my computer desk. Lighting test! Ignore the desk, it's messy today. Nobody has seen this yet, just YOU guys! Shh!
I have only 2 corners to mess with. Here, I'm marking off the 45-degree angle. A Harbor Freight plunge-cut tool is used to cut the soft PVC. It's a piece of cake to use. With that edge-cutting tool, you can cut materials while they are hanging on the wall, or cut them on a bench, either way. It's 10 times easier to cut with than a conventional saw. It's also about a third less accurate, depending on how steady your hand is. But for this project, 100% cutting accuracy isn't necessary. It all gets covered up with silver tape, lenses, edging, and a front "hider" panel.
The corners are being fit together. After assembly, the rope light will be zip-tied in place. These materials are pretty easy to work with. This doesn't take any special skills.
A year ago, my neighbor observed that I was sawing up wood for my Star Wars window covering. He asked me what I was building. I told him I was uhhh, building some cabinets.
Yeah, that's it, just some normal cabinets.Today I lit the "lightspeed" window shades behind my computer desk. Lighting test! Ignore the desk, it's messy today. Nobody has seen this yet, just YOU guys! Shh!
Attachments

Amazing DJ
Well-Known Member
Here we have the different stages of construction for the illumination gutter's front "hider" panel. The panel will hide the front side of the gutter from view.
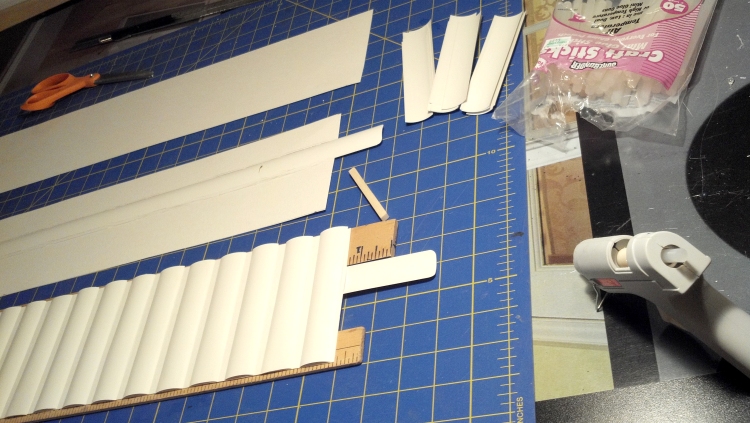
Start at the top of the image. First, I have a sheet of thick 140-lb watercolor paper {Hobby Lobby} that I have cut into long strips. This paper is not too different from the heavy paper that some lampshades are made from. Then reinforce the back of the strip with a whole window blind strip. Hot glue that sucker down. Don't use too much glue or it might pucker the thin vinyl or the heavy paper. Apply a thin bead of hot glue down the sides like it was window caulk. At the bottom of the image, I've hot-glued 4.75" vertical pieces of window blind. Each piece of blind is spaced apart with that little chunk of 1/4" wood, (see that?) used as a spacer.
Next step, creating a dozen more of these "hider" panels. Then painting these "hider" panels dark gray. Boredom is setting in, but I shall not... stop... building. :unsure
Attachments

Amazing DJ
Well-Known Member
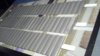
The first three "hider" panels have their first coat of paint.

While these dry, I'm cutting up more old mini-blinds. I have 10 more of these panels to make. Don't tell my wife, but I'm washing some dusty old mini-blinds in the bathtub. Well, I guess it's better than my friend who rebuilt a Ford truck transmission in his bathtub!
While these dry, I'm cutting up more old mini-blinds. I have 10 more of these panels to make. Don't tell my wife, but I'm washing some dusty old mini-blinds in the bathtub. Well, I guess it's better than my friend who rebuilt a Ford truck transmission in his bathtub!
Attachments
HermesBlackstar
Well-Known Member
Enthusiastic? Hell, I'm going to build a similar platform! Been wanting to do this for years, and you just inspired me to get to it.

HO...LY...CRAP!! that is the coolest thing I've ever seen!
Amazing DJ
Well-Known Member
Enthusiastic? Hell, I'm going to build a similar platform! Been wanting to do this for years, and you just inspired me to get to it.
Great! It's just some lumber and PVC pipes and screws and stufflikethatthere.
Good luck with your build!
Amazing DJ
Well-Known Member
HO...LY...CRAP!! that is the coolest thing I've ever seen!
Thanks, man. I like how the lightspeed window really "pops" with the addition of the window lighting. I'm glad I used the iridescent blue colors and the sparkly paints. The smearing stars kinda shine and sparkle. It looks "busy" and almost overwhelming. That's what a jump to lightspeed should be, a visual overload.
Too bad my computer monitors block most of the bottom of it. I have two flat monitors now, will be three monitors by the end of the year. I threw 3 of my old prehistoric 22" CRT monitors out by the road. Somebody picked them up!
Demonmaker
New Member
Too bad my computer monitors block most of the bottom of it. I have two flat monitors now, will be three monitors by the end of the year. I threw 3 of my old prehistoric 22" CRT monitors out by the road. Somebody picked them up!
You'll want to pick up the lovely new samsung's smart window "utube link" to use as monitors.
I'm so jealous right now...I have some great ideas for my 5x5 shed "simpod" but lack the skill to implement them.

Amazing DJ
Well-Known Member
I'm so jealous right now...I have some great ideas for my 5x5 shed "simpod" but lack the skill to implement them.
[url]http://s23.postimg.org/67vnikk6f/050.jpg[/URL]
Demonmaker, that's a huge monitor ya got there!
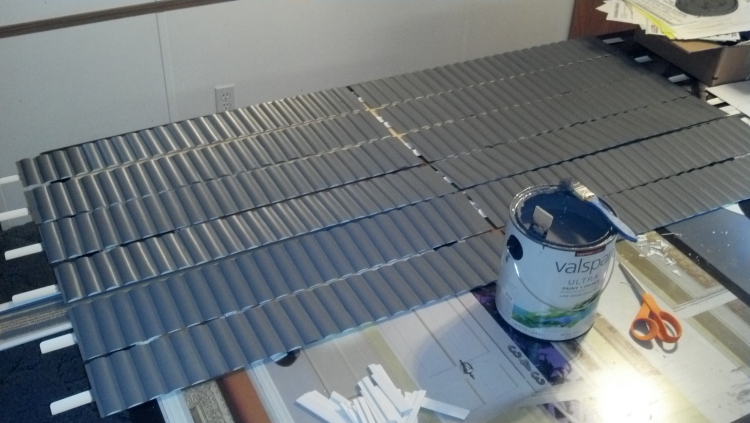
More progress today on my light fixtures. I built more of the "hider" panels. A couple of them have the first coat of dark gray paint on them.
Here's a dozen of them laying on the floor.
Ya don't need special skills to make something like this. If you can use a hot glue gun, and cut a straight line with scissors - you're good. Total cost so far $14. 3 pieces of heavy watercolor paper x $3 plus a pack of hot glue sticks $5 plus recycled miniblind slats $0 = $14
These panels under construction remind me of the detail seen on various Star Wars sets. Like, on the doorway edges in Tatooine and other places.
Above, Tatooine set building doorway edge
Attachments


Last edited:
Pretty damn awesome man. :thumbsup
Rhapsodyred99
New Member
Amazing!
Bantha Crossing
Well-Known Member
That really is awesome!!:eek
Amazing DJ
Well-Known Member
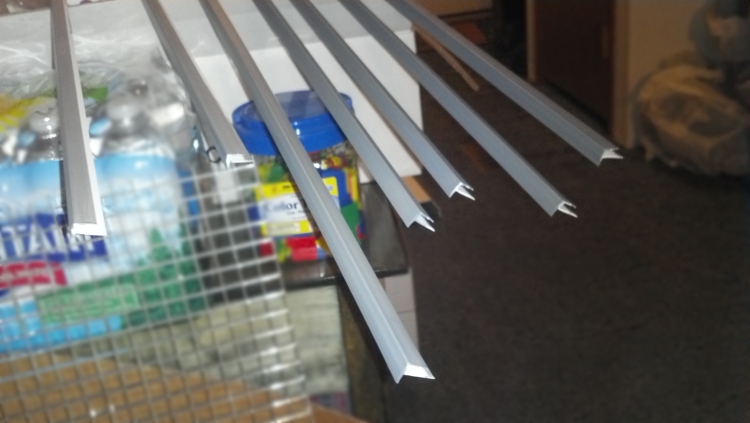
At last, the "hider" panels all have 2 coats of dark gray paint on them. I made 12 of these. Something tells me I will need 13 of them to finish it. Hmm.
And some trim pieces are painted. They are the "F" channels that will snap on the underside of the light fixture and hold the lens in place.
While all these dry, I'm trying to draw out the final plans for the ceiling. I'm thinking of these features:
* industrial mechanical room pipes as seen in Ralph McQuarrie's concept art
* horizontal vent pipes with odd lights in them
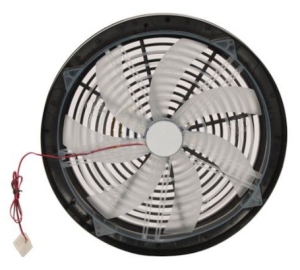
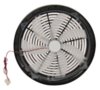
* one pipe (or box) in the center will have a fan in it to keep me cool while I'm gaming. Was shopping for a quiet 360mm to 400mm (15.7 inch) computer case fan to be used for that purpose...
So the ceiling would resemble the shapes seen below...

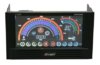
Just discovered they make 12 volt touch-screen panels to control the fan speed. I might get one of these lighted control panels and build it into my desk surface.

More likely, I will have it somewhere on the back edge, angled up with a bracket for easy visibility.
And some trim pieces are painted. They are the "F" channels that will snap on the underside of the light fixture and hold the lens in place.
While all these dry, I'm trying to draw out the final plans for the ceiling. I'm thinking of these features:
* industrial mechanical room pipes as seen in Ralph McQuarrie's concept art
* horizontal vent pipes with odd lights in them
* one pipe (or box) in the center will have a fan in it to keep me cool while I'm gaming. Was shopping for a quiet 360mm to 400mm (15.7 inch) computer case fan to be used for that purpose...
So the ceiling would resemble the shapes seen below...
Just discovered they make 12 volt touch-screen panels to control the fan speed. I might get one of these lighted control panels and build it into my desk surface.
More likely, I will have it somewhere on the back edge, angled up with a bracket for easy visibility.
Attachments
Last edited:
Similar threads
- Replies
- 18
- Views
- 1,563