Ep 7 concept saber build DONE

RvanAken

Well-Known Member
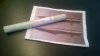
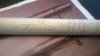
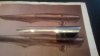
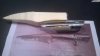
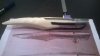
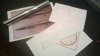
So. I found the concept picture of a lightsaber here and on some other blogs last week and I thought I'll give it a shot. I happen to have a chroom tube laying around and am planning to use that and scaled the picture an plans to that tube. It's 32mm in diameter which was the base measurement for the plans. Up till now I have drawn the templates for the metal parts. The wampa tooth I plan to make from XPS foam which I also happen to have laying around left over from a rc spitfire project. I'll keep you all posted on this project but it may take a while because ill have to do it between work, family and working on props for the production of Aladdin from the local youth theater .


Tips and criticism are always welcome


-R-


P.s. Excuse my English, it's not my native language
 

Attachments

  • WP_20141022_002.jpg
    WP_20141022_002.jpg
    1.3 MB · Views: 530
Last edited:
Re: Ep 7 concept saber build

Quick update. I taped the tube with painters tape and transferred my templates on it using spay adhesive. I've got pics but can't figure out how to post them in a reply using tapatalk
 
Re: Ep 7 concept saber build

Just found out how to post pics in a reply by using the only button I didn't try. Facepalm.
 

Attachments

  • WP_20141023_001.jpg
    WP_20141023_001.jpg
    1.4 MB · Views: 234
  • WP_20141023_002.jpg
    WP_20141023_002.jpg
    1.4 MB · Views: 216
Re: Ep 7 concept saber build

Small update. The metal part is almost done. I'm also making an emitter, as this isn't pictured in the concept drawing I'll have to use my imagination. I'll be keeping it simple.

I know I have a red button somewhere, I'll be looking for that to today.

Thanks for watching.

-R-
 

Attachments

  • WP_20141026_004.jpg
    WP_20141026_004.jpg
    1.4 MB · Views: 322
Re: Ep 7 concept saber build

Yep! They have a tiny threaded rod like a screw that screws into whatever is inside your tube. The "real" buttons have threading around the bottom rim of the button - they thread into the wall of the hole itself.

Real buttons, Credit to the makers of the website and people that took these for that outstanding thread on Graflex variations:
R20120206-113052.jpg

Fake or replica on the right

DSC05448_zps1f4acd09.jpg

ignore the knurling variations! That part is identical, I have a vintage one with full knurling - these photos just happen to have the tiny knurling of another graflex variant.
Can't wait to see the progress, I love scratchbuild sabers
 
Last edited:
Re: Ep 7 concept saber build

Thanks for the tip on the button. I'll look into that.

So I got some work done today. Even more than I thought I would.

The metal part is done, except the button that is. And that was what I hoped to achieve today but the spare time just kept coming.

For the tooth I glued two layers of 20mm XPS foam together and used my homemade hotwire table to cut the basic shape. I then used a knife and 120 grit sandpaper to Finnish the shape. I used the drawing for inspiration but tried to give it a bit more of a tooth like appearance. I also looked at T-Rex teeth for inspiration and used some elements of those.

Lucky me, the tooth fitted at the first try.

It being made from XPS foam it needs to be sealed before I can paint it so I just put on the first layer of glue. I'll let it dry tonight and pit on a second layer on tomorrow. I cant wait to start painting the tooth. I've got the whole paint scheme in my head since I started this build, hope it works.

Again thanks for the tip on the button. But this is a budget build and I haven't spend any money on this yet. Al the materials I just happen to have laying around so I'll look for the red button I should have l somewhere.

-R-
 

Attachments

  • WP_20141026_006.jpg
    WP_20141026_006.jpg
    1.4 MB · Views: 169
  • WP_20141026_007.jpg
    WP_20141026_007.jpg
    1.3 MB · Views: 201
  • WP_20141026_008.jpg
    WP_20141026_008.jpg
    1.3 MB · Views: 325
Re: Ep 7 concept saber build

Oh and you might have seen that the saber is larger then the print I use for reference. It is exactly 14.28% larger to be precise. I had some trouble printing on the correct size.

-R-
 
Re: Ep 7 concept saber build

I wonder, with it being a claw and all, if the wampa section has an underside with exposed lightsaber components or some sort of a metal cover over the concave section of the claw.
 
Re: Ep 7 concept saber build

My theory is that its hollow with all the components inside giving it a sleek outside. Anyway, thats how I'm building it.
 
Re: Ep 7 concept saber build

It just looks great.
I hope this saber will appear in ep7, so you already have a saber prop of ep7 when the film gets released in 415 days ;)
Can't wait to see the paintjob.
 
Re: Ep 7 concept saber build

The First layer of paint is on the tooth /claw. I didn't seal the xps foam as goods as I wanted so the paint affected is a bit. Not that much, just a few little dimples, and that gave is I really nice natural look and a grew texture for weathering . Lucky me. It doesn't show up that good on a picture with only the base coat on so no pic, sorry.

But I'm stuck on a few things. For the paint job I can either go old fossilized brown or new and white. I'll probably go with the browns but aren't sure yet.
I also haven't got a button yet. And ill have to find out how to make the saber wareble on a belt, no place for a D-ring and nothing on the concept art to help me. I've got some ideas but can't decide.

Any ideas?

-R-
 
Re: Ep 7 concept saber build

Old fossilized brown, just my preference.
I suggest a leather pouch where you can push it in for hanging, almost like a dagger.

As mvanwalks421 suggests something like a dagger sheath will work quite well. Maybe just a broad leather loop on a belt. You could slip the saber through tooth/claw first and it will stop at the button switch. Similar to the leather loops some cosplayer/larps wear on there belts to hold some drinking horns.

Hope you understand what I'm trying to explain ;)
 

Your message may be considered spam for the following reasons:

If you wish to reply despite these issues, check the box below before replying.
Be aware that malicious compliance may result in more severe penalties.
Back
Top