You are using an out of date browser. It may not display this or other websites correctly.
You should upgrade or use an alternative browser.
You should upgrade or use an alternative browser.
MK38 Igor build (04/29> Painting and detailing)
- Thread starter laellee
- Start date
Re: MK38 Igor build
More progress this evening. I've never had to jump around from part to part so much on a project, between waiting for supplies, adhesives to dry, foam to cure, sealers to dry, batteries to charge, etc. etc. etc.....
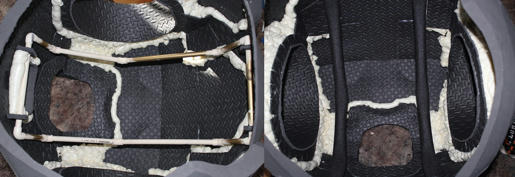
First off, I realized that mounting up the permanent screen position is pretty stupid if I'm not POSITIVE where the upper torso will sit on the wearer. A quick explanation on the interaction of the torso pieces: When suiting up, the abs and cod are independent but attached together (if that makes sense), and worn with adjustable straps over the shoulders like a pair of suspenders or bibs. The upper torso is then lowered down over the wearer, with the upper ab seam sliding into the chest piece (a lot like most Iron man suits). The chest section is then made to sit on wearer's shoulders using a couple of padded shoulder bars. Anyways, I assembled that basic framework this afternoon. The upper frame is built from 1/2" pvc pipe and fittings, with all of the joints cleaned and glued once it was sized properly. It was initially held in place using brackets made from doubled-up EVA foam (two each at the front and the back), and then locked in with expanding foam. After one end was locked in, I added foam padding (pipe-wrap) and tried it on to make sure everything's working good. Tonight I'll finish locking this frame in with foam, and then clean it up and adjust padding tomorrow.
The pic on the left is the initial PVC framing being fit, with one end partially locked in. Extra expanded foam can easily be cut out with hot wire or electric knife later. (Ignore the gold sections of PVC, must have been used to hold parts for painting earlier). Right picture is with the padding added. I can easily double it up if I want more clearance between the top of the wearer's head and the suit :thumbsup Once the interior fixtures are finished and trimmed, I'll plastidip all the expanded foam black as well so it's not an eyesore. That's OCD for ya.
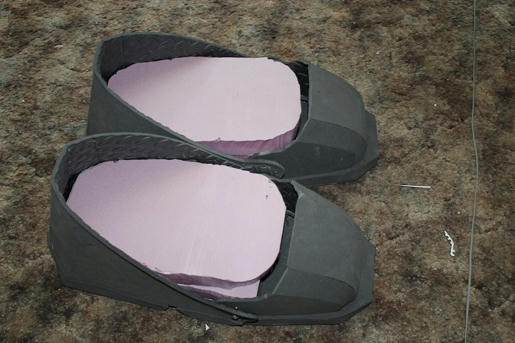
Next up, boots. I finally picked up the material for the lifts, 1 1/2" pink home insulating foam. This foam is pretty sturdy, and can be used as a lift material if you don't go crazy with it and also properly reinforce it. I planned Igor's original boot with a 4 inch lift, so the plan is to use two stacked pieces of the 1 1/2" foam, another sliced 1/2" layer, and then a thin piece of laminate on top of the foam to distribute the shoe weight evenly and give good attachment points for the shoe straps. This foam will indent if a lot of weight is placed on one small point, so the laminate will work well as a protective 'armor' to distribute weight. After the initial foam layers are installed, I'll fill any gaps around the sides of the inserts with more expanding foam so that the boots have no 'soft' spots.
First hurdle of the afternoon, I got home to realize that my hot knife was on the other side of town. I was not about to get back in the car, so I instead rigged up a redneck hot wire to cut my foam with using a completely inappropriate and dangerous setup. It was a success, but not before burning myself a couple of times and being nearly poisoned with fumes. Using a rough template of the boot soles, I cut 3 blanks for each boot. The top layer will eventually be cut down to set the proper height, and won't be permanently installed until I have the shoe straps anchored in. I also had to cut out and bevel a couple of sections in the first layer for each boot; the bottoms are not perfectly flat, so and had to be notched to fit. Here are the boots with the 3 foam layers fit initially:
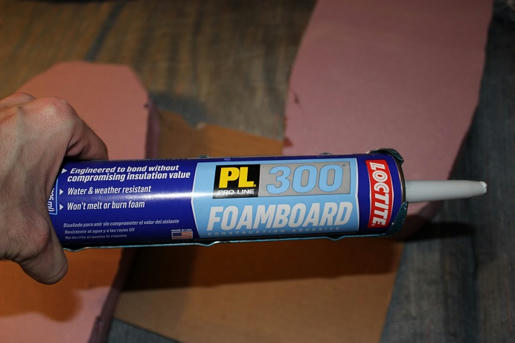
I only glued in the bottom two layers for now, the top layers and laminates will be added when the straps some in this week. A lot of adhesives will melt insulating foam, it's a good idea to test on an area before committing unless you're sure it'll work. This is what I use:
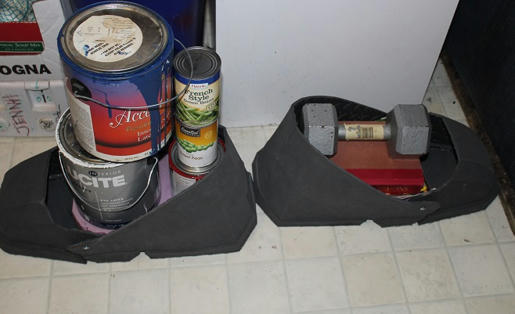
Glued and weighted in the kitchen")
More progress this evening. I've never had to jump around from part to part so much on a project, between waiting for supplies, adhesives to dry, foam to cure, sealers to dry, batteries to charge, etc. etc. etc.....
First off, I realized that mounting up the permanent screen position is pretty stupid if I'm not POSITIVE where the upper torso will sit on the wearer. A quick explanation on the interaction of the torso pieces: When suiting up, the abs and cod are independent but attached together (if that makes sense), and worn with adjustable straps over the shoulders like a pair of suspenders or bibs. The upper torso is then lowered down over the wearer, with the upper ab seam sliding into the chest piece (a lot like most Iron man suits). The chest section is then made to sit on wearer's shoulders using a couple of padded shoulder bars. Anyways, I assembled that basic framework this afternoon. The upper frame is built from 1/2" pvc pipe and fittings, with all of the joints cleaned and glued once it was sized properly. It was initially held in place using brackets made from doubled-up EVA foam (two each at the front and the back), and then locked in with expanding foam. After one end was locked in, I added foam padding (pipe-wrap) and tried it on to make sure everything's working good. Tonight I'll finish locking this frame in with foam, and then clean it up and adjust padding tomorrow.
The pic on the left is the initial PVC framing being fit, with one end partially locked in. Extra expanded foam can easily be cut out with hot wire or electric knife later. (Ignore the gold sections of PVC, must have been used to hold parts for painting earlier). Right picture is with the padding added. I can easily double it up if I want more clearance between the top of the wearer's head and the suit :thumbsup Once the interior fixtures are finished and trimmed, I'll plastidip all the expanded foam black as well so it's not an eyesore. That's OCD for ya.

Next up, boots. I finally picked up the material for the lifts, 1 1/2" pink home insulating foam. This foam is pretty sturdy, and can be used as a lift material if you don't go crazy with it and also properly reinforce it. I planned Igor's original boot with a 4 inch lift, so the plan is to use two stacked pieces of the 1 1/2" foam, another sliced 1/2" layer, and then a thin piece of laminate on top of the foam to distribute the shoe weight evenly and give good attachment points for the shoe straps. This foam will indent if a lot of weight is placed on one small point, so the laminate will work well as a protective 'armor' to distribute weight. After the initial foam layers are installed, I'll fill any gaps around the sides of the inserts with more expanding foam so that the boots have no 'soft' spots.
First hurdle of the afternoon, I got home to realize that my hot knife was on the other side of town. I was not about to get back in the car, so I instead rigged up a redneck hot wire to cut my foam with using a completely inappropriate and dangerous setup. It was a success, but not before burning myself a couple of times and being nearly poisoned with fumes. Using a rough template of the boot soles, I cut 3 blanks for each boot. The top layer will eventually be cut down to set the proper height, and won't be permanently installed until I have the shoe straps anchored in. I also had to cut out and bevel a couple of sections in the first layer for each boot; the bottoms are not perfectly flat, so and had to be notched to fit. Here are the boots with the 3 foam layers fit initially:

I only glued in the bottom two layers for now, the top layers and laminates will be added when the straps some in this week. A lot of adhesives will melt insulating foam, it's a good idea to test on an area before committing unless you're sure it'll work. This is what I use:

Glued and weighted in the kitchen

Re: MK38 Igor build
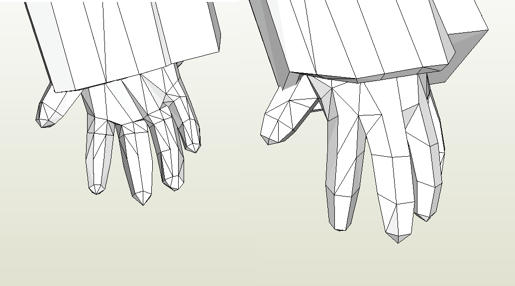
Yep that's why I'm freehanding. The original 3d model's hands are completely undetailed, it'll be easier to scratch build for me than to remodel the whole deal:
ah... ok
I was hoping for specifically made hands for igor. its kind of a bummer to have the same hands for every single suit.
Yep that's why I'm freehanding. The original 3d model's hands are completely undetailed, it'll be easier to scratch build for me than to remodel the whole deal:

Re: MK38 Igor build
Thanks for looking! It's getting there. I will say this, once I get these main fixtures in, the progress speed should make a BIG JUMP. I can't wait to start detailing this properly.
A bit more progress... I'll just start this post with a quick sketch to help explain some of the things getting accomplished right now:
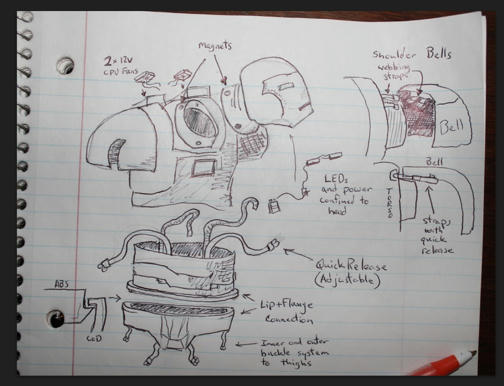
First off, the neck and head assembly are removable, and sit on a flange in the upper torso. I've been asked for ID in an oversized suit before, and it sucks to have to take off an entire torso just so somebody can check your age Anyways, the helmet electronics and power are all in this piece, so it's completely removable. The assembly is held in place by a combination of the flange and neodynum magnets. To cut the holes for the neck magnets, I used a copper plumbing fitting that I dremeled sharp on one end, and just punched the holes out with a mallet. I do this a lot for clean circular cuts:
The torso flange couldn't be easily laid out on a block for the punch, so I just melted them out with an extra soldering Iron. This in nice because it cauterizes the foam edge making it stronger, but it also releases poison fumes (and will muck up your iron's tip)
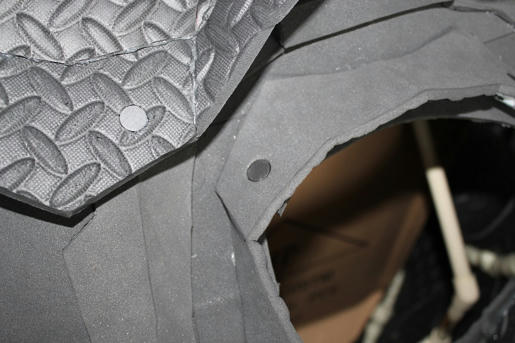
The magnets are then glued in with construction adhesive and foam backing where it's allowed (the temp of hot glue can demagnetize). Double check the polarity of your magnets if you're using one on each side of the attachment point; otherwise, you'll end up with the magnets repelling each other Here are the magnets placed before final gluing:
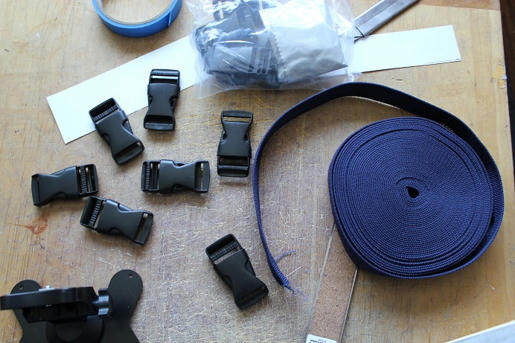
The lower torso and cod lock together on a flange connection, so they can move independently but won't come apart. This whole assembly get adjustable webbing suspenders to hold it up while the upper torso sits on the wearer's shoulders. Got my strapping in this morning:
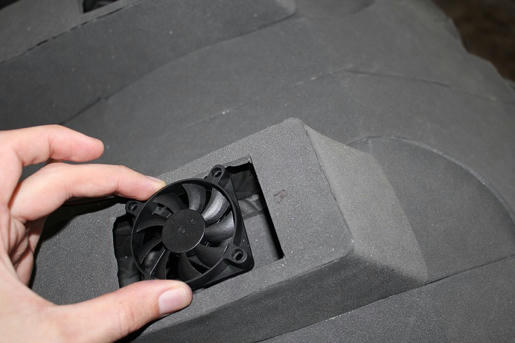
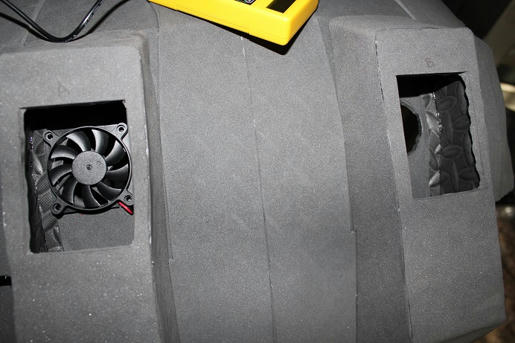
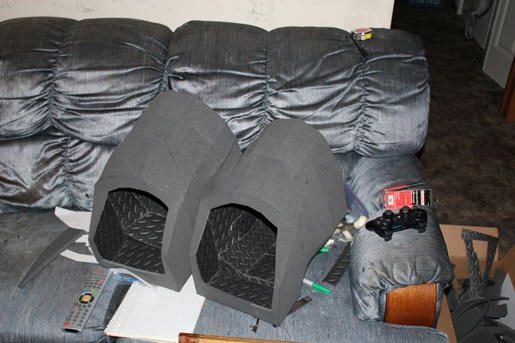
And I finally got ONE of the correct fans for the cooling system. The first two fans weren't quite doing it, but this one looks good both size and function-wise. The fans install in the back humps, behind the wearer's head, with intake vents added for circulation. Here's one of the fans next to a vent hole:
Also started working out the rear ab detailing... The spine will be built separately and then integrated into the rear 'ribs' when the two separate pieces are up to snuff. Laying out the first rear rib bits here:

LASTLY, I should have pics of the camera display and mount tomorrow. I decided to change my original mount design so that the display is completely removable when the suit isn't being worn. I don't know what Mark might want to do with it, but the 7" lcd can now be easily removed and used as a portable screen for anything with rca jacks :thumbsup
Anyways, back to it.... Over halfway done.
Thanks for looking! It's getting there. I will say this, once I get these main fixtures in, the progress speed should make a BIG JUMP. I can't wait to start detailing this properly.
A bit more progress... I'll just start this post with a quick sketch to help explain some of the things getting accomplished right now:

First off, the neck and head assembly are removable, and sit on a flange in the upper torso. I've been asked for ID in an oversized suit before, and it sucks to have to take off an entire torso just so somebody can check your age
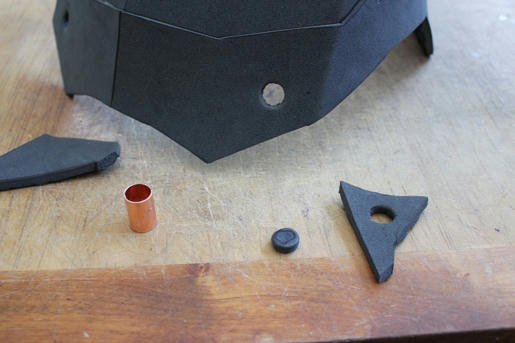
Anyways, the helmet electronics and power are all in this piece, so it's completely removable. The assembly is held in place by a combination of the flange and neodynum magnets. To cut the holes for the neck magnets, I used a copper plumbing fitting that I dremeled sharp on one end, and just punched the holes out with a mallet. I do this a lot for clean circular cuts:
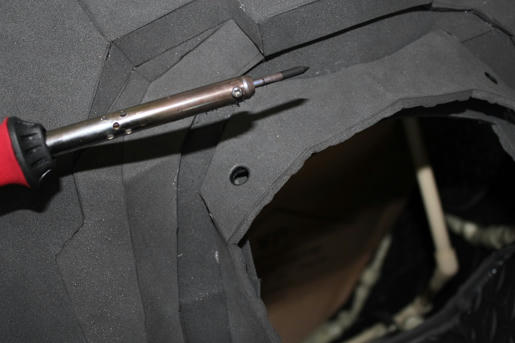
The torso flange couldn't be easily laid out on a block for the punch, so I just melted them out with an extra soldering Iron. This in nice because it cauterizes the foam edge making it stronger, but it also releases poison fumes (and will muck up your iron's tip)

The magnets are then glued in with construction adhesive and foam backing where it's allowed (the temp of hot glue can demagnetize). Double check the polarity of your magnets if you're using one on each side of the attachment point; otherwise, you'll end up with the magnets repelling each other
Here are the magnets placed before final gluing:
The lower torso and cod lock together on a flange connection, so they can move independently but won't come apart. This whole assembly get adjustable webbing suspenders to hold it up while the upper torso sits on the wearer's shoulders. Got my strapping in this morning:

And I finally got ONE of the correct fans for the cooling system. The first two fans weren't quite doing it, but this one looks good both size and function-wise. The fans install in the back humps, behind the wearer's head, with intake vents added for circulation. Here's one of the fans next to a vent hole:

Also started working out the rear ab detailing... The spine will be built separately and then integrated into the rear 'ribs' when the two separate pieces are up to snuff. Laying out the first rear rib bits here:

LASTLY, I should have pics of the camera display and mount tomorrow. I decided to change my original mount design so that the display is completely removable when the suit isn't being worn. I don't know what Mark might want to do with it, but the 7" lcd can now be easily removed and used as a portable screen for anything with rca jacks :thumbsup
Anyways, back to it.... Over halfway done.
ironmaided
Sr Member
Re: MK38 Igor build
Now thats what I call progress :thumbsup
He could watch something inside the suit with the LCD screen :lol Keep it up man
Now thats what I call progress :thumbsup
He could watch something inside the suit with the LCD screen :lol Keep it up man
Re: MK38 Igor build
Well, this makes me feel very untalented
Well, this makes me feel very untalented
Re: MK38 Igor build
Yeah, like he could READ YOUR POST AND RESPOND FROM INSIDE THE SUITlol:lol
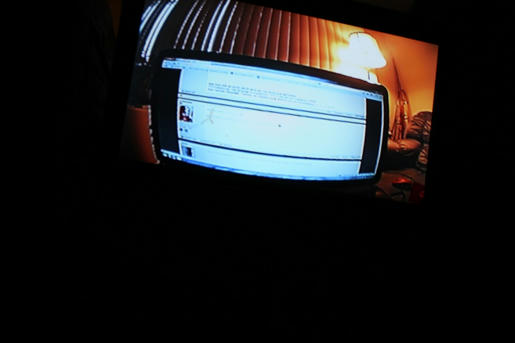
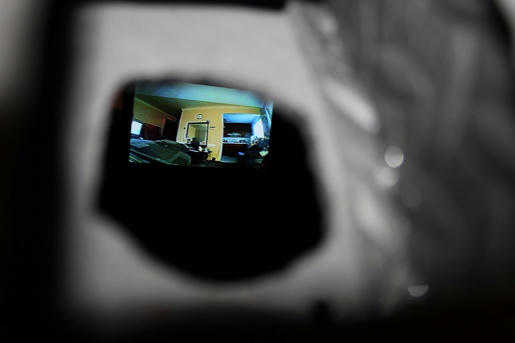
Seriously, though, I boxed in the new display mount tonight, and was able to test mount the screen while the foam and adhesives started curing. Here's a garbage pic (shooting outside through the fan mounting hole) of the powered display; the camera is actually behind the torso at this point, so you can see part of the suit in the display pic:
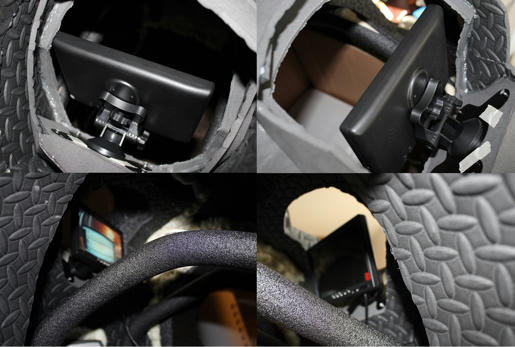
I've got to let everything cure before I get better pics, but here's a collage of the display mount. A quick release knob holds the display on a 6-way adjustable tripod-style mount, so it only takes a turn of the knob and one plug pulled to remove it. The lower left pic gives you an idea of how far back the wearer is from the display; it's a comfortable distance. The fasteners and tape in the pics are temporary, all that gets cleaned up tomorrow
Also got the fan holes and electrical guides cut; a grill and detail ribbing will go over those vent openings to hide them; they are also over 6 1/2 feet in the air, so I'm not so worried about anybody noticing
Well that's enough picture-taking for today. Last great news of the day, my second (and hopefully last) order of foam showed up late today, so I can get started on the biceps and forearms. I know it's a big suit, but at under 7 feet tall, this suit is still just EATING foam up. I'm on par for well over 160 square feet to finish, and I don't waste foam at all when I build. At least everything is staying pretty light :thumbsup
Thanks for looking!
Now thats what I call progress :thumbsup
He could watch something inside the suit with the LCD screen :lol Keep it up man
Yeah, like he could READ YOUR POST AND RESPOND FROM INSIDE THE SUIT
lol:lol
Seriously, though, I boxed in the new display mount tonight, and was able to test mount the screen while the foam and adhesives started curing. Here's a garbage pic (shooting outside through the fan mounting hole) of the powered display; the camera is actually behind the torso at this point, so you can see part of the suit in the display pic:

I've got to let everything cure before I get better pics, but here's a collage of the display mount. A quick release knob holds the display on a 6-way adjustable tripod-style mount, so it only takes a turn of the knob and one plug pulled to remove it. The lower left pic gives you an idea of how far back the wearer is from the display; it's a comfortable distance. The fasteners and tape in the pics are temporary, all that gets cleaned up tomorrow

Also got the fan holes and electrical guides cut; a grill and detail ribbing will go over those vent openings to hide them; they are also over 6 1/2 feet in the air, so I'm not so worried about anybody noticing

Well that's enough picture-taking for today. Last great news of the day, my second (and hopefully last) order of foam showed up late today, so I can get started on the biceps and forearms. I know it's a big suit, but at under 7 feet tall, this suit is still just EATING foam up. I'm on par for well over 160 square feet to finish, and I don't waste foam at all when I build. At least everything is staying pretty light :thumbsup
Thanks for looking!
GhostMinion
Sr Member
Re: MK38 Igor build (04/09> LCD Display installed)
Man, this is beyond cool!
Man, this is beyond cool!
SuperiorSvyat
New Member
Re: MK38 Igor build (04/09> LCD Display installed)
You're ingenuity is unbelievable! Can't wait to see the final product!
You're ingenuity is unbelievable! Can't wait to see the final product!
Re: MK38 Igor build (04/09> LCD Display installed)
The ones going in are Evercool 60mm cpu fans, you can get them on Amazon for about $8-$10 each. Here's one:
Amazon.com: FAN,12VDC,15.5 CFM,60X60X10,BALL BEARINGS,3-9 INCH LEADS(SPD SNR)UL/CE/TUV: Electronics
I was originally going to power all of the electronics in the torso from a single 12v Li-Ion pack, but it would drastically cut back the run time if everything is powered up and running simultaneously. SOOOO, plan for now is to have the arc reactor and cam/display system powered by the 12 volt system, and then the fans on a separate 9 volt system with it's own switch controls. At 9 volts, a pair of these fans will still recycle the air in the suit at around 25 cfm. :thumbsup Noise-wise, they are very quiet, about 20db. You could have one running (@ 9 volts) 6 inches from your ear, and still hear a whisper. This upper torso turns into a sound chamber when it's closed up, so I want the wearer to at least have a fighting chance to converse with people.
nice. looks great so far. how silent are the fans and where did you get them plus price?
The ones going in are Evercool 60mm cpu fans, you can get them on Amazon for about $8-$10 each. Here's one:
Amazon.com: FAN,12VDC,15.5 CFM,60X60X10,BALL BEARINGS,3-9 INCH LEADS(SPD SNR)UL/CE/TUV: Electronics
I was originally going to power all of the electronics in the torso from a single 12v Li-Ion pack, but it would drastically cut back the run time if everything is powered up and running simultaneously. SOOOO, plan for now is to have the arc reactor and cam/display system powered by the 12 volt system, and then the fans on a separate 9 volt system with it's own switch controls. At 9 volts, a pair of these fans will still recycle the air in the suit at around 25 cfm. :thumbsup Noise-wise, they are very quiet, about 20db. You could have one running (@ 9 volts) 6 inches from your ear, and still hear a whisper. This upper torso turns into a sound chamber when it's closed up, so I want the wearer to at least have a fighting chance to converse with people.
Re: MK38 Igor build (04/09> LCD Display installed)
ah well you could probably attach something like a mic and headset/speaker system so you can hear people. im going to be doing something like that with my helmet(s) when i make them. im going to try and fully emmerse someone in it with speakers mics cams and screens.
ah well you could probably attach something like a mic and headset/speaker system so you can hear people. im going to be doing something like that with my helmet(s) when i make them. im going to try and fully emmerse someone in it with speakers mics cams and screens.
Re: MK38 Igor build (04/09> LCD Display installed)
Boring morning update.... BICEPS. I incorporated the elbow brackets into the biceps, but haven't added the 'torque posts' (yeah I just made that up) yet. I'd like to get the shoulder bell strapping on this evening, and then I can also modify the biceps to fit well with the torso. If I radius out the upper inside edge of each bicep, I'll get them to sit against the body better, and also add a couple of inches of reach to the wearer into the forearms.
Boring morning update.... BICEPS. I incorporated the elbow brackets into the biceps, but haven't added the 'torque posts' (yeah I just made that up) yet. I'd like to get the shoulder bell strapping on this evening, and then I can also modify the biceps to fit well with the torso. If I radius out the upper inside edge of each bicep, I'll get them to sit against the body better, and also add a couple of inches of reach to the wearer into the forearms.

Similar threads
- Replies
- 18
- Views
- 1,197
- Replies
- 17
- Views
- 3,830
- Replies
- 3
- Views
- 1,114
- Replies
- 0
- Views
- 780
- Replies
- 6
- Views
- 1,549