KnowOne's Designs
Member
Hello!
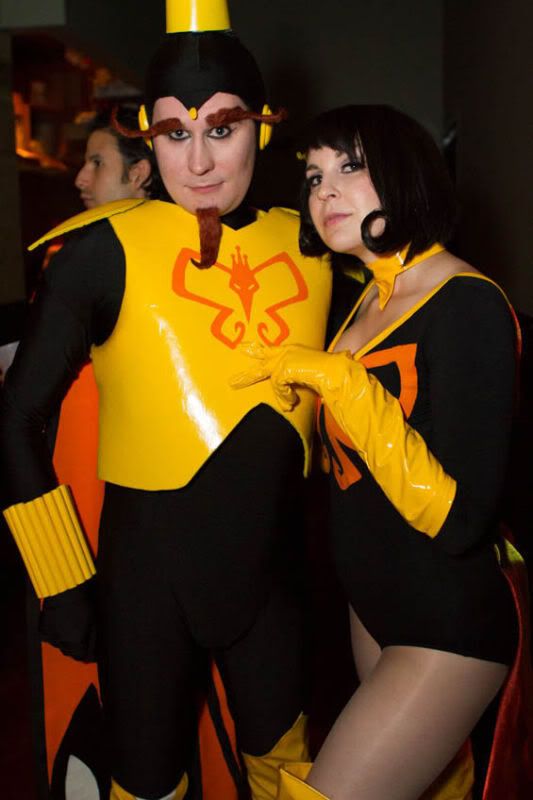
We (TrooperDudeFace and KnowOne251) decided to do a group costume for Halloween this year with our good friends Deb and Paul. We decided on Venture Bros. since Garrick (KnowOne251) and I had wanted to make Monarch costumes for awhile now and Garrick does the voice so well. We also thought Deb and Paul would make the PERFECT Brock and Molotov thus we set out on our Halloween venture. (ha get it?! Halloween VENTURE...I'm so funny)
This definitely ended up being more work than either of us thought, with many pitfalls along the way that I will elaborate on. All in all, there are a few things I would like to go back and re-do in the very near future, but we got such great responses from people at the parties we went to that these are easily two of our favorite costumes now.
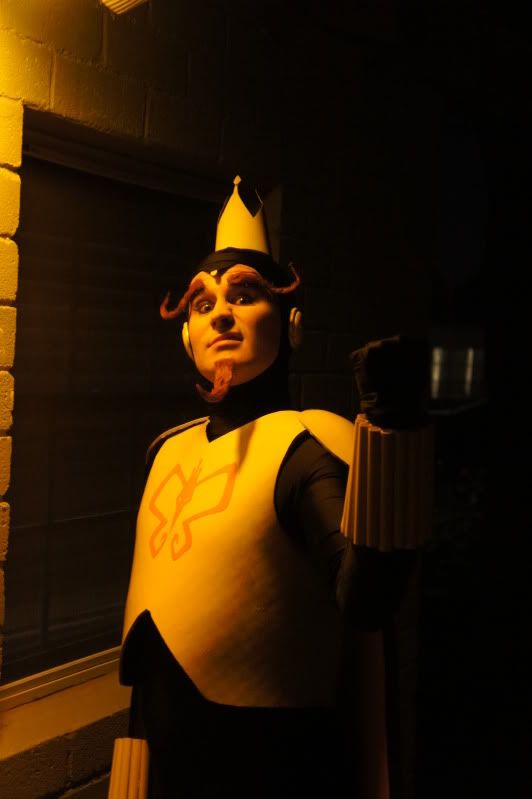
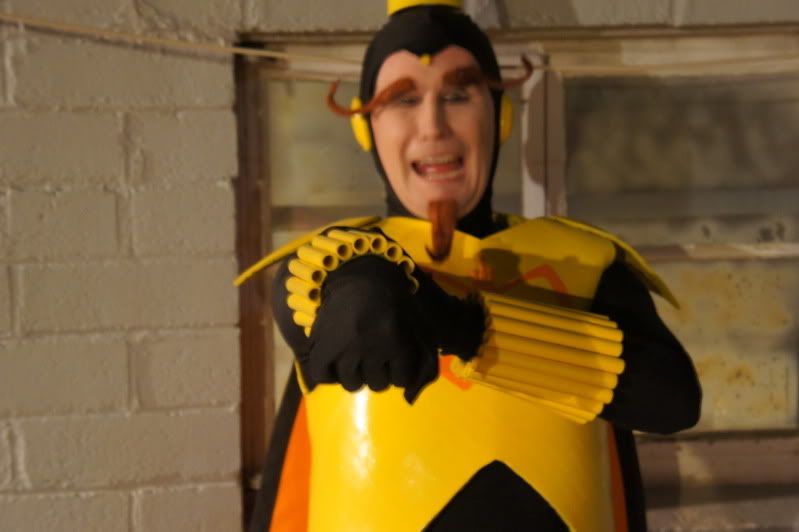
Let's start with the actual design here. The Monarch I decided to stick pretty close to home on his whole design just changing the shape of his face. Since we were hurried I didn't want to mess with prosthetic for this go around. I may try to find a hawk-ish nose in the future for Garrick but for now the eyebrows are enough.

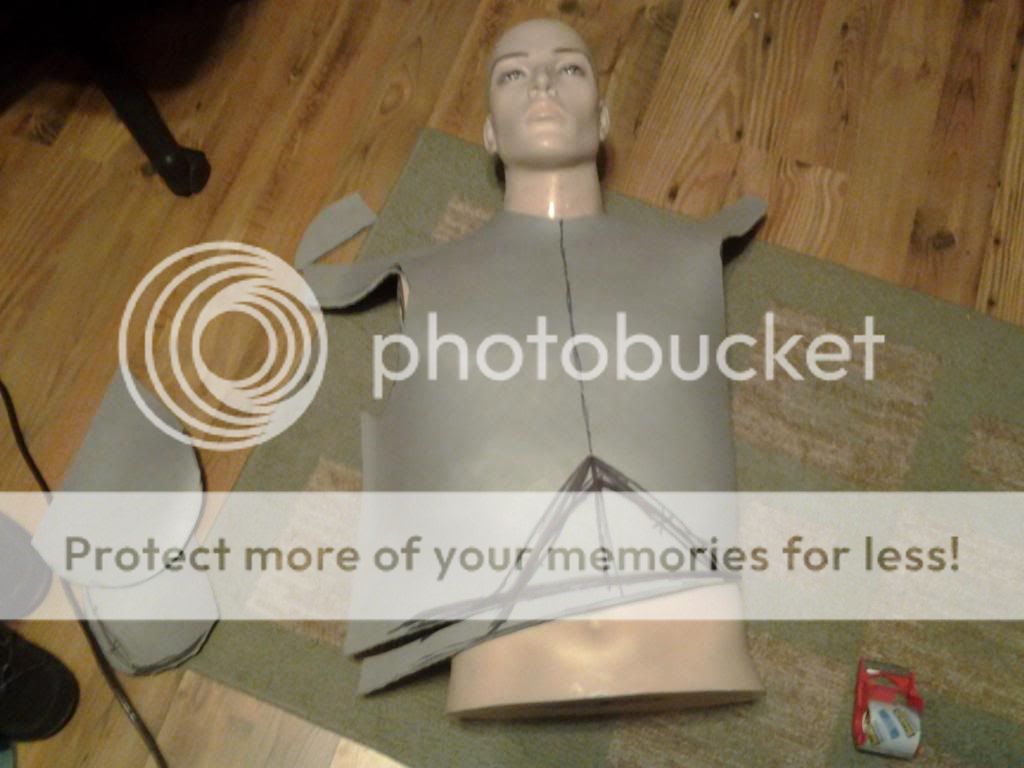
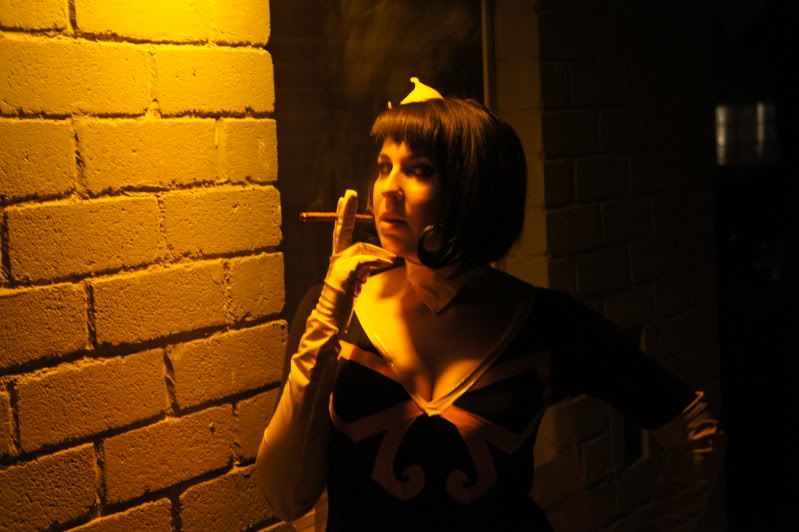
Dr. Mrs. the Monarch needed a little tweaking....I would like to stay in my costume when I wear it so I modified the neckline. I have seen girls build corsets underneath to support everything but to be honest, I wanted something I didn't have to worry about being taped into and falling out of. When I get more of the yellow material in I am going to make it lower cut than it is in the below pictures,( I know, I know, you were all worried, you can calm down now!) but other than that I stayed pretty true to her design.

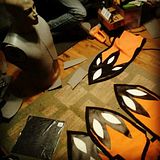
The very first thing I made were the wings. I had a ton of orange fabric and needed it to be wings so I went to town! I cut the shapes for the two large wings and for the two shorts wings and sewed them up. About 4 yrds total for all of them. I cut out the black wing tips, glued those on, Then sandwiched them in between the 16 yrds of inch black bias tape I sewed along the edges of the wings to give them a more defined comic look. The white details were last, they were cut out of white vinyl and glued on top of the black. Easy Peasy fresh and squeezy.
I then worked on my body suit and Garrick's. I bought a long sleeved leotard (I couldn't help myself, it was so cheap and made in the US!!) I cut out the butterfly design from the same fabric as the Monarch wings (one side) traced a mirror image of it and then ironed on some of the iron on backing to it so it would stay when I sewed it. I had never used this stuff before and it's pretty awesome but in hind site I should have just ironed it to a whole piece and then cut my design out of that...live and learn...:facepalm
Garrick's was just a black spandex body suit we bought to save time that I sewed done to fit him better.
I actually started the butterfly design on Dr.Mrs. the Monarch with some orange bias tape but the color kept bugging me. It was dayglo orange and I just couldn't handle it I wanted the costumes to match as much as possible. I initially didn't want to use the material that the wings are made out of because it frays. But using that iron-on backing and stop fray-stop helped with that.
ugly bias tape: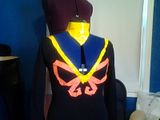
matching fabric:
I then sewed the yellow vinyl I have cut and made into thinner ribbons so I could edge the neck line. Awesome part about using the pvc was that it held the neckline in place and kept it from stretching bigger than I cut it. When I get more in to re-make the boot covers I'm going to deepen the neckline a little because of this. I wanted to go conservative at first so I could see how everything would "handle." (translation: I didn't have the "deep v bra" or any toupe tape and needed to be able to wear a normal bra under this. :lol)
My FAVORITE part of this was the wing material. This picture doesn't do it justice. It's bright orange with some red and yellow all through it and changes colors depending on how the light hits it. It's perfect and ties all the colors together. It's one of those fabrics that makes me feel like how I imagine a bird gets with something shiny, I just can't stop staring at it! Something like that can be time consuming to sew lol....
Our crowns were made out of QT cups and have either velcro or hair clippies glued to them. (I'm sure you can guess who's used what). We are going to make molds of them, clean them up and make them more 3D soon.
My gloves were bought and I sewed my collar out of the same material as everything else. I am considering casting it to make it look like hard plastic but the one thing I don't like about that is how it doesn't close to the next that way. I may leave mine this way or maybe make it out of foam and cover it, we'll see. I'm trying to make them look more like dolls that stepped out of a box, very clean, polished and stylized.
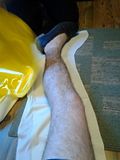
Boot covers....oh boot covers... :confused
You works so well and this girl and this girl have a such a great tutorials but I still tried to take a short cut. Folks, don't take the easy way...it ends up being the painfully, mind-numbing dumb way. Garrick's boots I made completely from scratch and was very happy with how they came out. I only have to re-make them because I didn't wash his body suit before he wore it (DUMB!) and it bled onto the yellow and stained it.
I used some pirate boots that we had laying around and cut them down to the weird dude mary-janes you see in the far left picture for the base soles of the boots. I did the Monarch's toe curl (my favorite part of these!) and I gave them a pointed top to match mine to create more visual interest and added style.
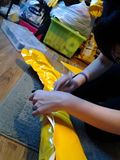

Mine were a different story....
I bought yellow pvc leggings thinking I would just glue them to the shoe and poke the heel through. Wrong.
I ended up going with wedges so I could wear these for a decent amount of time. You can't use that method for wedges. Also stupid to change the shoe after you have already ordered your fabric thinking you were going to make it another way. Did I mention not to take the easy way out on anything?! I didn't buy enough fabric to make mine from scratch....so I had to get creative...
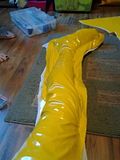
I sewed mine and then realized I had to make the thigh part bigger since I didn't account for the height of the shoe. This I was most proud of. I was able to make a v design on the back of each of the legs to add the needed thigh width but making it not look cobbled together.
This was a wasted effort since I ended up needing to add some to the calf because of my giant calves...oh well I tried. 6hrs later... I was done and convinced someone would tell me how awful they looked as soon as we got to the party. They don't look bad from a distance, or really from close up unless you know what you're looking for but they're sloppy for my standards (especially for 6 flippin hrs of work!!) and need to be redone. Also as a note for making boot covers for wedges, only glue the cover to the actual part where your foot goes into for the shoe. Glue the side of the wedge separately. It will look cleaner and fit better in the end. Again, live and learn, I just got more fabric in the mail to re-make them. I'll post pictures on my blog of these updates and more as I complete them.
Now for the fun part. I hand-made Garrick's eyebrows and goatee. I had a few ideas for this but ultimately it came down to time. I ended up using crepe wool and straightening it. I didn't use a flat iron although I hear you can, but I was down to the line on making these and didn't want to destroy my materials. I bought a mustache and goatee that had a lace base and glued the crepe wool to it. I also glued some floral wire in it to hold the shape. I then sculpted them into their proper shape and used some styling products to stick them together without making them look hard and glued. I wanted them to look like hair still.
When I remake these I am going to flat-iron the wool to get it less kinky (it felt like pubes...) and use some more glue to secure it before I start styling them with products. We then attached them with prosthetic adhesive. They held up pretty well for me not really knowing what I was doing so yay, new skill acquired!
I tried something new with my hair. I am all about wigs but my hair cut is nearly perfect for this costume so I did an experiment. I curled the ends of my A-line bob up (it's asymmetrical so one side is longer) and pinned them with bobby pins to hold them in place while I hair sprayed and glued the crap out of them. I let them dry, and they stayed! It was awesome! the longer one got a little lopsided by the end of the night, but I was so impressed I will keep doing this for this costume, it's looked dead-on to the character!
Again, these were awesome costumes and a lot of fun to go to parties in. They held up pretty well after multiple wears and will be ones I think we wear often to cons and the like. It also taught us a lot. Just when you think you know what you're doing, even for a seemingly simple costume, you can always learn new skills, techniques, and better ways of achieving the same end. So yay for learning new things!")
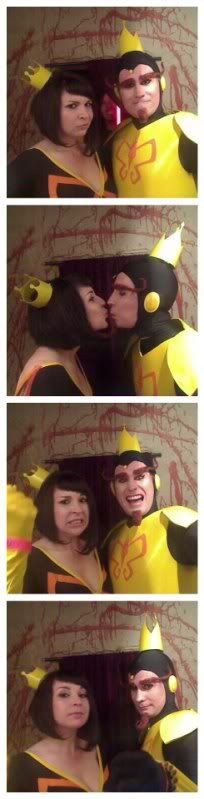
Finished product, the Monarchs!:


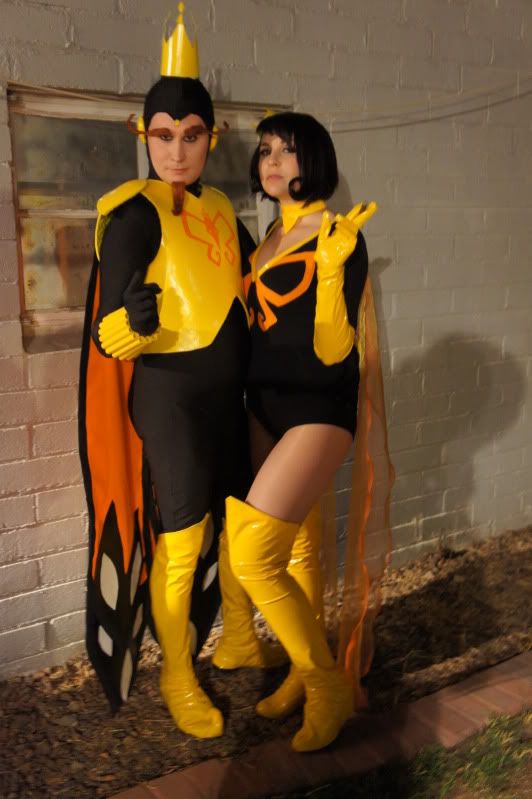
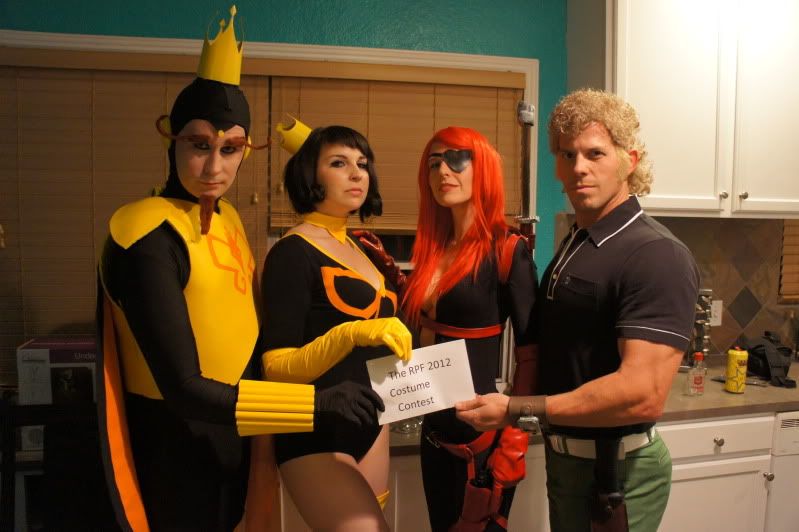
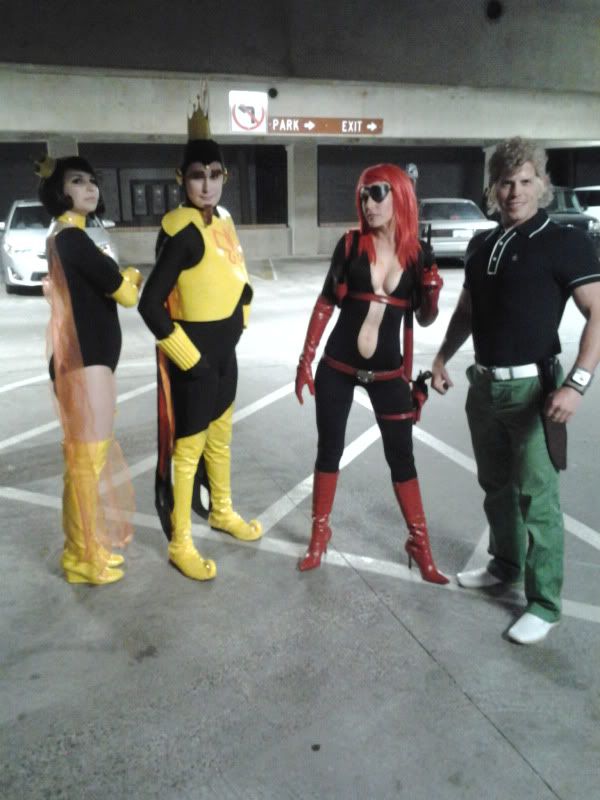
Group shot
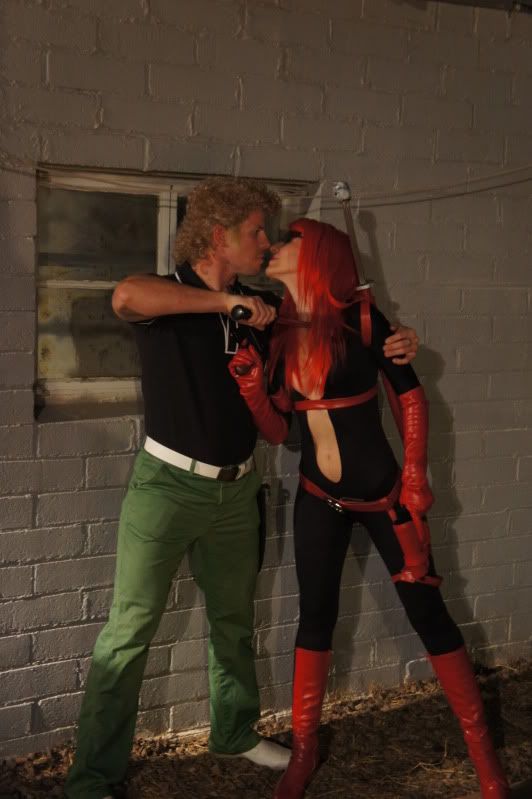
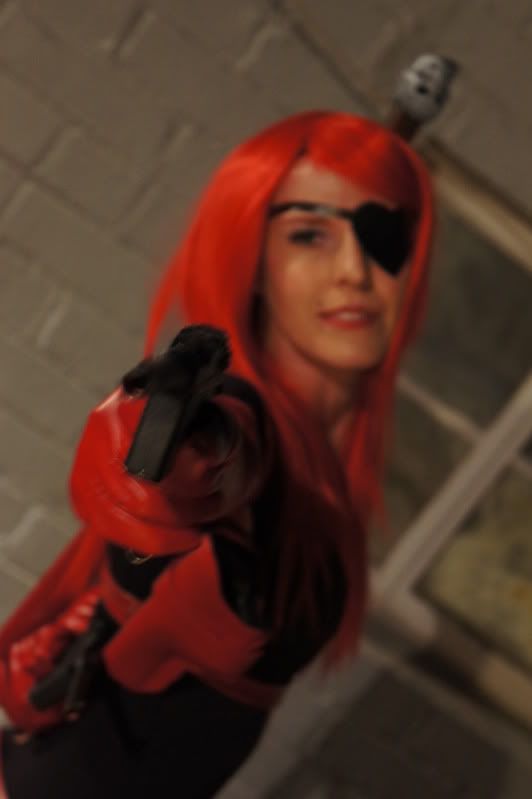
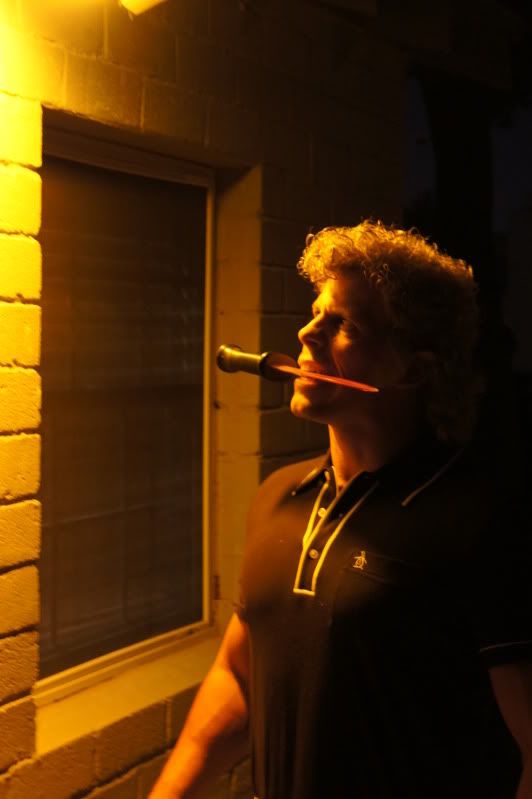
Brock and Molotov (since I have the pictures on my computer, I'll post the finished ones and then they can add their build details)


We (TrooperDudeFace and KnowOne251) decided to do a group costume for Halloween this year with our good friends Deb and Paul. We decided on Venture Bros. since Garrick (KnowOne251) and I had wanted to make Monarch costumes for awhile now and Garrick does the voice so well. We also thought Deb and Paul would make the PERFECT Brock and Molotov thus we set out on our Halloween venture. (ha get it?! Halloween VENTURE...I'm so funny)
This definitely ended up being more work than either of us thought, with many pitfalls along the way that I will elaborate on. All in all, there are a few things I would like to go back and re-do in the very near future, but we got such great responses from people at the parties we went to that these are easily two of our favorite costumes now.
Let's start with the actual design here. The Monarch I decided to stick pretty close to home on his whole design just changing the shape of his face. Since we were hurried I didn't want to mess with prosthetic for this go around. I may try to find a hawk-ish nose in the future for Garrick but for now the eyebrows are enough.

Dr. Mrs. the Monarch needed a little tweaking....I would like to stay in my costume when I wear it so I modified the neckline. I have seen girls build corsets underneath to support everything but to be honest, I wanted something I didn't have to worry about being taped into and falling out of. When I get more of the yellow material in I am going to make it lower cut than it is in the below pictures,( I know, I know, you were all worried, you can calm down now!) but other than that I stayed pretty true to her design.

The very first thing I made were the wings. I had a ton of orange fabric and needed it to be wings so I went to town! I cut the shapes for the two large wings and for the two shorts wings and sewed them up. About 4 yrds total for all of them. I cut out the black wing tips, glued those on, Then sandwiched them in between the 16 yrds of inch black bias tape I sewed along the edges of the wings to give them a more defined comic look. The white details were last, they were cut out of white vinyl and glued on top of the black. Easy Peasy fresh and squeezy.

I then worked on my body suit and Garrick's. I bought a long sleeved leotard (I couldn't help myself, it was so cheap and made in the US!!) I cut out the butterfly design from the same fabric as the Monarch wings (one side) traced a mirror image of it and then ironed on some of the iron on backing to it so it would stay when I sewed it. I had never used this stuff before and it's pretty awesome but in hind site I should have just ironed it to a whole piece and then cut my design out of that...live and learn...:facepalm
Garrick's was just a black spandex body suit we bought to save time that I sewed done to fit him better.
I actually started the butterfly design on Dr.Mrs. the Monarch with some orange bias tape but the color kept bugging me. It was dayglo orange and I just couldn't handle it I wanted the costumes to match as much as possible. I initially didn't want to use the material that the wings are made out of because it frays. But using that iron-on backing and stop fray-stop helped with that.
ugly bias tape:

matching fabric:

I then sewed the yellow vinyl I have cut and made into thinner ribbons so I could edge the neck line. Awesome part about using the pvc was that it held the neckline in place and kept it from stretching bigger than I cut it. When I get more in to re-make the boot covers I'm going to deepen the neckline a little because of this. I wanted to go conservative at first so I could see how everything would "handle." (translation: I didn't have the "deep v bra" or any toupe tape and needed to be able to wear a normal bra under this. :lol)
My FAVORITE part of this was the wing material. This picture doesn't do it justice. It's bright orange with some red and yellow all through it and changes colors depending on how the light hits it. It's perfect and ties all the colors together. It's one of those fabrics that makes me feel like how I imagine a bird gets with something shiny, I just can't stop staring at it! Something like that can be time consuming to sew lol....
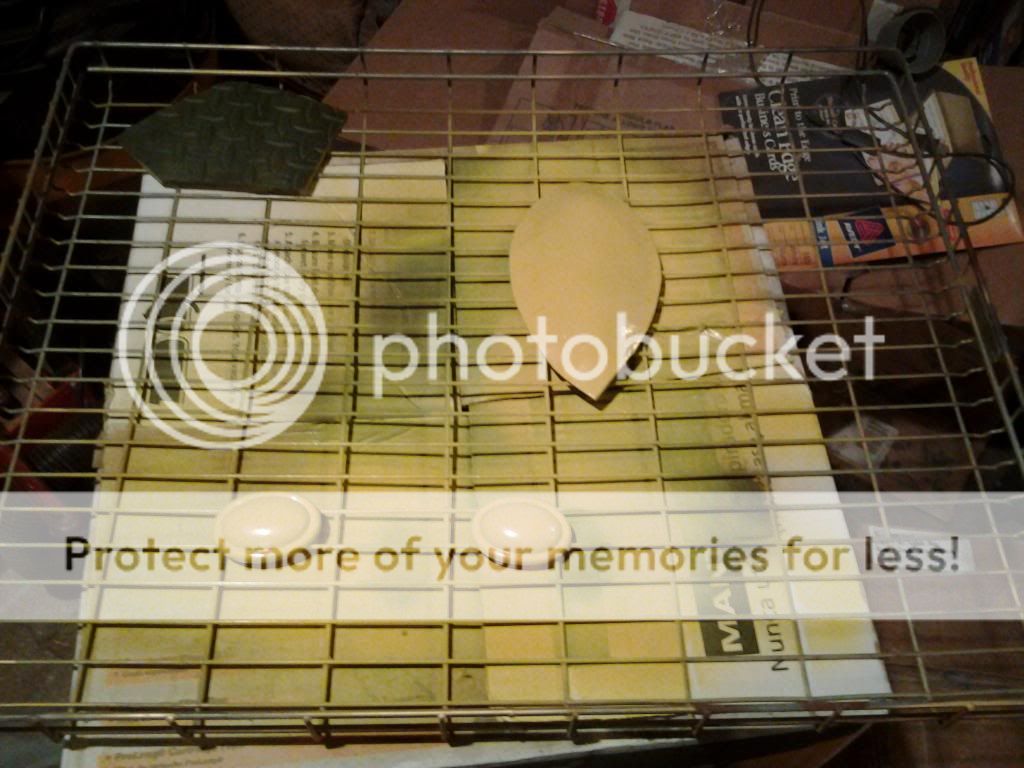
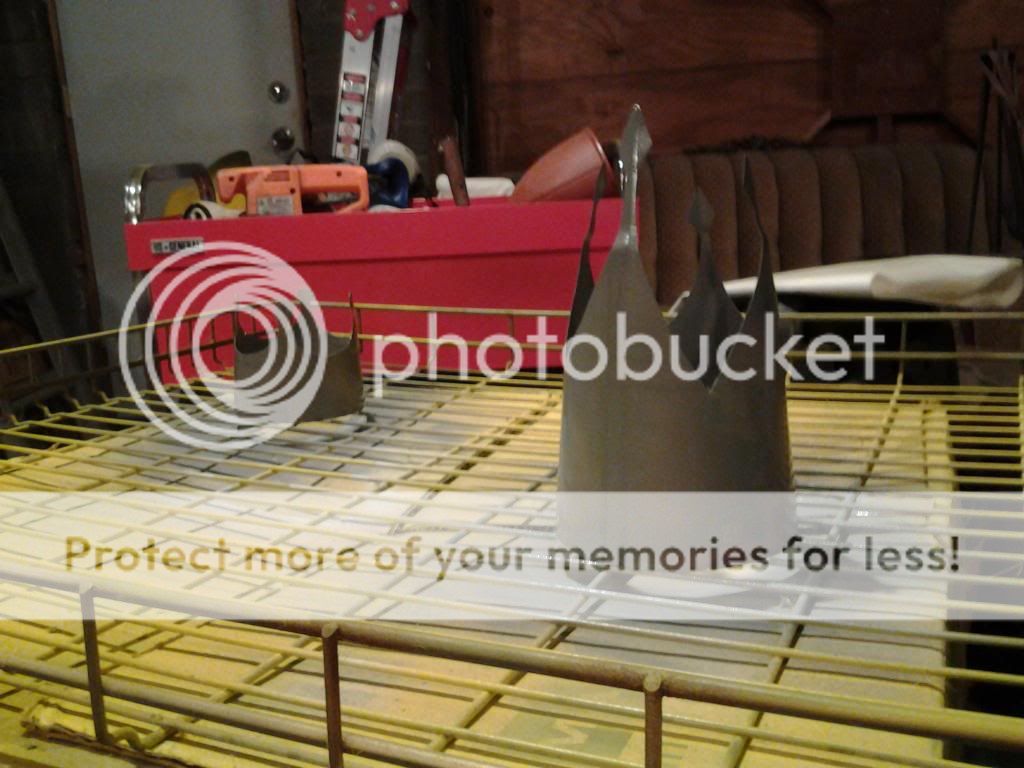
Our crowns were made out of QT cups and have either velcro or hair clippies glued to them. (I'm sure you can guess who's used what). We are going to make molds of them, clean them up and make them more 3D soon.
My gloves were bought and I sewed my collar out of the same material as everything else. I am considering casting it to make it look like hard plastic but the one thing I don't like about that is how it doesn't close to the next that way. I may leave mine this way or maybe make it out of foam and cover it, we'll see. I'm trying to make them look more like dolls that stepped out of a box, very clean, polished and stylized.
Boot covers....oh boot covers... :confused
You works so well and this girl and this girl have a such a great tutorials but I still tried to take a short cut. Folks, don't take the easy way...it ends up being the painfully, mind-numbing dumb way. Garrick's boots I made completely from scratch and was very happy with how they came out. I only have to re-make them because I didn't wash his body suit before he wore it (DUMB!) and it bled onto the yellow and stained it.
I used some pirate boots that we had laying around and cut them down to the weird dude mary-janes you see in the far left picture for the base soles of the boots. I did the Monarch's toe curl (my favorite part of these!) and I gave them a pointed top to match mine to create more visual interest and added style.


Mine were a different story....
I bought yellow pvc leggings thinking I would just glue them to the shoe and poke the heel through. Wrong.
I ended up going with wedges so I could wear these for a decent amount of time. You can't use that method for wedges. Also stupid to change the shoe after you have already ordered your fabric thinking you were going to make it another way. Did I mention not to take the easy way out on anything?! I didn't buy enough fabric to make mine from scratch....so I had to get creative...
I sewed mine and then realized I had to make the thigh part bigger since I didn't account for the height of the shoe. This I was most proud of. I was able to make a v design on the back of each of the legs to add the needed thigh width but making it not look cobbled together.
This was a wasted effort since I ended up needing to add some to the calf because of my giant calves...oh well I tried. 6hrs later... I was done and convinced someone would tell me how awful they looked as soon as we got to the party. They don't look bad from a distance, or really from close up unless you know what you're looking for but they're sloppy for my standards (especially for 6 flippin hrs of work!!) and need to be redone. Also as a note for making boot covers for wedges, only glue the cover to the actual part where your foot goes into for the shoe. Glue the side of the wedge separately. It will look cleaner and fit better in the end. Again, live and learn, I just got more fabric in the mail to re-make them. I'll post pictures on my blog of these updates and more as I complete them.
Now for the fun part. I hand-made Garrick's eyebrows and goatee. I had a few ideas for this but ultimately it came down to time. I ended up using crepe wool and straightening it. I didn't use a flat iron although I hear you can, but I was down to the line on making these and didn't want to destroy my materials. I bought a mustache and goatee that had a lace base and glued the crepe wool to it. I also glued some floral wire in it to hold the shape. I then sculpted them into their proper shape and used some styling products to stick them together without making them look hard and glued. I wanted them to look like hair still.
When I remake these I am going to flat-iron the wool to get it less kinky (it felt like pubes...) and use some more glue to secure it before I start styling them with products. We then attached them with prosthetic adhesive. They held up pretty well for me not really knowing what I was doing so yay, new skill acquired!
I tried something new with my hair. I am all about wigs but my hair cut is nearly perfect for this costume so I did an experiment. I curled the ends of my A-line bob up (it's asymmetrical so one side is longer) and pinned them with bobby pins to hold them in place while I hair sprayed and glued the crap out of them. I let them dry, and they stayed! It was awesome! the longer one got a little lopsided by the end of the night, but I was so impressed I will keep doing this for this costume, it's looked dead-on to the character!
Again, these were awesome costumes and a lot of fun to go to parties in. They held up pretty well after multiple wears and will be ones I think we wear often to cons and the like. It also taught us a lot. Just when you think you know what you're doing, even for a seemingly simple costume, you can always learn new skills, techniques, and better ways of achieving the same end. So yay for learning new things!
Finished product, the Monarchs!:
Group shot
Brock and Molotov (since I have the pictures on my computer, I'll post the finished ones and then they can add their build details)