Page 1 of 2 12 LastLast
  1. DarthVader1's Avatar
    Join Date
    Jun 2003
    Location
    Columbus, GA
    Message Count
    230
    Aug 11, 2009 - "SECRET-SECRET, I'VE GOT A SECRET..." (Pics intensive) #1

    (NOTES -

    1. Topic copied from the TDH forums;

    2. THIS PROJECT IS NOT 100% ACCURATE YET, still in progress and facing modifications in the future after Dragon*Con.)


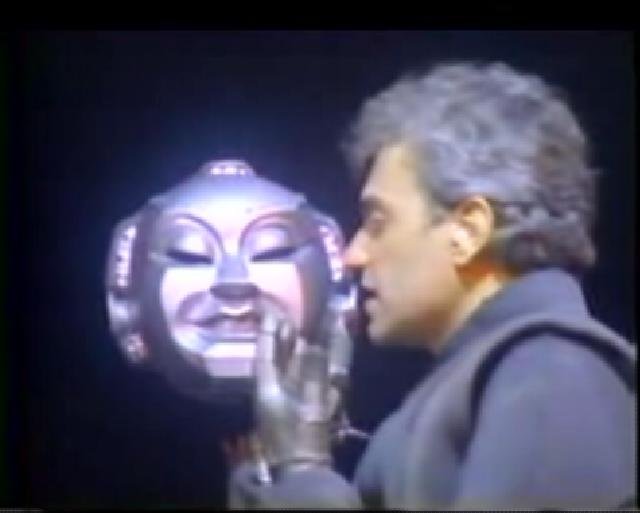
    Well, greetings everyone. I haven't posted in here in a LOOOOONG time, but I've being busy since last year with a project for Dragon*Con originally sheduled for last year, but lack of time and money prevented me of completing the project on time then. Now, I'm in the final steps of finishing it, in which I call it the "SECRET-SECRET" project. No one in YEARS have toppled this project before, so I've decided to embark in an almost two years journey, and celebrating the 25th year since the debut of the video.

    If you've seen my avatar or signature in other forums (if it shows), you'd probably know already what I'm doing so far. Reason was to celebrate the 25th anniversary of the video.

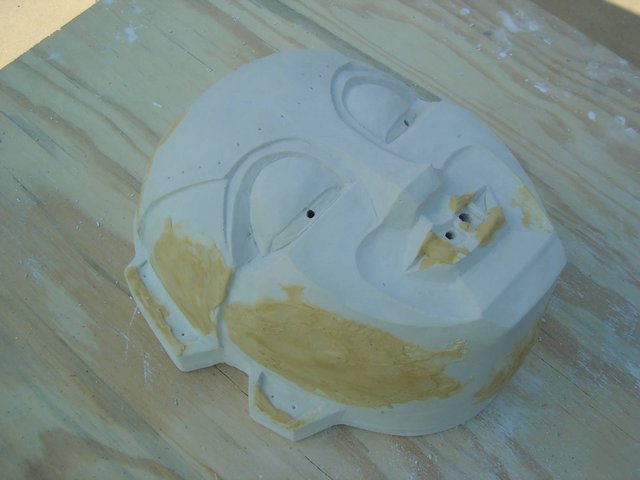
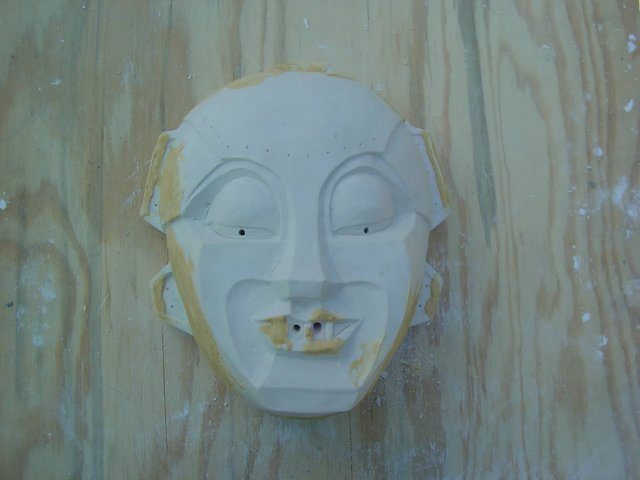
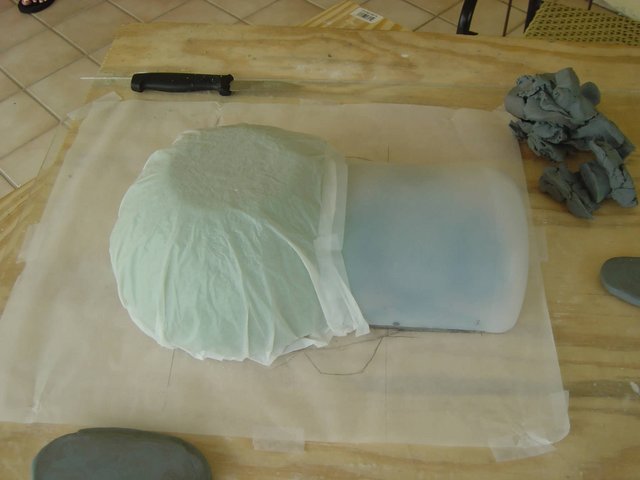
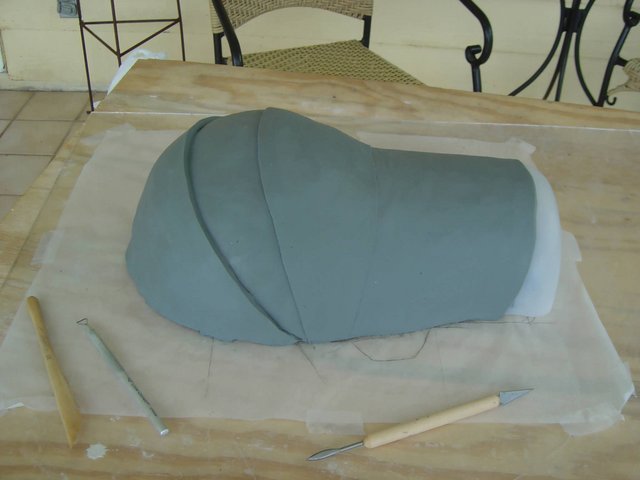
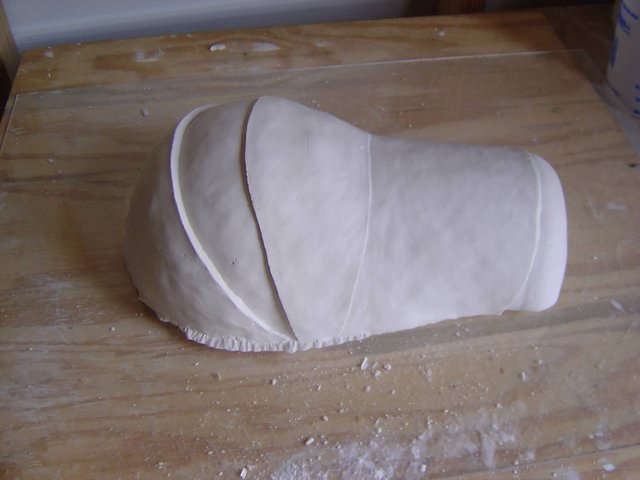
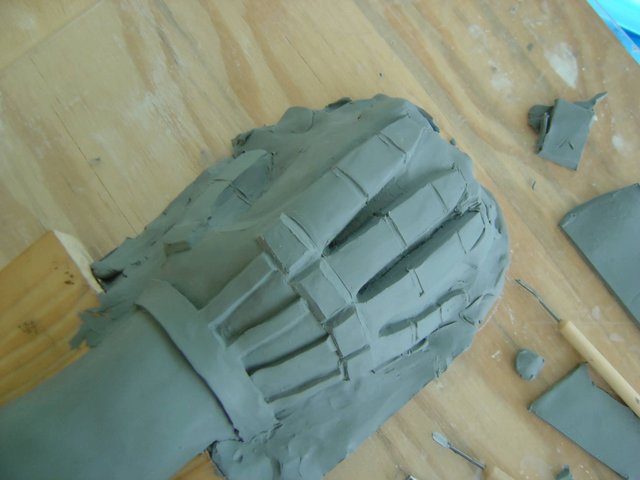
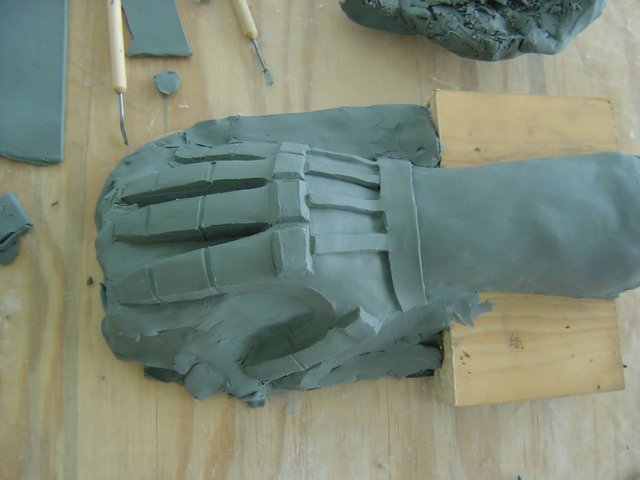
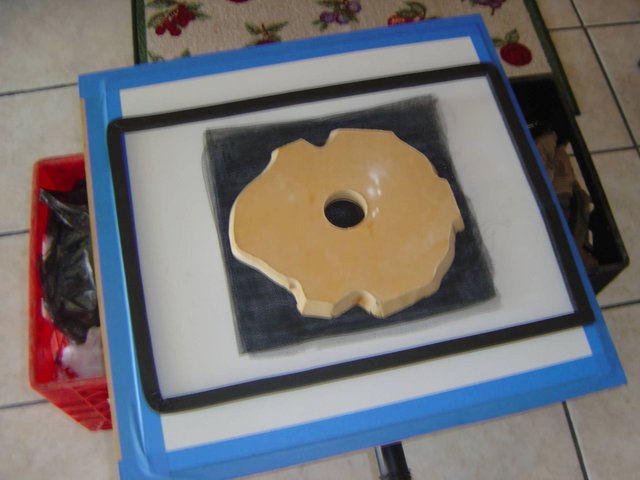
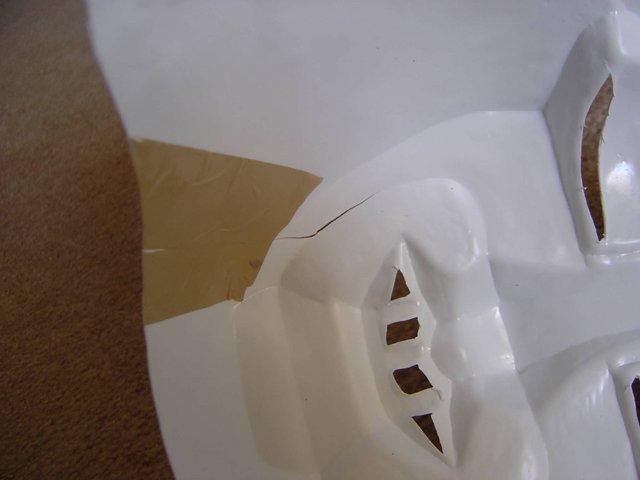
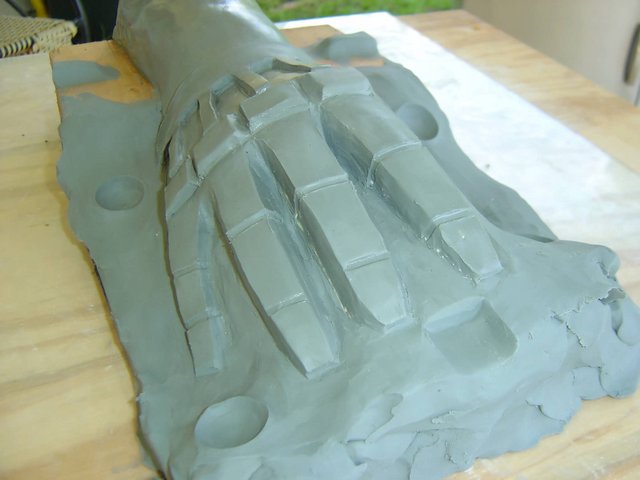
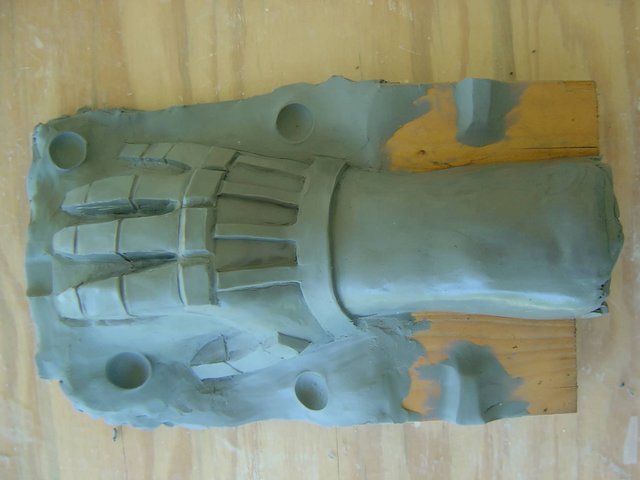
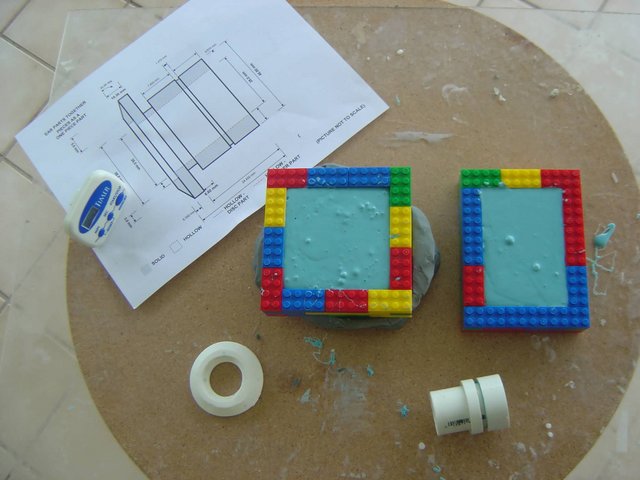
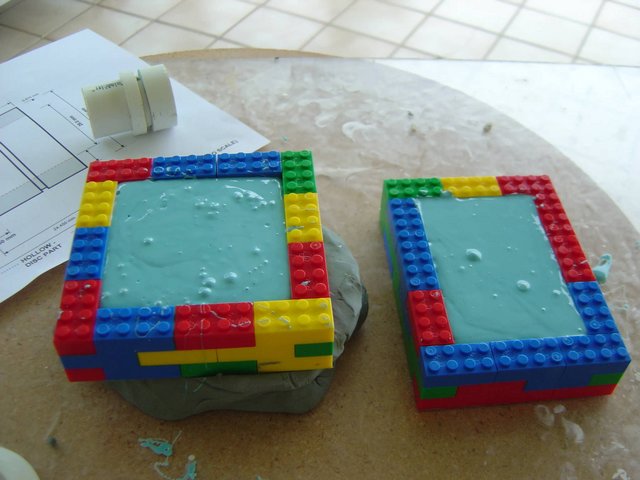
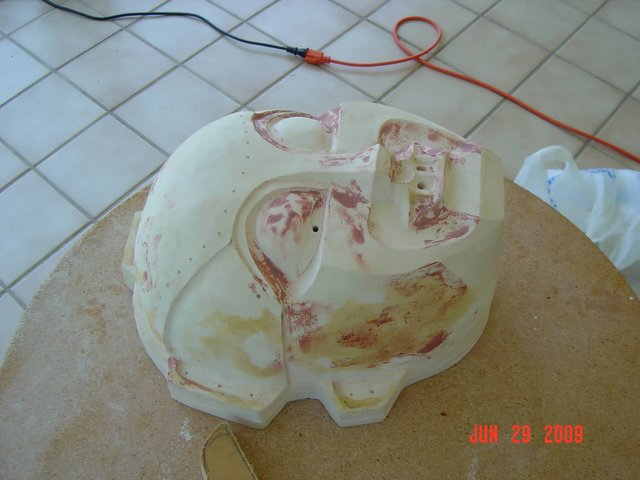
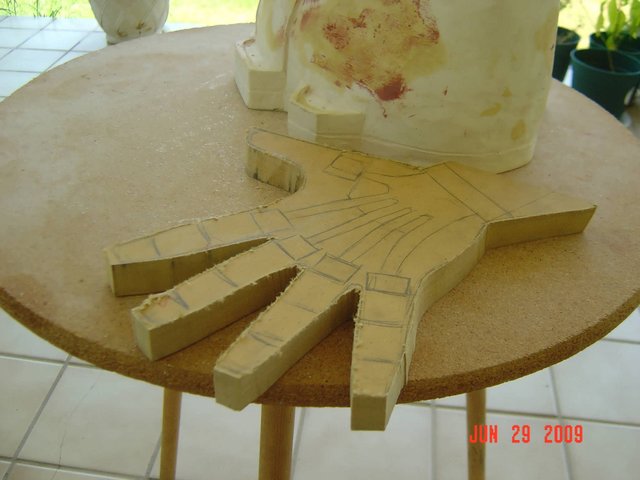
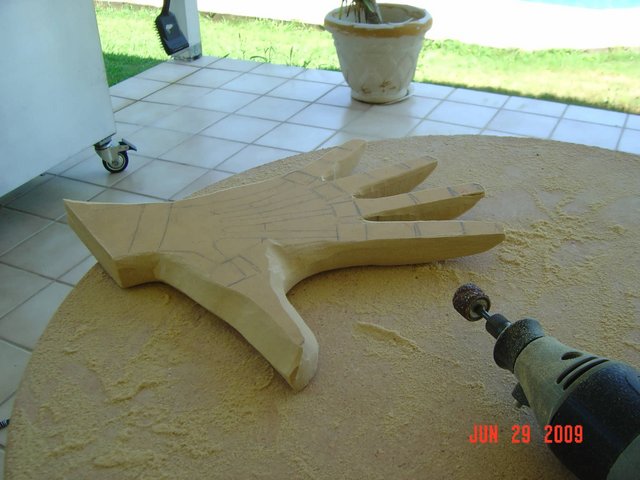
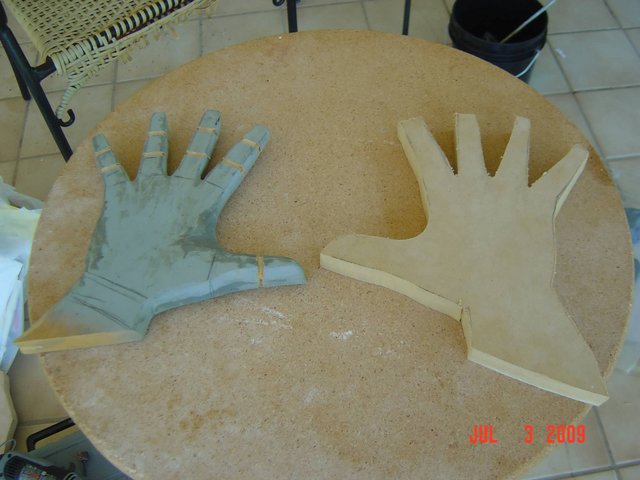
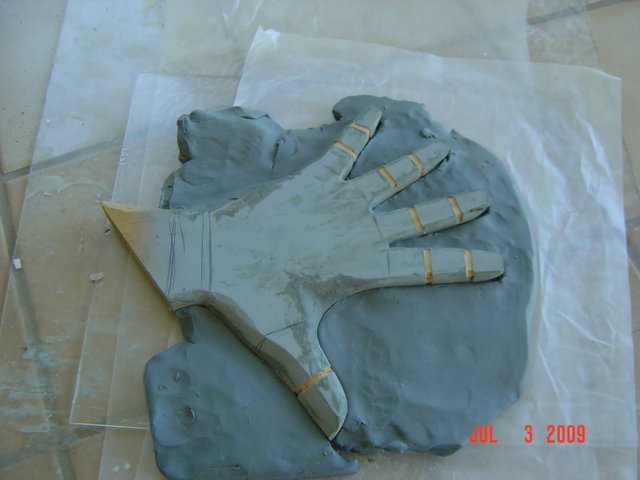
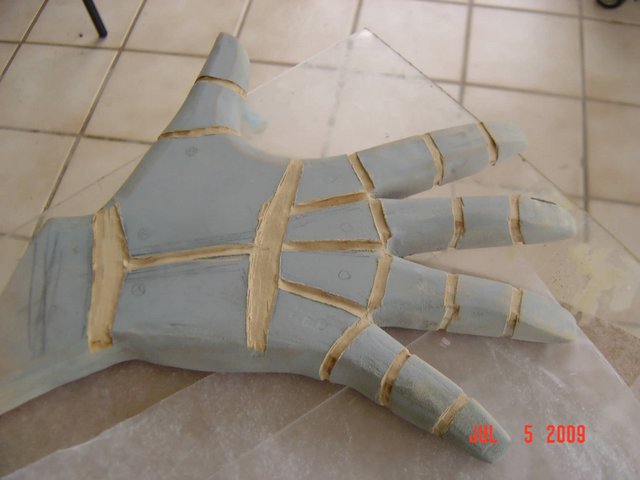
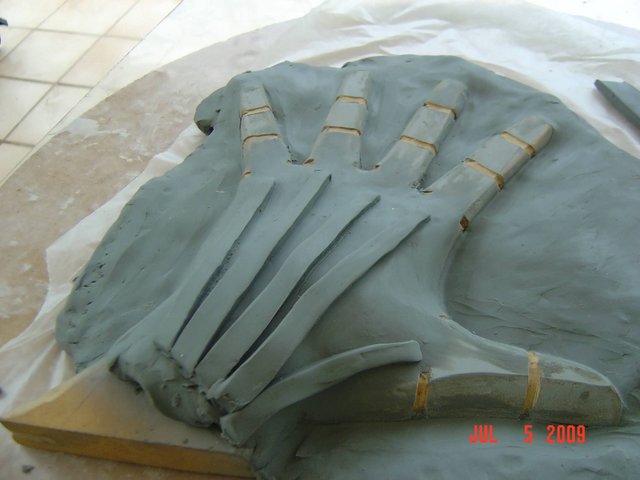
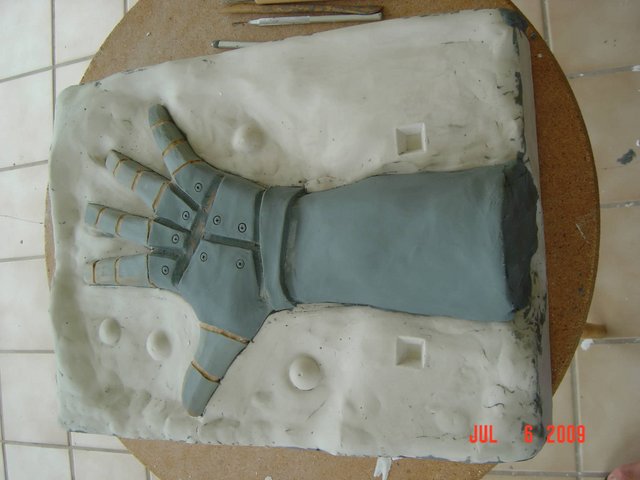
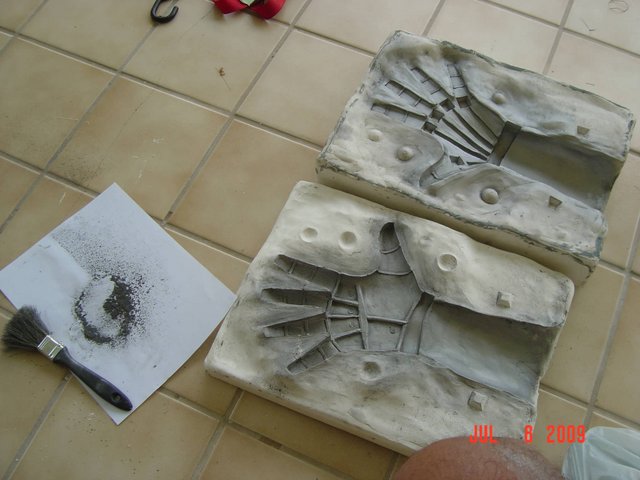
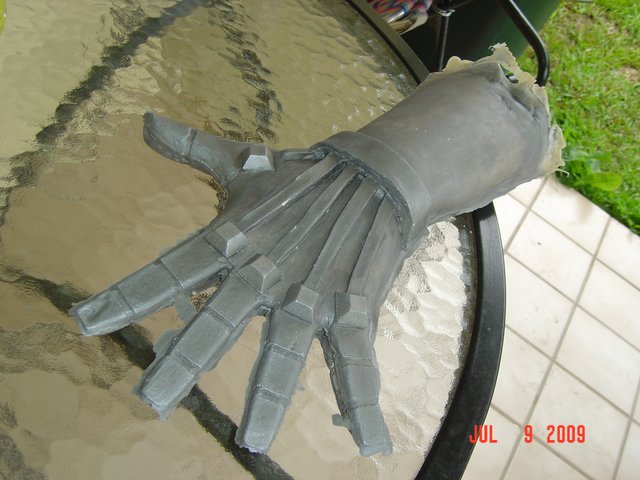
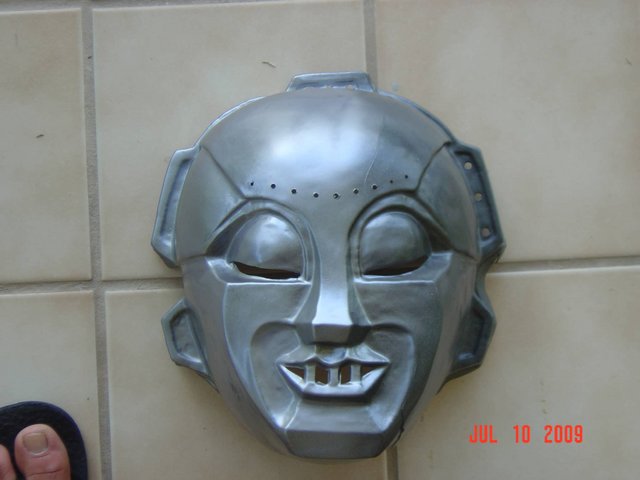
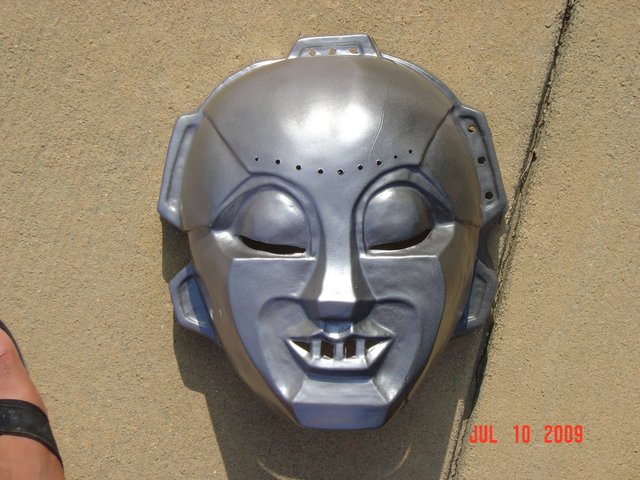
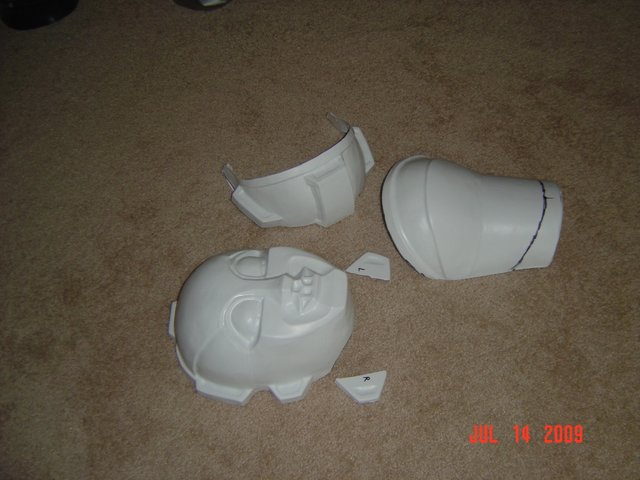
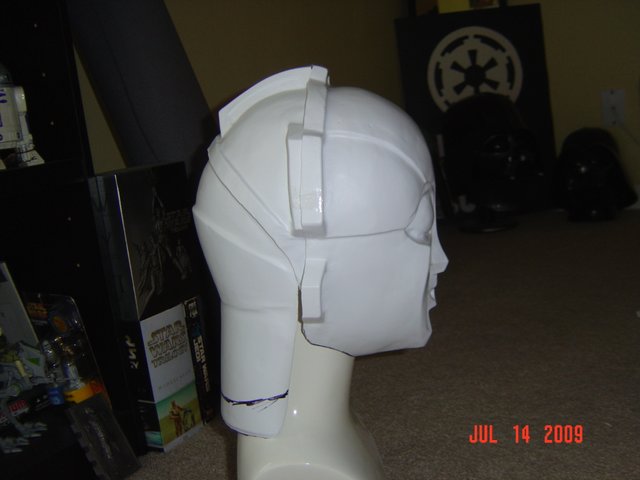
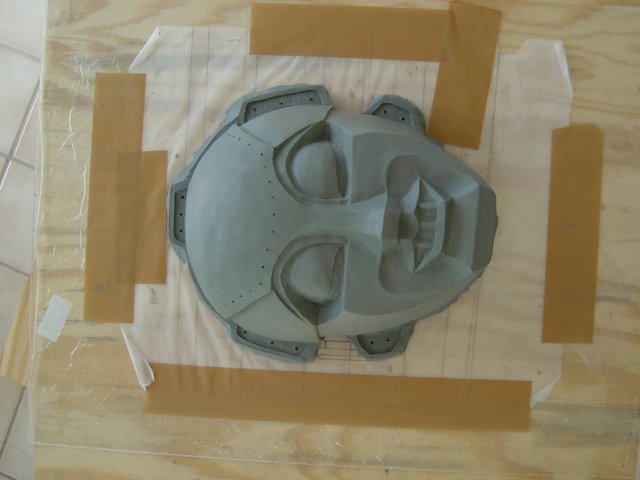
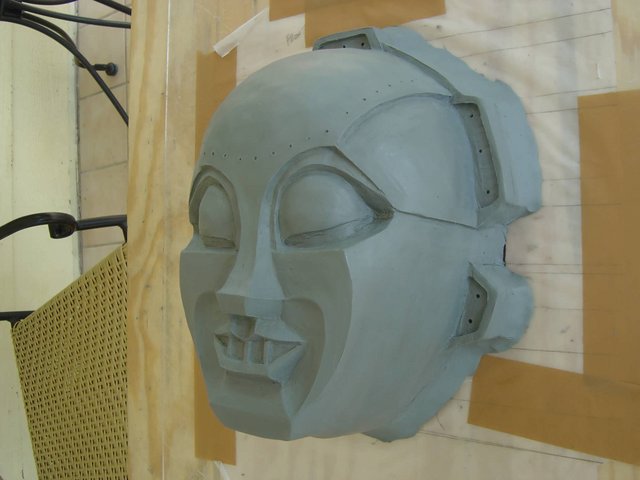
    Here is a pic of the clay sculpture ready to make a mold of it
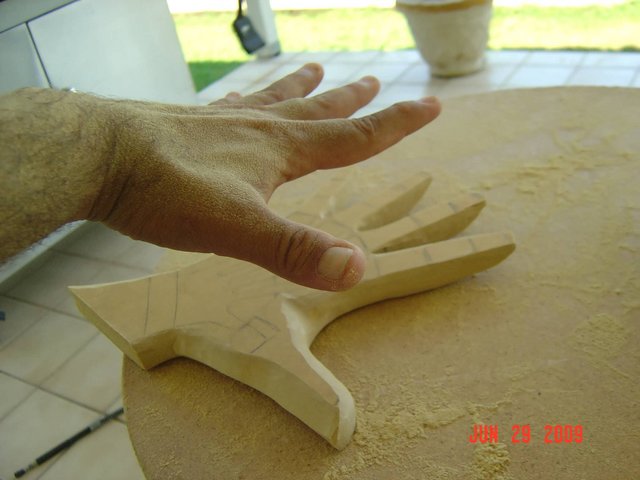
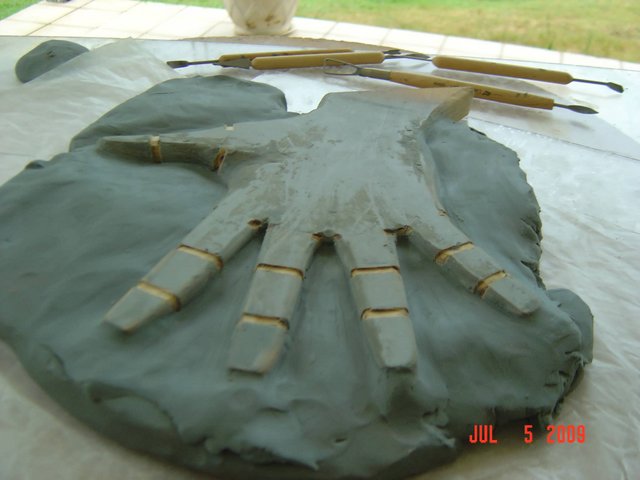
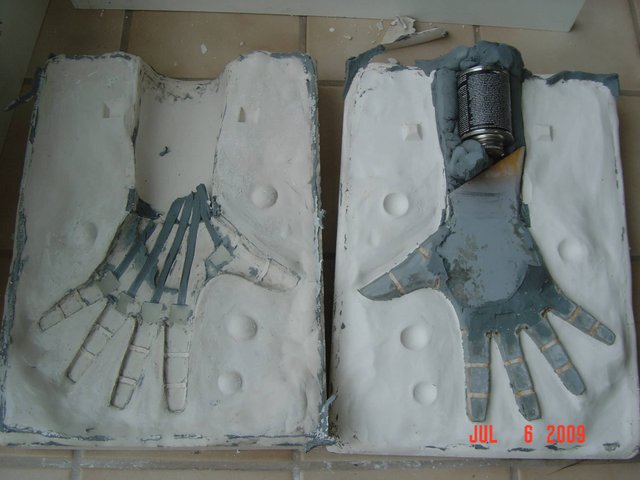
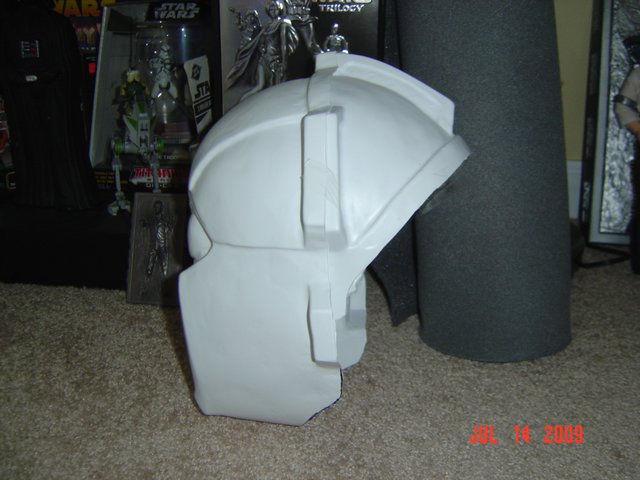
    One side....

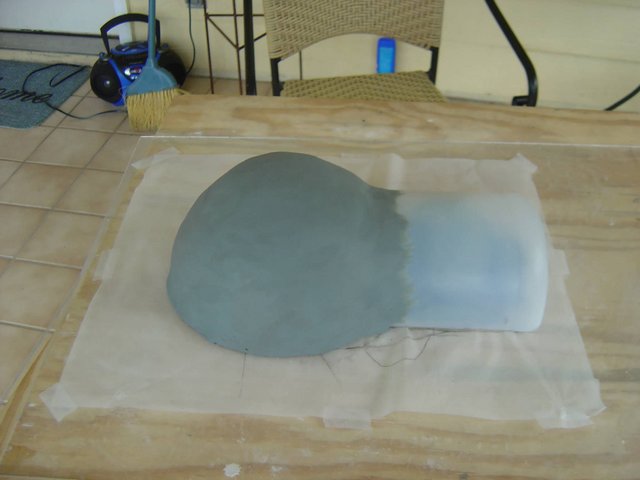
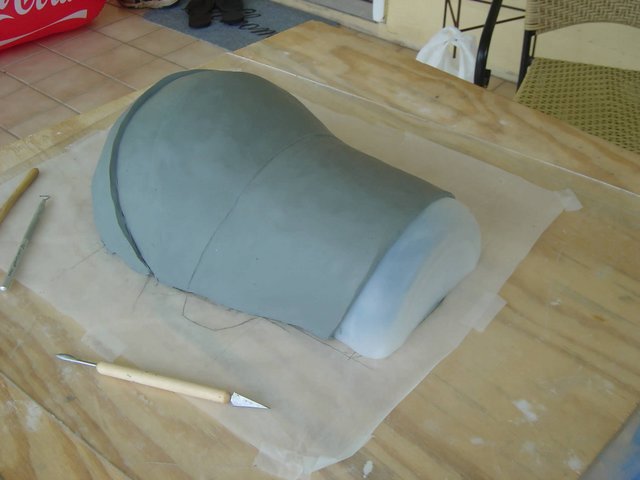
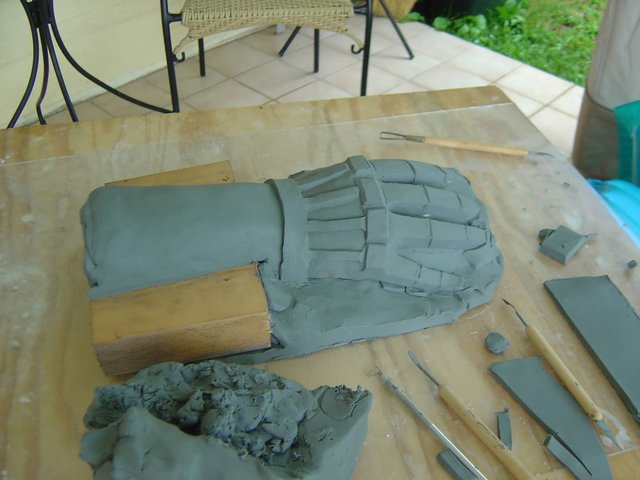
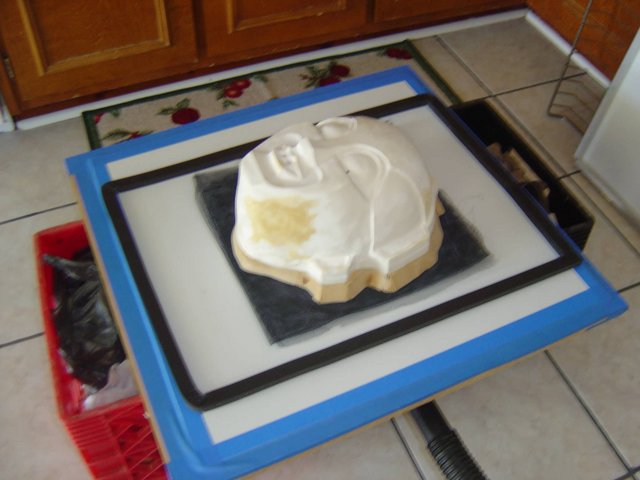
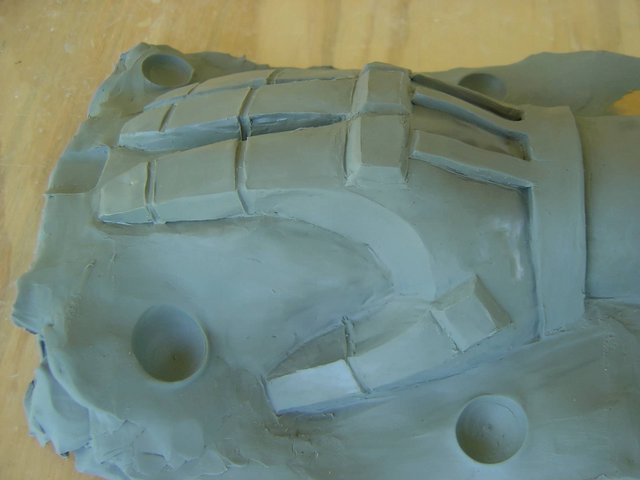
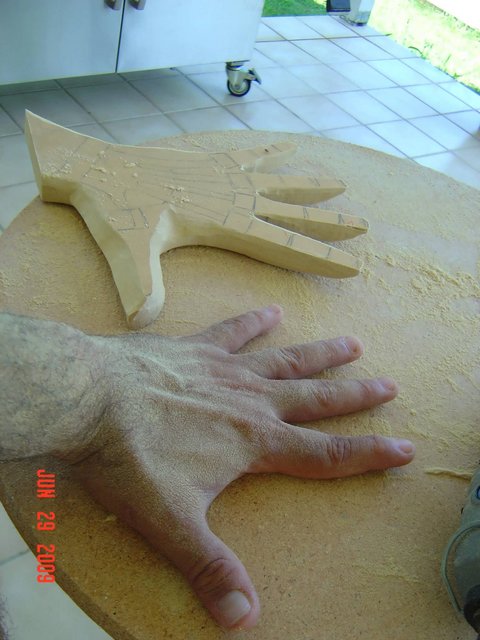
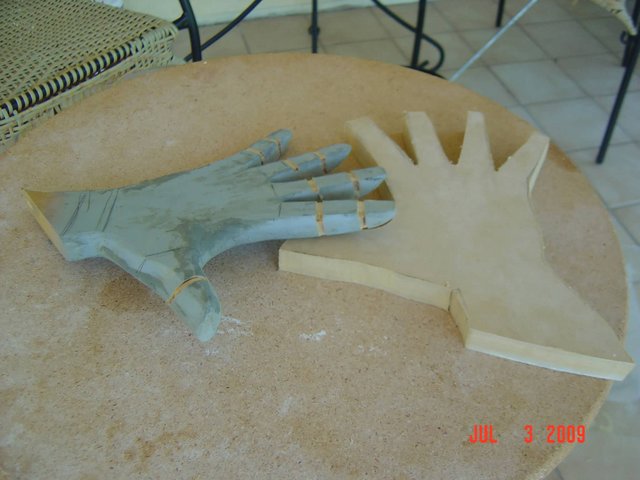
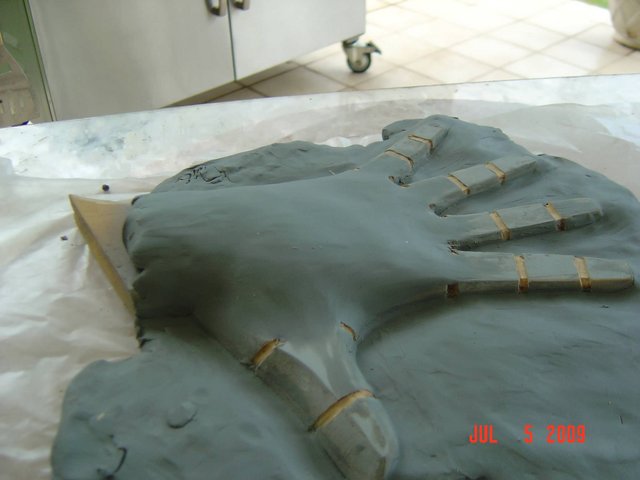
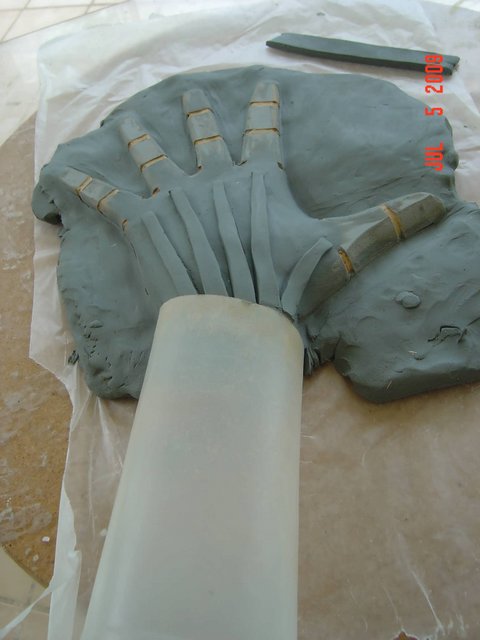
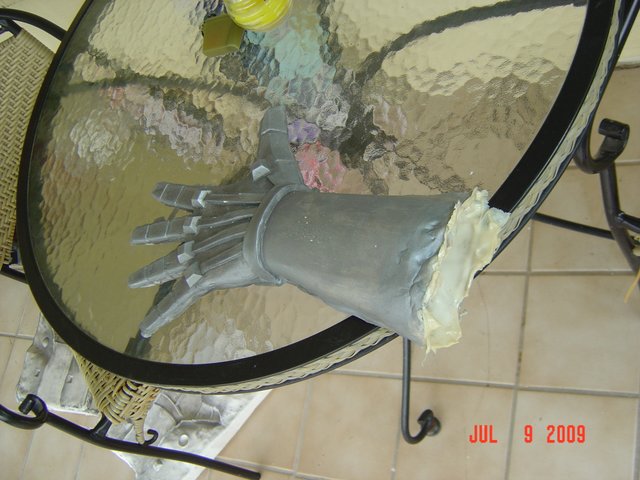
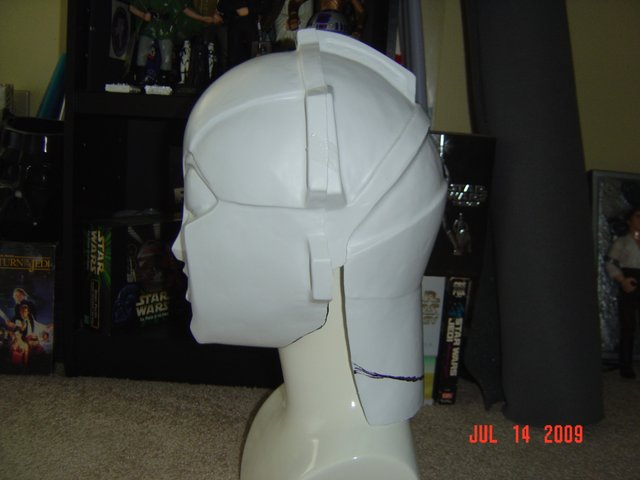
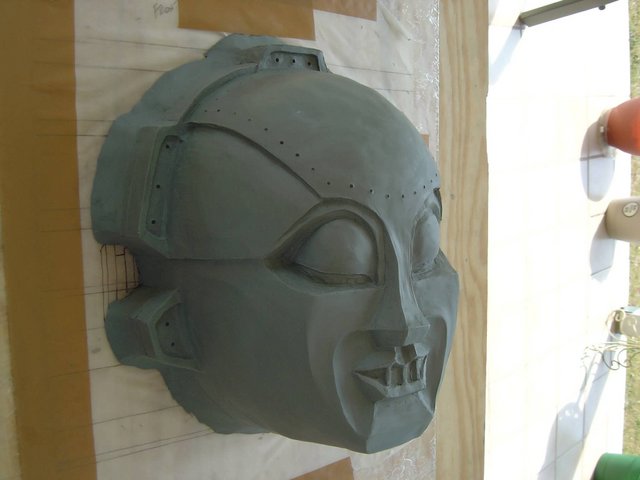
    and the other side.....


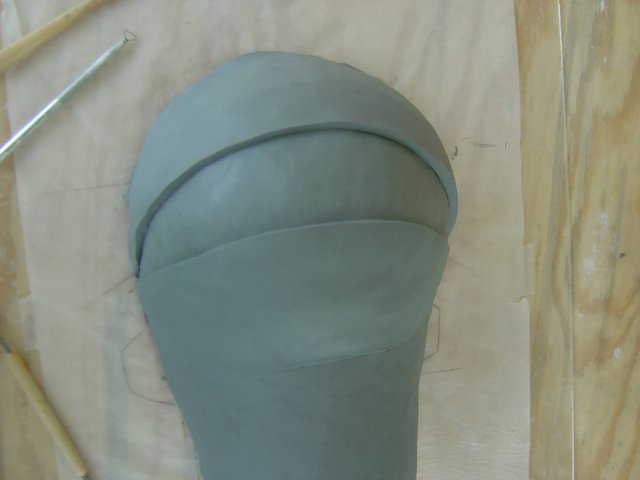
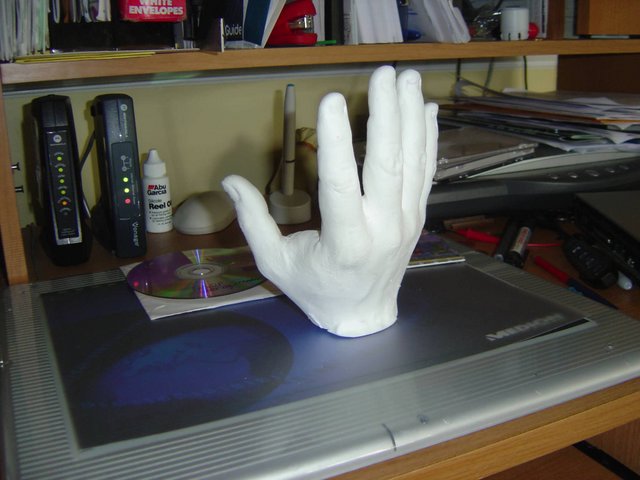
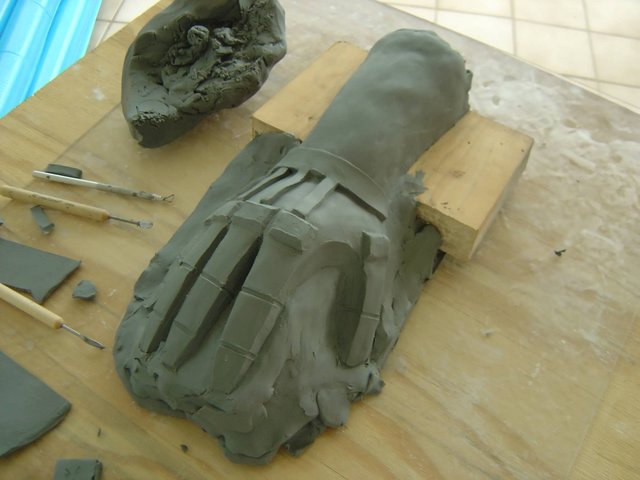
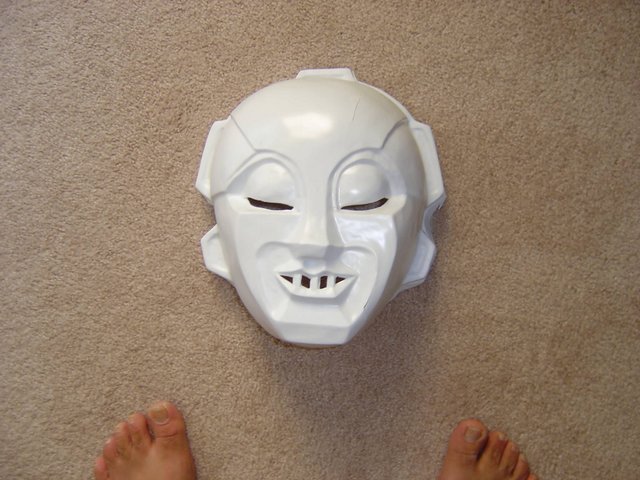
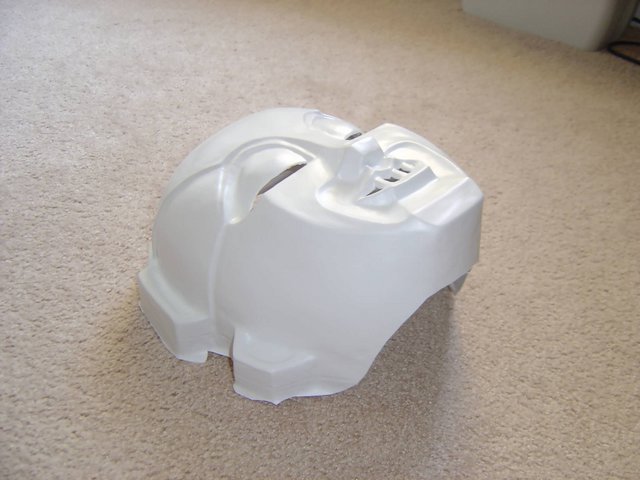
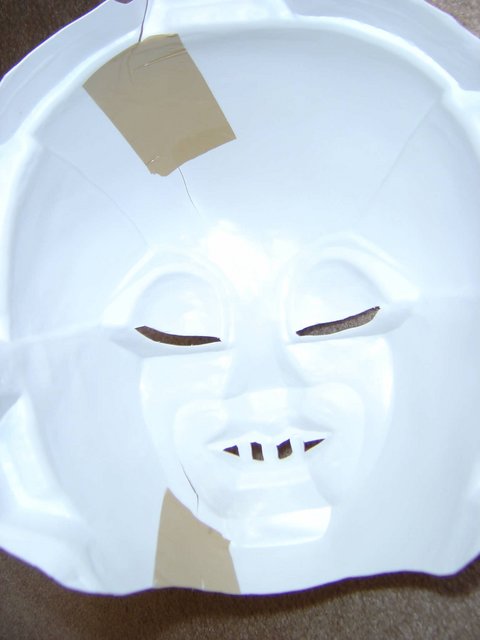
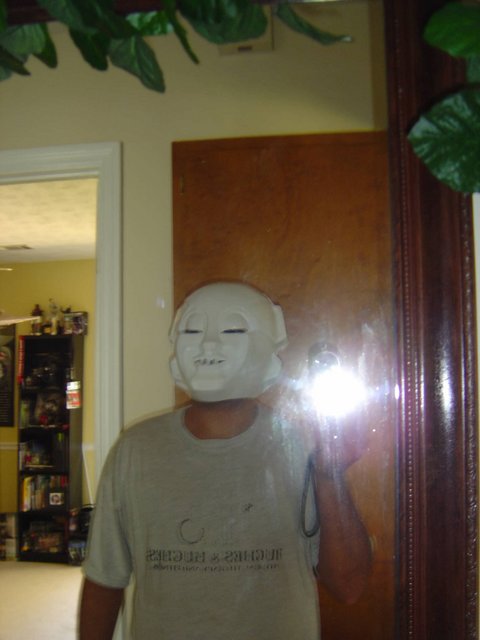
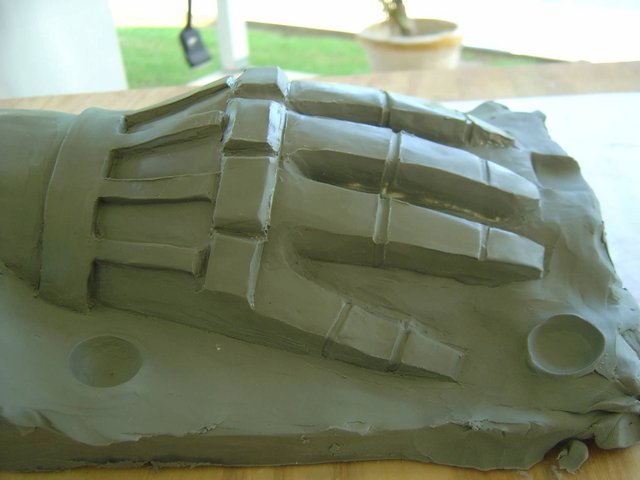
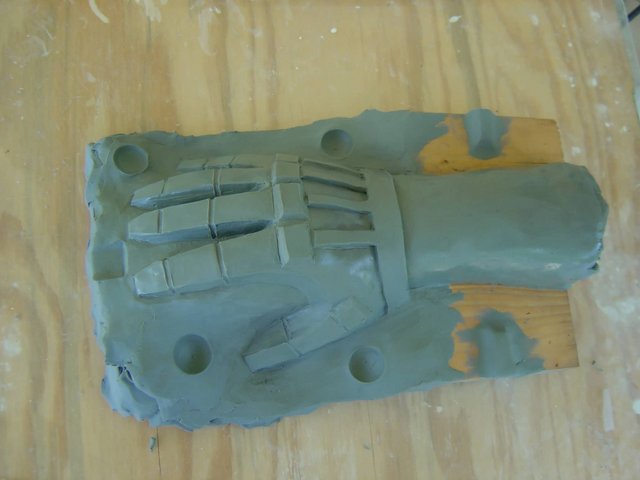
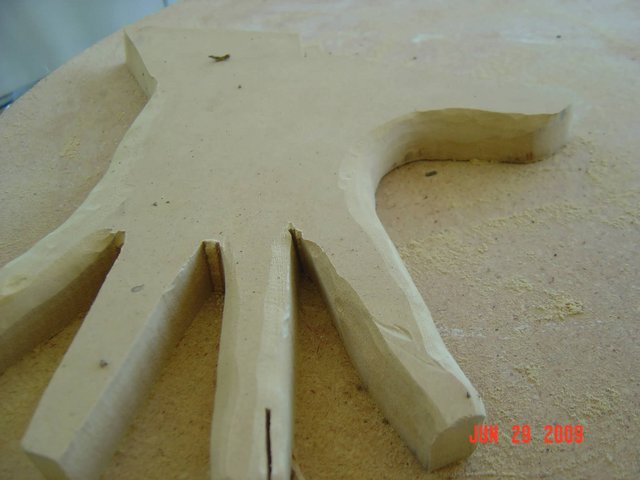
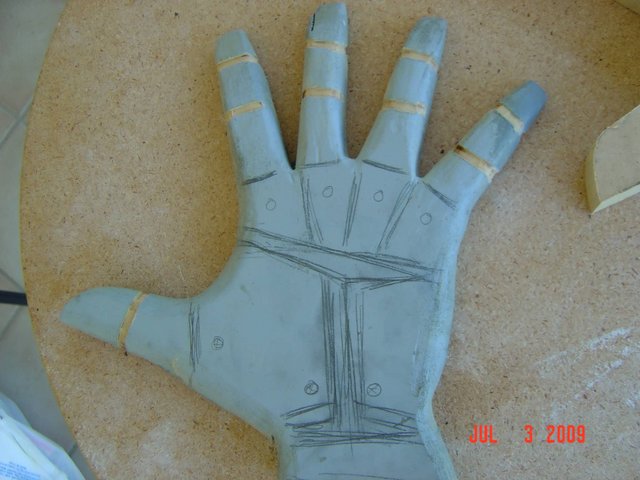
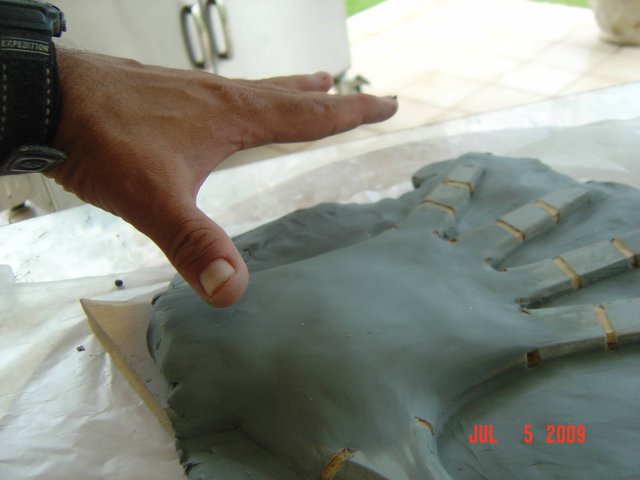
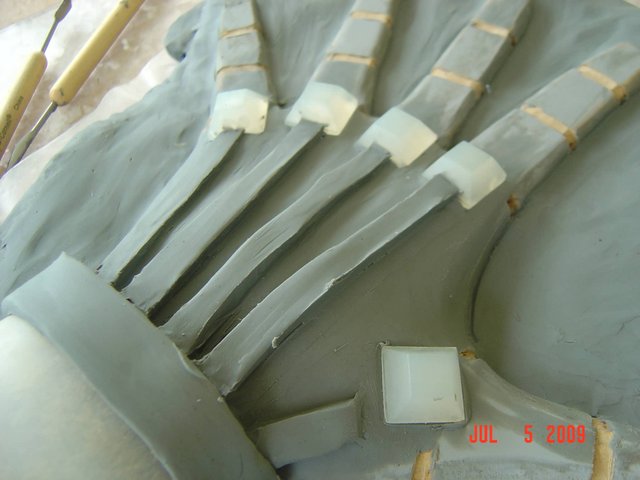
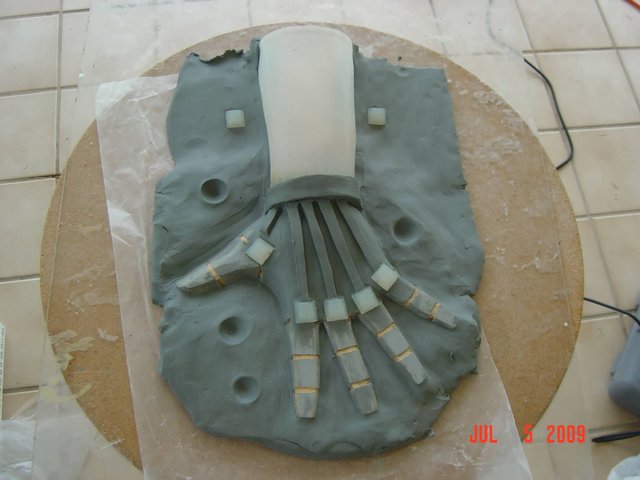
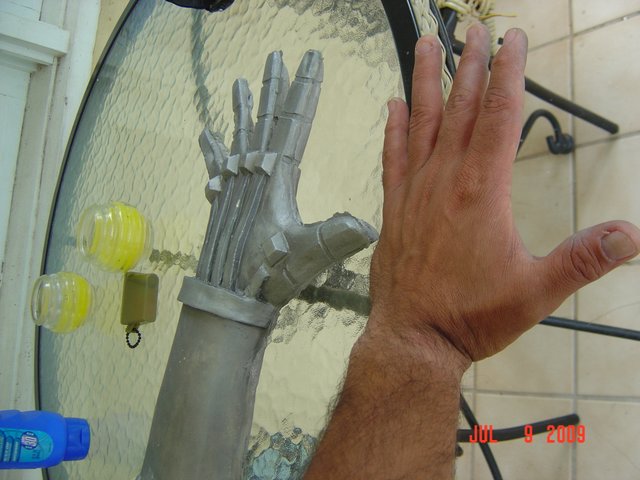
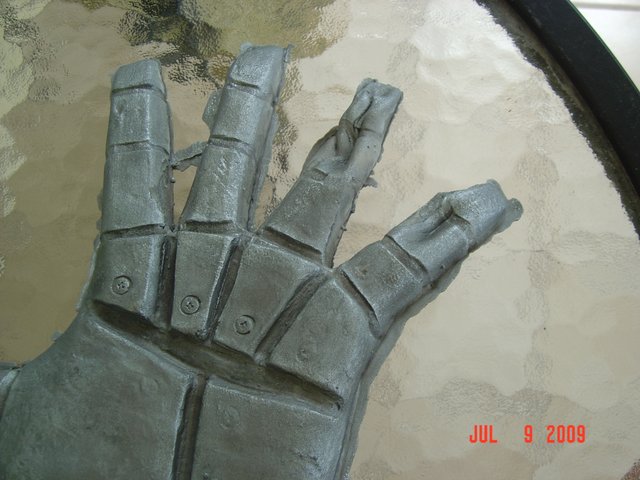
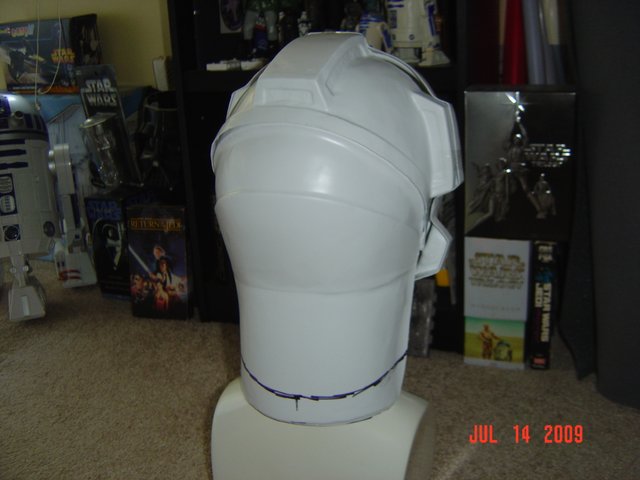
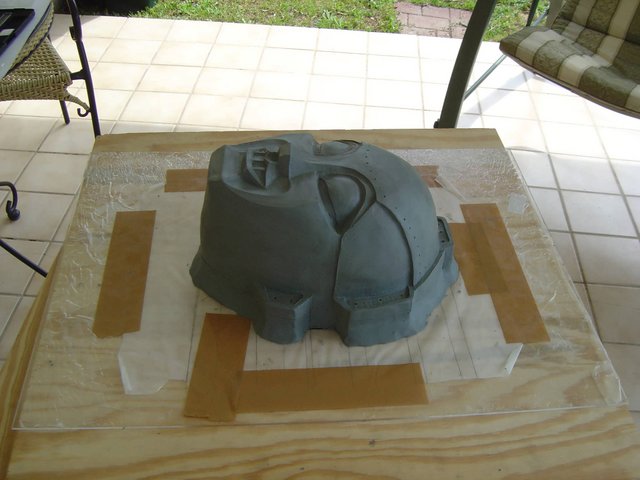
    From the distance, since pics taken at close-up don't look as good....


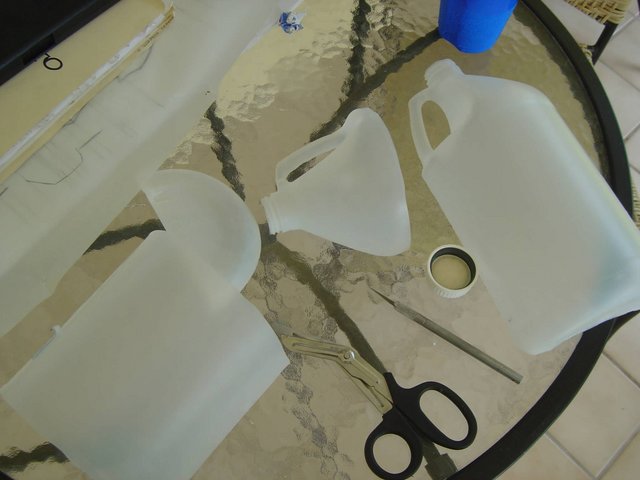
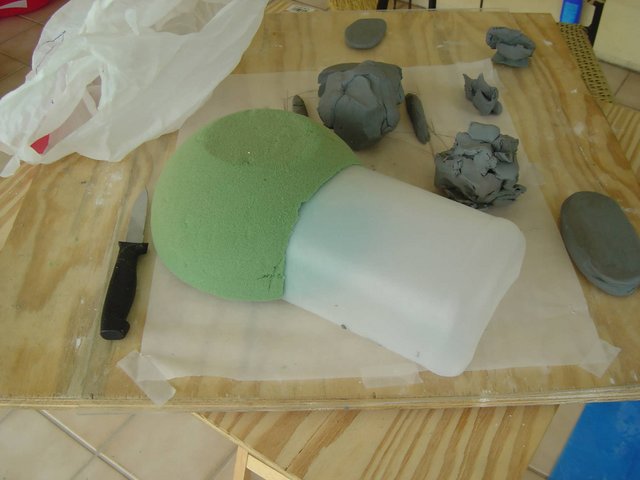
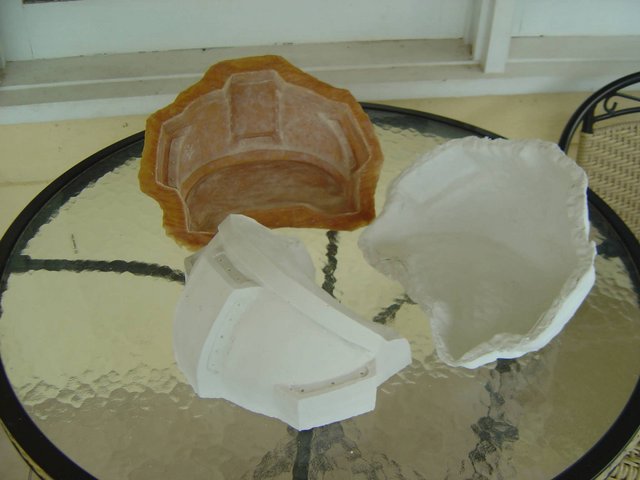
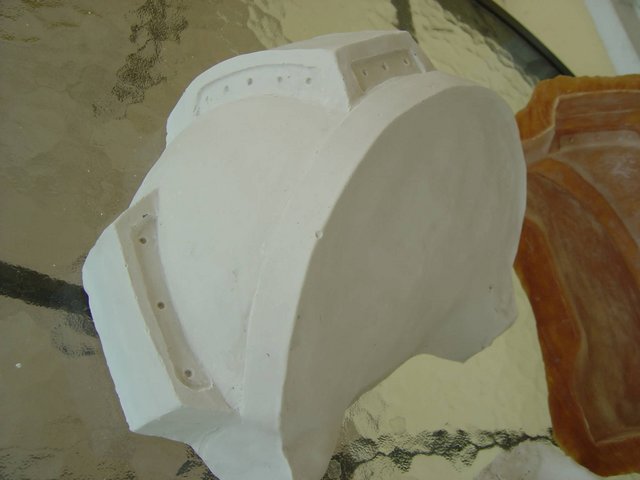
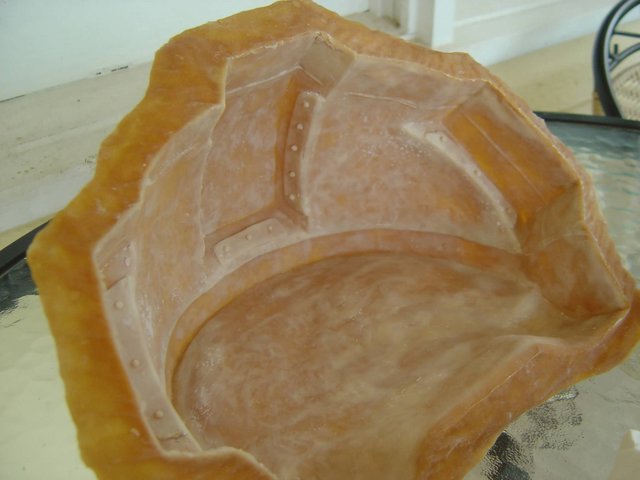
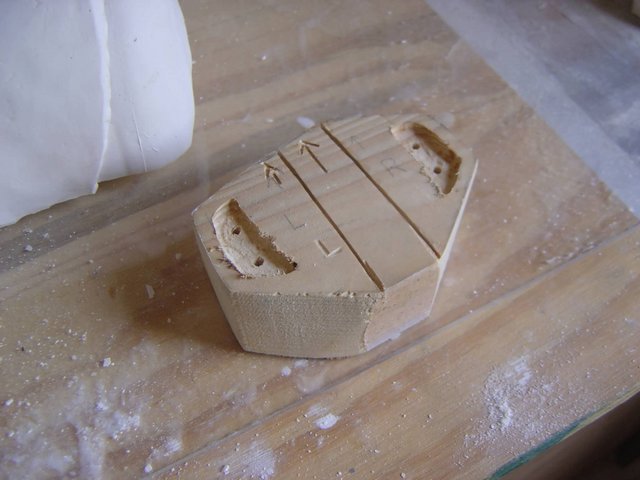
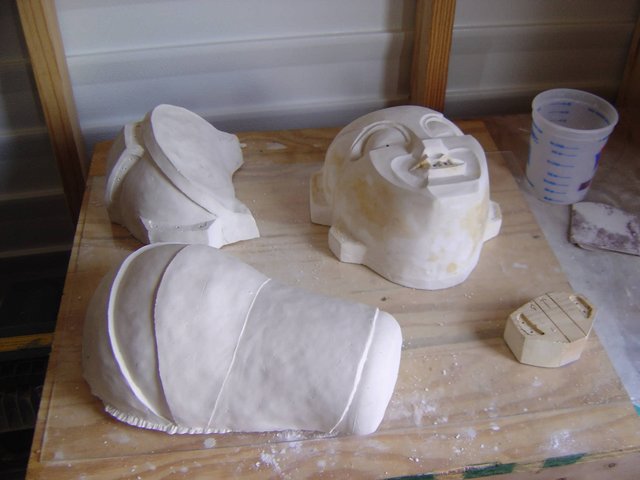
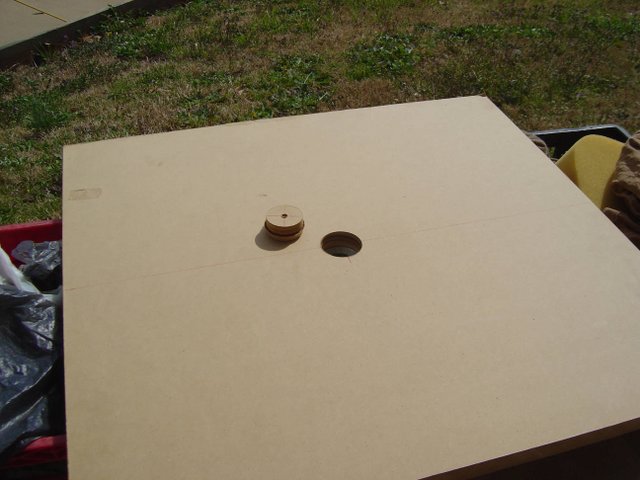
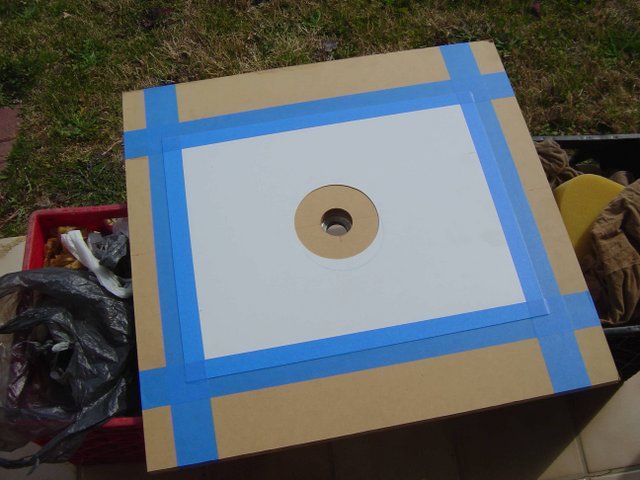
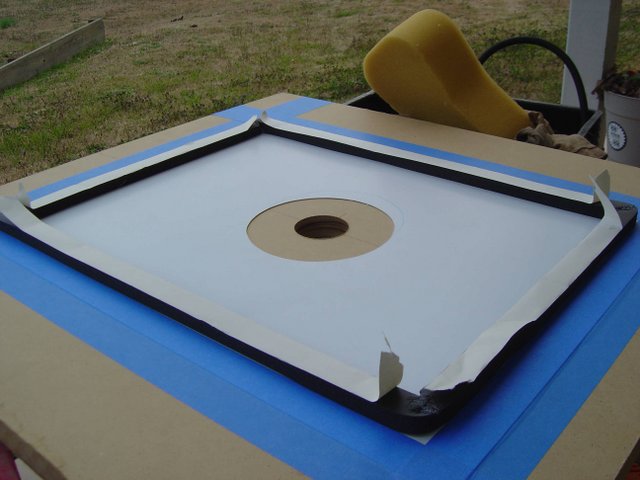
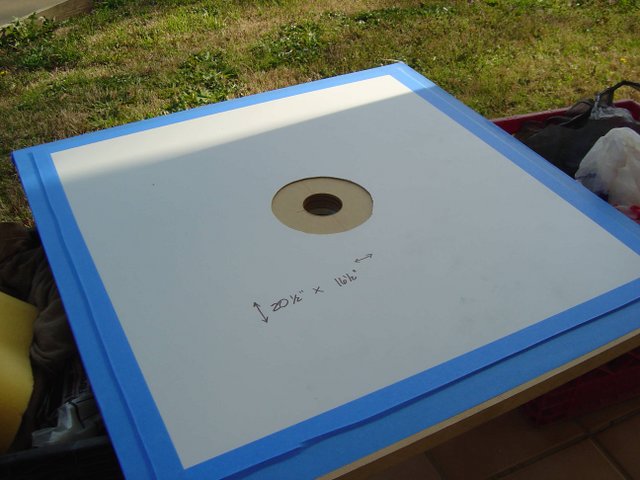
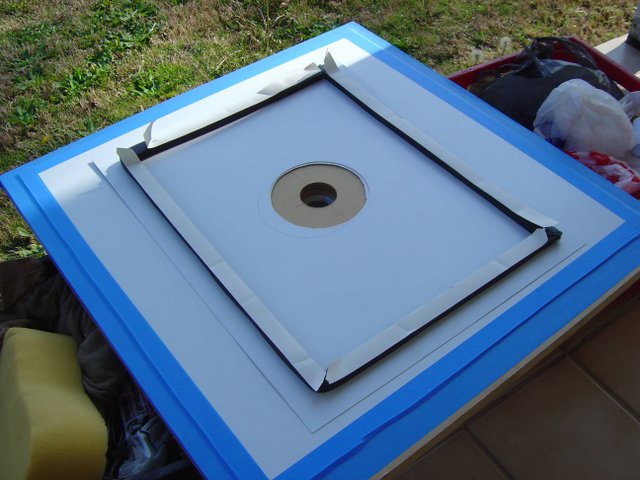
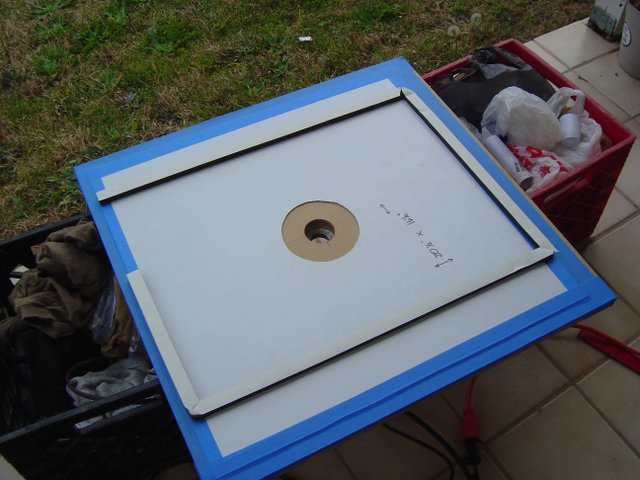
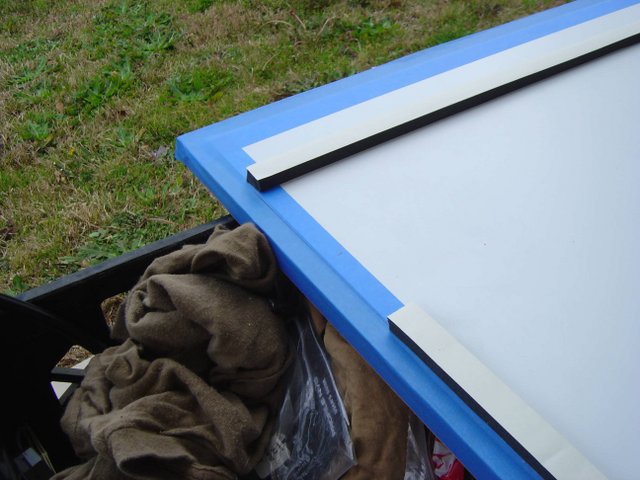
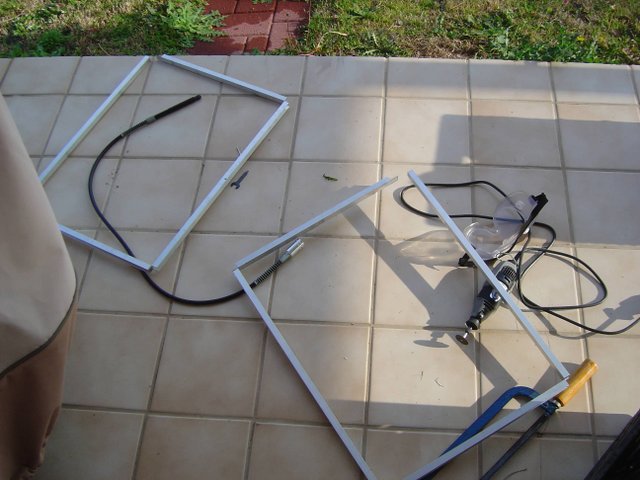
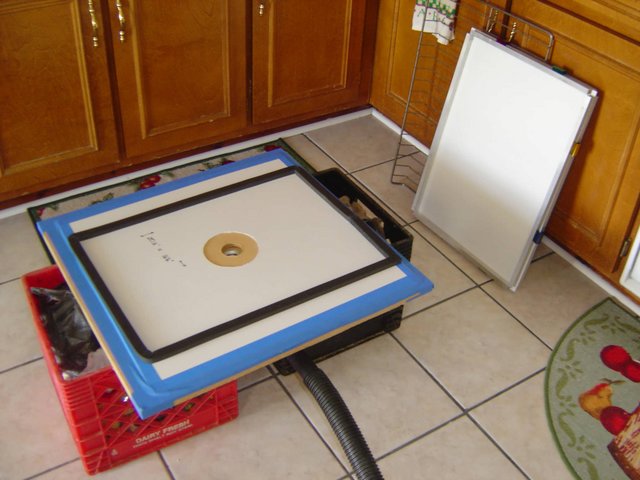
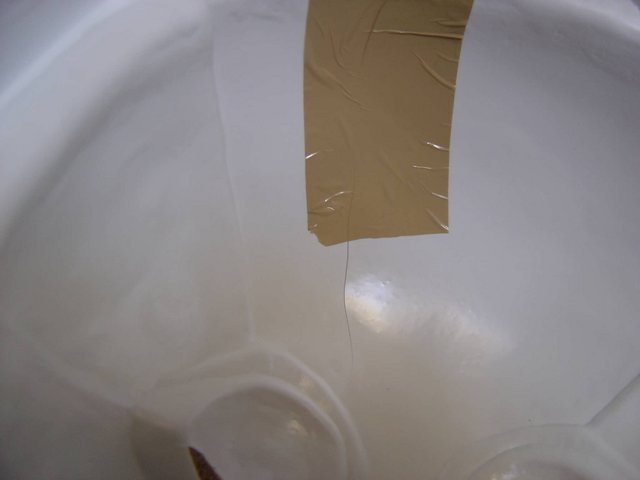
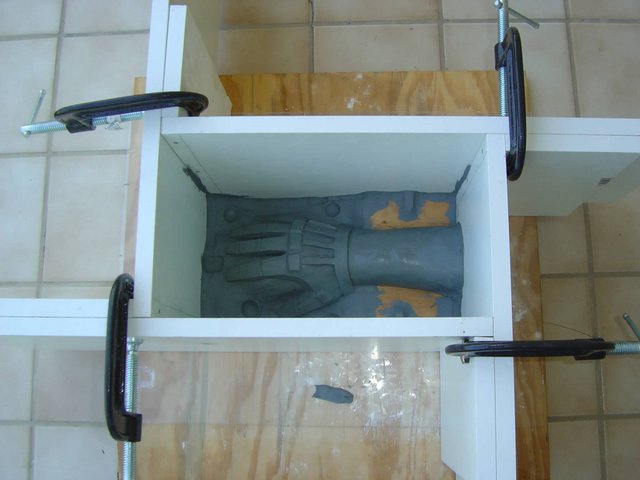
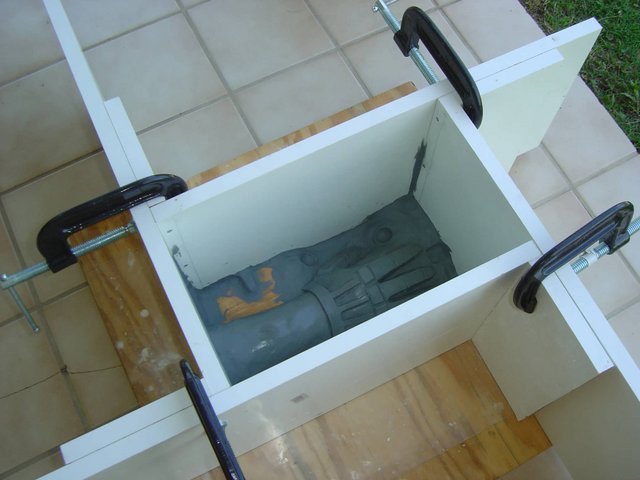
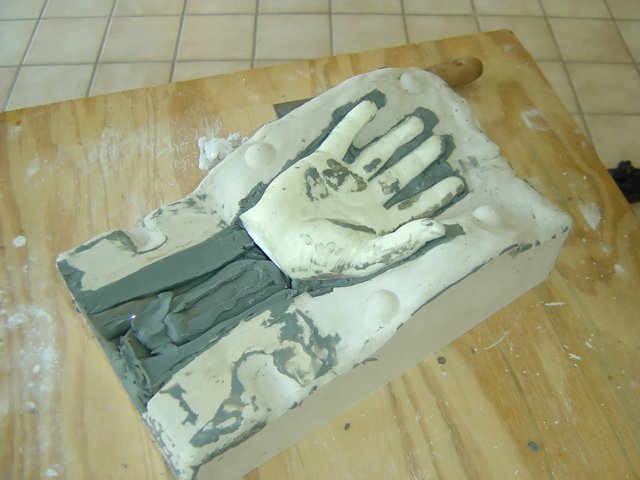
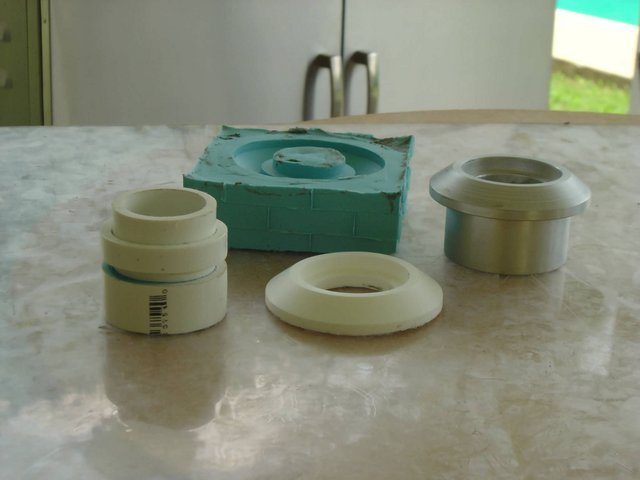
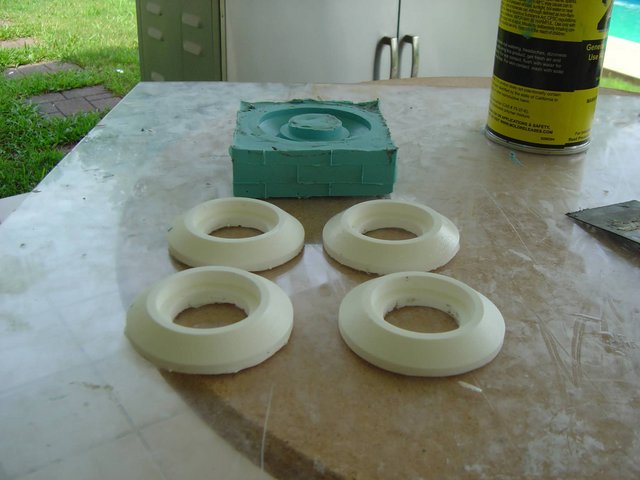
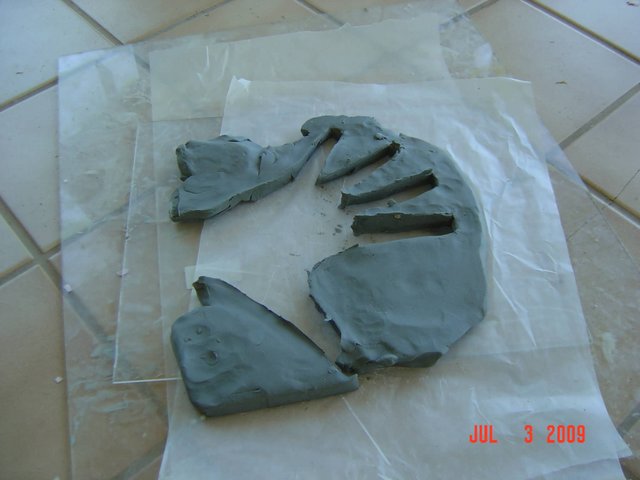
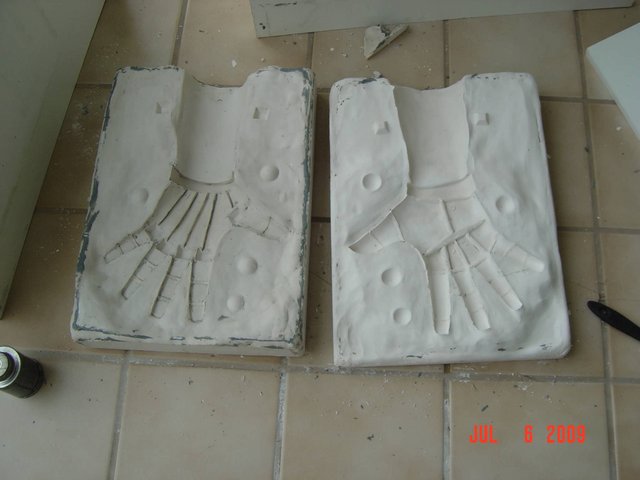
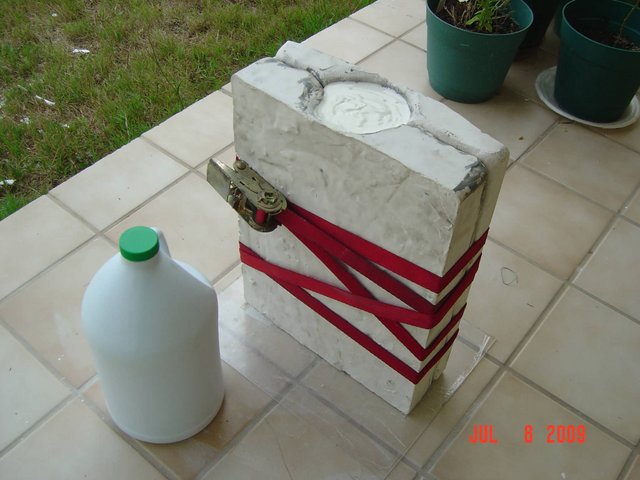
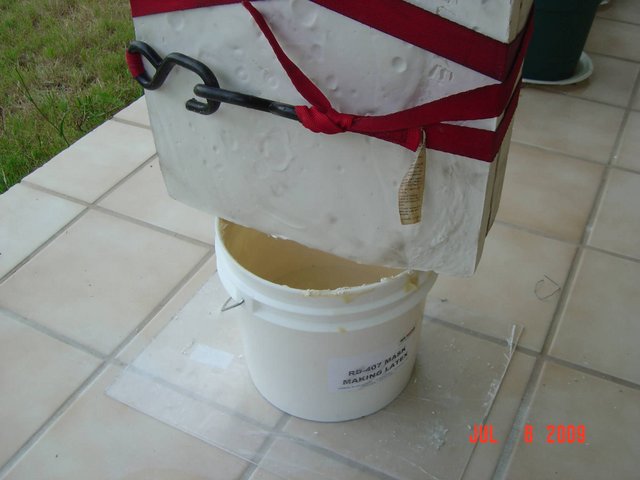
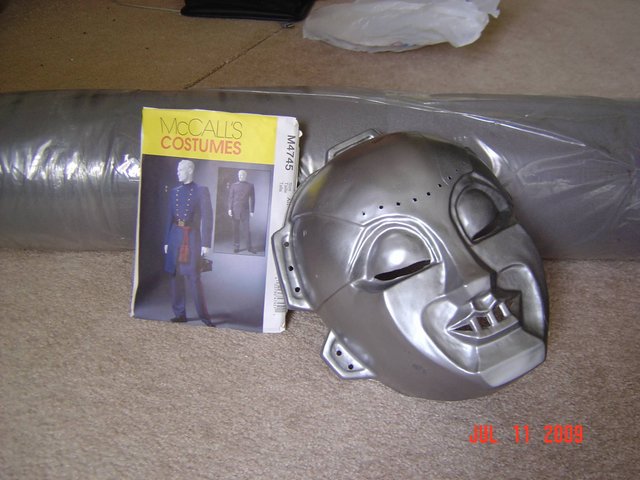
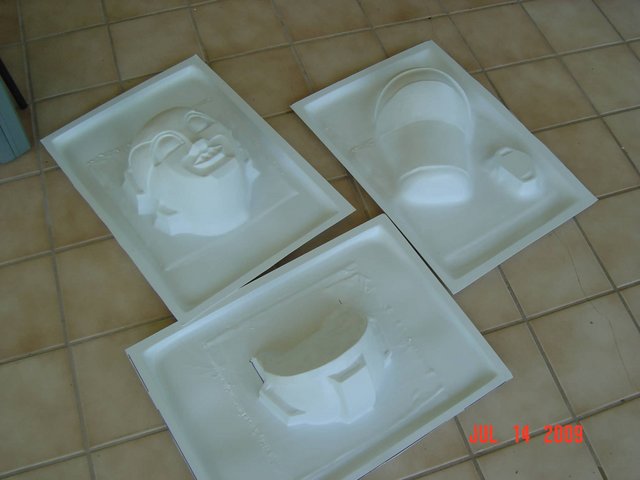
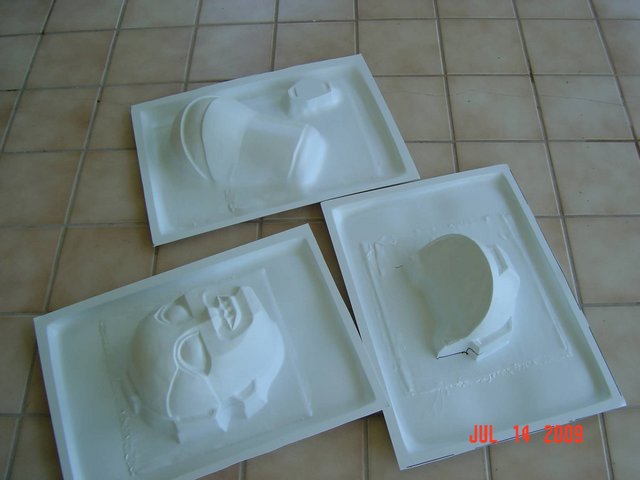
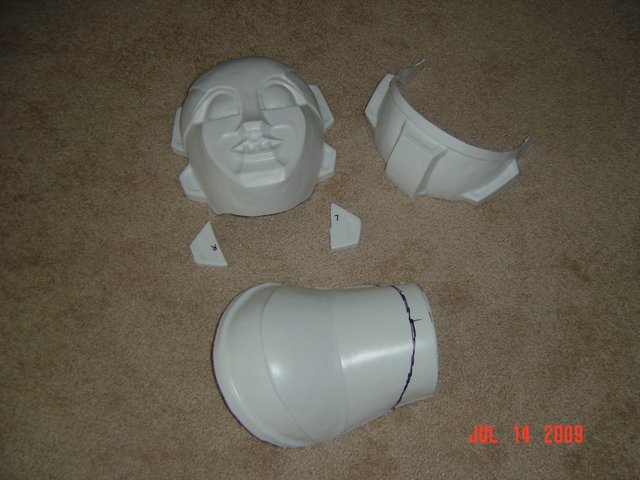
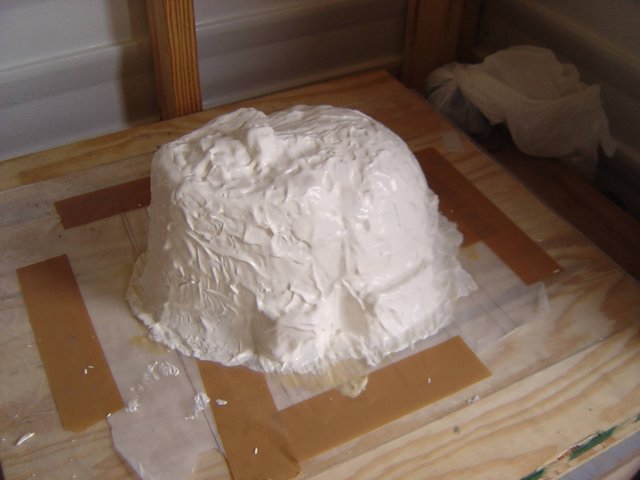
    I've made a silicone rubber mold, to then cast in PLASTER, which will be the MASTER MOLD for the Vacuuforming table. This process took a LOT OF TIME!!!

    Here's the video of the "movie" STYX did before a show.....just for good old times memories...
    http://www.spike.com/video/2788348

    Mini-Movie that led to the creation of the video above, played before the concert...
    http://photos.imageevent.com/darthva...oy%20Movie.wmv

    and the concert version of the video, as a "continuation of the movie"
    http://photos.imageevent.com/darthva...r%20Roboto.wmv

    Enjoy!
    (PS: That's a lot of research....don't you think?)
    Last edited by DarthVader1; Aug 11, 2009 at 10:19 AM.
  2. DarthVader1's Avatar
    Join Date
    Jun 2003
    Location
    Columbus, GA
    Message Count
    230
    Aug 11, 2009 - Re: "SECRET-SECRET, I'VE GOT A SECRET..." (Pics intensive) #2

    This is the part I like about, when you change materials and the result is almost as you was told....PRICELESS! The plaster is HYDROSTONE, and I love it!!! I was taking the casting for cleanup the areas that got messed up with the mold defects, and I've spent a good 5 hours cleaning it up and ready it up for vacuuforming.

    Cleaning it up with the clay-sculpting tools was relatively easy, but harder in areas. I was feeling like if I was working as a dentist or a dental technician, since I was scraping the hell of that casting in all the areas that has great detail, and really got messed up like the area by the left side of the lip/cheek, that was looking like a "venereal-dicease thing".

    I've covered the defects with Durham's Water Putty (I love it too), but when it gets hard....it REALLY gets hard. I had a really good deal of time trying to sand down those areas. Here are a couple of pics of the casting so far before the sanding process. I've drilled the holes for better vacuum and have more details. I have to accept that it looks a little CREEPY, though.


    One of the two holes in the mouth actually went through the other side, since the tip of the drill bit I was using, got stuck inside, and couldn't cut through it, and the areas in the mouth that has DWP is due that the drill messed up the detail of the mouth a little, and I had to fix it now. Well, just a little more cleanup, and it will be ready for vacuuforming.
    Now I am ready for PART # 2: The top/back of the helmet....it should be easy, since it doesn't have much details.
  3. DarthVader1's Avatar
    Join Date
    Jun 2003
    Location
    Columbus, GA
    Message Count
    230
    Aug 11, 2009 - Re: "SECRET-SECRET, I'VE GOT A SECRET..." (Pics intensive) #3

    the third, and final part of the helmet/mask, since the other (very last, namely the front - lower neck) part will be just improvised, custom made to size. It will be a waste of plastic, time, resources and electricity doing it in a vacuum forming way.

    I wanted to go with measurements (which I did and kept), to start doing a sculpt of that back piece, but I've just discovered that this piece is the MOST DIFFICULT to accomplish, more than the face, since it has to connect somehow with the other two parts previously done, and based on the last cast the calculations were a little WRONG somehow. Not bad news, since I was going BY-SCALE from the original on the videos, but I managed to find a solution, since there's no actual or really defined pics of the back of the original ones, so I am coming with an really original idea, just to unite all parts together, and not compromise any gaps in between.

    Here are the pics of the progress so far, be advised that I've tried to do so many calculations, and it's still getting difficult, since this has to connect with ALL the other parts at the same time.
    Last minute decision of what to use for the round neck backing. The plastic gallon is ROUND, not squared like a gallon of milk, just to point that out:


    I've chose to go with the "flower foam" instead, but they leave a whole mess around....specially sticking to the clay.


    ...so, I've decided to cover the "messy part" with a plastic bag, and then do the whole shell on top of it with clay, which I had to add some more clay underneath the plastic gallon plastic for support, since there will be a lot of pressure from the sculpting, but not as much as I thought:


    Here's the result of the BASIC FRAME (as of today). I did this to save on clay.


    Part to be vacuuformed with, just need a few minor fixes here and there, but nothing biggie.


    Pic of the silicone rubber mold, which came out....PERFECT! Even the studs that makes the little holes, ALL came out in PERFECT shape, IMHO.


    (in Count Dooku's voice) "This is just the beginning!"
  4. DarthVader1's Avatar
    Join Date
    Jun 2003
    Location
    Columbus, GA
    Message Count
    230
    Aug 11, 2009 - Re: "SECRET-SECRET, I'VE GOT A SECRET..." (Pics intensive) #4

    this is the part that covers the very back of the head and half of the neck. Believe me or not, this is the piece that got me puzzled, and probably the most difficult to sculpt, since even the design is simple, but it actually have to "interact" with the other two pieces somehow, which means that ALL three parts (not counting one that has to be cut to shape and bend, that goes in the front of the neck) have to touch each other at the EARS area, and THAT is not an easy task, and was a design flaw of not thinking about that before.
    Here's what I got so far (looks like a prototype for "Vader's REVEAL Helmet" back piece, somehow):


    Some of the plastic (when vacuuformed) at the top of the head, will be cut by eyesight, until I get parts one and two together (the most important ones). The top border design, wasn't exactly what I wanted, but that could be corrected once I make the plaster casting, which needs just a hard time sanding off that part.

    Another flaw that just slipped away from my mind and NEVER thought about it, is the back piece for the SIDE DETAILS from the BOTTOM of the mask, just below the ears. Based on the design of the mask, I believe that THOSE specific pieces were casted separately, since there is NO WAY to make them as part of either face piece or top-back piece. This last part pictured above, are essential for the WHOLE costume; but for collectors, they only want part 1 and 2 together, that's about it (front and top-back)

    I've just done with the casting process (for the MAIN MASK PARTS), but I have to design the ears so they could be useful, or working, not just pieces of resin bolted in place, but something that I could hear through them....but that is coming soon. These are the pics of my last castings, with the one for the backing of the lower details I had to come up with a WOOD MOLD, since I didn't want to go through the process of applying the latex coating/mold 6-8 times or the plaster bandage process....TEDIOUS!!! :x
    Here are the pieces for VACUUFORMING, almost ready since I have to do some cleanup AND sanding to all of them, to include the front mask part.
    The back of the head part, which I have to add a piece of 1" MDF with the shape of the part at the bottom before vac'form the part, since the sculpt didn't allow me to add space for the cutting line,

    The backing detail cover mold for both sides,

    And the pic of ALL pieces together.

    Yesterday I've started with the gloves casting process, making a casting of my own hands (I still have to cast my left hand, though. I will post pics as soon as I cast my left hand to show up the process of sculpting the gloves. I will find out the "ears" making process, as soon as I find something I need.
  5. DarthVader1's Avatar
    Join Date
    Jun 2003
    Location
    Columbus, GA
    Message Count
    230
    Aug 11, 2009 - Re: "SECRET-SECRET, I'VE GOT A SECRET..." (Pics intensive) #5

    GLOVES
    This time I am working on the gloves, which will be casted in latex. I've started with making a cast of my hand to use as model to sculpt the mold of the glove. Looks like "THING" from "The Addams Family"


    This is the look I want to have, based on the only three screen captions that I could actually see the details of the gloves.


    And I've done sculpting just the top half of the whole mold, to then make the sculpt for the second half,


    All I have left to do is to cover some areas, and a little cleanup. More updates coming soon as I keep working with it.

    Well, since the funds and the time available to make a vacuuforming machine (TJ style) are not exactly helping me out, so I've decided to go the cheapest way around just to finish the difficult part of my "SECRET-SECRET" project......I went with the GENIUS' design, "DR. CRASH".

    http://www.youtube.com/watch?v=hGBRiYhxRTM

    http://www.instructables.com/id/Make...-plastic-vacu/

    The model in the pics is of a 13" X 17" frame size, but after thinking about it, I could actually expand the frame size to maybe 14" X 20" (which is the max dimensions inside my oven, minus 2" each side, just to take maximum advantage of the HIPS plastic sheets.


    I've created a silicone "gasket" under the floor flange before installing, and also added silicone after installing the bolts, to include the outside edge between the flange and the MDF (as of Dr. Crash recommendations on his site).


    I had to actually increase the platen working area, of course to take advantage of the oven size. What I did I used one of the 2'X2' pre-cut HIPS sheet I've ordered.
    As you can see, it came out not exactly within the dimensions as Dr. Crash recommended, and besides, when it was time to measure the platen area, and frame size....something went wrong, which I went oversized in lenght, probably just thinking about the oven area and not working area.

    Here are a few pics of my "upgrade", which I also failed to have extra weather strip, leaving a 7" gap between contacts. I gotta go buy me more weather strip, though.

    This is the whole working area, as we speak.


    Size comparison between the old one......


    ....and the NEW frame size.


    Notice the gap in between the seals...need to buy some more, though.


    And the preparation of my frames, which Dr. Crash updated his blog in his website, adding that C-Channel frames will work better, since window screen frames are more flimsy, when it comes to working with them. I don't know if I actually made the C-Channel frames the right way, though... I hope they work. :suprise


    -------------------
    Well, seems that my hard work paid off. I've sucessfully vacuuformed a mask with Dr. Crash's method. No wrinkles, no setbacks.... A PERFECT VACUUFORMING session.


    First, I had to add some electrical tape to the joint between the elbow and the vacuum cleaner hose, since it doesn't fit quite tight.


    Like I've said last year, I used a 6.5 hp SHOP-VAC, which helped the purposed nicely.


    Then instead of glass cups, I used BEER BOTTLES, for not to compromise the plastic corners of the sheets while heating (which later I had to change the location of the bottles, by retiring the bottom grill since they kept falling due to the lack of flat space to rest.


    Then I've added a 5-layer of mosquito screen (metal), and I chose BLACK, which I love it. Then added a "Taper", if that's what Jegner calls it. (???) Then the original mold on top of it.


    Well, and the final result: TA-DAAAA!!!!


    Only thing that happened was that the plastic got stuck to the mold for some reason, which I later found out that it was due to the DUNHAM'S WATER PUTTY patches I have in my original mold. Either way, it was a first chance to see what I should do next or what to improve (namely buy some BONDO), such as to cover inperfections and seal the DWP patches away from the plastic. The mask had to be cut and literally RIPPED from the mold to finally let it go.
    ------------------------

    Well, after over a month hiatus due to personal issues and bad weather at the same time, I've continued with this project, and this time in FULL THROTTLE! I haven't done anything since then, but now I've started sanding the imperfections on the mask molds, and started to work with the GLOVES. Last year I've made just the sculp and didn't even finished, but now the top is done, and this week will be sculpting the bottom (way easier than the top) to then make the bottom half of the mold. Here's the progress so far.


    What do you think so far?
  6. DarthVader1's Avatar
    Join Date
    Jun 2003
    Location
    Columbus, GA
    Message Count
    230
    Aug 11, 2009 - Re: "SECRET-SECRET, I'VE GOT A SECRET..." (Pics intensive) #6

    EARS
    I've finished casting the "ears". What the pics are not showing is the cleanup process (bondo the holes and imperfections and excess resin), and carve the lines along the ridge of the "ring" part.


    The mold at the left is the mold of the "ring" part, and the one at the right is for a TOP-SECRET thing I have planned in the near future.


    Here are the four ear outside rings, ready for cleanup and attach to the cylinder part...


    ....and now with the castings of the cylindrical part to be attached to, that have to go through the same process, and also I have to cut come extra slack before attaching...


    More to come soon, as I continue with the gloves.
  7. DarthVader1's Avatar
    Join Date
    Jun 2003
    Location
    Columbus, GA
    Message Count
    230
    Aug 11, 2009 - Re: "SECRET-SECRET, I'VE GOT A SECRET..." (Pics intensive) #7

    Well, since the last update I've being thinking about something that made me change the way I was doing the gloves. I came with a different approach of doing things, this time THE EASIEST WAY POSSIBLE.
    I realized that the first mold and sculpture for the right hand was kind of difficult to make it happen, but then I was thinking about the way the TK amor is done with (mostly), and the best solution is MDF board. This is what I came with...
    BTW, this is the mask mold, with some bondo and a lot of sanding, ready for step 2 for vacuuforming:

    First cutout of the left hand, using a piece of MDF board...

    Giving it some shape with my dremmel tool...

    ...to try to get the proper "hand" shape...

    Size comparisons between the mold and the real hand..just to keep the actual shape...


    That's the thing about MDF boards; easy to work with, but really messy when it comes to sand down. :shock:
    Now, this is the end result: (MEMO TO SELF: remember to make/finish as much details as you need, before applying primer or preparing for a mold). I sanded everything with fine grit paper AFTER I sprayed the whole thing with automotive primer, which makes you see all kinds of imperfections during the process, not to mention the clay I used before while preparing for the mold-half. I've carved the lines where the fingers bend in the MDF hand mold, which will minimize the use of clay for sculpting the details of the hand later on...the less clay, the better.

    I've came up with a design for the inside of the hands, since there area no reference pics showing the inside of the hands, sooooo, I will make them more "ROBOTIC", and less "human-shaped" as possible...

    Now, a comparison between the original size, and the sculpted hand so far...


    And this is the setup for the mold. I flattened about ¼ to ½ inch of clay, so it could properly cover HALF of the “glove” mold, which I did by carving around the hand mold with a knife, and extracting the clay that’s laying underneath the mold, that way to accommodate the mold and be easier for preparation.


    More updates coming this weekend, which includes upper and lower hand detailing, more vacuuforming progress and more. :wink:
  8. DarthVader1's Avatar
    Join Date
    Jun 2003
    Location
    Columbus, GA
    Message Count
    230
    Aug 11, 2009 - Re: "SECRET-SECRET, I'VE GOT A SECRET..." (Pics intensive) #8

    As I've previously noted, I've decided to change the method of creating the gloves; cheaper, faster, easier, and cost-cutting measure.

    Of course, the "easier" part doesn't come THAT easy, since I have to go back and redo the details of the forehands from scratch, since it's a different model/sculpt. The volume overall is lower, and as the originals, they'll be made out of a THIN LAYERED LATEX, just way thicker than your traditional latex gloves you see used at hospitals....and prostate checks.

    :suprise

    Seriously, if you see the videos I've posted earlier in the thread (specially of the concert versions), you'll see that the thickness is really close to the actual hand, making the effect believable as a "ROBOTIC" hand. Well, here's the progress so far, which I was able to complete the first half of the right "hand", I've started by sanding the "details" of the palm, which looks a little like a "SPIDERMAN" glove, but it won't.

    I came with this UNIQUE design, since there's no physical proof of the design of the palm, not even on the videos.....I've decided to do a design of my own, and make it my "signature design" by creating a ROBOTIC palm, and I will be adding more details later on (details to be shown on my next update this week), but I want to concentrate on the visible details first......


    Preparing the forehand mold first after shaping the bottom/palm...


    Adding more volume to the upper hand, due that the hand mold is almost "flat", and I want it to be more shaped to the real deal...


    Compared to what I was just talking about....


    ...adding the "tendon" details...


    ...adding the "forearm" part, which is the same plastic cut out from the gallon, used to make the "neck" area of the very back of the head mold...


    Added the "wrist" detail and the "knuckles" details. Knuckles details what I came out with, is basically those flexible plastic things you use for under the furniture to prevent scratching. I've paid only about $3 for a set of 12 at HOME DEPOT. Less time and hassle for me to sculpt.


    Hand, almost ready to make a mold of the first half... notice the "guides" I used in the clay...couple of them are the same things I used for the "knuckles" in the hand mold.


    More updates coming this week, since I'm rushing this project as fast as I can.... I promise.

    Well, finished the whole mold for the left hand. (NOTE TO SELF: Do not use the plastic film to build the wrist or a cylinder of any kind). Unfortunately, when I did the first half, the plastic "wrist" came out loose while pouring the plaster, and it made a little mess outside the mold and some inside the hand mold itself. Fortunately, nothing that I wouldn't clean myself or fix. For the other half, I've decided to use clay, with some kind of support inside, such as an empty PVC Glue can.


    I did some details of my own, as a "signature design", unfortunately on the finishing making of the mold, two or three of those designs were erased from the mold somehow.


    I've done both halves, and time for cleanup the mess. Not the prettiest job in the world, but practical. As you look at the left half, reminds me of another note: APPLY SOME MOLD RELEASE before casting the mold half. It took me a good deal of time cleaning the details of the forehand.


    Mold is cleaned up, and ready for first casting....


    Now, the interesting part...adding color to the latex casting while pouring the latex in the mold. I used something called ALUMILITE, which is a metallic talc/powder used for cold-cast molds. It serves as MOLD RELEASE at the same time, giving the casting a metallic look once it's out of the mold....no need to paint afterwards....we hope.


    I've applied the powder in the internal cavities of the mold with a clean, soft brush, to then close it, and secure with ratchet straps or rubber bands. Be advised...this process is rather messy, and make sure you use some kind of protection on the floor, such as brown paper or anything you could use to pick up the excess and throw it back in the canister....and not to do this in a windy area......trust me.


    Latex poured in the mold once it's secured....


    ...and taking the excess out once you pour back the rest of the latex back in the gallon after a few minutes.


    Next day, I separated both halves to expose the final result, and....EUREKA.....well, somehow. You could see that came exactly as my hand is, which is what I wanted.


    Obviosly there's some cleanup to do, specially the excess latex where the mold halves meet...


    But there's a problem. Once I took this glove out of the mold, the ALUMILITE didn't stick completely to the glove, since I have to find a way to clean it without removing it from the glove.....I will update on that soon...
    And if you look at the outside edge on the hole of the glove, you'll see that it's warped...that's because some of the latex haven't dried up since yesterday.


    Another thing, the glove came out perfect on the outside, but in the inside is still wet, and a lot of latex got to waste. The main problem I found was that I let the latex in the mold for over 30 mins (45 mins, actually), and the glove was supposed to have a thin layered wall, similar to those yellow gloves you use to wash dishes, but the walls came out too thick, similar to those found in quality halloween latex masks. Next time I will let it sit for only 15 minutes to see what happens....and NO ALUMILITE (until I find out if after cleaning is good enough). Same thing happened to the last two fingers in this pic....latex too wet inside, and the inner layers got stuck to each other. What a shame. >:


    More updates coming later on.

    :fettesb
    Last edited by DarthVader1; Aug 11, 2009 at 10:41 AM.
  9. DarthVader1's Avatar
    Join Date
    Jun 2003
    Location
    Columbus, GA
    Message Count
    230
    Aug 11, 2009 - Re: "SECRET-SECRET, I'VE GOT A SECRET..." (Pics intensive) #9

    This is my progress as of today...

    During the weekend, I received a large roll of goodness....meaning it's the CAR HEADLINER MATERIAL which the original suits were made of (we think). Using a CIVIL WAR UNIFORM sewing pattern, I'll be making the pants and coat, but as you saw in the videos and screen caps, it's designed in a slighly different way, which I will be creative for that.


    Here's the roll in the back of the pattern package and my prototype mask (BTW as you see, it's painted and holes for lights done....i will explain later)...


    I've started cutting the pattern with the easiest part....the pants and the jacket sleeves.


    I will update more on the suit sometime this week.

    I've being working with the helmet, which constitutes the MOST IMPORTANT part of this project. Couple of days ago (and as I mentioned before), I painted the mask trying different paints and colors. I tried the best around for this purpose (TAMIYA Gunmetal spray). It gives a nice and shiny look, but it's too dark to be noticed around, specially in the dark. I decided to use acrylic paints found at WALMART...


    And with the use of the cheapest airbrush available (even though I have a compressor and a professional airbrush handy), and only for one reason....to obtain the right color not available in stand-alone spray can or bottle.


    For this one, I had to use 3 parts SILVER to 1 part GUNMETAL to create the best effect. I could still use 50/50 of each color, but I prefer the silverish color better, since it was still looking dark before compared to the gloves.

    At the left of the screen (side where my TOE is ) , it's sprayed with the acrylic mix; the right is painted with the TAMIYA spray paint. Notice the difference in color / tone while outside in the porch.


    And in broad daylight...


    Today, I've decided to go forward with the vacuuforming process (again), to finally see what has to be fixed before creating another mold. Once again the mask and the top back molds of the helmet got stuck to the plastic, but with a little patience I was able to retrieve them without breaking the mask parts.


    Here are the parts cut from the rest of the plastic. The small two pieces are to cover the back of the lower "ears", which I didn't designed properly, and will be added later on once the LED lights are connected and glued in place.


    Side view of the 3/4 helmet (the way it will be assembled if I decide to do a run of these helmets:


    And now with the rest of the back that covers the mid section and neck. NOTE: there is another part that goes in FRONT of the neck, but I will do it with a strip cut to shape from a cheap FOR SALE plastic sign, and the areas in between parts will be covered in BONDO to camouflage the errors that will be fixed at a later time in the molds. The black line is where I have to cut so I could move my neck upwards, and most of the lower part will be covered by the neck of the jacket.


    This is a screen cap showing the same angle of view.


    What do you guys think?

    "Ears" coming up next.


    :fettesb
  10. DarthVader1's Avatar
    Join Date
    Jun 2003
    Location
    Columbus, GA
    Message Count
    230
    Aug 11, 2009 - Re: "SECRET-SECRET, I'VE GOT A SECRET..." (Pics intensive) #10

    QUICK UPDATE: (SUIT TEASER PICS)

    Progress being slow, but better to take it slow and precise than fast and sloppy. Here's just a TEASER pic of the suit itself, almost finished stage. Pants are basically done, and I still have to make the neck and attach the sleeves to the jacket, plus the crease details along the front and back.


  11. Formerly NightEyes
    Join Date
    Apr 2005
    Location
    NJ
    Message Count
    1,304
    Aug 11, 2009 - Re: "SECRET-SECRET, I'VE GOT A SECRET..." (Pics intensive) #11

    What no one around here likes Styx?


    Awesome job on all of it.
  12. Al- is offline
    Al-
    Al-'s Avatar
    Join Date
    Jun 2009
    Location
    Long Beach,CA
    Message Count
    63
    Aug 11, 2009 - Re: "SECRET-SECRET, I'VE GOT A SECRET..." (Pics intensive) #12

    Outstanding, I can't wait to see it completed.
  13. High Flyer Darth Mawr's Avatar
    Join Date
    Apr 2005
    Location
    Birmingham, AL
    Message Count
    969
    Aug 11, 2009 - Re: "SECRET-SECRET, I'VE GOT A SECRET..." (Pics intensive) #13

    I love this build. Saw this when I saw Stixx in concert in '83 and thought it was great. Shame it was Stixx's last hoorah. Can't wait to see pics of this finished.
  14. Banned
    Join Date
    Jan 2009
    Location
    N.C.
    Message Count
    860
    Aug 11, 2009 - Re: "SECRET-SECRET, I'VE GOT A SECRET..." (Pics intensive) #14

    That's fantastic! I love it!
  15. SSgt Burton's Avatar
    Join Date
    Jan 2009
    Location
    Canada
    Message Count
    2,031
    Aug 11, 2009 - Re: "SECRET-SECRET, I'VE GOT A SECRET..." (Pics intensive) #15

    I didn't have a friggin clue what the title of this thread was about until I saw the first pic... Then I could hear the song in my head.

    Awesome work on Mr Roboto!

    Kevin
  16. Capn_Jack_Savvy's Avatar
    Join Date
    Mar 2007
    Location
    Tortuga
    Message Count
    2,421
    Aug 11, 2009 - Re: "SECRET-SECRET, I'VE GOT A SECRET..." (Pics intensive) #16

    Domo arigato Mr. DarthVaderOneO mata ohima de
    Domo arigato Mr. DarthVaderOneO himitsu wo shiri tai!!

    Excellent job mate! Excellent job! I will be following this thread to completion!

    Ah! Memories of the 80s!
  17. 00MrNotWrong00's Avatar
    Join Date
    Jun 2008
    Location
    Stevensville MD
    Message Count
    717
    Aug 11, 2009 - Re: "SECRET-SECRET, I'VE GOT A SECRET..." (Pics intensive) #17

    That is really awesome I've wanted to do that for a long time.
  18. kimncris's Avatar
    Join Date
    Mar 2001
    Location
    Dallas
    Message Count
    4,055
    Aug 11, 2009 - Re: "SECRET-SECRET, I'VE GOT A SECRET..." (Pics intensive) #18

    how is it working with the headliner foam? I was considering trying that for my stillsuit...
  19. DarthVader1's Avatar
    Join Date
    Jun 2003
    Location
    Columbus, GA
    Message Count
    230
    Aug 11, 2009 - Re: "SECRET-SECRET, I'VE GOT A SECRET..." (Pics intensive) #19

    It's not bad at all. Really flexible and comfortable, as long as you choose the XXL measurements instead of the Large choice. I had to customize the pattern, the cuts once they're attached, so they could fit my body type perfectly.

    The only problem you will face while working with headliner material, try to SEW IT as much as you can, specially main joints between pattern parts (unless they're customized). You could do that by purchasing a paper/fabric-like mix that comes in different strenghts and thicknesses....just choose the one that you feel comfortable with, not to be too stiff, as long as you could use for the sewing machine to grab "something" in the sewing process....since sewing machines are not that friendly with FOAM materials. Some parts you have to be really creative and use SPRAY ADHESIVE, such as making the folded neck part of the suit, and the corners of the shoulders to make them look a little like the "THRILLER" jackets, but just a little bit.

    More updates coming this week.
  20. I Need a Hug Mike J.'s Avatar
    Join Date
    Aug 1999
    Location
    St. Petersburg, FL
    Message Count
    6,210
    Aug 11, 2009 - Re: "SECRET-SECRET, I'VE GOT A SECRET..." (Pics intensive) #20

    You're Kilroy! Kilroy!

    Epic undertaking - looking good, too.
  21. womo68's Avatar
    Join Date
    Apr 2005
    Message Count
    886
    Aug 11, 2009 - Re: "SECRET-SECRET, I'VE GOT A SECRET..." (Pics intensive) #21

    Very nice...I can hear the song now!
  22. Sean Bradley's Avatar
    Join Date
    Jun 2008
    Location
    Lancaster, PA
    Message Count
    123
    Aug 12, 2009 - Re: "SECRET-SECRET, I'VE GOT A SECRET..." (Pics intensive) #22

    Great build you've got going here. I'll definately be looking for this at Dragoncon!
  23. CB2001's Avatar
    Join Date
    Jun 2009
    Location
    Madison, Florida
    Message Count
    4,264
    Aug 17, 2009 - Re: "SECRET-SECRET, I'VE GOT A SECRET..." (Pics intensive) #23

    Great job so far on making such a classic icon!

    I have a question about the heating portion of the vacuum forming. I noticed that you used your kitchen's electric oven (I'm assuming that it's in your kitchen due to the tile floor). Did you have to have any kind of ventilation going in order to heat up the plastic in the oven? I mean, I assume hot plastic would have had some fumes of some sort. The reason why I'm asking is that I am considering on making the same kind of vacuum forming machine, and other than buying a heat gun (which I doubt would do me much good), I have considered on using the oven in my apartment but I'm worried about toxic fumes too.
    Last edited by CB2001; Aug 17, 2009 at 4:19 AM.
  24. Contec's Avatar
    Join Date
    Jun 2008
    Location
    Sweden
    Message Count
    3,721
    Aug 17, 2009 - Re: "SECRET-SECRET, I'VE GOT A SECRET..." (Pics intensive) #24

    CB2001 said: View Post
    Great job so far on making such a classic icon!

    I have a question about the heating portion of the vacuum forming. I noticed that you used your kitchen's electric oven (I'm assuming that it's in your kitchen due to the tile floor). Did you have to have any kind of ventilation going in order to heat up the plastic in the oven? I mean, I assume hot plastic would have had some fumes of some sort. The reason why I'm asking is that I am considering on making the same kind of vacuum forming machine, and other than buying a heat gun (which I doubt would do me much good), I have considered on using the oven in my apartment but I'm worried about toxic fumes too.

    If you leave the plastic in the oven so that it burns then it bad. I open a couple of windows to get some fresh air.
    It also depends on the plastic. It says on the plastic that i have use that it can be formed under heat.
  25. CB2001's Avatar
    Join Date
    Jun 2009
    Location
    Madison, Florida
    Message Count
    4,264
    Aug 17, 2009 - Re: "SECRET-SECRET, I'VE GOT A SECRET..." (Pics intensive) #25

    contec said: View Post
    If you leave the plastic in the oven so that it burns then it bad. I open a couple of windows to get some fresh air.
    It also depends on the plastic. It says on the plastic that i have use that it can be formed under heat.
    That's a good heads up, Contec. Thanks.
Page 1 of 2 12 LastLast

Similar Threads

  1. The Secret Circle TV Props
    Wakeem, Replica Movie Props
    Replies: 5
    Last Post: Jun 8, 2012, 4:35 AM
  2. Secret Project [*Update 10.3.11-Megaman Pics added]
    burgerstrings, Replica Movie Costumes
    Replies: 10
    Last Post: Dec 25, 2011, 11:53 PM
  3. Replies: 36
    Last Post: Sep 29, 2009, 3:09 AM

1 2 3 4 5 6 7 8 9 10 11