PL 350 Refit/A - Striving for Accuracy

ColHero

Member
Hello Enterprise Refit fans - I am new to this forum and would like to introduce my build in progress.

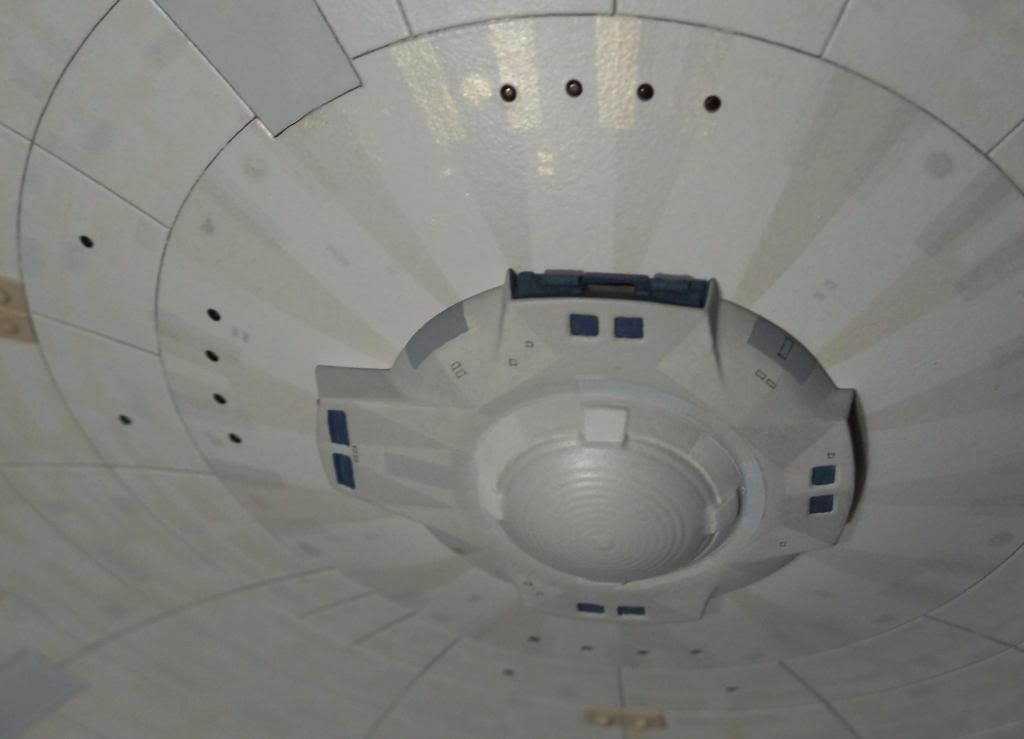
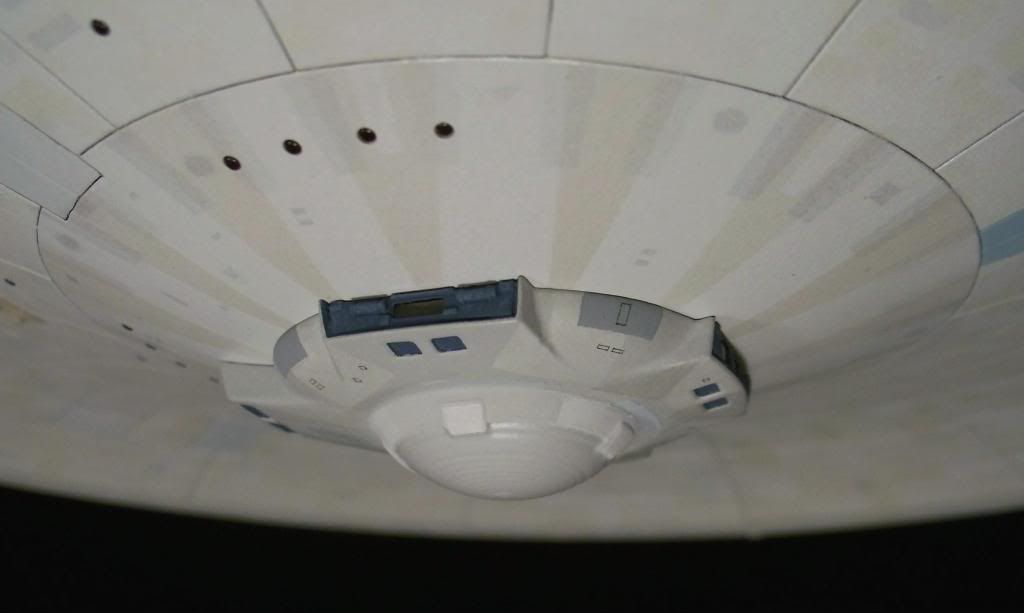
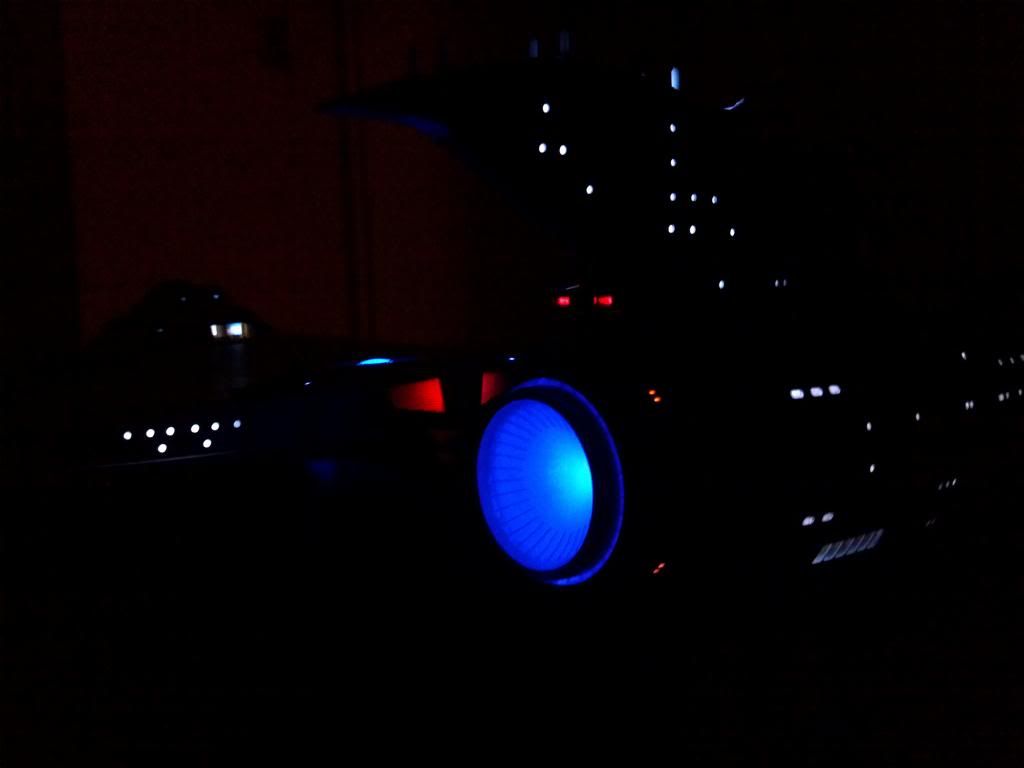
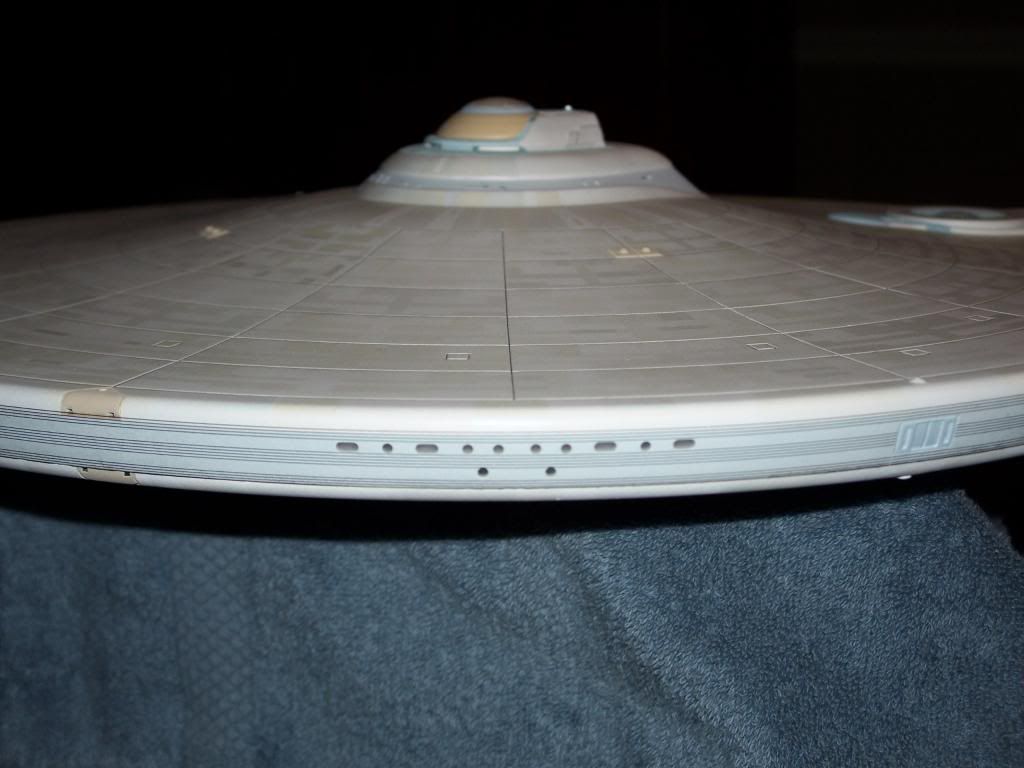
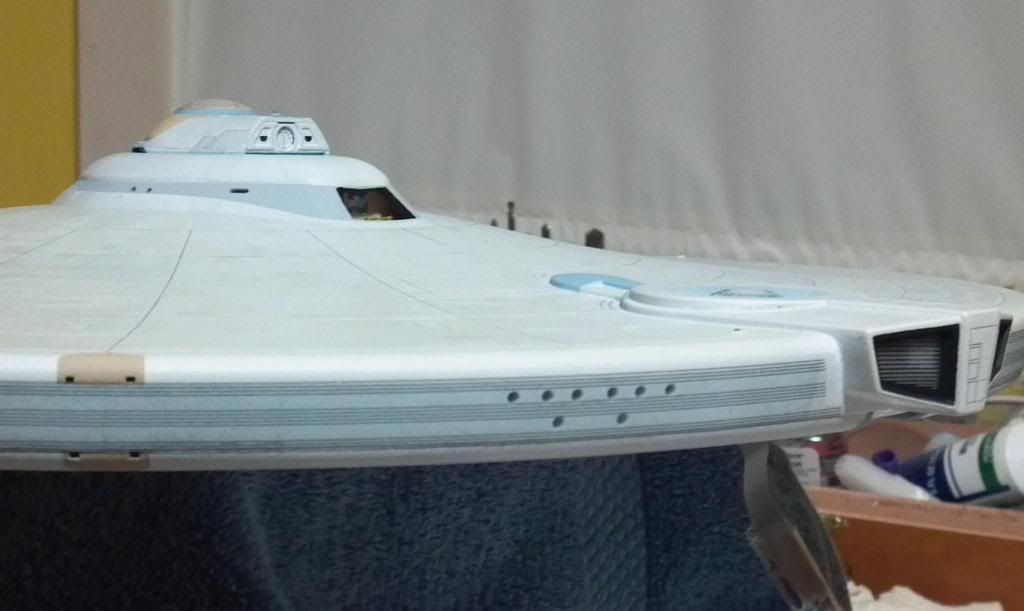
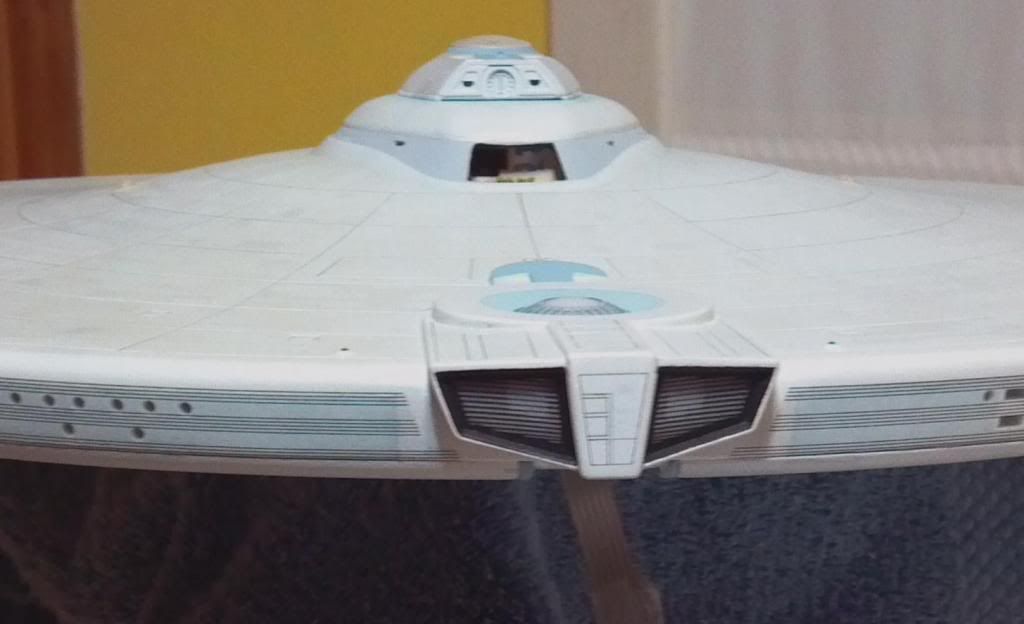
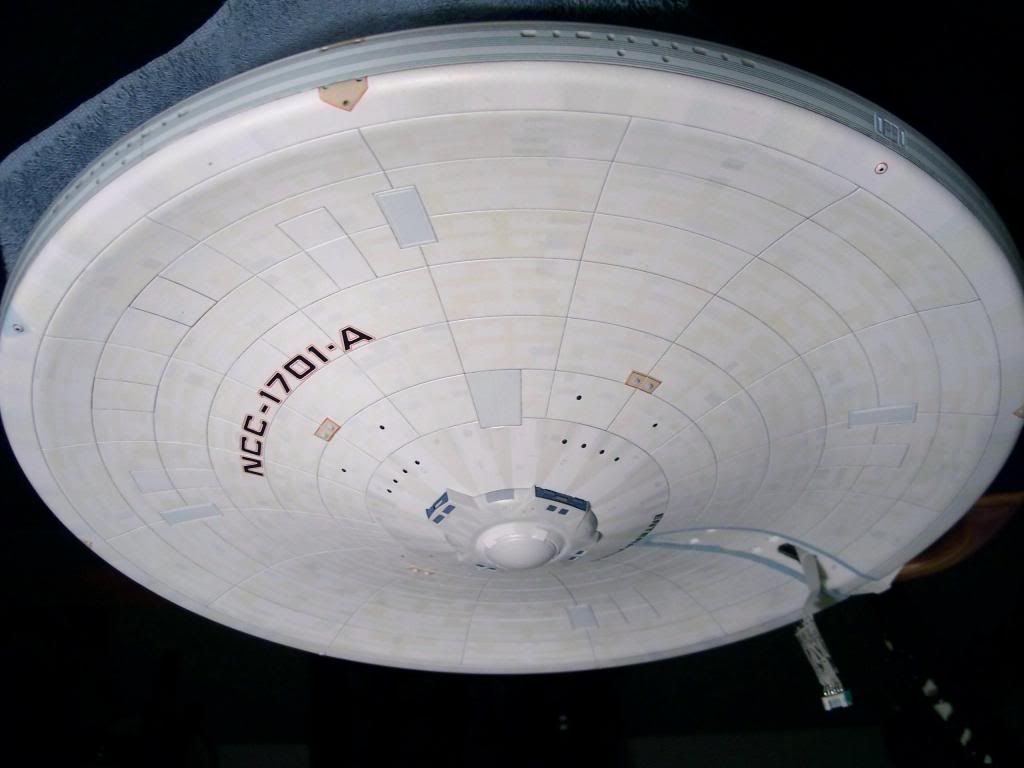
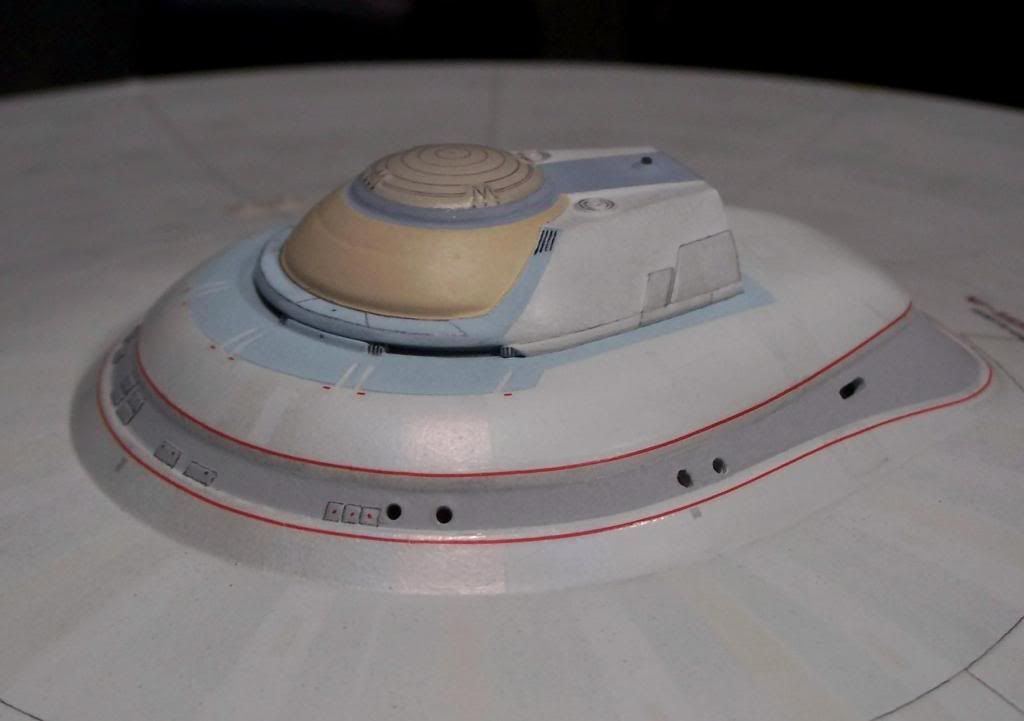
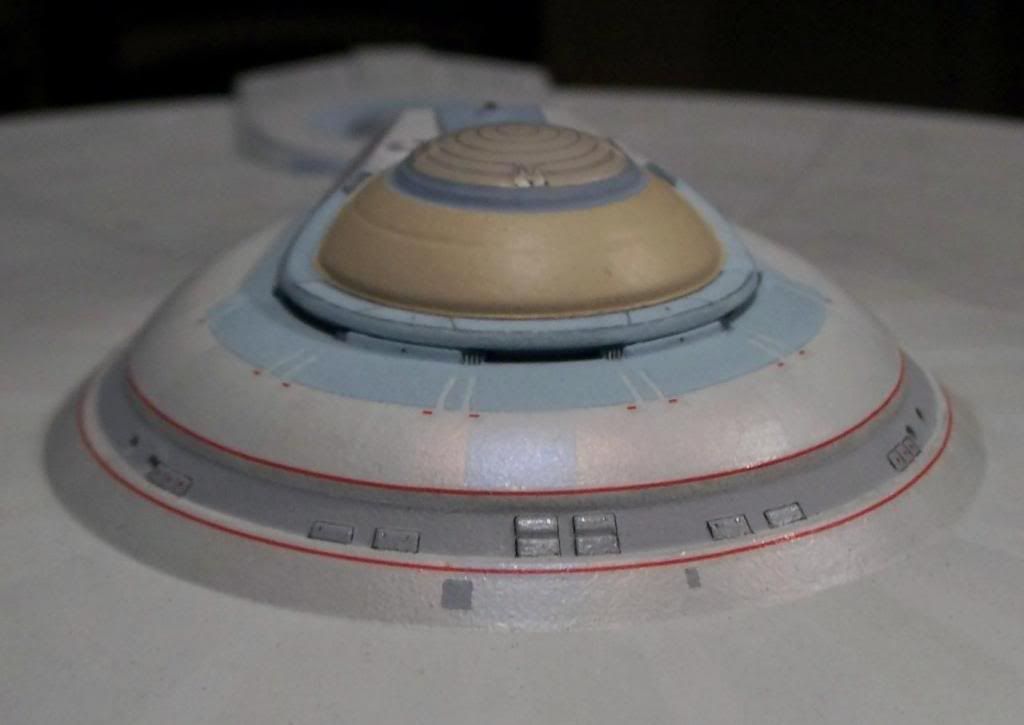
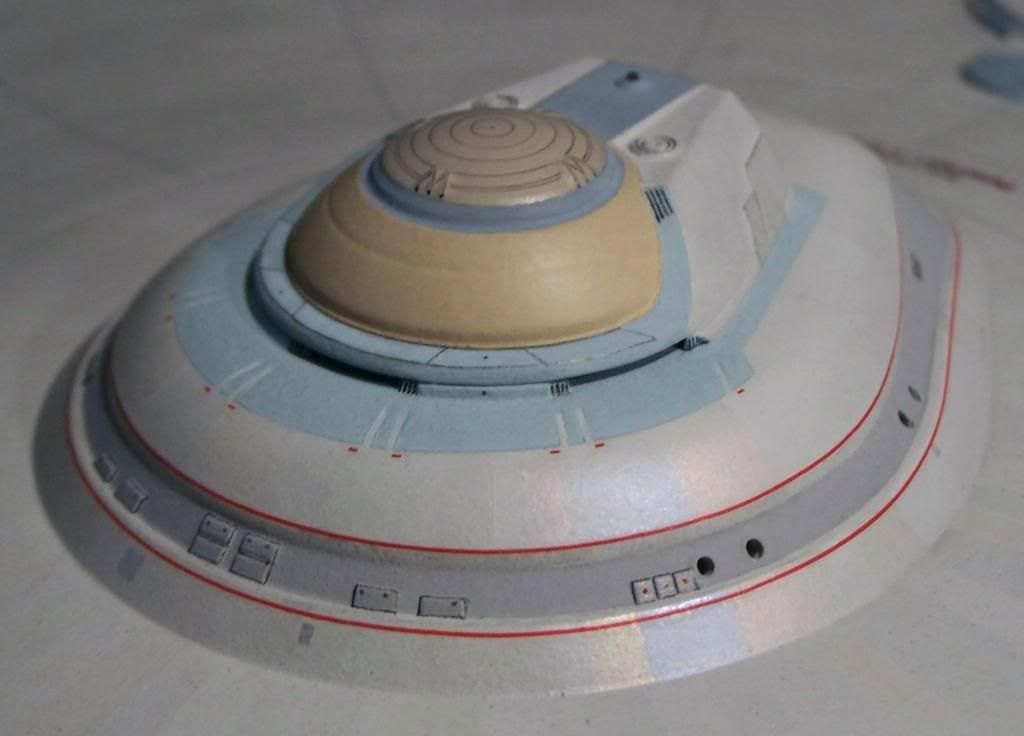
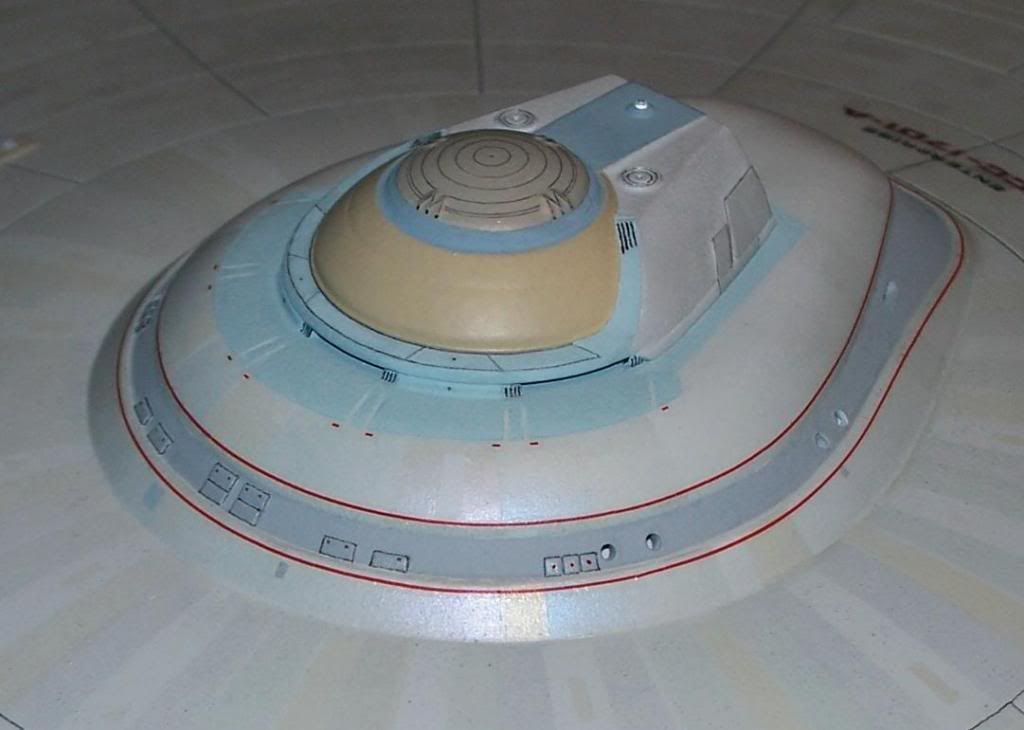
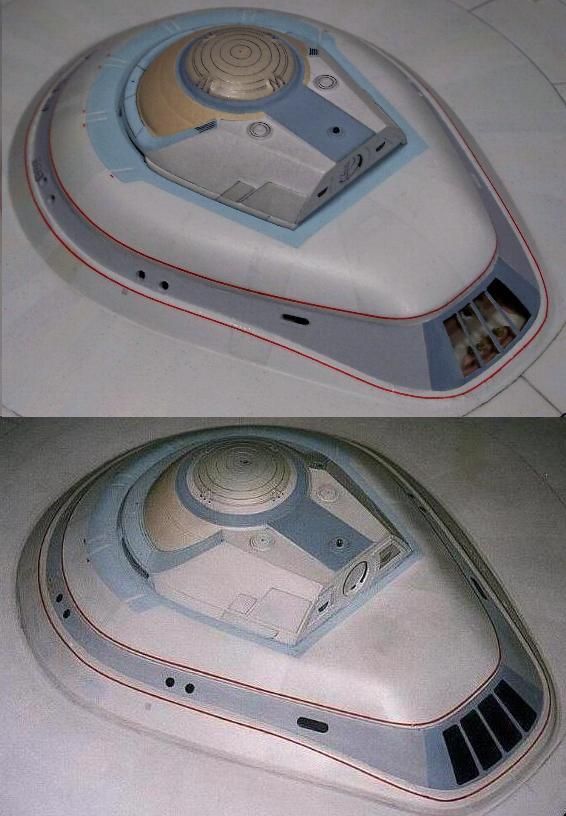
I am building the A version of the Enterprise Refit, as seen in ST 5/6. This is my second build of this model and I am now determined to achieve 80-90 percent accuracy, according to all available photo references from the Smithsonian days to Christies. I will be lighting this model but my accuracy goal will be focused on the colors and details, since these are most critical for accuracy.

I am making some modifications but not using photo-etched parts. I feel that the colors and painting are much more critical to an accurate look than details such as shuttlebay or docking ports, etc. You can build a model that has modified angles of this and that and photo-etched everything but if your colors and workmanship are off then accuracy is too.

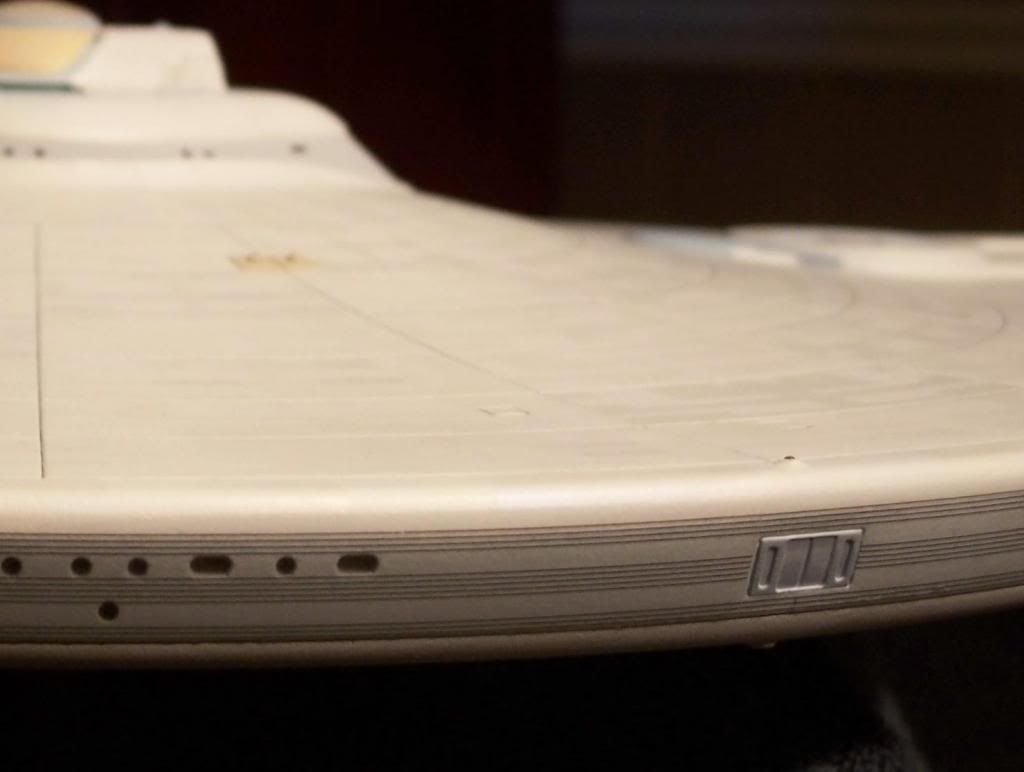
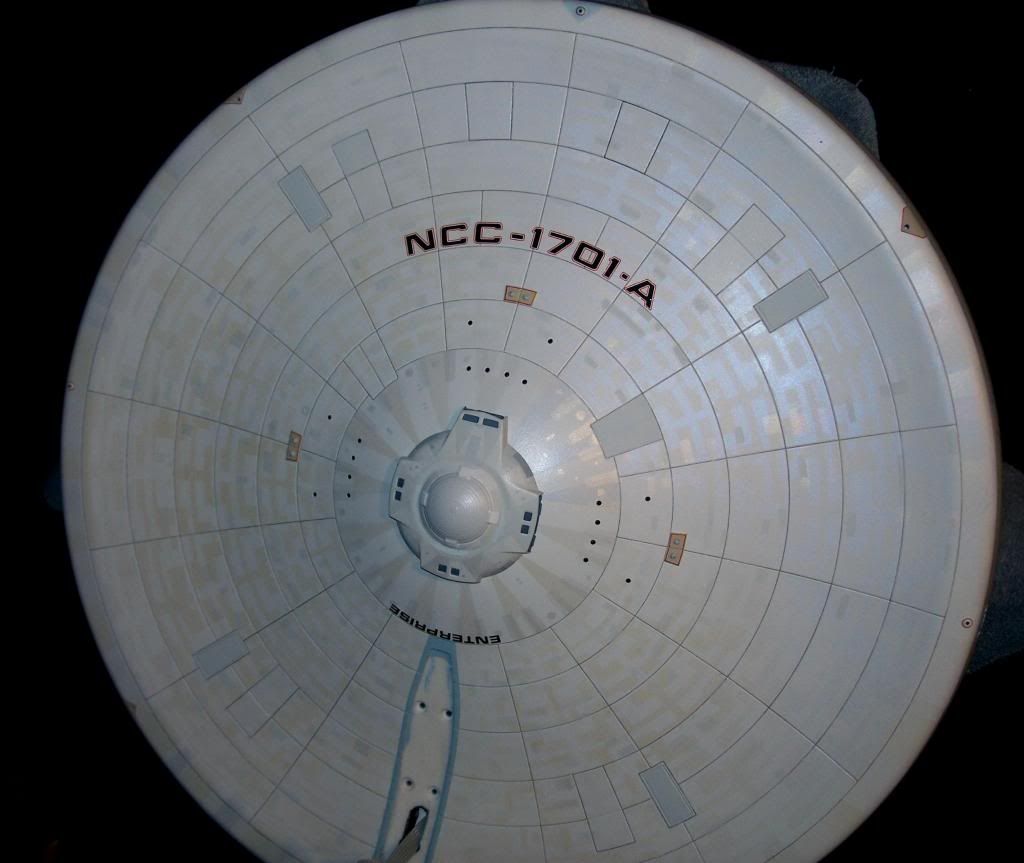
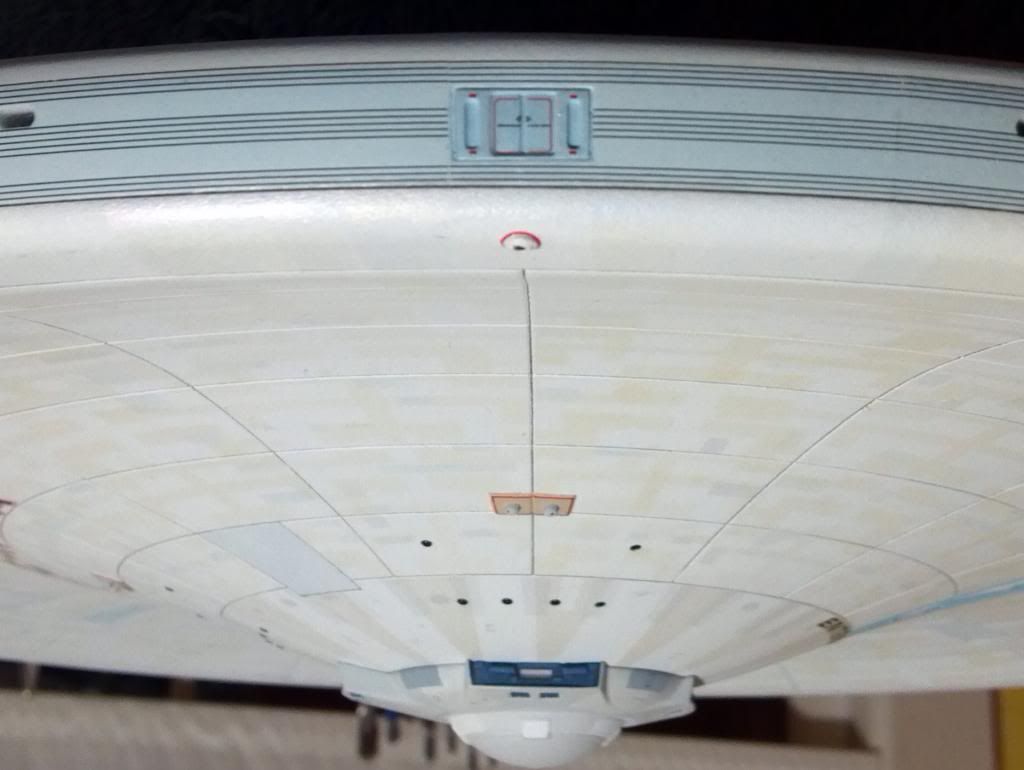
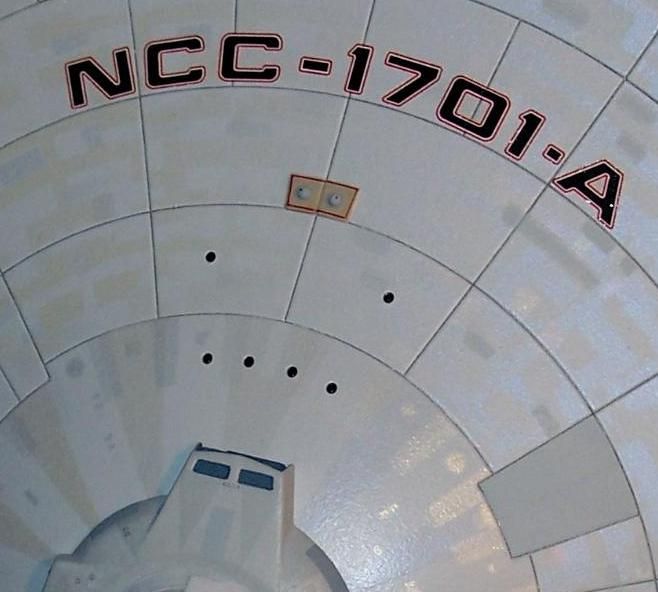
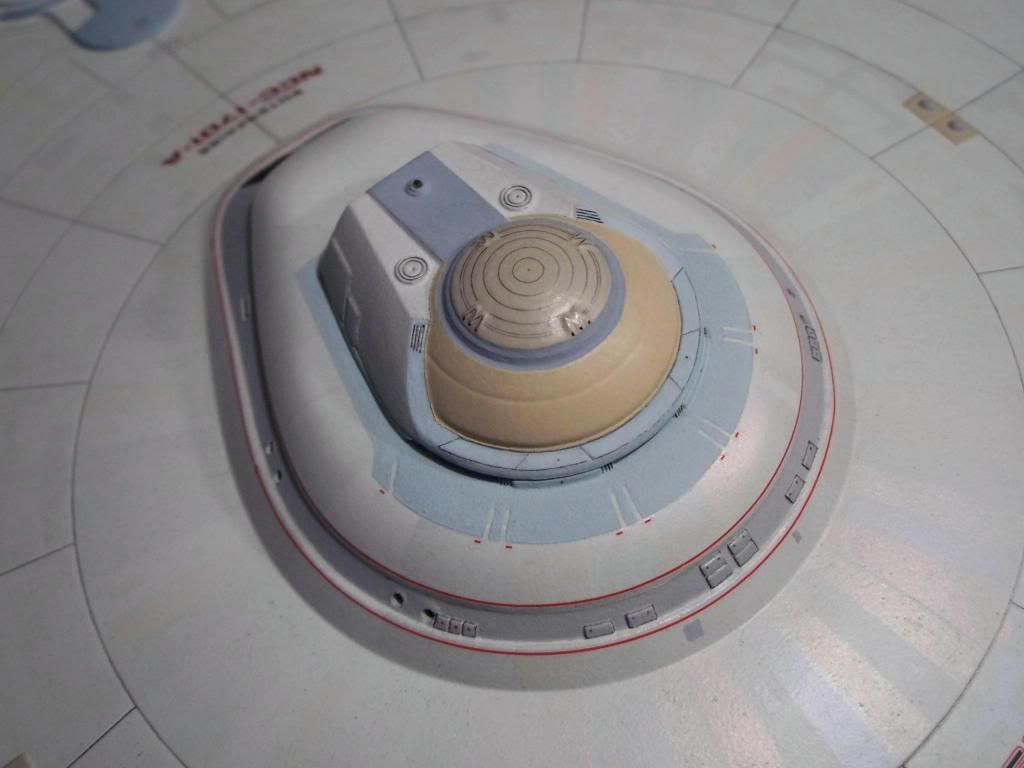
So far I have the Secondary Hull completed and am almost finished with the Primary Hull. I have been comparing my work directly with ref photos at different angles and lighting to try and nail down the colors and patterns. So far I am fairly pleased.

Feel free to offer comments and suggestions along with examples of your work to demonstrate. Questions are also welcome!

Here is a link to the general photo album:

1701-A 2013 Photos by ColHero | Photobucket

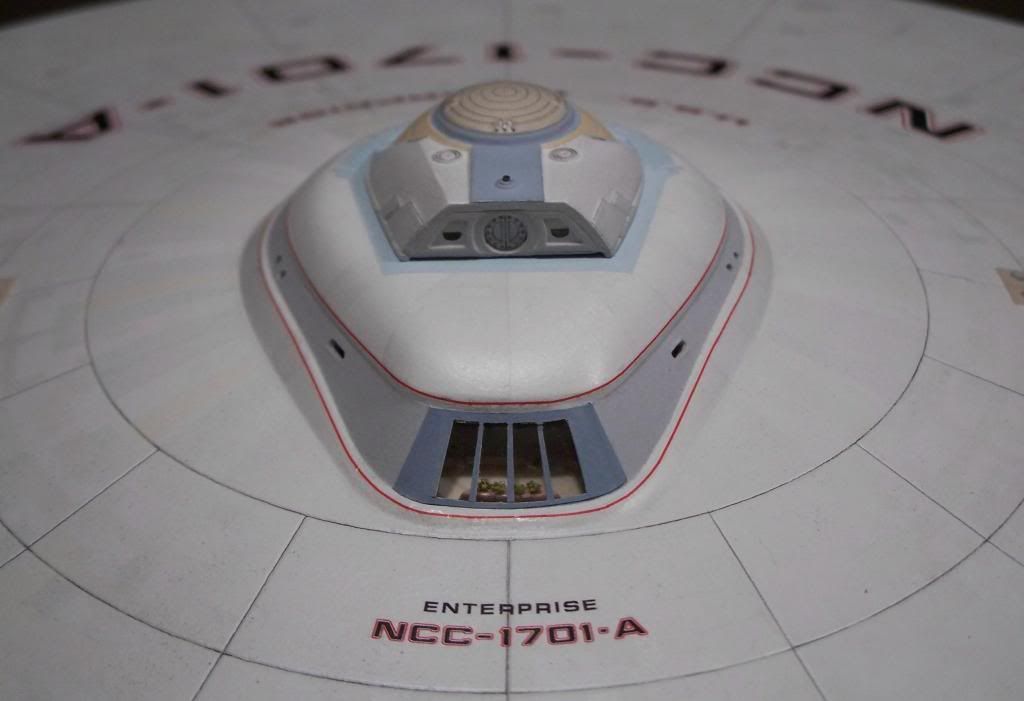
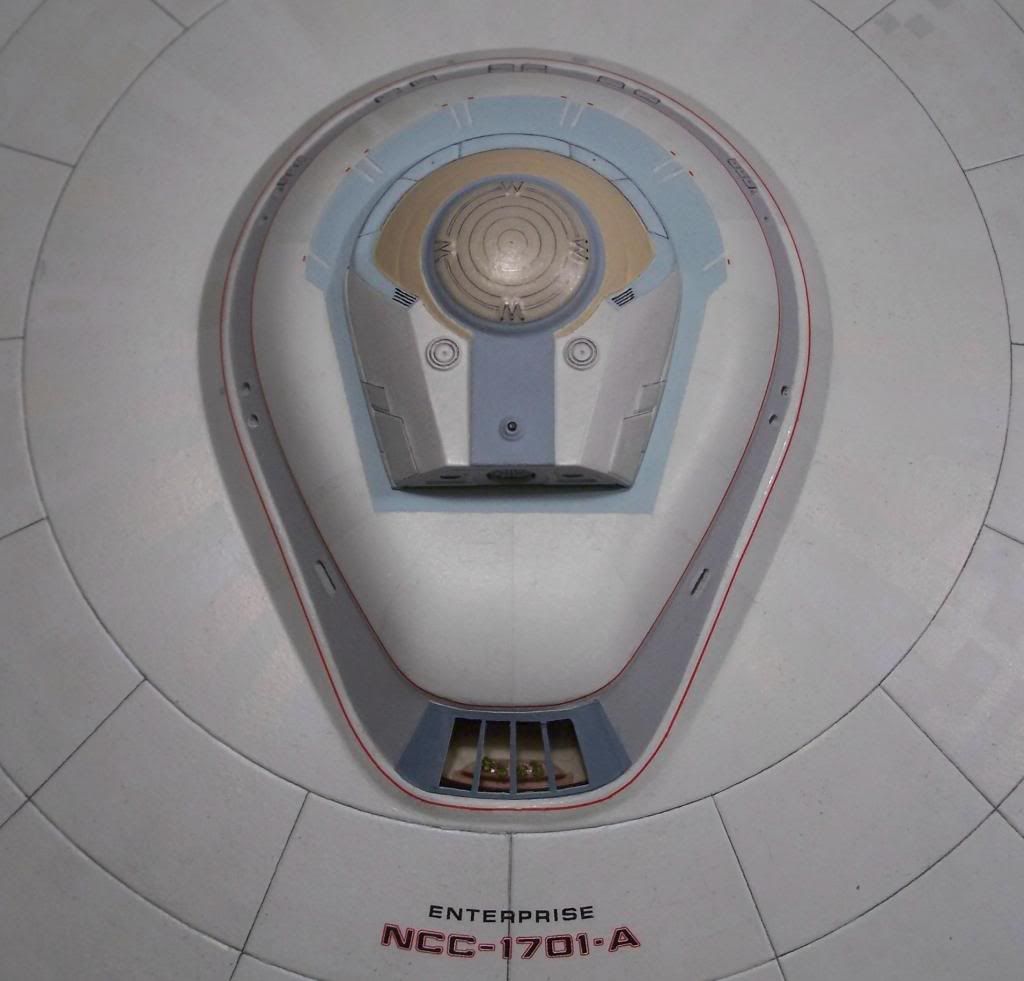
Here is a comparison shot:
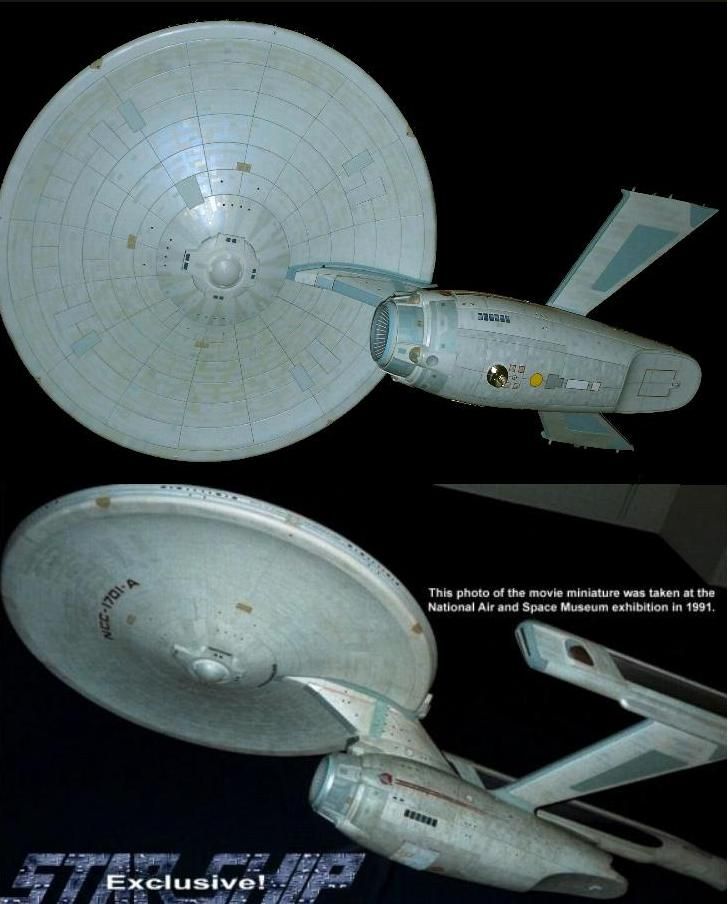
nkhfyy-1.jpg
 
Finally finished the Lower Sensor Array - For the dome I settled on using Pearl mixed with a bit of Silver - still not happy with it but I havent been able to reproduce the Studio effect. I tried silver, pearl, heavy clear coats, interference gold, etc...

I re-shaped the sides and light ports and added the dome ring to the kit part. Fairly happy with the shape and colors and patterns - just wish I could have nailed that dome...

100_4475.jpg


100_4480.jpg


More pix here:
1701-A 2013 Photos by ColHero | Photobucket
 
Hey ColHero!

Good to see you on the RPF at last!

As i've stated on other forums, your 1701-A is THE definitive build of this kit, IMHO. Your ATD, colors and shades are just bang on!

Thanks for sharing this astonishing build!!!

Rich
 
VERY VERY beautiful!! and you're so right, you can do everything right, but if you get the final details wrong, then the model is just WRONG. I struggle sometimes in the minute detail, its a process. haha I'm working on getting better at it. Just takes patience and time.
 
Sincere thanks for the gracious comments, gents. Though I am finding a strange paradox in my quest for accuracy - the more accuracy I seek, the further away the attainment of it gets. I finally realized that even 90% accuracy would take a near-obsession level of attention, trail and error and TIME. I spend many hours testing colors, comparing my results to studio shots at different angles, then when I finish a section it still comes up short of my expectations. The studio model details and paint work is so complex and multi-dimensional! I have then re-worked sections to the point where now they are no longer as crisp and clean as I would like. So now I have to settle for a lesser result. It will still look good and fairly accurate, but still short of the lofty goal I started with. Lesson - be reasonable with your goals and know when good enough is good enough!
 
Light Test:

Im using TrekModellers light kit which is pretty good for a novice like myself. Couple things Im not entirely satisfied with, the thrusters are too red and Im having to learn as I build since this is my first seriously lit model. One thing I did was use white paper behind the windows to help soften the lights and even out the light distribution nicely - gives a more realistic look in my opinion. I also used white paper for the Impulse section as well and used only one light for the engines since in my opinion they would have otherwise looked over-lit. Just wish I had the patience to work the saucer and pylon spotlights in...

2014-02-17_18-49-59_472.jpg
 
Finally glued the top and bottom primary hulls and added the sensor grid decals. Not perfect but not bad. The JT Graphics decals themselves are a very good alternative to finishing the side panels, just takes a lot of patience to get them aligned just right.

100_4504.jpg


2014-02-22_01-53-03_405.jpg


2014-02-22_01-51-51_706.jpg


100_4502.jpg
 
Added decals and red outlines to bottom of PHull - I cut each character out of the reg number decal separately and the red outlines were drawn on by hand with a fine-tip permanent red marker. Startin to look like a ship!

Notice how one of the four outer blue-gray rectangles looks gray while the others look lighter blue - they are all the same color but look different depending on light/angle - perfect!

vbmndfkbjhr.jpg


100_4510.jpg


2014-02-23_22-37-13_406.jpg


iini.jpg
 
Wow! Excellent work. May I ask what colors you used on the rectangular hatches on the lower saucer? Thanks!

Thanks for the compliment sir - unfortunately all the colors I used were hand-mixed and because they took so much tweaking I dont even have formulas for them :-( However, all of the blue/gray colors on the ship are really just that blue/gray mixes - some darker, some lighter - the rectangles are really sky blue mixed with gray and white and clear to lighten it. Here is a link to a website that converts scanned images/colors to comparable manufacturer's paint colors - I havent yet used it but it I plan on trying it (wish I saw it before mixing all these colors) http://scalemodeldb.com/paint
 
Last edited:
I know we have seen enough of the Primary Hull, but its not finished yet! Here are some shots of the finished bridge with decals.

The red stripes were a royal PITA. They kept breaking into little pieces even though I thought they were wet enough. So what you see is actually a patchwork of many little pieces carefully aligned. Also, because the decals dont fit exactly, especially around the back of B/C deck, I purposely cut them and spliced in different pieces to get a better fit. I did the typical Microsol process and then I carefully painted flat clear over them by brush. All together, this was about 5 hours of work - insanity confirmed!

100_4520.jpg


nbvnbnbbb.jpg


100_4524.jpg


q34g234t3.jpg


And one with flash to show all the added detail:
uuuuuhh.jpg
 
Thanks again or the generous compliments guys! Finally added the Lounge window. The entire blue-gray window section is a piece of decal paper, cut and painted, including the mullions, with a piece of thin clear plastic stuck to the back of the decal paper. Not too shabby...

hhgvhgvhg.jpg


100_4552.jpg


100_4551.jpg
 
This thread is more than 9 years old.

Your message may be considered spam for the following reasons:

  1. This thread hasn't been active in some time. A new post in this thread might not contribute constructively to this discussion after so long.
If you wish to reply despite these issues, check the box below before replying.
Be aware that malicious compliance may result in more severe penalties.
Back
Top