X Wing build.

CutThumb

Sr Member
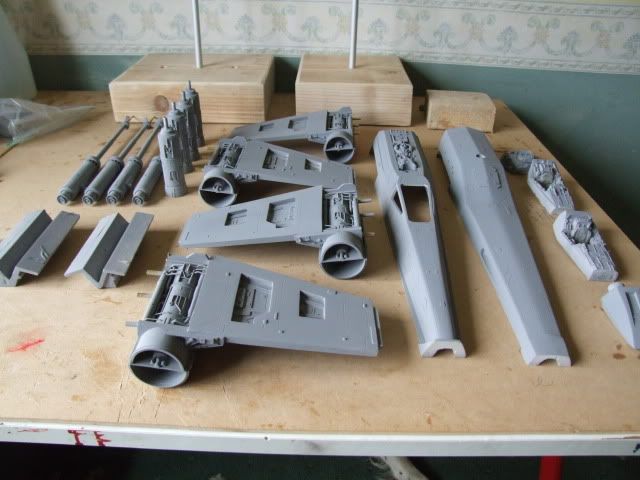
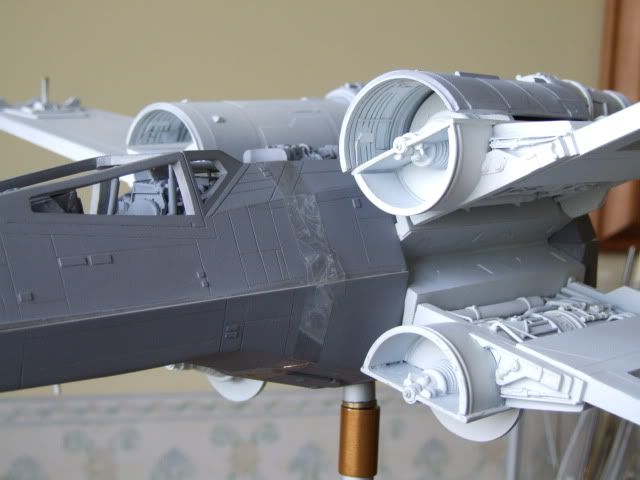
Well I' ve started my first X wing build in about thirty years. I finally managed to get a Salzo V3 and I have to say its about as near perfect as I imagined it would be after seeing all the excellent X wing prop versions built of it here and elsewhere. It really gave me an odd kind of thrill to see it all laid out and ready to go.The casting quality meant there has been little to clean up as well as it fits together cleanly and nicely.
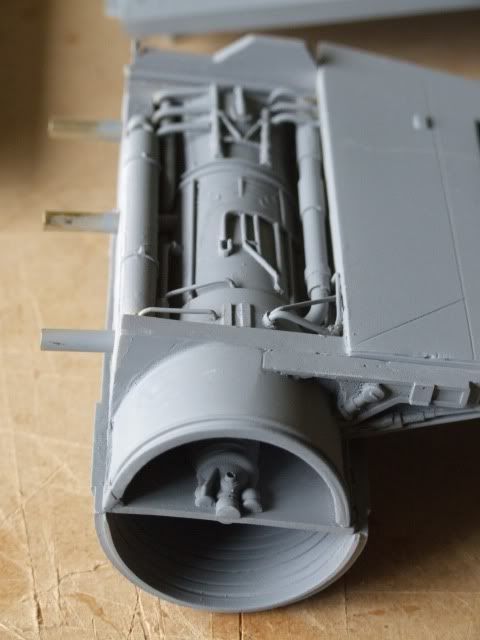
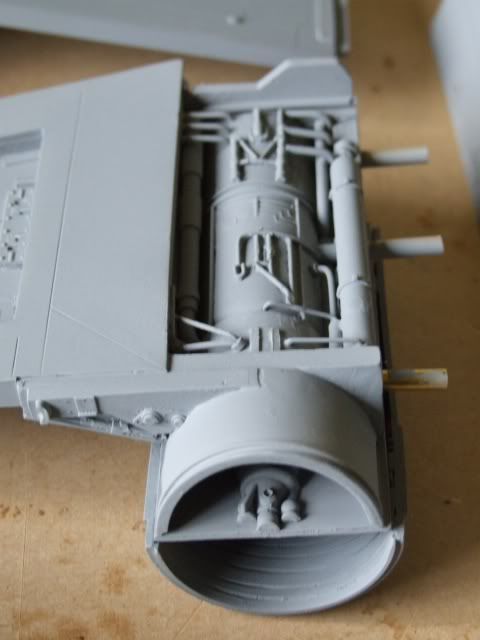
Having looked at so many builds and photos I've decided to go my own way and not go for strict accuracy to one example. I've used the 4ft X wing exhibition model as a template for added detail, particularly around the engines , which has always impressed me ( though I don't think this was ever used in filming). I just liked the detail and it seemed a bit different to everyone else versions, and the kit leaves you damn little to do as is ,as it is that accurate to the screen version of the original X wing.
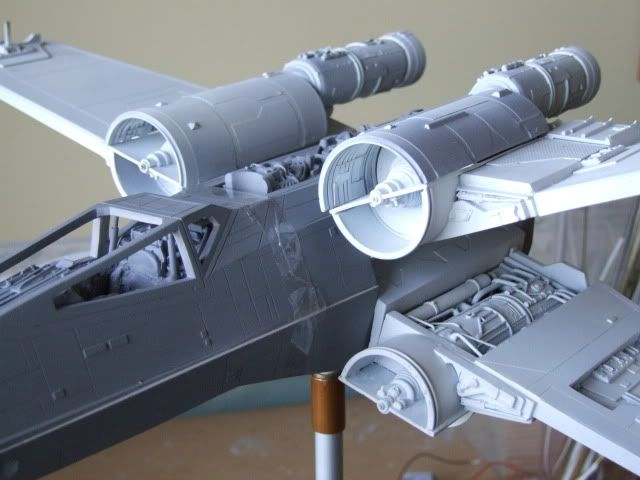
So the painting will be free lance, I guess Rogue leader (I liked playing that game alot) though pretty close to the exhibit model. it should get done over the next couple of weeks.


2009_0929sunset0036.jpg


2009_0929sunset0034.jpg


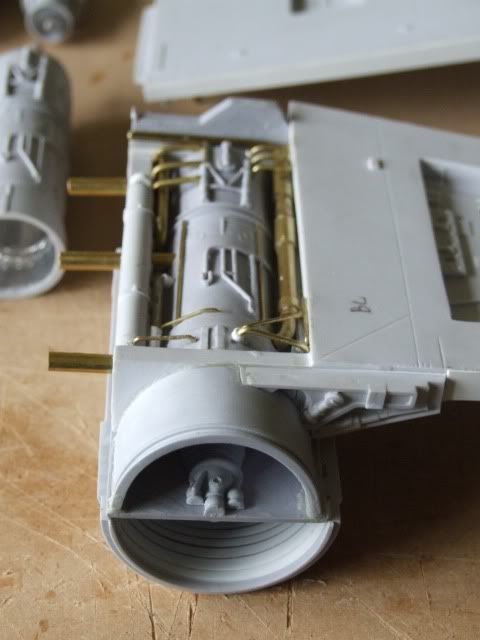
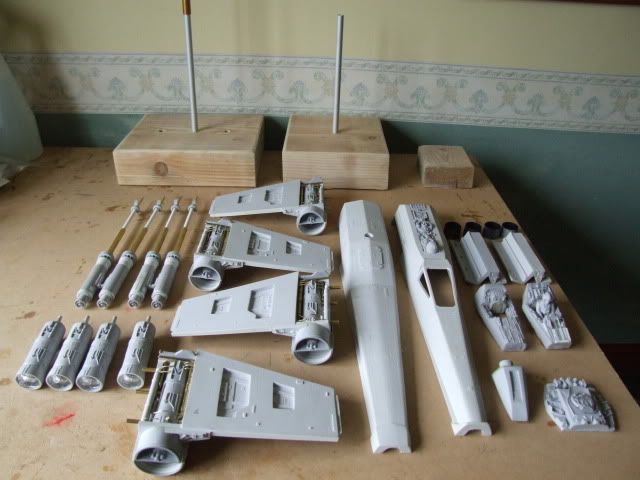
The engines will be lit , the cockpit I'm not so sure about as I'm trying to get tinted plastic for the windows. The blocks at the back are my sustitute for panavice stands, they seem difficult to get in the UK. If anyone knows a supplier let me know, thanks.
 
Last edited:
I like the mods you've done.

One thing to consider (if its important to you) is that the shape of the nose on the large-scale exhibit model varies from the 1:24 scale models. it is much more like the FX toy X-Wing.
 
Good for you CutThumb! Not to hijack your thread,but Eagle1,and I are building the four foot version of the Jedi model. Only his will be the seventies ILM version,and mine will be the actual Jedi version build up to the specs that it soley has. My version will be 100% accurate to the four foot Jedi model,and is intended to be painted as Red 3 once cast. His will be a four foot verison of the smaller models with original X-wing styling. Long story short: My version will have the same details your using inside the wing wells(engine bays). Is your model going to have the Jedi styling all over,or just what you can add to make it look like the Jedi model? P.S. I love the brass tubing - it gives it a more industrial look!
 
Well , the first undercoat has dried and its surprising how the brass tubing disappears into engine bay. Dyonisis, just been reading your thread today. Great work! I wish I had the talent to go your way for a complete build , but I haven't the skills (or the space for that size of beast !!!). I'd like to go for extreme accuracy to the 4ft build but my photo resources won't stretch to it-I just do what I can ,and at the 2ft size manage the details as best I can. The engine bay tubing is what i can make out from the photos, which aren't too hot , and my own liking. It pretty much disappears from view once the wings are in the X pos anyway,and I'll watch with deep interest how you do yours!
I wasn't aware there were two different 4ft versions, I'm basing mine on the most recent exhib photos , and i'm not sure what the Jedi styling look is ???.
PHArchivist, thanks for the info on the noses, I didn't know otherwise. Have you any comparison info I can look at please? Your Deathstar build is a testament to patience and accuracy.

2009_0929finishedpond0037.jpg


2009_0929finishedpond0041.jpg


2009_0929finishedpond0039.jpg
 
PHArchivist, thanks for the info on the noses, I didn't know otherwise. Have you any comparison info I can look at please? Your Deathstar build is a testament to patience and accuracy.

"Back in the day" when I was doing my toy conversion, I had a comparison pic of the nose of Red 2 and the big Red 3; perfect profiles of each. PM me as a reminder to see if I still have it.

My guess is perhaps Hasbro used the biggie as their reference do to its size and availability... (?)

Thanks on the DS!
 
:eek Is that a second 4fter!......
CutThumb, the detail youve put into the engine pits is excellent. Reminds me of superdetail etched brass for Military kits. Looks great even without the paint :cool This is going to be a nice build.
 
Looks that way,I've never seen that photo before I don't think?Love the added detail to the engines,is that all scratched from K&S or did you get the parts elsewhere?
 
What's this?
That is the original ILM build in the archives.

There weren't, these guys are just taking different approaches in their builds.
Correct. eagle1 is making an interpretive on his build. Mine will accurate to the original.

:eek Is that a second 4fter!...... .
No. The black fuselage is the master which the finished version was cast from.
CutThumb, the detail youve put into the engine pits is excellent. Reminds me of superdetail etched brass for Military kits. Looks great even without the paint :cool This is going to be a nice build.
I like it better without the primer on the brass. CutThumb - PM sent.
 
Well , the first undercoat has dried and its surprising how the brass tubing disappears into engine bay. Dyonisis, just been reading your thread today. Great work! I wish I had the talent to go your way for a complete build , but I haven't the skills (or the space for that size of beast !!!).
Thanks! I'll show how to do this will the simplist tools,and very little trouble. If you can figure out how to build this with brass tubing - then you can start to scratch build. Just start small,then build your way up!
I'd like to go for extreme accuracy to the 4ft build but my photo resources won't stretch to it-I just do what I can ,and at the 2ft size manage the details as best I can.
I think I can help you. PM sent.
The engine bay tubing is what i can make out from the photos, which aren't too hot , and my own liking. It pretty much disappears from view once the wings are in the X pos anyway,and I'll watch with deep interest how you do yours!
I wasn't aware there were two different 4ft versions, I'm basing mine on the most recent exhib photos , and i'm not sure what the Jedi styling look is ???.
I'll make mine the same way that ILM made this version - with an armature in it. Here's what the Jedi version looks like.
352940322.jpg
 
Thanks for your offer Dyonisis, any ref photos will help as I prep her for painting. In answer to the questions asked its all scratched cut or bent brass tubing. It didn't take long with a new hacksaw blade, wire cutters and a spot of superglue! I seem to have more trouble cutting large sheet plastic accurately with a stanley knife, which is why I guess I shy away from the big super structures.What tools or methods to cutting do other people use?
PH ,thanks for the nose photos, they are quite different! I may try to alter it but I'm kind of averse to messing with Mikes ace casting! Your DS is looking more like the real thing!!! As I've said brilliant work resulting from alot of careful research.
 
PH ,thanks for the nose photos, they are quite different! I may try to alter it but I'm kind of averse to messing with Mikes ace casting! Your DS is looking more like the real thing!!! As I've said brilliant work resulting from alot of careful research.

My pleasure - glad I had them for you. And thanks again!
 
Well, didn't do much on her last week, as the weather was so good and I had to finish off work in the garden, which has taken me a lot of time and money to sort out.
However, I think I am absolutely finished with the detailing now!! Firstly a great round of thank yous to Dyonisis for sharing a brilliant set of photos of the 4ft model!!! They really do cover almost every angle of the ship. I wish I'd had them earlier so the engine detail could have been more accurate but what the hell- maybe next time! Thanks again anyway to Dyonisis and to 3 D for comments.
i am going to light the cockpit with fibre optics ,though it is going to be a squeeze to get it all in, though the test fit has gone okay. I've detailed the pit as best I could. Strangely the two cabin window lift mechanisms seem to be missing in every build I've looked at, but not in the mocked up cockpit screen shots in the film, so I've added them, sort of.
Everything is held together by tape for the moment but its looking fairly together now for the painting.

2006_0101Xwing0002.jpg


2006_0101Xwing0013.jpg


2006_0101Xwing0001.jpg
 
+1 on those ribs for the intakes. I always thought that area looked too bare on the originals. Can't wait to see paint; those engine wells are really gonna look great. Great build.:thumbsup
 
This thread is more than 14 years old.

Your message may be considered spam for the following reasons:

  1. This thread hasn't been active in some time. A new post in this thread might not contribute constructively to this discussion after so long.
If you wish to reply despite these issues, check the box below before replying.
Be aware that malicious compliance may result in more severe penalties.
Back
Top