Jacob's Tapestry from Lost - the cut off corner.

Guri

Sr Member
Since I'm still on my Lost kick...

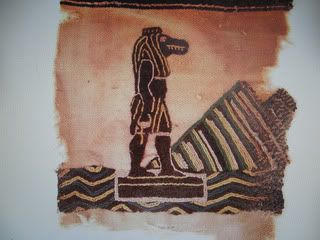
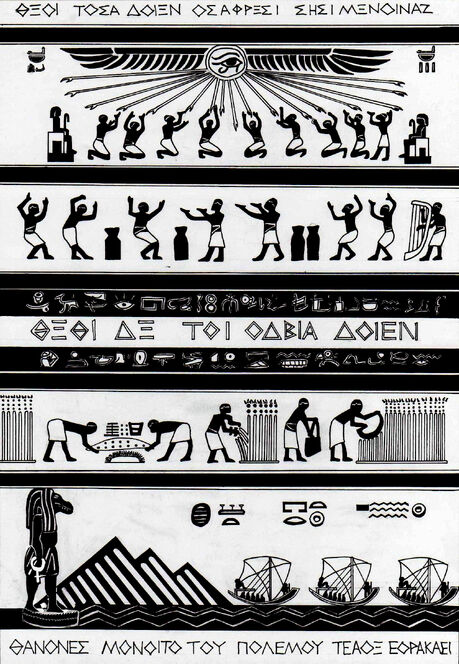
From what I can see in screen snaps, calling this piece a 'tapestry' doesn't seem to fit with what I understand tapestries to be - woven images. It looks more like it's painted on in some images:
thumbweaving.jpg


thumbweaving2.jpg


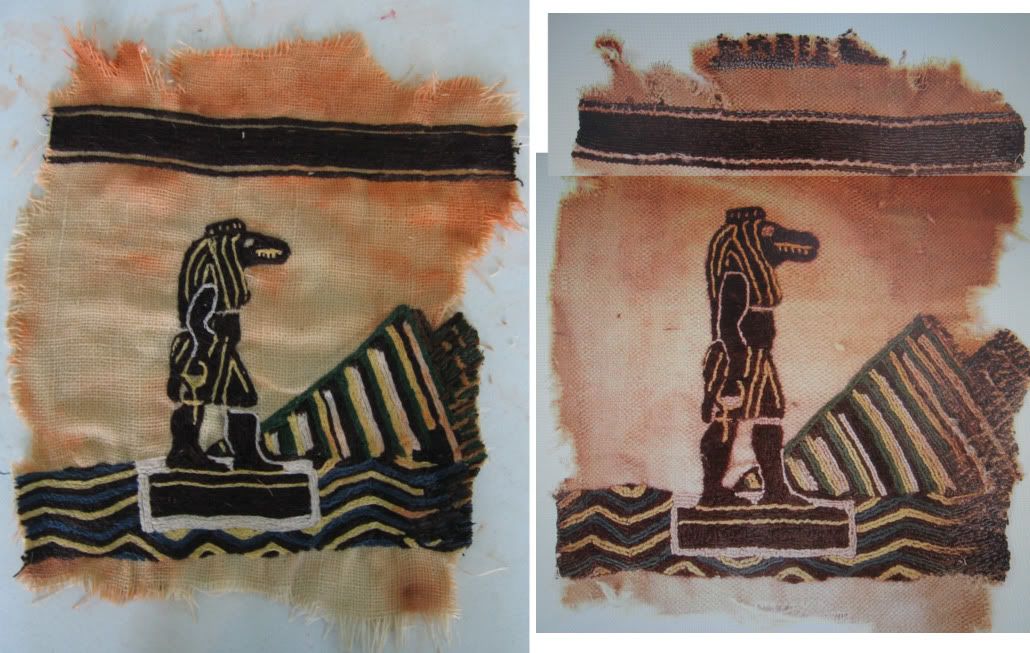
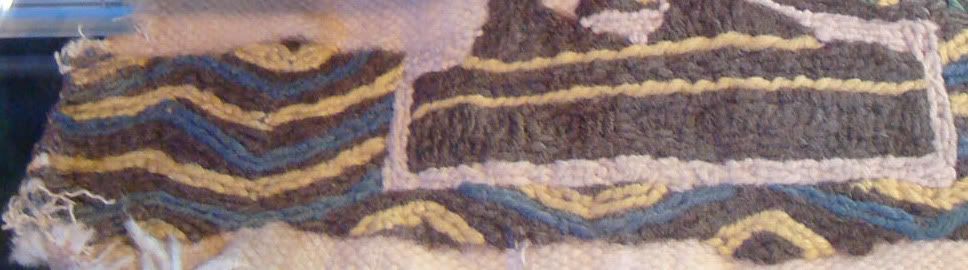
And the images from the auction of the corner piece I'm replicating seem to be an embroidery/needlepoint sort of execution.

thumbtapestry3.jpg


I'm going for what it looks like on the show, the embroidery:

thumblost-statue-tapestry.jpg


Rather than actually making a tapestry that it's supposed to be - because it's easier (which is why they probably made the props that way!)

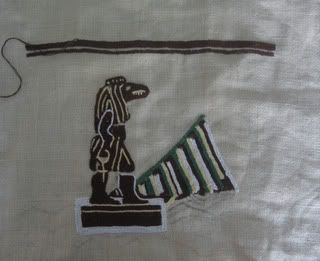
Here is what I have so far.
mytapestry1.jpg


It's my first attempt ever to needlepoint and I'm learning as I go. If it turns out crappy I may redo it, but so far, from a distance, anyway, it's not bad.

My ultimate plan is to mount it with a replica knife on some sort of board so that it hangs on the wall like was shown in the cabin:

5x16_Jacob%27s_knife.jpg


Will have to find a good place for it where nobody is going to walk into it. :lol


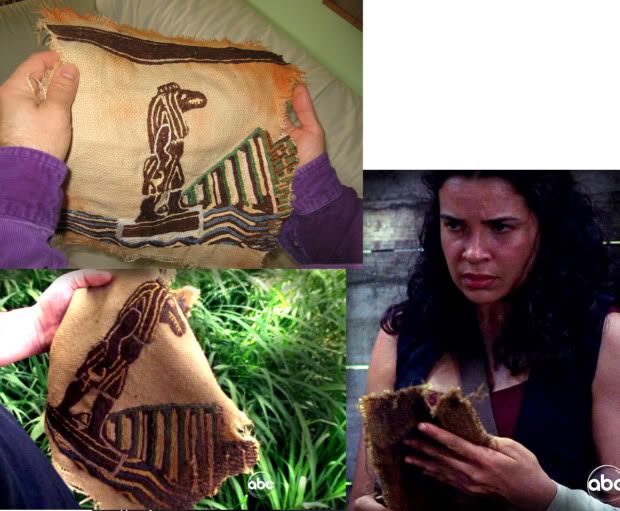
Side note: I'm doubting the one sold is the same that was screen used, based on the bottom right hand corner differences from the screen shot and the catalog photo - and it doesn't even look like what was hung in the cabin is either of them from the way it's frayed or that it's an actual cut out piece from the tapestry; the weave in the screen snap of Jacob weaving is WAY more loose than the close up image of the piece held in hand by Bram. I'm going for something in between all of these...
 
Great idea. Looks like you're off to a great start. A much better price also considering the differences you pointed out from screen used and the auction.
 
Thanks for the interest! That wine bottle (I wondered if anyone would notice *heheh*) has a bit more of a stubby neck than Jacob's metaphorical one on the show, but it was so close and only $3 at the thrift store that I couldn't resist picking it up. :)

Embroidery is much more difficult than drawing. To undo a whole line of thread takes almost as much time as sewing it... and if you don't catch a mistake until you've turned a corner or two, ugh, you can't just cut it out!

So far the perfectionist in me has issues with several places, but I'm learning a lot as I go and it's not taking as much thread as I thought so it won't be that expensive to do another one.

I seriously can't wait to age this one, I think that'll really make it. (and hide the imperfections) :angel
 
Some more progress on this...


mytapestry3.jpg
tapestry3.jpg


Next time I think I'm going to draw it out really well first on the fabric and compare photos, maybe even with something darker than pencil, before I start sewing. It's so easy to slant a line of stitches or not make them long enough, or make it too thick... Still, it's a fun project and despite the glaring errors I see I'm enjoying picking up something new. :D
 
Wow, Guri, that turned out great! I really admire all the hard work you put into that. My poor fingers would have given up on that project way before I finished. And I can't believe that's your first stab at embroidery. Excellent!
 
Thanks guys! I'm still bent outta shape for getting some of the details off, but I'm happy as my first attempt. I have more fabric and thread to start a new one when time allows.

Here's an interesting screen snap comparison to what I've done and to the obvious prop switch they did. Not important to the plot, but noticing these types of details is what we do here on RPF, right?

I made mine based on the sizing of the piece in Bram's hands... But if you look at the image of Ilana holding what she took down from the cabin wall - either she has MASSIVE hands, or they used a different piece of fabric for her shot. :lol

sizediscrepency2.jpg


Another thought I had was to make the rest of the entire tapestry, painting the images on - that's what it looks like they did from other screen shots I've analyzed. We're getting an addition put on to our house for a large entertainment space and wouldn't it be cool to have that hanging in there?

As time allows... And I really think I want to make the black and white rock scales first.
 
Last edited:
Thanks Egon. :)

The Malum, I think this link might be the one you're looking for. It's too huge to put in this thread. From the look of it, that corner is even larger than the version that Bram is holding - so it confirms further that the cut off version is not from the original tapestry.

Here's from the auction and even thought it's smaller, because of the better lighting you can make out the colors pretty well:

tapestry_660.jpg


And on that one, you can see the mountain range is lacking a lot of the color that the cut off tapestry has...

Some things I learned from the first go:

- The fabric I'm using SHRUNK when I wet it for the weathering. So I washed and dried it first this time.

- It's not possible to eyeball the pattern and proportions (should have been a no brainer). So this time I've printed and cut out the image to trace on the fabric with a fabric pencil.

- The stitch I was using is a chain stitch, the one on the original is a stem stitch. I am practicing first because it's more difficult.

- The weathering paint looks darker when wet, so I need to go over it a couple times to get it right.


Sweet.... look what I just found! An unbelievable close up from the auction display case


That guy has a TON of Lost auction photos - really great close ups of the props!!! Wow... what a treasure.

http://www.flickr.com/photos/popculturegeek/page20/
 
Last edited:
I'm thinking you might be able to come up with a colorized image file, then get a shop to print it on fabric for you. The question then becomes, do you take your colors and hues from the auction photos of the large tapestry prop (which looks fairly faded and may have been a poorly-constructed temporary prop) or from the smaller corner piece (which was obviously a separate prop, more detailed and newer -- hence more vibrant colors)?
 
I think what I would do is paint it on myself using print outs of my own as stencils - much cheaper than a shop, and I would use the same colors I've been using to stitch on top of the paint.

This new photo I found is so close up, I can even count the stitches! Do I want to be that insanely accurate?? :lol

countthestitches.jpg


The fabric I've been using is not even close to this, it's more like the very top two photos of Jacob's weaving. Hmm....
 
This thread is more than 13 years old.

Your message may be considered spam for the following reasons:

  1. This thread hasn't been active in some time. A new post in this thread might not contribute constructively to this discussion after so long.
If you wish to reply despite these issues, check the box below before replying.
Be aware that malicious compliance may result in more severe penalties.
Back
Top