Studio Scale Snowspeeder

Thanks guys, I appreciate that you think highly enough of this build that you'd ask my input on the paint.

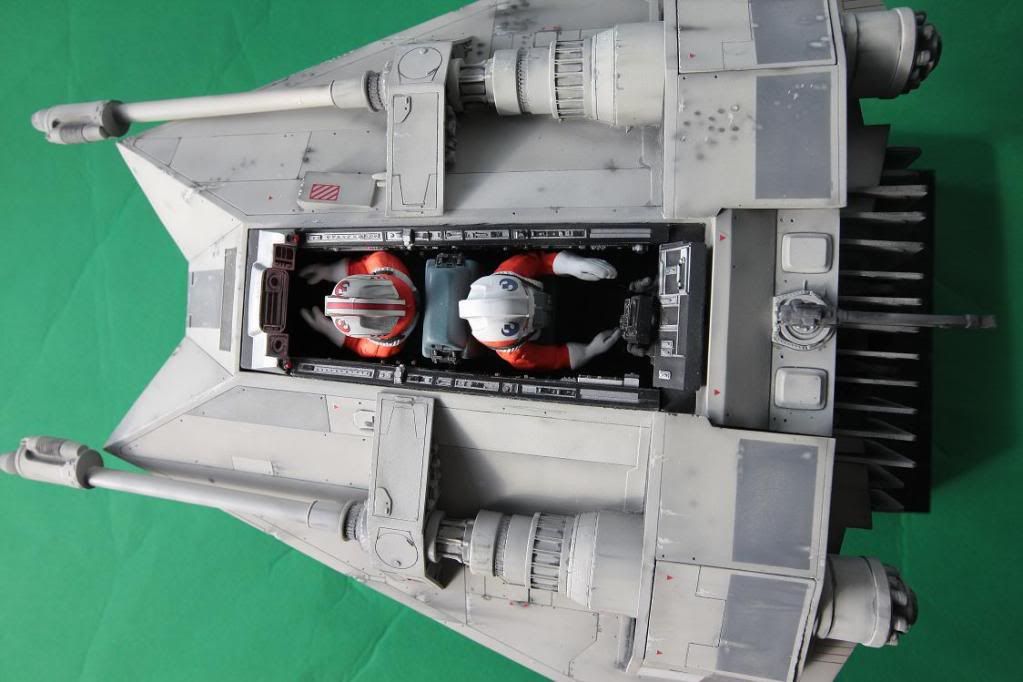
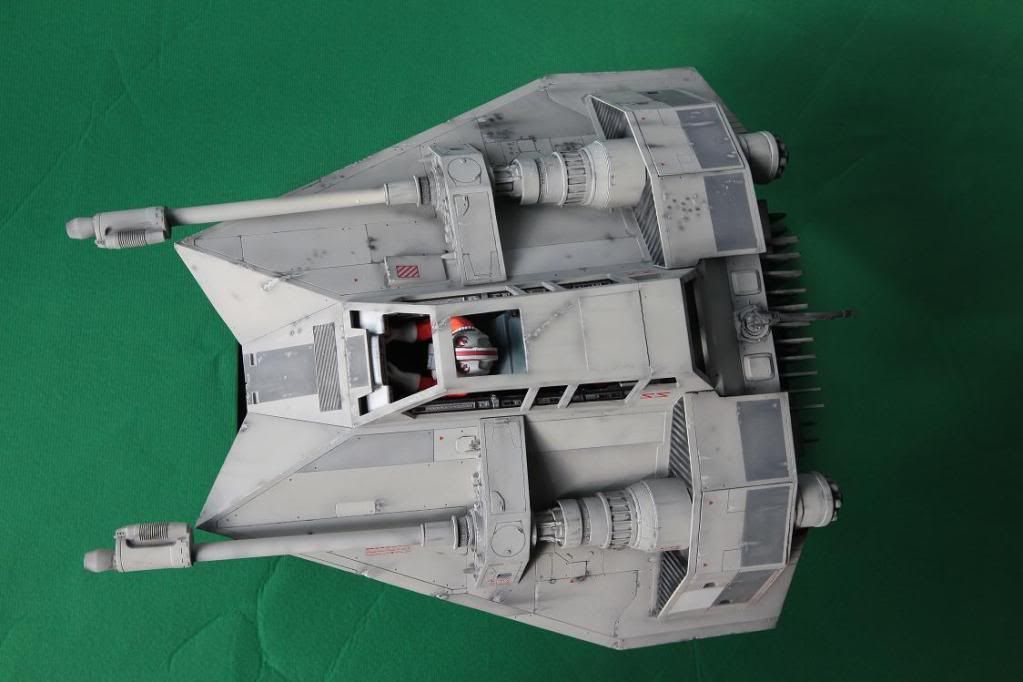
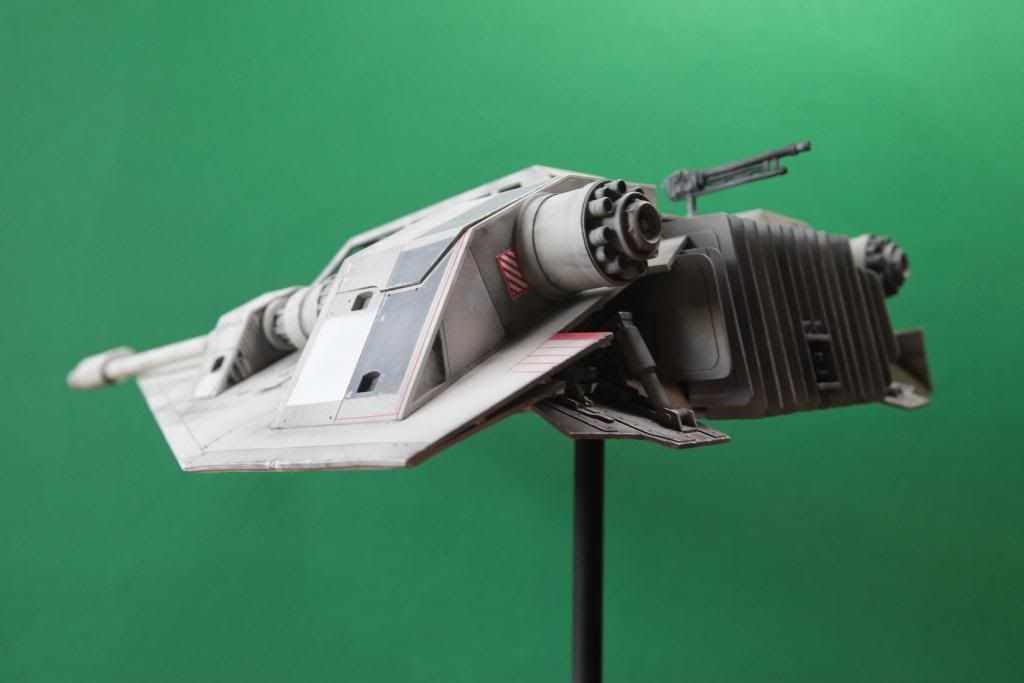
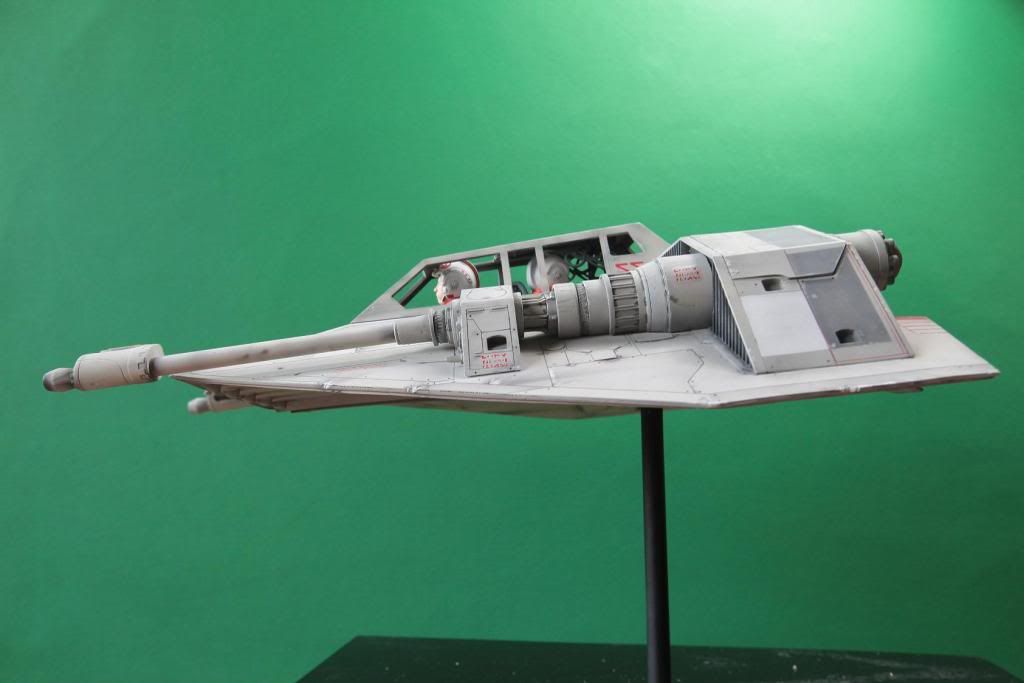
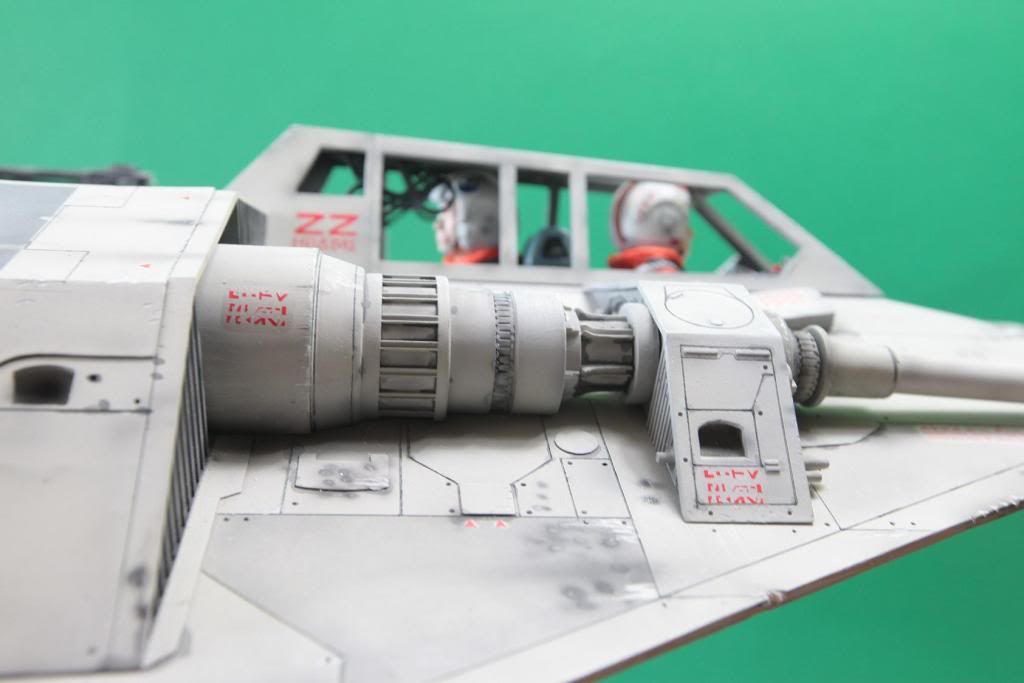
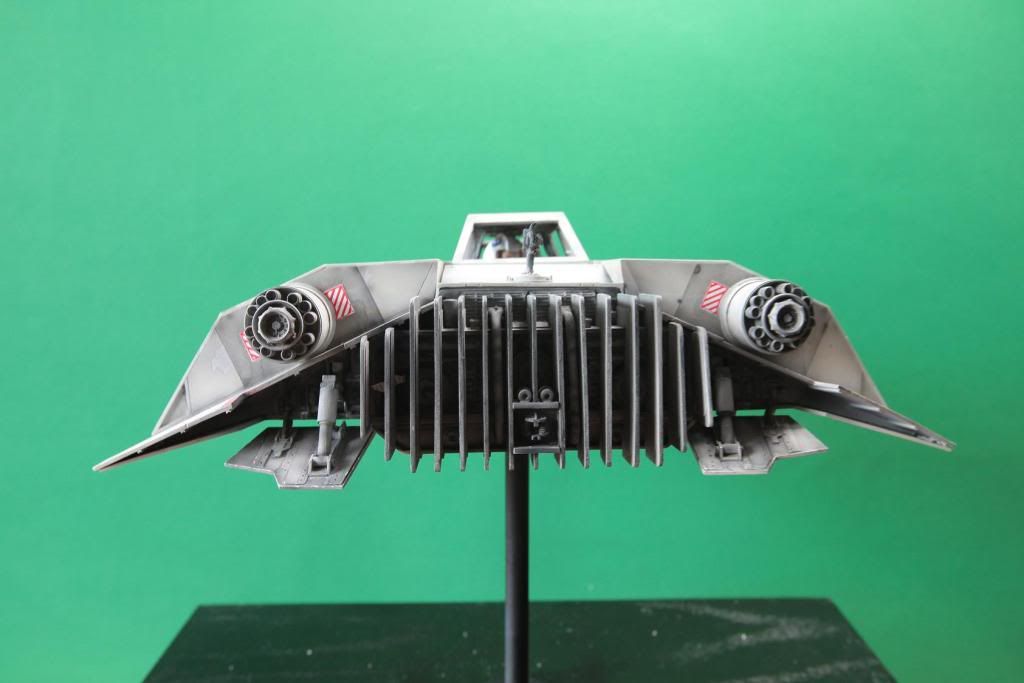
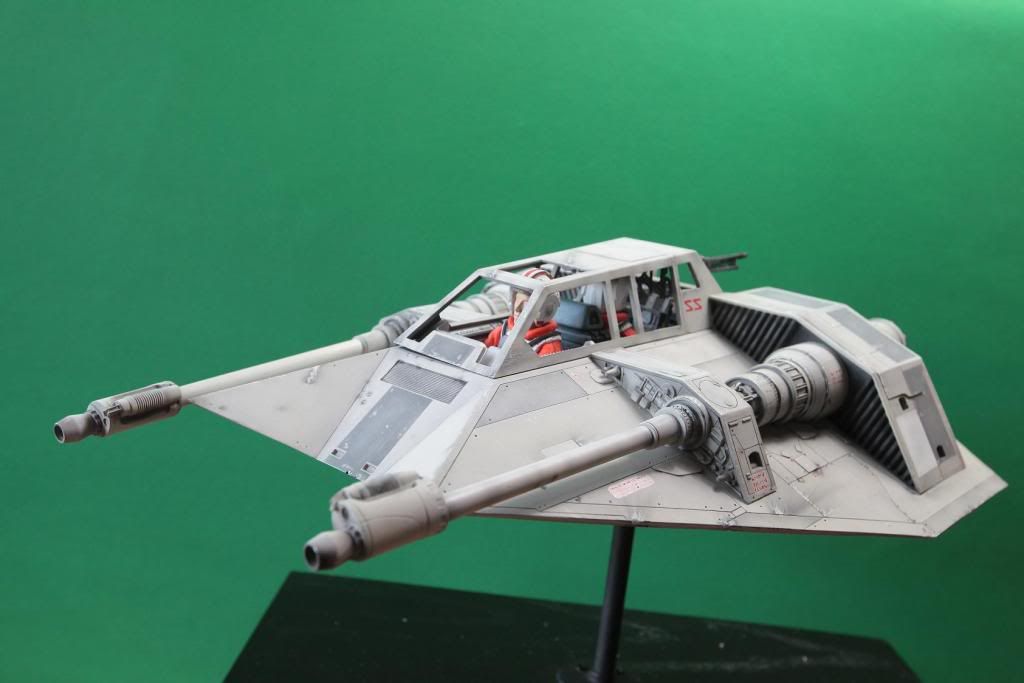
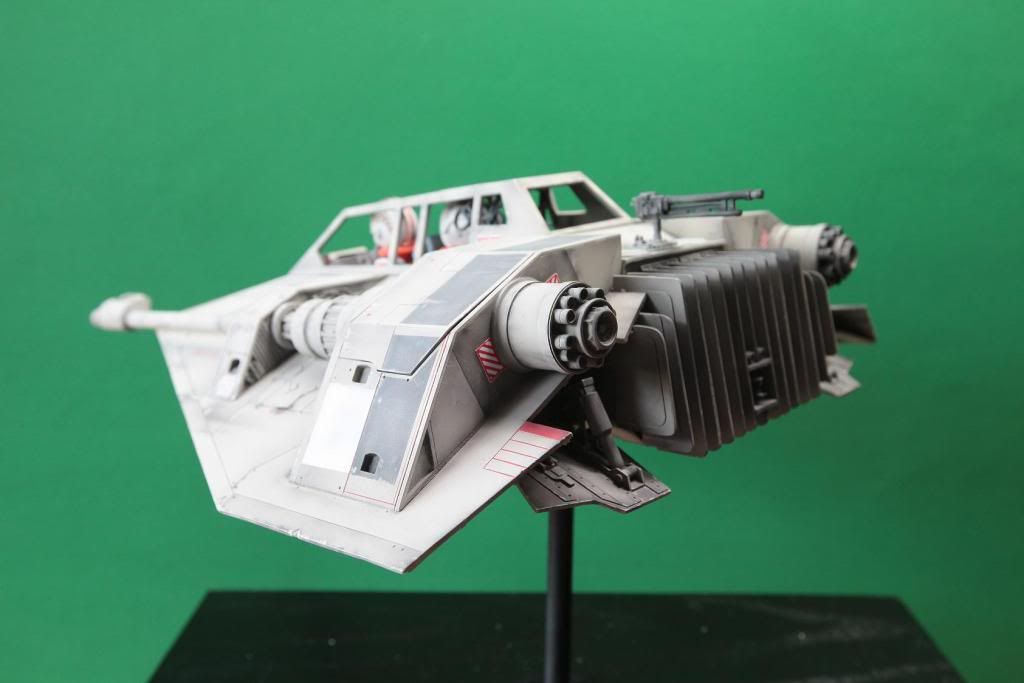
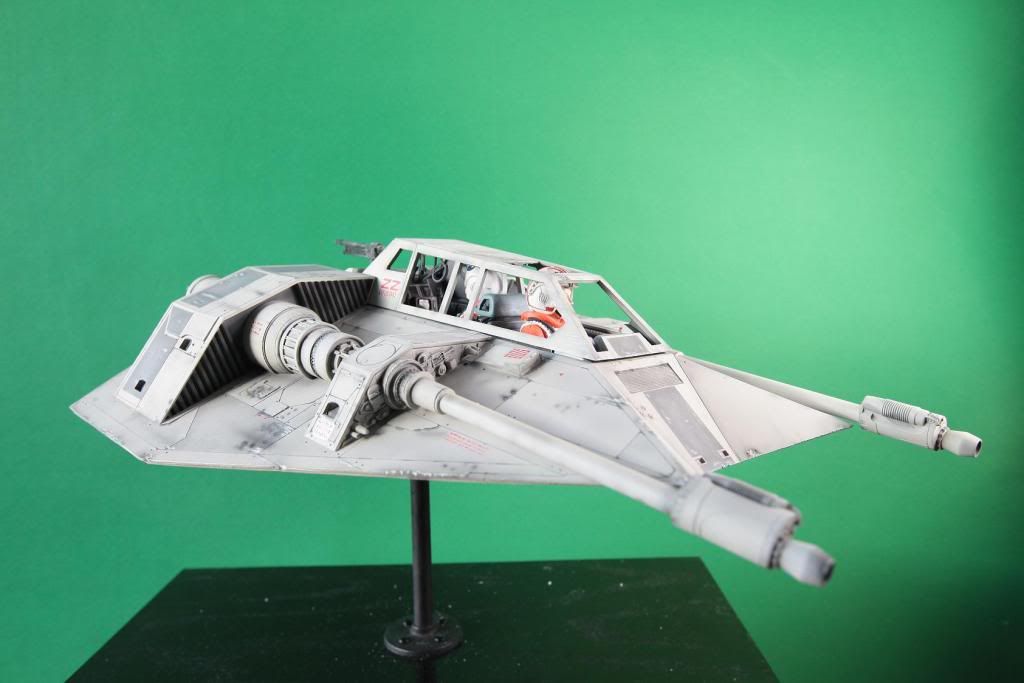
I used Mike Salzo's suggestion for the base color using a spray can of Testor's flat light aircraft gray, after that dried I oversprayed it very lightly through my airbrush with light gray (flat white with just a drop of black)

For the darkest panels, I sprayed the Testors into a cup, then added black to get that warm dark gray color. For the light panels, I did the same thing, only adding flat white.

So all the colors on the entire speeder originate from the spray can of the aircraft gray with black or white added.

Weathering, and blast marks were all done with super thinned down black.

I've totally abandoned acrylic paint at this point as in my experience enamels just go down smoother.
 
Wow brilliant job Richard. (Are you sure you haven't just nicked that out the Archives?) :)

Makes me very proud to see such a terrific build up, and I'm sure Mike and Steve think the same. If there was ever proof needed of what this terrific forum is all about, then there it is. Great stuff.

N
 
richard..
really love the warmth of the gray you ended up with. has a slight hint of sand/taupe in it. perhaps its your camera settings and maybe its not really that color, but feels like what i think the speeder is in my head when i think of it. blast marks, chipping and overall weathering is also done expertly -- very goldilocks -- not too much...not too little.

congrats on a wonderful paint job.

btw, am i crazy, didn't you post pictures of your interior too? didn't notice them when i reread the whole thread?
 
pics of the interior. (better pics to come as I set up a new photo studio.... somewhere :unsure Man babies take up a lot of room :))

IMG_1381.jpg

IMG_1383.jpg

IMG_1385.jpg

IMG_1399.jpg

IMG_1364.jpg
 
Yup, contact mike salzo, cant fault it too, builds very well.
A few areas are off to the prop, but thats forgivable as its cast so well.

Lee
 
So, there's no excuse for my not posting. I received this BEAUTIFUL SS model from Rel almost a month ago.

I've been a bit busy and, as some of you know, I had to take down my photo studio room to make room for my new daughter. Anyways, I attempted to recreate a studio green screen setting without a proper room or proper lighting...

Either way, I will continue tweaking the lighting in my temporary setup to get the lighting just right. I am hoping to simply produce photographs that do justice to the incredible build by Rel. I have to say, the pics below do not even come close to showing all the detail that he has put into the piece.

This kit is most likely still available - if you don't know what to get yourself for Christmas, I would highly recommend this baby

A public thank you and thumbs up to Rel! :thumbsup

Hope you all had a Happy Thanksgiving!

IMG_3091.jpg

IMG_3076.jpg

IMG_3013.jpg

IMG_2990-1.jpg

IMG_2980.jpg

IMG_2977.jpg

IMG_2866.jpg

IMG_2812-1.jpg
 
Wow!, great job dude!. Youv'e really made something special form this kit & the paint job is very well done.

But yeah, the gun orientation is wrong as pointed out mate!.
Should be an easy fix.
Stu
 
The ribbed pod section under the blaster barrel should be angled so effectively it comes off at right angles to the slope of the hull. ie if you were to position the speeder so the side of the hull was horizontal in front of you. Imagine a line down from that at 90 deg and that should give you a good position.

N
 
I will adjust the guns - That was my fault. For some reason I always assumed they were oriented at an angle like that... Ah wells., I will spin them around. Thanks for the tips. :thumbsup
 
This thread is more than 12 years old.

Your message may be considered spam for the following reasons:

  1. This thread hasn't been active in some time. A new post in this thread might not contribute constructively to this discussion after so long.
If you wish to reply despite these issues, check the box below before replying.
Be aware that malicious compliance may result in more severe penalties.
Back
Top