You are using an out of date browser. It may not display this or other websites correctly.
You should upgrade or use an alternative browser.
You should upgrade or use an alternative browser.
Fetts $25 Iron Man - Mark V Suit Tutorial
- Thread starter Fetts.Sobriquet
- Start date
-
- Tags
- iron man
Wolfie
Sr Member
Wolfie, Bad form dude.......Because you just made me spit coffee at my monitor! LOL
Dudette lol but next time I'll remember to put "not responsible for monitor damages" after posting
")
I'm really tempted to try to build this to make my fiance wear it but no way I'd have time between trying to finish a Sandtrooper backpack before next month. :/ That and I wanna make him a Rocketeer to AND find him some better wolverine claws (which I made out of rubbermade trash can plastic last time lol)
Alas. But really, as much as I lurk to learn things, threads like this make me squee. and FS thanks for being above the poo and better than me cause I couldnt help stoop down to the level too , it was the whole 'get out of my thread' thing then coming into yours that did it for me lol
Last edited:
I haven't posted anyone else's picture. All of them are mine. The ab flex video is me.
I know....I could not understand how someone else was stating that you had used their photos as reference so I was a little confused by their post. Keep the updates coming! Thanks.
Someone had a question in reference to what tools to use to cut the trashcan instead of razor knives. I always use, and am currently using on the WM, cutting shears purchased at Home depot (comes in a set of 3 shears that have a straight pair, one for right-handed curves and one for left-handed curves for $29.) for cutting up plastic sheets and trashcans. Then, sand the edges.
Paul D.
Fetts.Sobriquet
Well-Known Member
ARMS
Arms are very different sizes obviously, so this is an instance where you are going to have to play with the templates to find YOUR size.
I tried to make the templates easy to understand and adjust.
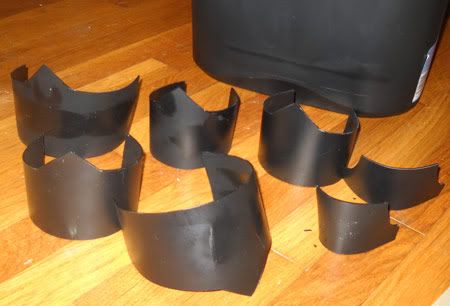
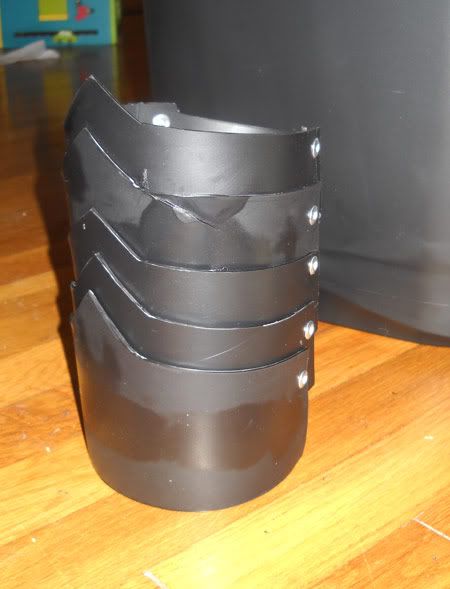
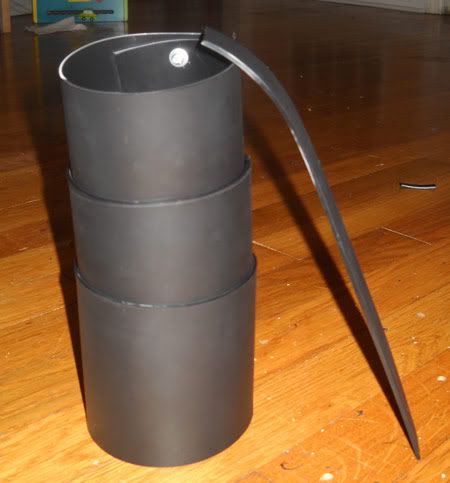
Upper arm:
Print out the triceps and bicep templates. You're going to need to print out 5-6 plates for the triceps and 5-6 for bicep. You'll know how many you'll use depending on your arm length. I went with 6 for the triceps and 5 for the bicep.
The first thing I did was cut out the 5 tricep and 5 bicep paper templates. then I assembled them. I held them to my arm and taped them together so I could see exactly what size I needed to cut the plastic.
I marked the templates accordingly and cut out the plastic. The bicep part wraps around your bicep and the tricep part around your tricep.
When you have a nice paper upper arm built and you're happy, take it apart and cut your plastic. I would cut one bicep and one tricep strip at a time assemble them, then the next. That way you can better gauge how much the thickness of the plastic comes into play when cutting the length of the next strip. Since they over lap, each one has to be a little bit longer to accommodate for the increase in size.
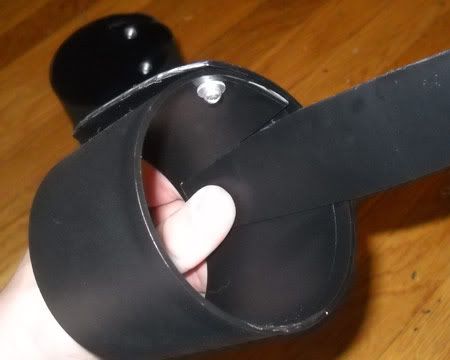
I cut mine out and test fitted them but didn't rivet them. before assembling I heated them up with a heat gun and gave them a little bend just to help me assemble everything.
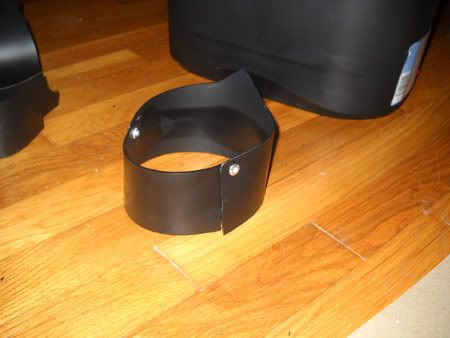
Now just rivet each section together.
Test everything as you go to make sure it is all fitting together.
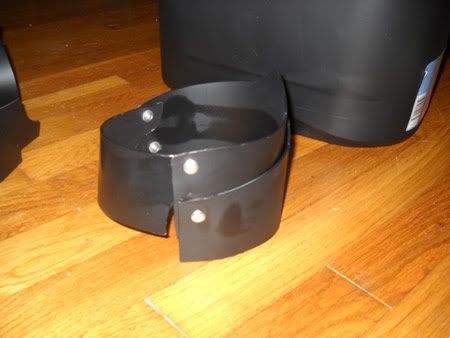
Once they are all assembled you can rivet each section to it's neighbor to form one upper arm section.
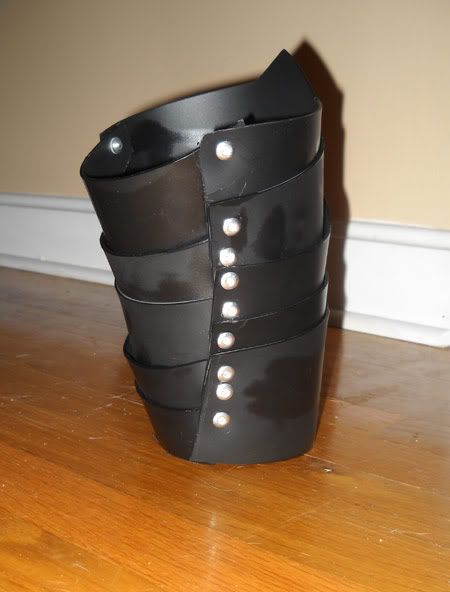
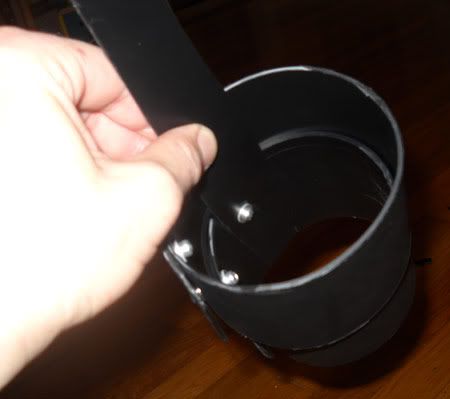
As you can see I made my bicep strips a little shorter toward the elbow to create a taper.
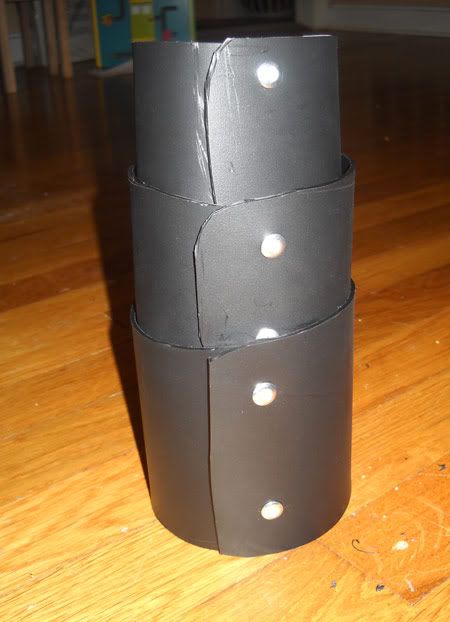
Forearm
For the forearm I basically repeated the above steps.
Cut out your three (might need four) forearm sections in template form and test fit everything in paper. The forearm sections are just one strip, not two combined like the upper arm. When you're happy with your fit, cut the plastic parts out using your modified templates.
Cut the the strips out and assemble each part.
Trim and do another one.
Test fit as you go.
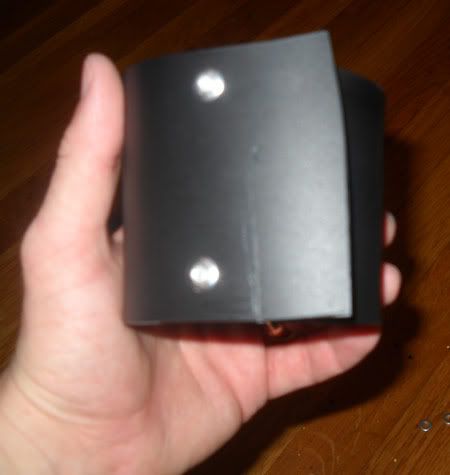
To connect the sections together I cut a long strip of scrap plastic about 1 inch wide and riveted the sections to it.
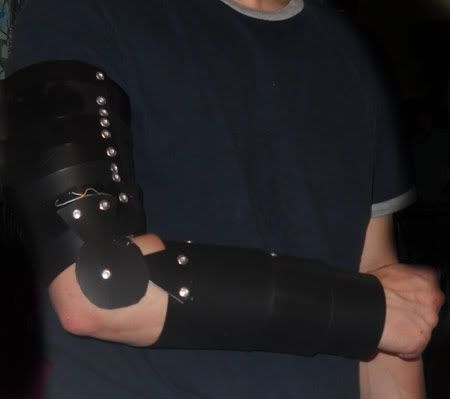
Lastly, I cut two elbow sections out and riveted one to the upper arm and one to the lower arm. I cut out a circle and placed it over the elbow and rioted the elbow sections together in the center of the circle. the elbow pivots on this rivet.
The little squiggly line above the elbow is silver sharpie I was using to mark the plastic.
My circles suck because I free handed them. Use the template to cut nice circles.
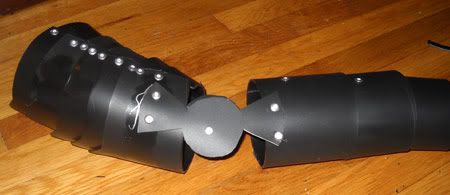
Testing the size is most important here.
This might not be the best way to do this, so experiment and have fun.
I'll answer any questions but I won't be back online until this time tomorrow.
:cheers
Arms are very different sizes obviously, so this is an instance where you are going to have to play with the templates to find YOUR size.
I tried to make the templates easy to understand and adjust.
Upper arm:
Print out the triceps and bicep templates. You're going to need to print out 5-6 plates for the triceps and 5-6 for bicep. You'll know how many you'll use depending on your arm length. I went with 6 for the triceps and 5 for the bicep.
The first thing I did was cut out the 5 tricep and 5 bicep paper templates. then I assembled them. I held them to my arm and taped them together so I could see exactly what size I needed to cut the plastic.
I marked the templates accordingly and cut out the plastic. The bicep part wraps around your bicep and the tricep part around your tricep.
When you have a nice paper upper arm built and you're happy, take it apart and cut your plastic. I would cut one bicep and one tricep strip at a time assemble them, then the next. That way you can better gauge how much the thickness of the plastic comes into play when cutting the length of the next strip. Since they over lap, each one has to be a little bit longer to accommodate for the increase in size.
I cut mine out and test fitted them but didn't rivet them. before assembling I heated them up with a heat gun and gave them a little bend just to help me assemble everything.
Now just rivet each section together.
Test everything as you go to make sure it is all fitting together.
Once they are all assembled you can rivet each section to it's neighbor to form one upper arm section.
As you can see I made my bicep strips a little shorter toward the elbow to create a taper.
Forearm
For the forearm I basically repeated the above steps.
Cut out your three (might need four) forearm sections in template form and test fit everything in paper. The forearm sections are just one strip, not two combined like the upper arm. When you're happy with your fit, cut the plastic parts out using your modified templates.
Cut the the strips out and assemble each part.
Trim and do another one.
Test fit as you go.
To connect the sections together I cut a long strip of scrap plastic about 1 inch wide and riveted the sections to it.
Lastly, I cut two elbow sections out and riveted one to the upper arm and one to the lower arm. I cut out a circle and placed it over the elbow and rioted the elbow sections together in the center of the circle. the elbow pivots on this rivet.
The little squiggly line above the elbow is silver sharpie I was using to mark the plastic.
My circles suck because I free handed them. Use the template to cut nice circles.
Testing the size is most important here.
This might not be the best way to do this, so experiment and have fun.
I'll answer any questions but I won't be back online until this time tomorrow.
:cheers
Last edited:
Fetts.Sobriquet
Well-Known Member
tk1055, that chest looks great by the way!
charliehall03
New Member
So i know you gave us various options for the helmet.
But what did you personally decide to make it with?
But what did you personally decide to make it with?
charliehall03
New Member
Code:

epic!!
Last edited by a moderator:

mgbeach
Well-Known Member
awesome find! Killer clip!
Although, trailers really go too far these days in many cases. Imagine how amazing it would have been to see the briefcase suit for the first time in the theater.
The design art linked from that page is pretty cool too..
http://movies.yahoo.com/photos/movie-stills/gallery/1096/iron-man-design-art#photo0
Interior of faceplate
http://movies.yahoo.com/photos/movie-stills/gallery/1096/iron-man-design-art#photo28
Last edited:
charliehall03
New Member
awesome find! Killer clip!
Although, trailers really go too far these days in many cases. Imagine how amazing it would have been to see the briefcase suit for the first time in the theater.
Yeah, that's what I told my brother. I mean, they take the really anticipated fight scene and put it on the internet.
Chuey
Sr Member
Yahoo has just recently posted a clip, featuring the Mark V.
Iron Man 2 Trailers & Video Clips (4 videos)
(click on the clip called "Suitcase Armor")
Iron Man 2 Trailers & Video Clips (4 videos)
(click on the clip called "Suitcase Armor")
SpideyFett
Well-Known Member
Go Go Go... nice work bud.:thumbsup
Fetts.Sobriquet
Well-Known Member
So i know you gave us various options for the helmet.
But what did you personally decide to make it with?
Sintra, but that was my one lame attempt at a helmet you saw in this thread. I don't have the talent these other guys have. :lol
Last edited:
Hey all this is Nintendude from the 405th I know I have mainly stuck to pepakura but after going though all 7 pages of reading EVERYTHING and looking through all the templates, I must say awesome job with the templates. I know that trashcan armor is one idea of doing this but I will be starting on this myself probably after the movie is out just for fun and I may do this with sheet aluminum and back the pieces with foamie sheets. Another thought instead of plastic or sintra is to go with sheet rubber or foamies material if you want all the parts to have some flex and comfort to it. I know I'll be going metal and my Iron man helmet is being made from sheet metal as well using dungbeetles pep file to do that some might find me crazy but thats in my nature.
cavedwellar
Sr Member
Awesome work friend, and thanks for sharing your expertise instead of hording away your trade secrets.thumbsup
thumbsupSimilar threads
- Replies
- 1
- Views
- 1,038
- Replies
- 16
- Views
- 4,716