RC Sand Crawler build.

CutThumb

Sr Member
Well, the box came Tuesday and it was a big heavy box, thankfully with all the parts intact inside it!! After the clean beauty of the Salzo kit, this one is a bit of a beast to tidy up. The instructions on the disk are quite clear as a build guide and it is straight forward to follow, but there are a few issues I've worked pasted which I hope will save people time and trouble.

2006_0101Xwing0014.jpg


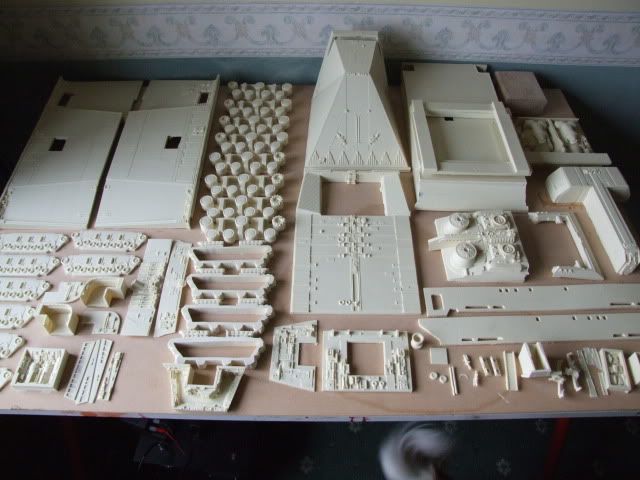
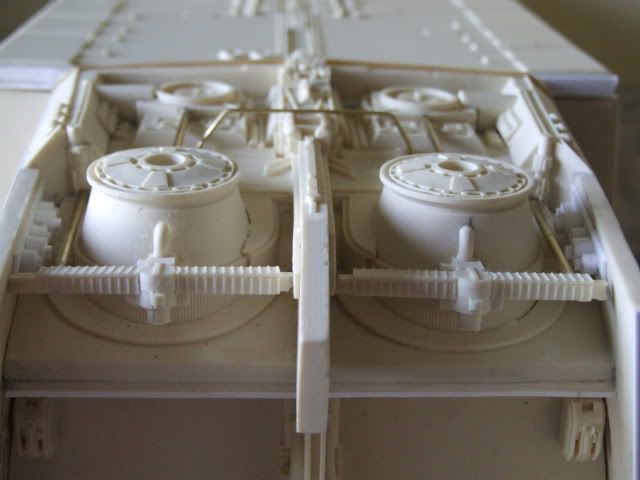
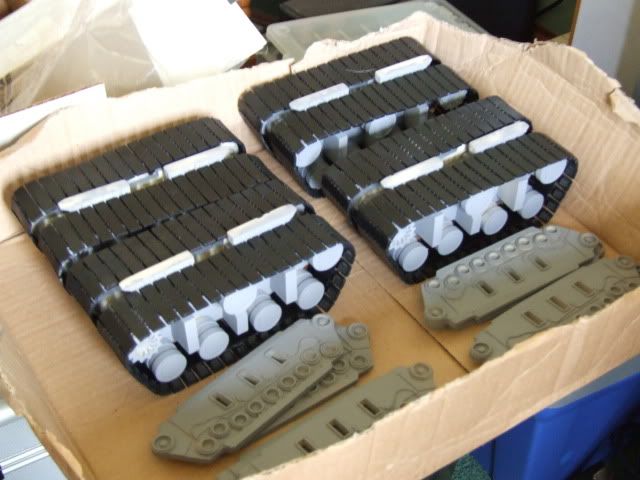
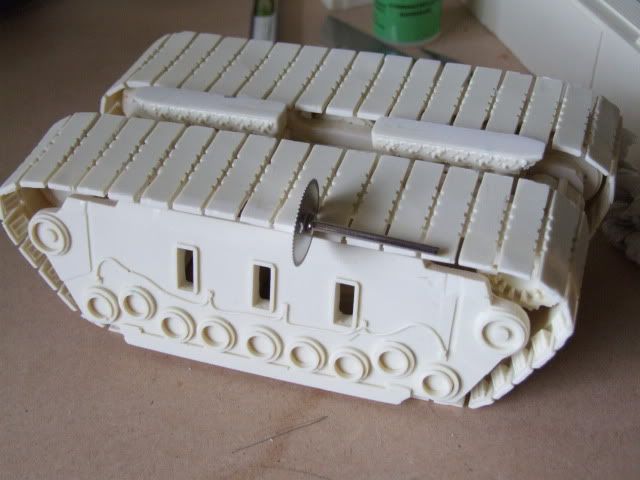
The clean up on this is kit before you even start to build is about five hours of work. Fortunately it chucked it down yesterday and but was warm enouigh to work in the garage. Anyone who has built a Cooper kit will know your best tool for the job is a hand or belt sander for most parts , but I have to admit this little circular saw attachment for a Dremel came into its own when cleaning the treads.
It will save you hours as it just slips in an out without seriously messing with the treads!! By hand it takes for ever, but with this about 15 minutes for one. And be warned there are eight of them.

2009_1006CrawlerSand0009.jpg


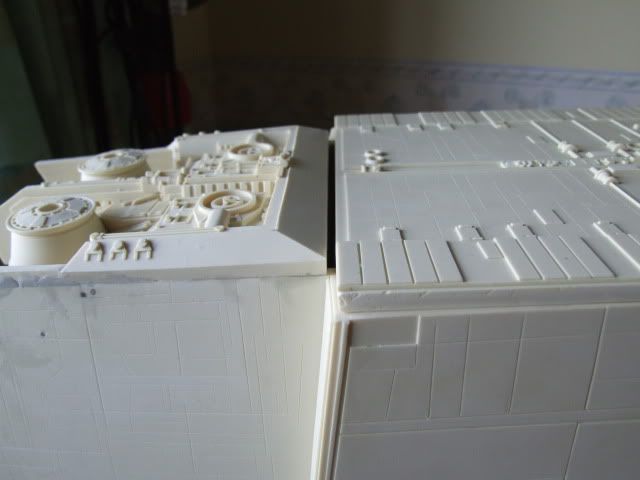
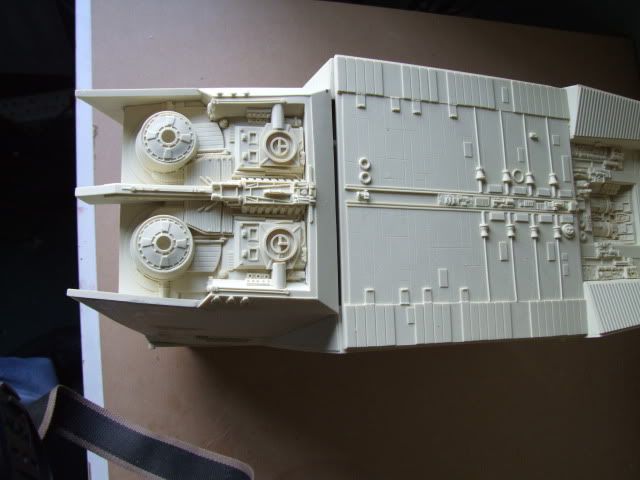
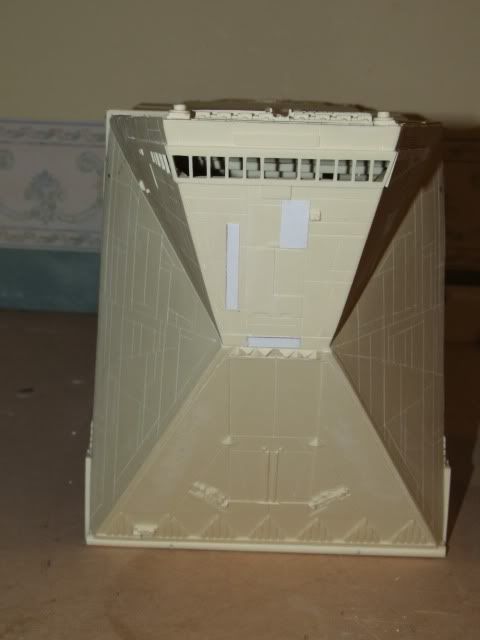
I thought the threads would be the most difficult part of the but they were actually a joy once done. They look very good and the quality is high. The problems start once you start to build the main body.
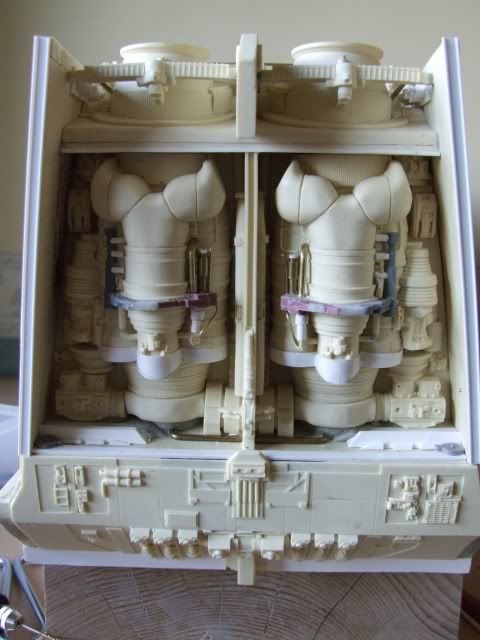
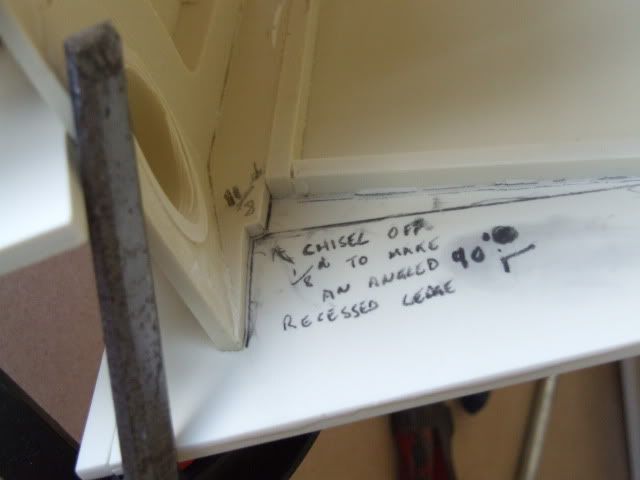
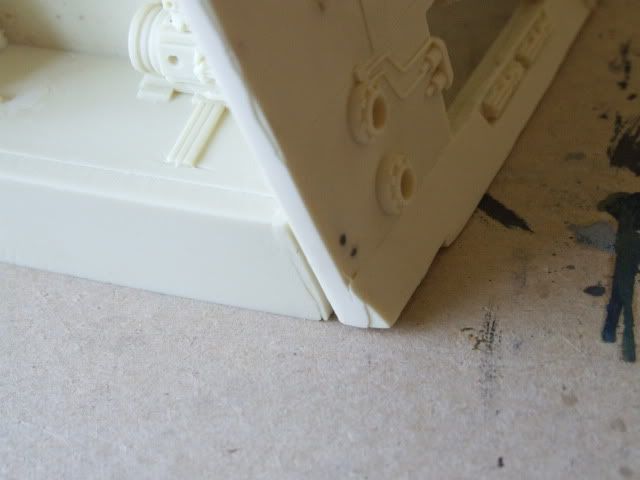
You build from the back engines forward, but there is an immediate problem with the angle at which the engine unit goes in. Randy marks it well enough on his disk, but doing it his way put all section under such pressure it kept popping the glue joints. By cutting a very small angled recess into the shelf this went away and with a bit of work it now holds together without it all being under tension.

2009_1006CrawlerSand0001.jpg


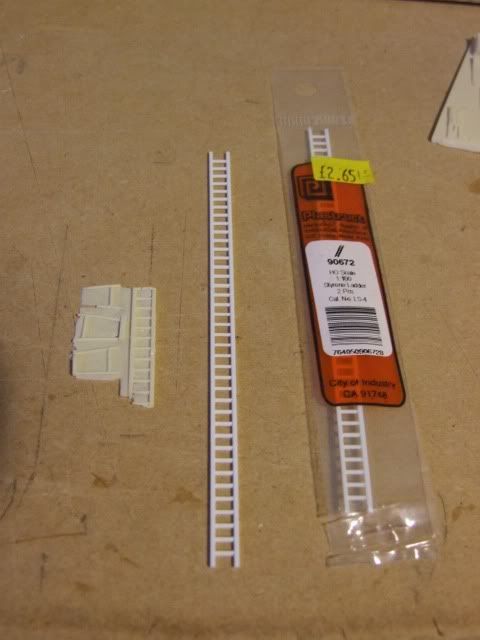
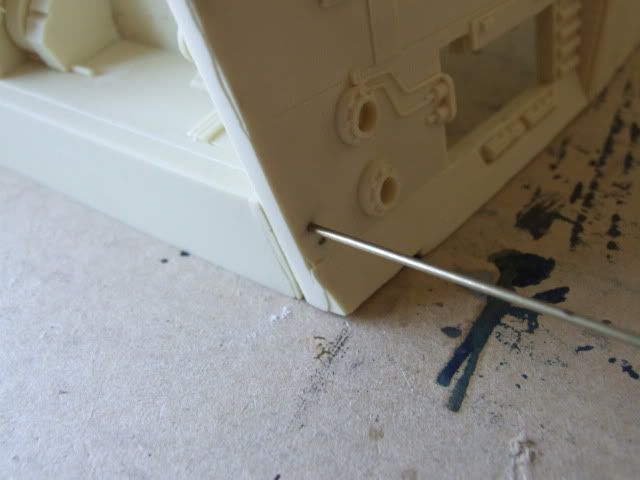
I have discovered a method of pinning it together before major glue and clamp work that works fairly well.A 1/6th inch brass rod , drill bit and lastly superglue.
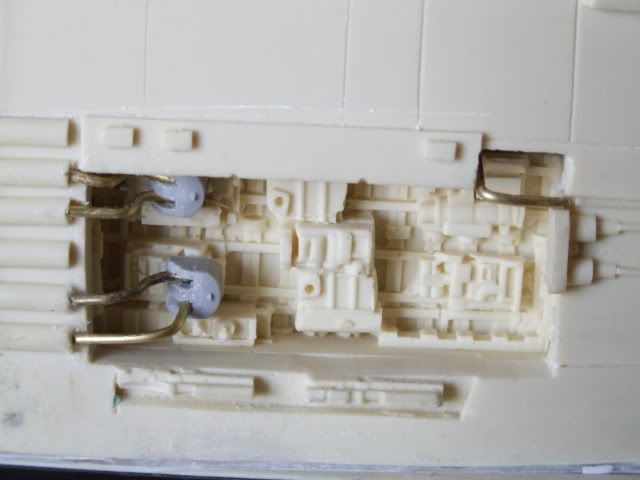
Position whilst test clamping and mark ,and carefully drill hole. I find its best to get it right at the corners as these are most diffiult to clamp.

2009_1006CrawlerSand0002.jpg


Push in rod and cut with a pliers, leaving a little space to push the rod fully in, but don't do it yet.


2009_1006CrawlerSand0003.jpg


Drill and pin the other corners then glue the superstructure and clamp.


2009_1006CrawlerSand0008.jpg


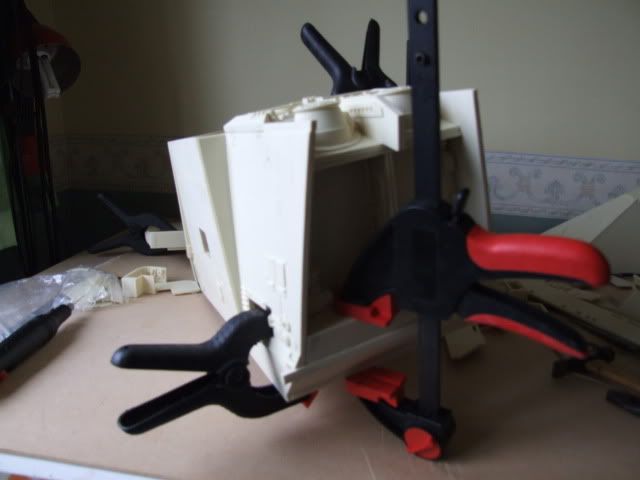
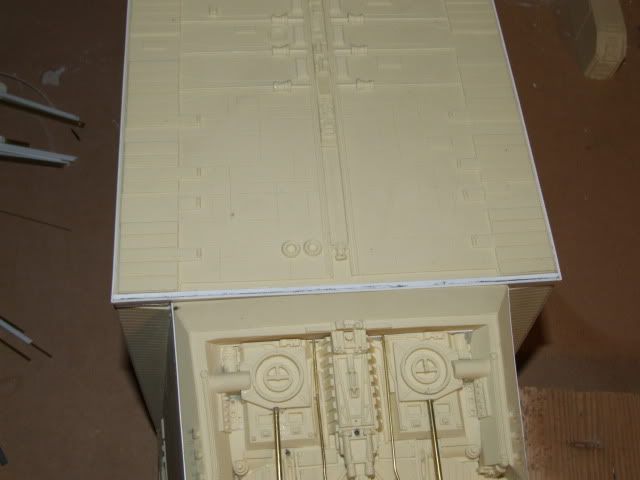
Then you just apply glue to the pins and push in to the holes quickly. They form a weld like joint very quickly and hold everything together better. Otherwise I found I kept popping joints once the clamps came off. So there is alot of sanding and fitting to do.
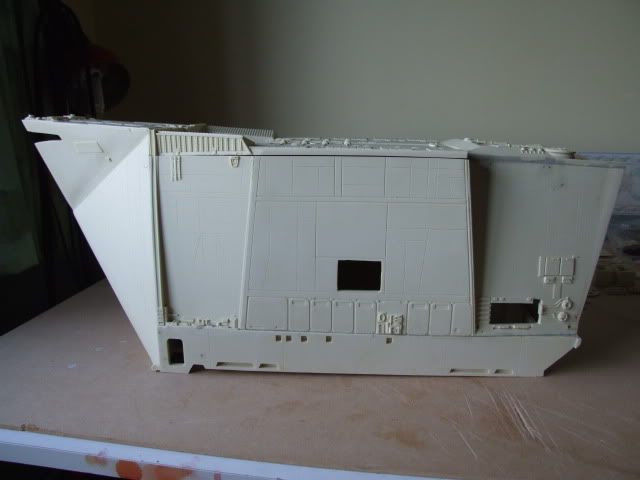
Thats as far as I am for now. There is alot of scope for super detailing with extra panelling and brass rods, and a some poorly cast detail lost to bubblinfg to remove and redo. But I think it should be a swiftish build.
 
I can tell from your build that we are close to the same place on the RC SC build. I can also tell that the kits do seem to vary in the way they go together. I didn't have to notch anything to get the pieces to fit like I wanted, but it did make a difference in how I sanded certain items flat and at what angle etc... I did not take photos of my build, but I have already filled and sanded the superstructure and am now detailing the body sans the nose section. All I have left after that is painting and assembly of the treads and the tiny room details. I'll attach the roof section last. I believe I'm gonna make my roof section attach with magnets so It can be removed easily for batteries and lights etc etc...

Nice job on your build man. I like your approach. :)
 
The body has gone together fairly well. No major problems with it ,though I did pin the front on, because that nose is a devil to hold into place otherwise. I used the headlight position as a drill points for the bottom two.
Vaderdarth, glad to see I'm not alone with this one as the kits trundel out from Randy.
I could have sanded the top and bottom of the rear engine mount but past experience with the Star destroyer put me off. It was easier (and cleaner!!!) for me just to slowly chisel away that ledge at the base. In the end it fitted in so well that I didn't worry. Also I've changed glues as this batch seems a bit weak.
I'm planning to leave the top free too and I'm doing my own lighting. However, I have a pretty large gap of about an eighth of an inch between it and the rear engines. No huge problem as I will pack it out with sheeting. it may actually help to hold the top in. I might simply put two wooden strips on the inside of the lid to keep it in place, like the inner supporting struts Randy has added.
The painting part of this should be the real interesting process!!!! I'd like to get the whole thing built by this weekend, then I can take take my time with it and the X wing.

2009_1006CrawlerSand0013.jpg


2009_1006CrawlerSand0011.jpg


2009_1006CrawlerSand0010.jpg
 
Looks great, I'm glad your doing this, I can follow your steps when I eventually start mine. Are you going to light it & keep em coming?
 
Not certain about the scale at all. Try Randys site to see if he listed it there, I don't remember seeing it though. Guy, glad this helps when you get underway. I think some of the pieces you have finished are superb. Huge fan of your X wing paint work! Not much done today apart from ordered the lights from Maplins (£30 odd quid!!!) and tidying up some scribing lines and somemore sorting the treads out.I need to get some brass again to add pipe detail. Interestingly the finished original SC had considerably more pipework that has not survive the many exhibitions its been too. I've been rooting through as much photo ref as I can. I no longer think this will just be a quick weekend job! Not if I want to do an extra bit of detailing that is. I don't have to rush it I guess. That Tauntaun of yours!!!! That kind of work is remarkable, the face detail is stunning!!
 
Fixed the gap at the back with block and sheet plastruct . It actually makes it a nice tight fit. Also bought some replacement ladders as the ones supplied require too much clean up. I'd like to know what the profit margins on it are.
Also got the windows in and its looking good. Bought alot of brass to redo engine detail like VaderDarths.

2009_1010CrawlerSand0001.jpg


2009_1010CrawlerSand0003.jpg


2009_1010CrawlerSand0006.jpg
 
All this detailing is where the fun really begins. Love the ladders. Gonna hit hobbytown today and see if they carry the ladders, I may have to get the number from ya and order them online if HT doesn't have them in stock. I agree on the cleanup. Too much for those ladders. Don't forget the slight bends in the ladders on the original SC. :)
 
Wow! That looks cool. The detail is really nice on that kit. Could you tell me what the overall length of the crawller is?

Are you planning on detailing the inside, where the loading ramp comes down?
 
Scratchy,I'm planning to get in as much detail as is possible. As the weather was impossibly nice this weekend ( we are having a real indian summer in the UK at the moment) I didn't get much building of a modeling variety done, as I had to push to get the last of my garden finished.It has cost me more in time and money than any model, but it has to be completed before the weather turns.
I did manage to get bits done like spraying the treads, the wire into the inserts and the back engine area started.
As VaderDarth has mentioned there is alot of original material gone missing over the years and its an effort to scratch build some of it. The photographs in the Chronicles do really help though. I remember going to see the SW exhibition at the Barbican in London back in 2000 and most of the models there were more than a bit beaten up back then!!!
I'll push on as I can but the engine and tidy up will take longer than I anticipated.
I do really like the treads though, despite all the effort to get them cleaned up. They really do look good once sprayed and fit together very smoothly so full marks to Randy on that. But he really is not kidding when he said you can stick in a SW movie and kick back whilst doing them. Even with the dremel attatchment they did take well over two hours to do.

2009_1012CrawlerSand0007.jpg


2009_1012CrawlerSand0005.jpg


2009_1012CrawlerSand0009.jpg
 
Hey ,VaderDarth. Just been reading your thread, your ship of the desert looks really clean in comparison to mine!!! I see you're gearing up for the painting. I'm going to go for a red oxide base coat and then over spray with browns and tans. The reason is I've an old combine harvester rusting away at the back of me and its great refference. On a strong sunny day it really looks reddish, on a dull day brown. Heres a couple of pics. This is real British wet summer weathering !!!!


2009_0626Harvester0046.jpg


2009_0626Harvester0063.jpg


2009_0626Harvester0028.jpg
 
Worked on the rear engine detail last night. I would suggest that anyone intending to add detail to it does not glue it in to the engine block first, as it otherwise makes adding detail very difficult.
Its not strictly accurate to the scale model ,and a little large but it is an upgrade on the current detailing. Another couple of evenings work and I should have finished with the brassing!!!

2009_1013CrawlerSand0002.jpg
 
This thread is more than 10 years old.

Your message may be considered spam for the following reasons:

  1. This thread hasn't been active in some time. A new post in this thread might not contribute constructively to this discussion after so long.
If you wish to reply despite these issues, check the box below before replying.
Be aware that malicious compliance may result in more severe penalties.
Back
Top