Almost finished: Real Parts Obi-Wan ANH Saber

James Kenobi 1138

Master Member
RPF PREMIUM MEMBER
I decided about 2 weeks ago that I wanted to bring something for the big Prop Party on Saturday, so I decided to work on my old Obi-Wan lightsaber.

It was more replica then real but I had the real parts I just needed to get going and replace them. I figured the party would be a good motivation to make some progress.

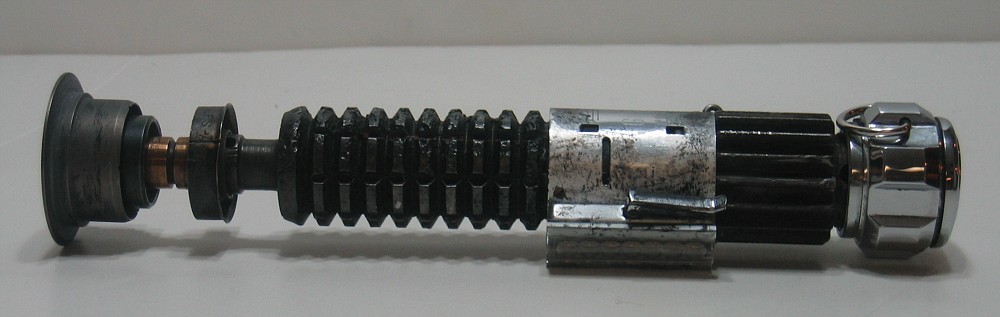
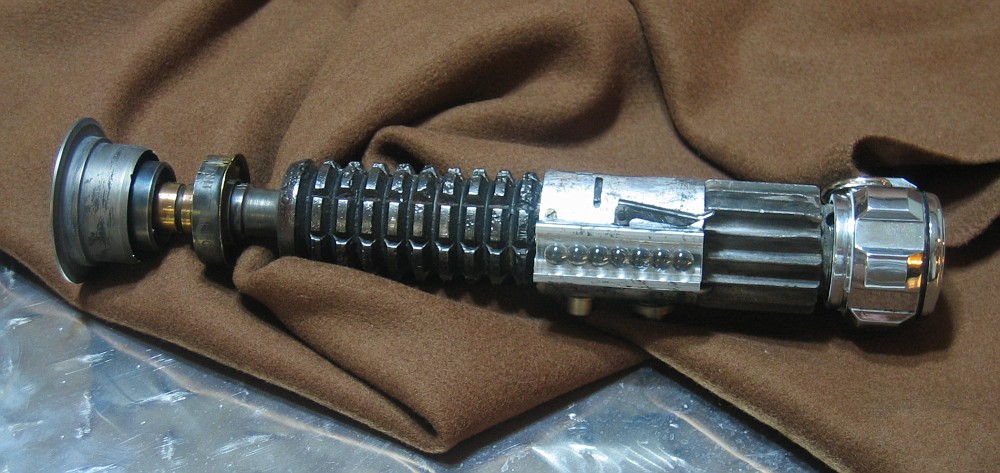
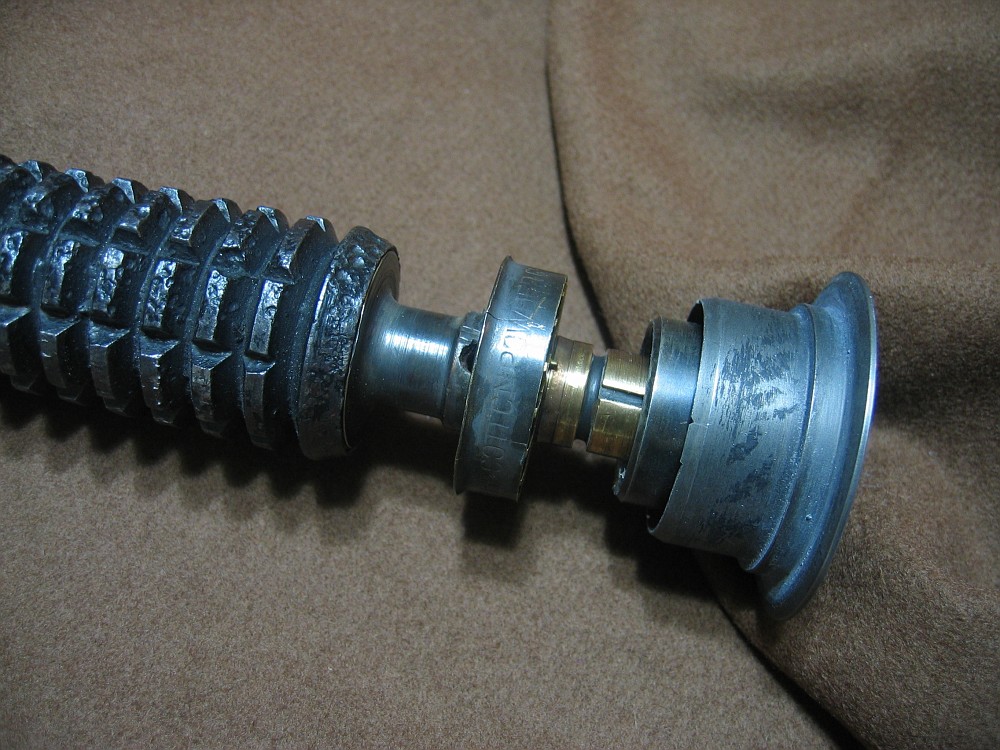
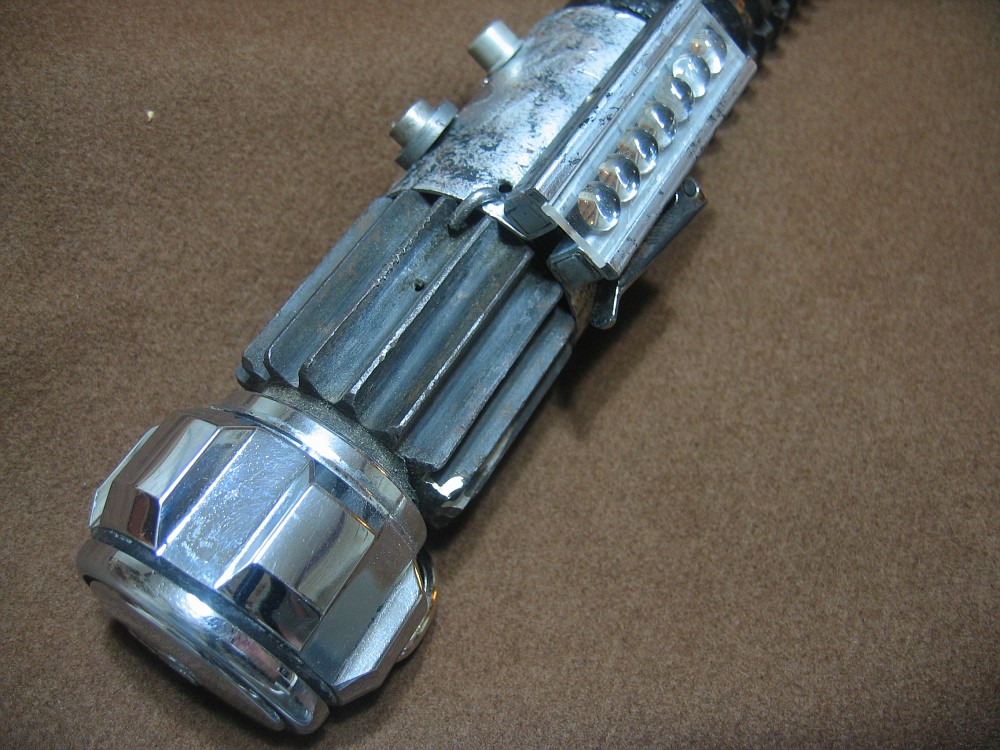
It's a shorter list to say what's still a replica part on this saber. The emitter, cone, and washer are Russ steel replicas. Everything else is the real deal.

I know the lighting is crap, it's night and I shot these real quick in the kitchen.

Standard side shot:
1_obi05copy-vi.jpg


obi66-vi.jpg


1_obi053_copy-vi.jpg


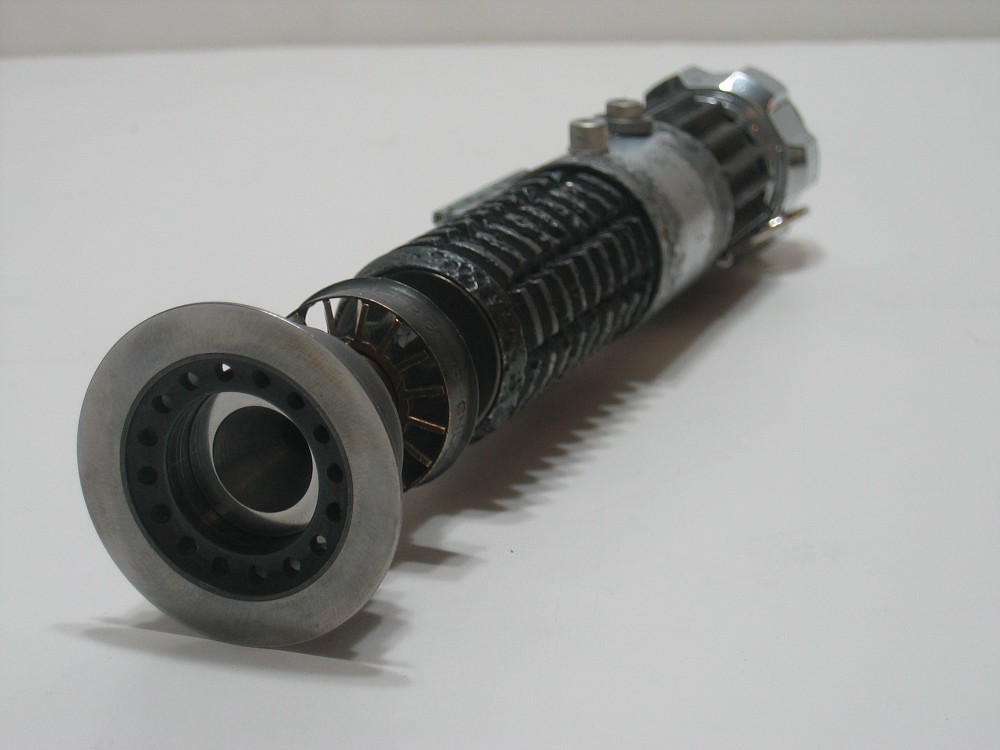
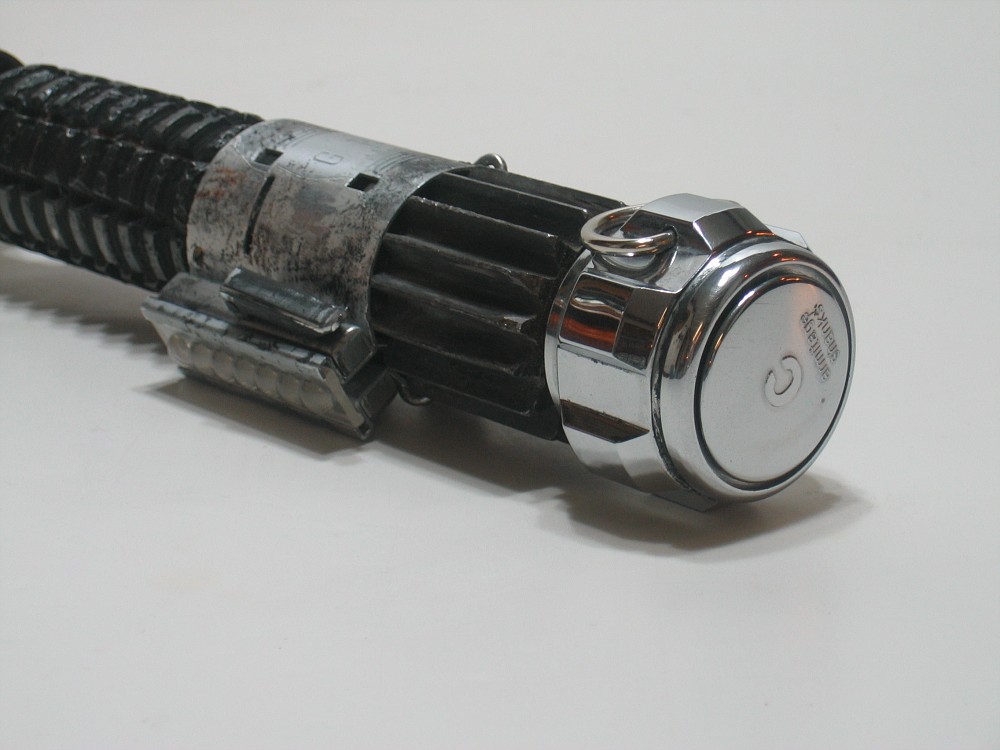
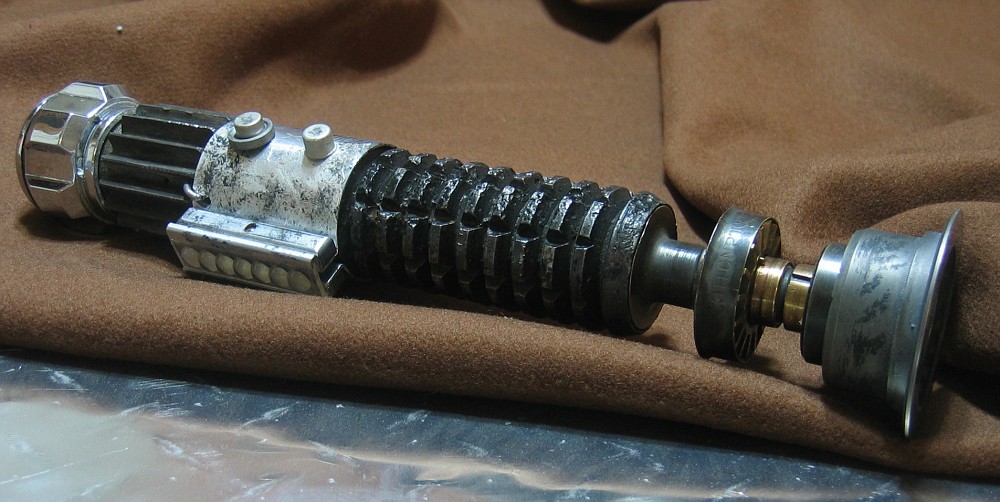
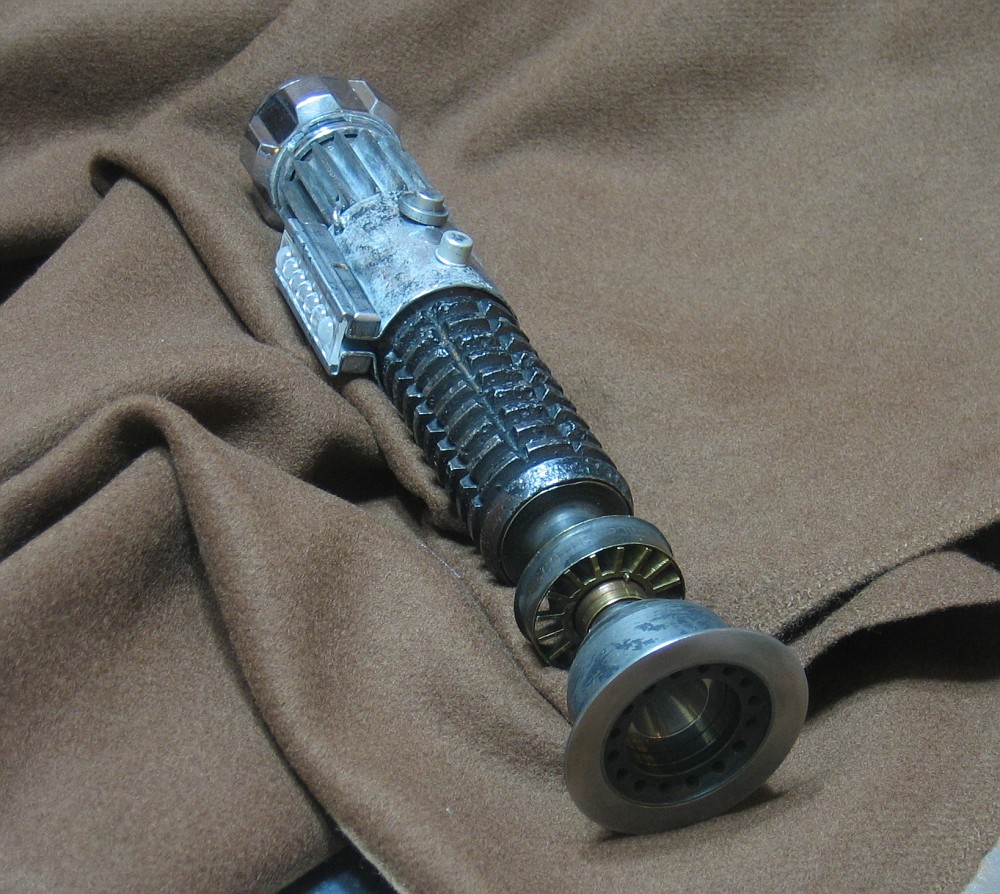
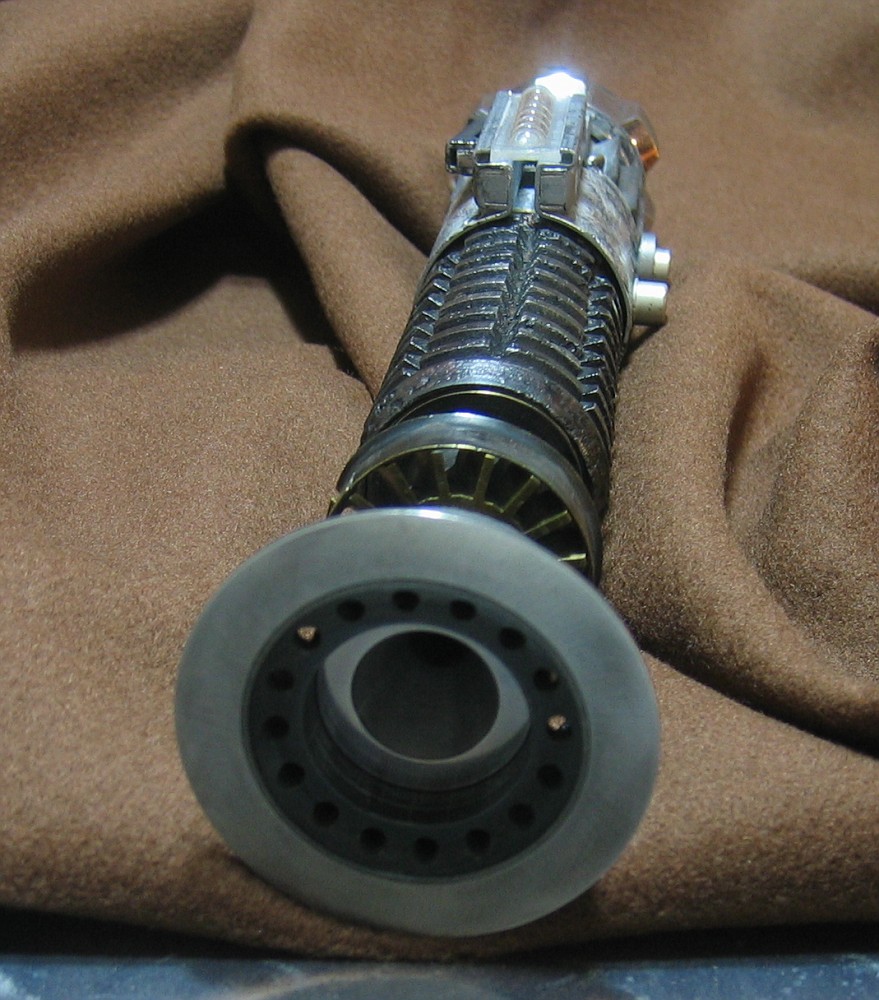
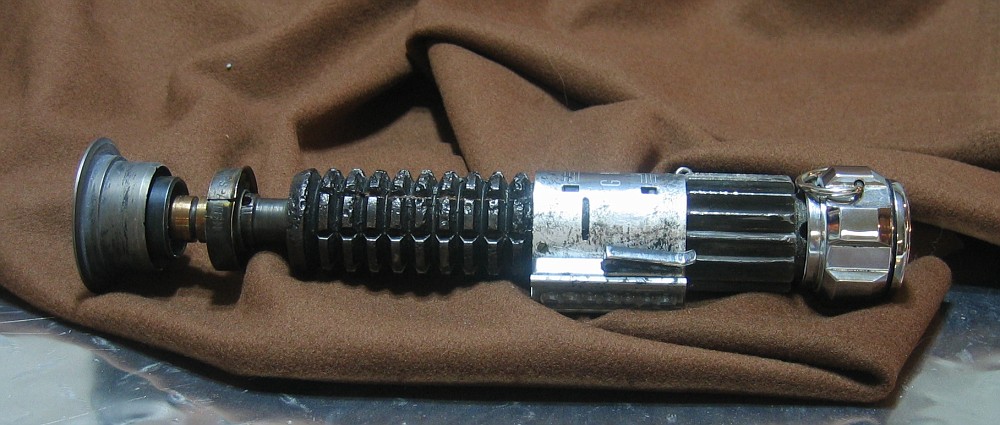
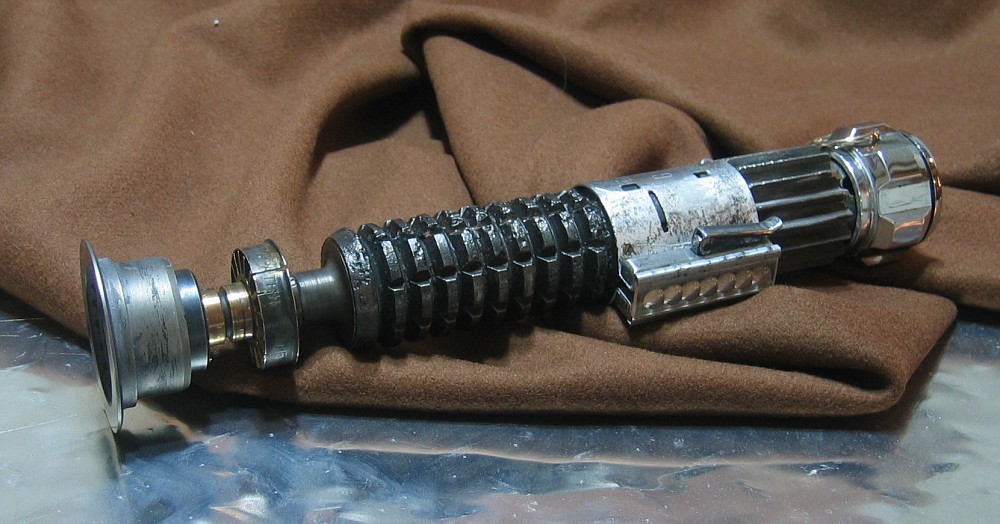
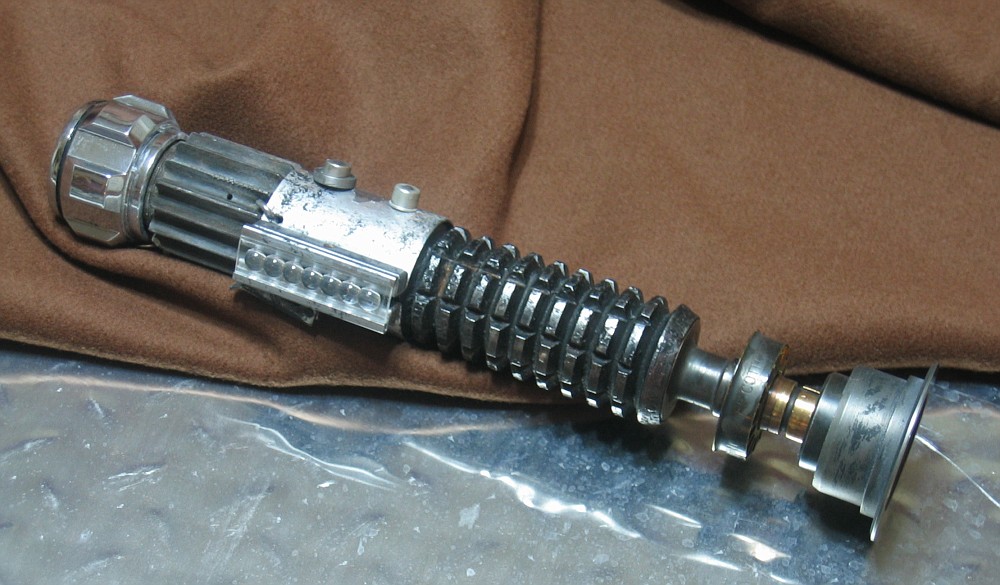
The 'Death Star' floor and Jedi robe shots:
1_obi033_copy-vi.jpg


1_obi016_cody-vi.jpg


1_obi012_copy-vi.jpg


1_obi029_copy-vi.jpg


1_obi034_copy-vi.jpg


1_obi037_copy-vi.jpg


1_obi027_copy-vi.jpg


1_obi022_copy-vi.jpg


1_obi006_copy-vi.jpg
 
Last edited:
Re: Almost finished: Obi-Wan ANH Saber

Beautiful!! Out of curiosity, where did you locate all of the real parts, and over what time span?
 
Re: Almost finished: Obi-Wan ANH Saber

Grenade: ebay, about 5 years ago- got it for a steal. $125 because the windvane sleeve was broken, I glued it back together.

Graflex Clamp: ebay, top and bottom shell were used on a Vader ROTJ.

Transistors: Electronics store.

Booster: Former RPF'er located it for me from a gun dealer in Florida. I paid $55 for it. Measurements were taken and it was the basis for the Serafino Booster but obviously Serafino made changes to the design to reflect the screen-used Booster.

Bubble Strip: About $40 off ebay for the whole calculator.

AS Handwheel: Purchased from an RPF'er for the best deal I could ever get on a real one, $400.

Timespan has been about 5 years collecting these parts.
 
Last edited:
Re: Almost finished: Obi-Wan ANH Saber

That saber is an absolute beauty... How did you get the finish on your emitter like that. It truly looks like an authentic balance pipe.
Wow, I wish I could get my hands on a real correct AS handwheel. NO matter how good the replicas are, I am am always bugged by not having the real deal. $400 is a good price. I'd unload $400 for one for sure if I could locate it. Great job!!!:love
 
Re: Almost finished: Obi-Wan ANH Saber

That saber is an absolute beauty... How did you get the finish on your emitter like that. It truly looks like an authentic balance pipe.
:love

For the steel balance pipe replica I used a trial-and-error mulit-layer method.

First I chucked a brass wirewheel in the drill press and went over both pieces. This gave the metal a dull finish and opened up the metal a little.

For the inner sleeve, I first applied Permablue Gel and worked it into a dark, almost blask color. Then I rubbed it with some 00 steel wool. I repeated this a few times until the color was a very dark, almost black color. I then dipped the inner sleeve in some AluminumBlack for that burned-jet-engine look and washed off the excess with cold water.

The outer sleeve started the same way. A few rubs with PermaBlue Gel, rubbing with 00 steel wool for a dark grey color- NOT black.

Next I used some acrylic black paint and dry brushed on some black scorch marks and rubbed off some of the paint with the steel wool. While the paint was wet I rubbed some graphite flakes over the outer sleeve for texture.

After everything dried I sprayed the outer sleeve with a flat clear paint to dull the finish.

Last, I brushed on some white chalk I made from rubbing the side of drywall board with a rasp. When I look at the few actual prop pictures I always notice a white dusting on the emitter and the booster so I dusted both of those in the cracks and corners with whote dust.
 
Looks awesome! Hopefully mine will look as nice when I'm done with it. I have all real parts except a real balance pipe.
 
Really nice work. Whats going on inside this saber for attachment?

The emitter cone is screwed into the grenade neck. My Russ cone has the threading for his grenades which is a larger diameter thread then the real grenade. I took the cone to my die grinder and rotated it to shave off just a little bit of the threads and tested the fit. 2-3 turns on the grinder and it screwed on. The threading is different also but I was able to 'cut' new threads between the brass neck and the hot/mild steel cone.

Grenade is attached via the little blass screws in the clams as well as a little spacer that sits just below the grenade. It fits into the clamp tabs.

The AS Handwheel is glued to the booster with a temporary glue if I ever want/need to remove it.

The booster is the fun one.

I took the real booster cone attachment and unscrewed it from the booster. I turned it sideways and put it in the clamp and then turned it 90 degrees so the ring of holes in the cone are inside the clamp tabs. There is now more then enough threads on the cone part to simply screw the booster to the cone and closing the clamp keeps everything tight.

The wires actually keep the booster from unscrewing from the rest of the saber.
 
Last edited:
That is a work of art that I am not able to stop looking at. Superb job my friend...just wonderful. I would be proud to have such a saber on my shelf.
 
This thread is more than 8 years old.

Your message may be considered spam for the following reasons:

  1. This thread hasn't been active in some time. A new post in this thread might not contribute constructively to this discussion after so long.
If you wish to reply despite these issues, check the box below before replying.
Be aware that malicious compliance may result in more severe penalties.
Back
Top