PHArchivist
Master Member
We took quite a few shots but only a few turned out and only one that I actually liked (which Rob already posted). I am sending all we took to Rob to do with as he likes and post as he likes, but we had a number of technical issues, and even on the best shot, I had a bit of crud on the CMOS that left with a dark mark on the far left...
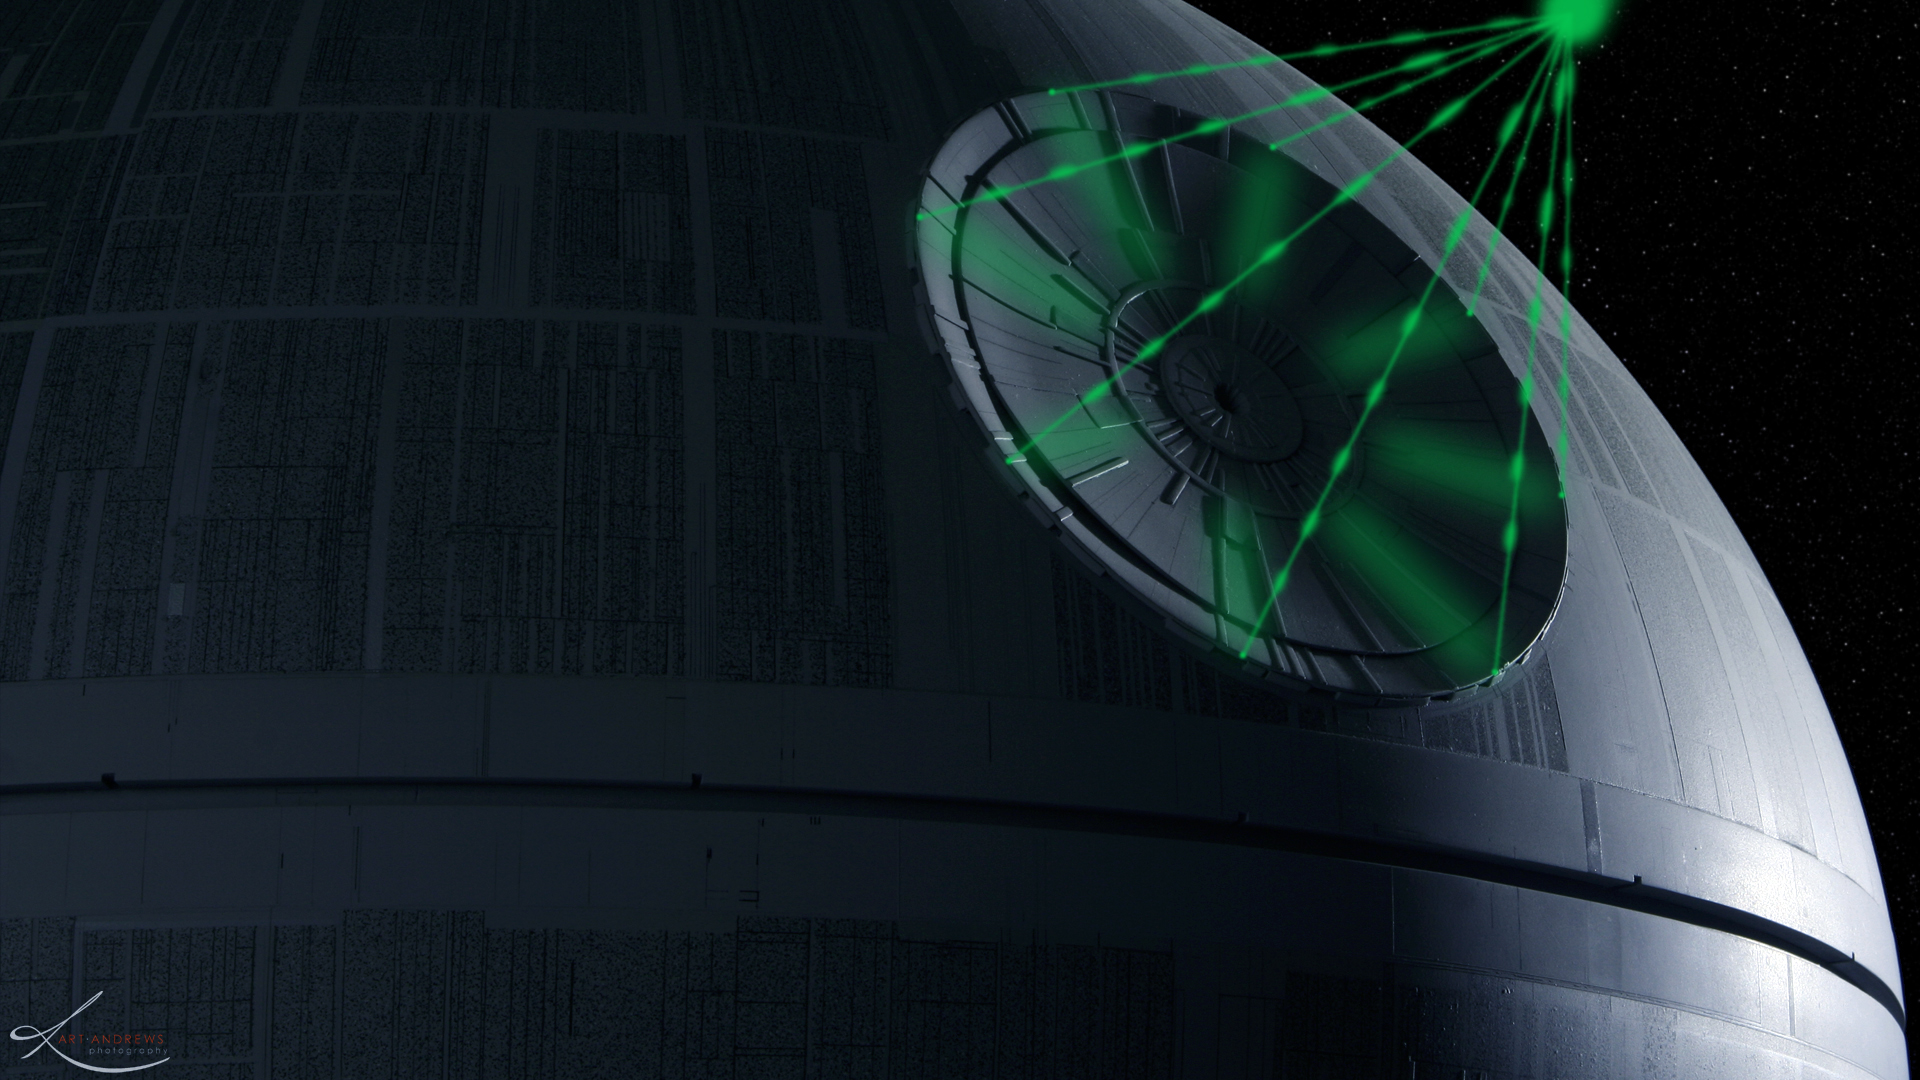
Seeing the Death Star in person was a true joy and once you got the lights on it, it truly is breathtaking and feels like you are reliving your childhood. There is no photo and no words that could truly describe it. I did my best and hopefully it gives it some justice, but seeing the real thing makes any photo pale in comparison.
As always, click to enlarge.
These are scaled to 1920X1080 so they can be used for backgrounds if you like.
View attachment 47354
View attachment 47355
Art and Kristen, I honestly don't know how to thank you enough. You're a class act through and through. You go to pretty extensive lengths on my behalf to generate the most stunning images ever of this model, then beyond that, you offer incredibly gracious compliments of the project.
I am so "close" to the project at this time that in response to you compliments, I want to say, "Nah...! It's not that good...!"
But on the other hand, that comp shot with the star field is mind-blowing. Even though I built this damn thing, I honestly could not tell the difference between my model and the original. At least on the dome surface.
The dish is a give-away though. The styrene strips are too robust, which I have already babbled on about. Its and easy fix though. Tape off a strip/piece, knock it down a half a millimeter, re-paint the piece (which I can do now thanks to CrackerJazz!), rinse and repeat...
With Art and Kristen's images, I can now get this one step closer to a perfect match.


") This DS is my favorite studio scale model ever!!! Thanks again for sharing
This DS is my favorite studio scale model ever!!! Thanks again for sharing