Space Tug (circa 1970)

JCalhoun

Active Member
Attempting a scratch-built "space tug". Loved seeing these illustrations from NASA in the 1970's — I couldn't wait until the 80's when they would be everywhere in orbit, on the moon, etc.

Space Tug Eath Orbit Applications (1024 x 718).jpg

- - - Updated - - -

First, knocked out a couple of prototypes from foam, etc. to sort of evolve the design and scale.

TugPrototypes1and2.jpg

- - - Updated - - -

By the third prototype, I've got the dimensions and proportions pretty close — figuring out the robotic arms....

TugPrototype3.jpg
 
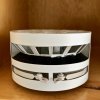
With prototype #3 styrene is replacing some of the card-stock used — greebles appearing. There are a few things I dislike about prototype #3 though so I'll probably wrap it up soon and move on to prototype #4 where acrylic parts will replace the foam.

TugPrototype3Skinned.jpg
 
Oh, god. These were wonderful. I used to pore over these illustrations as a kid when they were new and draw them. Doesn’t matter if it was a Robert MCall NASA painting or a Brooke Bond PG tips “Race For Space” collectible card. I’ve often wanted to build these. Good job!

FFF7D884-EA43-4ACB-9041-4EE1E1D3393F.png178F07D5-3BB2-49EC-9CFD-C5AC518F4482.png
 
9E7CDD11-6B49-4AC2-B3C6-A7D387E47855.jpeg1CC6399F-F5AD-447B-ADBD-DBF274C7D463.jpegF721A8DF-6707-42E0-A5FF-84F5DD17AF6B.jpegC745D6FF-94D1-49C6-B29F-131DEC7860D6.jpeg6BC4DFDB-A122-4B59-87C3-7C32282A84CE.jpegB35A248D-04A0-4CED-A018-01D9C4D4F44A.jpeg

And more!

There’s one painting of the tug which is frustrating me. It’s of it sitting on the lunar surface, with that wonderful slit window lit up red. Maybe in one of the McCall art books.
 
Last edited:
And more!

There’s one painting of the tug which is frustrating me. It’s of it sitting on the lunar surface, with that wonderful slit window lit up red. Maybe in one of the McCall art books.

I can't find that but I know the one you mean. Bob was such an inspration. Nicole Stott told me that Bob designed their crew patch for STS-133 which was one of his very last jobs before he passed away.
 
I'm using drawing software to sketch parts of the space tug.

I print them out on the laser printer (yes, on paper) and then Super-77 (spray adhesive) these paper templates onto foam, styrene, balsa or whatever.

(Below is an attempt to create a robotic arm for the space tug prototype out of balsa.)


1 Paper Template.jpg

2 Balsa Cut.jpg

I hand-cut these and put them on the model. If I don't like the look or fit, I can edit the digital file, and repeat the process.


Some parts are complicated to cut out but the drawing software sure makes laying out the geometry easier....

3 Complex Piece.jpg
 
Interesting project(y)thumbsup Those space-ships remind me of "2001 A Space Odyssey" hardware. Eager to see the next update!
 
While I wait for laser parts to arrive, I have started to work on a figure for the space tug.

I decided on 1:35 scale. It seemed to be pretty close to what I was mocking up with the foam. No luck finding a 1:35 scale astronaut.

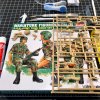
Somehow a 1:35 scale South Korean tank crew showed up on eBay that looked like something I could work with.

IMG_0983.jpg

One guy is standing to look out of the tank, I believe. With the right paint scheme (i.e. not camo), maybe I can make this guy flying the space tug. The head garment even reminds me of the "snoopy-style" head garment worn by Apollo crews.

Color-scheme-wise, for the figure's main outfit, I haven't decided wether to go "Mercury-astronaut-silver", "Apollo-white", "Shuttle-orange" or "Air-Force/MOL-blue".

IMG_0985.jpg
 
Going to 1/35 scale. I'm afraid I may need to scale up the space tug though. :(

There is no "scale" for the space tug to speak of since there are no measured drawings I am aware of. Nonetheless, as an exercise, I looked up the diameter of the Apollo service module, imaging that perhaps NASA would go with a size they already have adapters, etc. for. At 1:35 scale I would want to make the space tug body 4.38" in diameter. That is just 0.38" larger than the current prototype....

Okay, to heck with it, going to scale up the model and re-order the laser cut parts at the larger scale.

A. B. I.
Always be iterating.

And wouldn't you know it, the laser parts from sculpteo.com just showed up today. Oh well, this will be the improperly-scaled prototype #4.

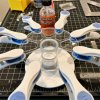
Below test-fitting the pieces + trying to squeeze as many parts as I can into a small area:

IMG_1004.jpgIMG_0999.jpg
 
Starting the bottom of the space tug.

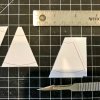
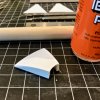
To cut the four "pie shaped" panels, as I did for the foam prototypes before:
• print the pattern to a laser printer

• Super-77 the paper pattern to a sheet of thin styrene

• use a knife to cut out styrene

IMG_1005.jpg

• remove paper pattern from cut part (lighter fluid works well for this)

• clean-up/tweak edges of styrene with sand paper

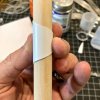
I used a dowel to roll the cut piece of styrene on to get the right curvature I wanted:

IMG_1011.jpg

Combining this hand-cut styrene piece with two of the laser-cut acrylics pieces gives my one of the completed pie wedges:


IMG_1007.jpg

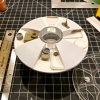
To position the wedge pieces correctly around the bottom of the space tug, I created a guide and printed it to size (two wedges completed and glued in place here):

IMG_1010.jpg

The bottom of the space tug with all four wedges completed:

IMG_1012.jpg
 
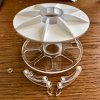
Gluing the two laser-cut acrylic top pieces to one another:

IMG_1015.jpg

Checking again the relative scale with the figure. It might work (very little headroom for this guy):

IMG_1016.jpg

Next, considering greeblies to populate the bottom....
 
So I have no idea what I'm doing. I'm just exploring this model-making thing. I've put together kits, decades ago, and made a few prototypes out of whatever. This is a push to try and make something half-way presentable. And I'm enjoying the learning (and occasional screwing up).

Decided to greeble up the bottom of the space tug but I'm not sure how. I have precious few "greeblies" since I am not a seasoned model-maker. I got some cheap tank kits on eBay though and have been picking through them.

I want pipes on the bottom — pressurized pipes that might go to a radiator of sorts, or move fuel or oxidizer around. Saw a YouTube video where a guy bends styrene tubing with a candle. So:

IMG_1017.jpg

Found out that this thin styrene stock needs very, very little heat to soften up. Too soft and you have a noodle and can't get a clean radius on your pipe bend. The cutting mat, BTW, makes for a nice way to lay out 90 degree bends. I just hold the soft styrene piece along mat lines until it cools.

Playing around with greeblies on the bottom of the space tug.... Nothing glued down here, just moving stuff around, considering....

IMG_1018.jpg

This isn't the Star Wars escape pod — probably not going to go crazy. I think I'm going to go with more subtle, understated greeblies on the space tug. I like the radiator idea ... and pipes. I have no radiator greeblie though so I may have to make something from scratch from these tiny styrene rods.
 
This thread is more than 5 years old.

Your message may be considered spam for the following reasons:

  1. This thread hasn't been active in some time. A new post in this thread might not contribute constructively to this discussion after so long.
If you wish to reply despite these issues, check the box below before replying.
Be aware that malicious compliance may result in more severe penalties.
Back
Top