build: model from 1983 Burger King ROTJ glasses ad

Treadwell

Legendary Member
RPF PREMIUM MEMBER
While my TIE and X-Wing SS projects remain in their years-long barely-started state, I embark on something fun and off the wall (and I'm sayin' commercials count. ;))
https://www.youtube.com/watch?v=UyhDvZMi4VI&frags=pl,wn

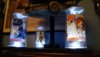
I am very far along and will document the build in subsequent posts below, but for starters I need some extra eyes on the only parts of this thing that do not come from the MPC Falcon:

part id.jpg

1/2 and 7/8 are obviously matched pairs, and if I'm lucky, all that detail is part of each donor piece and they aren't assemblies.
3/4 seem to be separate parts, though. And 9 could be two or more parts. 3 could very well be a part of a metal hinge or bracket, and not a model part at all. Easily scratched, though, if need be. 9 could be mocked up with no fuss as well.

Anything look familiar?
 
Last edited:
I decided I wanted to do this years ago. I would repurpose the model I built around 1984, and of course would have to get another one since the BK model uses two.

I don't even remember where or when I got the second one... a con, a garage sale, flea market.. dunno! But it was up on a shelf for years and here's what it looked like when I brought it down weeks ago:

20180630_021845.jpg

This is a little bit of a cheat, because it's the 1989 re-release that omitted lighting parts and one sidewall is retooled to eliminate a slot for the on/off switch. Going with it.

It begins. Prepare for mandible amputation.

20180705_010950_.jpg

Done, with the bay inserts installed, and the ramp, battery cover and landing gear hatches glued shut.

20180705_030852_.jpg

No attempt was made to cover gaps for the hatch hinges or anything. The BK version didn't.

I did go a little overboard and used Tulip to fill openings to the inside...even though there would not be a light inside to cause any light leaks. Kind of a needless step admittedly.

20180713_200241_.jpg

I needed something in the center, a flat surface to mount the BK logo to. It could also serve to tie both Falcon hulls together.

Turns out this is a PERFECT fit:

20180711_141355_.jpg

20180711_141425.jpg

I needed spacers to make it sit a little above the hull detail, and to make it level. The area will be covered by the logo but at certain angles you will be able to see under there if you really want to, so while the spacers could be simple, they couldn't be slapdash. So I cut tank wheels in half.

20180729_040650.jpg

Styrene cement (MEK) works great on whatever plastic that drain thing is. But I epoxied the hell out of it, too.

Next: sidewalls
 
Last edited:
Cool! Dig that crazy TIE fighter too. Part 3/4 looks vaguely familiar but damn if I know what it is. 7/8 look kinda like the plastic clips that attach windshield wipers to the wiper arms.
 
7&8 remind me of bycicle brake shoe,.as a matter of fact they all do except part 5
1 and 2 standing on their small ends 7 and 8 on their broad side ends and the rest( except 5) just the housing without the rubber parts
 
Last edited:
Someone on FB suggested #4 is from the Tamiya Wirbelwind. Part B12 in this tree from the 1/48 looks like a good match:
Tam_Wirbelwind_02.jpg

But I need to figure out how big it needs to be, because there's also a 1/35 version.
 
Found pics of the 1/35 trees, and the closest parts I can find are on the left here, and, surprisingly, are LESS detailed than the 1/48. I think the 1/48 is it!T35233a.jpg
 
Dig that crazy TIE fighter too.
Yeah, looks like they cut the ball off the flat part of the MPC hull and turned it around without the canopy frame on it. Strange.
Screen Shot 2018-08-26 at 2.55.44 PM.png

Or maybe removed a portion of that flat hull (look how flat the logo sits), taking the tapered rear of the ball with it. And just left a big 'ol hole!
 
Bending the mandible sidewalls around to follow the new curvature, filling in gaps caused by the initial removals, and detailing the clear engine pieces.
20180729_040932.jpg

20180729_040919.jpg
20180727_173325.jpg
20180729_040940.jpg
20180729_040954.jpg
20180729_040856.jpg
 
Black undercoat...
20180729_115825.jpg

And a not-quite-full coverage of Tamiya Insignia White. I didn't get a pic of that by itself.

Then to paneling. There's only one view in the commercial to have to match, so I was free to do what I wanted on the other side, being careful not to duplicate anything that was present on the actual Falcon:
Screen Shot 2018-08-26 at 2.53.16 PM.png
20180819_205738.jpg20180819_205713.jpg20180819_205744.jpg20180819_205731.jpg

During the black pass, I had an old can petering out on me, and ended up with some orange peeling that looked worse after the white pass instead of better. I sanded down those areas and decided not to repaint them, adding just a misting of more white:

20180819_205750.jpg

The same issue caused some paint to peel up when I removed masking. I liked the look so I left it that way:

20180819_205721.jpg

I'm a big believer in embracing happy accidents.

Next: weathering
 
Still kinda funny that they used a Falcon for their space BK. Too bad theres not a better shot from the ad. Turing out pretty good however.
 
Did washes with Vallejo Engine Grime and Vallejo Streaking Grime. Did a little misting of the base color over it.

20180825_143209.jpg20180825_143153.jpg20180825_143250.jpg
20180825_143320.jpg
I guess I could've recreated that light switch slot on this part. Oh well.


20180825_143311.jpg20180825_143301.jpg

next: more weathering
 
Last edited:
Added some streaking, and more misting of black, grey, tan, and base color. I stick with rattle cans, so my mistings have resulted in a rough surface. I'd rather live with that than have to clean an airbrush repeatedly, which I despise doing! Maybe I'll do a final semi-flat coat to even it out a bit.

Added dish. I had already built one before I discovered the two on there are different: the one on this upper "Falcon" uses the same center part as the Falcon kit. The one for the lower "Falcon" uses a part from the landing gear at the center.

Screen Shot 2018-08-26 at 2.52.05 PM.pngScreen Shot 2018-08-26 at 2.53.16 PM.png

I had already built the wrong one, including the struts on the back.

20180910_003701.jpg

I had a spare dish, but I also had already foolishly cannibalized the lower mounting struts for greeblies. So I scratched them.

20180909_155143.jpg20180909_155057.jpg20180909_155004.jpg20180909_155107.jpg20180909_155119.jpg20180909_155019.jpg20180909_155034.jpg20180909_155134.jpg

I'm going to dry-brush some base color on some high points, but otherwise am done for a while, until I find close-enough greeblies that surround the BK logo, and either another cheap Falcon kit or my childhood one (it's SOMEWHERE, dammit!).
 
Last edited:
You've never heard of the BK Falcon?!

-Should I have???

It's the ship that you can have it your way.

-Um... ok. :wacko


-------------------------

I've actually never heard of the BK Falcon.
I either didn't notice or forgot. Shame on me.
 
I got a 1/48 Wirbelind and the part's too small. Since I was having to scratch/bash all of the other non-Falcon add-ons anyway, I gave up sourcing that part (saving the time and expense of ordering a 1/35) and scratched it, too.

I never did come across my childhood Falcon (it IS in a box somewhere!), so I bought yet another 1989 ROTJ-boxed one....fairly cheap since it had been partially started. My old one was probably a Testors glue bomb anyway.

I found a vector file of the 80s BK logo and messed around with it in photoshop, adjusting colors closer to the available copy of the ad, and putting in some "brush strokes" that are evident on the original model, in the form of lighter streaks that follow the outer contours of the letters. Yeah, I think the original logo was hand-made, so there is a very slight variance to the official vector file. I didn't mess with that.

I printed it out on adhesive label paper and stuck it on some styrene. Used some fine sandpaper to weather the "buns" down a bit.

I was going to do the two little amber lights but have run out of time and especially inclination. (Working on electronics bores me, they're no fun at all, even if they do look great.) I do have holes in hidden places, though, to accommodate running bulbs or LEDs in there should I ever decide to.

It's done and I'm taking it to Wonderfest.
I made a display featuring the glasses to give it context---I still worry, though, that most people won't know it's from a commercial, so I'm going to have the ad playing on a loop using an old cell phone secured to the base.

Some shots with and without flash (and a couple screengrabs for reference). I used alternate mistings of Modelmaster Camoflage Grey (which is cool) and Tamiya Insignia White (which is warm), and the flash really brings out the blue of the Modelmaster, unfortunately, so it really gives away what portions got more of which paint!
 

Attachments

  • Screen Shot 2018-08-26 at 2.54.34 PM.png
    Screen Shot 2018-08-26 at 2.54.34 PM.png
    1.9 MB · Views: 302
  • Screen Shot 2018-08-26 at 2.51.44 PM.png
    Screen Shot 2018-08-26 at 2.51.44 PM.png
    1.5 MB · Views: 332
  • 20190525_044550.jpg
    20190525_044550.jpg
    4 MB · Views: 312
  • 20190525_044519.jpg
    20190525_044519.jpg
    3.2 MB · Views: 357
  • 20190525_044430.jpg
    20190525_044430.jpg
    3.3 MB · Views: 303
  • 20190525_044318.jpg
    20190525_044318.jpg
    3.8 MB · Views: 341
  • 20190525_044110.jpg
    20190525_044110.jpg
    1 MB · Views: 314
  • 20190525_044105.jpg
    20190525_044105.jpg
    1.6 MB · Views: 285
  • 20190525_044617.jpg
    20190525_044617.jpg
    2.5 MB · Views: 299
Last edited:
HA HA!
Can't believe you did this but it's recovering some modeling history of the original era! LOL
Yeah good idea to have the commercial running because without it it's a big WTF???

I forget who said it here but was discussing the amazing ship designs of GOTG, and
the comment was made they make the Falcon look like a flying hamburger.

Well, there it is! LOL
 
This thread is more than 4 years old.

Your message may be considered spam for the following reasons:

  1. This thread hasn't been active in some time. A new post in this thread might not contribute constructively to this discussion after so long.
If you wish to reply despite these issues, check the box below before replying.
Be aware that malicious compliance may result in more severe penalties.
Back
Top