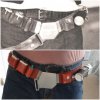
DL-44 and gun belt

phillbarron

Active Member
Hello there,

I've been stealing your wisdom over the last year or so to build a DL-44 and thought I'd share the results along with heartfelt thanks to everyone who posted such wonderfully clear photos and tutorials. I knew I wanted the ANH version, partly because it's my favourite of the films and partly because I had the Palitoy (Kenner?) one as a kid and loved it.

After much deliberation, I went for a Denix build with a DEC aluminium kit.

Living in the UK, the Denix can only be sold if (something like) 50% of it is a bright colour, so it arrived like this:

20171130_190130.jpg

Which was handy. The DEC kit arrived like this:

20171129_135918.jpg

... and is just beautiful. Breathtakingly so.

I've built prop type things before, but mostly using whatever I had lying around the house. Basically lots of papier mache and bottle tops. I've always regarded buying a kit like this as cheating ... but I'm so glad I did in this case.

Seeing as this is the single most expensive prop I've built coupled with zero metal working experience and a complete inability to cut anything in a straight line, I approached the gun with extreme nervousness. The first cut may be the deepest, but it's definitely the scariest!

20171201_125519.jpg 20171201_175247.jpg

But it worked out alright in the end.

20171211_222306.jpg 20171211_222109.jpg

After the usual bluing, filing, sanding, swearing and the odd bit of bleeding.

I've done as many of the 'standard' mods as I could - removing the rear sight lump, the washer-type protrusions on the sides of the sight, the firing pin amongst others. I couldn't figure out how to mill in the ejector so settled for bluing it in with a template.

One thing I went for which I hadn't seen on other people's Denix builds was rounding the front end of the rear sight (one the lump had been removed) to get a more accurate look. Apologies if everyone else did this and I wasn't paying enough attention.

The only other thing I've done which is maybe slightly different is opting to build a reticle as opposed to printing one:

20171216_220846.jpg 20171216_221621.jpg 20171216_234224.jpg

Does anyone know why these photos have uploaded sideways?

I took a toy magnifying glass,cut off the handle and removed the lens, then chopped up a couple of sewing needles, heated them and pushed them through the plastic. It just felt a bit more real to me than a printed version. I guess I could have made a smaller one and mounted it deeper in the sight ... but I didn't.

All this plus a grip screw I struggled to find (because gun parts are hard to get over here) left me with this:

orca-image-1518208930846.jpg_1518208930961.jpeg

Okay, so I still need to darken the grips and maybe add light and sound in the future, but for the purposes of running around the house shouting pew pew at imaginary baddies, it works for me.

Next up: the belt.
 
Last edited:
Freakin' love the build. man. The pics work for me now. I laughed with the orange tape... but better than dipping it on a barrel of orange paint I reckon. :) Cutting into my first Denix felt like military ordinance disposal... sweating bullets... ah, I need to do another DEC/Denix build... It is just so choice... :)
 
BUCKLES AND GREEBLIES

I spent quite a lot of time debating about just buying a ready made belt. The gun looks and feels so real, surely putting it in a badly cobbled together belt would be a crime? Is it not far better to just buy one?

But then, that's no fun.

Also, they're a lot of money. Not so much for what they are, because I appreciate how much effort and skill goes into building them, but just in a general 'choosing to spend money on a space holster rather than food and mortgage' kind of way.

So building is the way forward.

My first step with the belt was to gather the greeblies.

20180803_213056.jpg

Where I immediately went back on what I just said and bought a bunch of (almost) pre-made bits. Technically I assembled them, which is close to building, I guess?

The sparklet cylinder is a real one, albeit a grey one I painted green.

The Droid Caller is a resin cast from Propsplus on eBay. I could have scratch built something similar, but not as beautiful as this.

The white box things (powerpacks?) i could have just built and gotten something almost identical .... but I didn't. Presumably I had a reason at the time, but I don't know what that was now. Those are CorellianExports resin ones.

I decided to draw the line at the disk. The only one for sale I could find was by ElvisTrooper and it just seemed like too much money for a small metal disk. Again, I'm not saying it's not worth the money because of the skill and time taken to make, just that I'm trying to do this cheaper than buying a pre-made belt and already the costs are rising.

I decided to make my own. Surely there must be something similar looking around the house? Or ... I could buy a bit of aluminium tube, fill it with wooden dowel covered with a layer of aluminium tape and then drill all the holes by hand?

Or I could admit that sticking a bottle top or foil-covered wood to the belt would look awful and just buy the one which won't ruin the whole belt.

Which I did.

And I'm glad I did. It's really pretty.


Time for the buckles.

I bought a 3mm piece of aluminium, pored over all the reference photos I could find and drew up some templates.

20180807_015100.jpg

The next day I was tried to figure out why I'd made one side of the rear of the rear buckle smaller than the other. Or why the rear buckle itself was so small. And not straight. Pretty certain the front buckle isn't symmetrical either.

Overall, I didn't like half of these, so I scrapped them and redid them using Crazylegsmurphy's plans as a base: https://www.therpf.com/showthread.php?t=232226

I modified them slightly because I know they're not finished and because I just had different ideas in some areas. (Or, more likely, I've missed info or misinterpreted the patterns) Like, for example, the front buckle hooks. I keep looking at this photo:

360054336_01d6ac500a_o.jpg

It seems to me that the hook on the left is probably the same size as the hook on the right. I don't think it's belt-wide like the ESB one. This photo seems to show it narrowing down:

$_57.JPG

So I made each hook the same size, out of a steel sheet. After making this much mess:

20180811_174516.jpg

And using every tool I had, including my teeth, I ended up with these:

20180811_174054.jpg

Which, when assembled, look like this:

20180811_174332.jpg

I know the curved ends of the holes in the y-shaped-piece buckles aren't accurate, but I made them by drilling two holes and then connecting them with a scroll saw. I'm a little worried if I try to square them off I'll either ruin the buckles or make them too weak. They probably could do with being a tad longer anyway. Maybe one day I'll redo them.

My solution to the rivet-less belt hooks is to rivet them, which sounds weird, but I figured if I rivet them further down, behind the front buckle then I get the strength of the rivets without the complicated tasks of gluing or welding Chicago screws or rivets to the back.

I don't think glue (or cold welding epoxies) would hold the weight and I don't have welding equipment, so this not-screen-accurate solution seemed best for my skills/tools.

The loops on the rear of the buckles can be glued to the face with impunity because the faces aren't load bearing. Plus, gluing them on meant I could drill and tap the holes for the screws so the y-piece buckles can hook on and off.

Overall, they've come out far better than I expected and I'm happy to move on to the next phase: leather.
 
BUCKLES AND GREEBLIES

I spent quite a lot of time debating about just buying a ready made belt. The gun looks and feels so real, surely putting it in a badly cobbled together belt would be a crime? Is it not far better to just buy one?

But then, that's no fun.

Also, they're a lot of money. Not so much for what they are, because I appreciate how much effort and skill goes into building them, but just in a general 'choosing to spend money on a space holster rather than food and mortgage' kind of way.

So building is the way forward.

My first step with the belt was to gather the greeblies.

View attachment 837437

Where I immediately went back on what I just said and bought a bunch of (almost) pre-made bits. Technically I assembled them, which is close to building, I guess?

The sparklet cylinder is a real one, albeit a grey one I painted green.

The Droid Caller is a resin cast from Propsplus on eBay. I could have scratch built something similar, but not as beautiful as this.

The white box things (powerpacks?) i could have just built and gotten something almost identical .... but I didn't. Presumably I had a reason at the time, but I don't know what that was now. Those are CorellianExports resin ones.

I decided to draw the line at the disk. The only one for sale I could find was by ElvisTrooper and it just seemed like too much money for a small metal disk. Again, I'm not saying it's not worth the money because of the skill and time taken to make, just that I'm trying to do this cheaper than buying a pre-made belt and already the costs are rising.

I decided to make my own. Surely there must be something similar looking around the house? Or ... I could buy a bit of aluminium tube, fill it with wooden dowel covered with a layer of aluminium tape and then drill all the holes by hand?

Or I could admit that sticking a bottle top or foil-covered wood to the belt would look awful and just buy the one which won't ruin the whole belt.

Which I did.

And I'm glad I did. It's really pretty.


Time for the buckles.

I bought a 3mm piece of aluminium, pored over all the reference photos I could find and drew up some templates.

View attachment 837438

The next day I was tried to figure out why I'd made one side of the rear of the rear buckle smaller than the other. Or why the rear buckle itself was so small. And not straight. Pretty certain the front buckle isn't symmetrical either.

Overall, I didn't like half of these, so I scrapped them and redid them using Crazylegsmurphy's plans as a base: https://www.therpf.com/showthread.php?t=232226

I modified them slightly because I know they're not finished and because I just had different ideas in some areas. (Or, more likely, I've missed info or misinterpreted the patterns) Like, for example, the front buckle hooks. I keep looking at this photo:

View attachment 837439

It seems to me that the hook on the left is probably the same size as the hook on the right. I don't think it's belt-wide like the ESB one. This photo seems to show it narrowing down:

View attachment 837440

So I made each hook the same size, out of a steel sheet. After making this much mess:

View attachment 837441

And using every tool I had, including my teeth, I ended up with these:

View attachment 837442

Which, when assembled, look like this:

View attachment 837443

I know the curved ends of the holes in the y-shaped-piece buckles aren't accurate, but I made them by drilling two holes and then connecting them with a scroll saw. I'm a little worried if I try to square them off I'll either ruin the buckles or make them too weak. They probably could do with being a tad longer anyway. Maybe one day I'll redo them.

My solution to the rivet-less belt hooks is to rivet them, which sounds weird, but I figured if I rivet them further down, behind the front buckle then I get the strength of the rivets without the complicated tasks of gluing or welding Chicago screws or rivets to the back.

I don't think glue (or cold welding epoxies) would hold the weight and I don't have welding equipment, so this not-screen-accurate solution seemed best for my skills/tools.

The loops on the rear of the buckles can be glued to the face with impunity because the faces aren't load bearing. Plus, gluing them on meant I could drill and tap the holes for the screws so the y-piece buckles can hook on and off.

Overall, they've come out far better than I expected and I'm happy to move on to the next phase: leather.

phillbarron, This is awesome. Next month I will be trying my hand at making the Han Solo Holster. The hardware is the hardest part to locate. I've heard many people making their own. But going through the trial and error that you went through. Are there any good templates available? Would you provide them? Could we get a rear picture of the buckles assemble?

Jedar

I used the excellent patterns by Crazylegsmurphy from this thread: https://www.therpf.com/showthread.php?t=232226&page=2 as the basis for my buckles. I don't think it's fair to post modified patterns when the massive bulk of the work was done by someone else!

Ali I did though was take the patterns from the first picture on that page. I used the front and back buckle templates as is.

For the rear of the front buckle I took the right half of Crazylegsmurphy's pattern and mirrored it to create equal sized bars for the hooks to grab onto. I then extended the pattern outwards to leave a 3mm hole and 3mm of "bar".

If you look at my abandoned patterns here ...

20180807_015100.jpg

... you can see what I mean in the bottom right hand corner.

I did something similar for the rear of the back buckle, but without the mirroring since it was already symmetrical.

On my abandoned pattern it's the bottom left. For some reason I made that one asymmetrical. I have no idea why.

The y-strap connectors I traced from full size prints of this photo:

360054336_01d6ac500a_o.jpg

And another one I can't locate at the moment which shows the rear connector.

In retrospect, they're a little too small. Might be my scaling skills. Might be they're on an angle in the photos. Not sure.

One thing I do know is if I were to do it again, I would make the rear of the buckles first before making the cut outs in the y- connectors. The aluminium didn't bend where I expected it too so I had to widen the holes slightly to allow them to swing around the bars.

Here's a few photos of the back of my buckles:

20180819_230416.jpg20180819_230404.jpg20180819_233331.jpg20180819_230621.jpg20180819_230439.jpg

Hope that helps!
 
Last edited by a moderator:
I used the excellent patterns by @Crazylegsmurphy from this thread: https://www.therpf.com/showthread.php?t=232226&page=2 as the basis for my buckles. I don't think it's fair to post modified patterns when the massive bulk of the work was done by someone else!

Ali I did though was take the patterns from the first picture on that page. I used the front and back buckle templates as is.

For the rear of the front buckle I took the right half of Crazylegsmurphy's pattern and mirrored it to create equal sized bars for the hooks to grab onto. I then extended the pattern outwards to leave a 3mm hole and 3mm of "bar".

If you look at my abandoned patterns here ...


... you can see what I mean in the bottom right hand corner.

I did something similar for the rear of the back buckle, but without the mirroring since it was already symmetrical.

On my abandoned pattern it's the bottom left. For some reason I made that one asymmetrical. I have no idea why.

The y-strap connectors I traced from full size prints of this photo:


And another one I can't locate at the moment which shows the rear connector.

In retrospect, they're a little too small. Might be my scaling skills. Might be they're on an angle in the photos. Not sure.

One thing I do know is if I were to do it again, I would make the rear of the buckles first before making the cut outs in the y- connectors. The aluminium didn't bend where I expected it too so I had to widen the holes slightly to allow them to swing around the bars.

Here's a few photos of the back of my buckles:


Hope that helps!

phillbarron.


First. I don't want to ask you to do something you don't feel comfortable about. Let me say that right away. But I also have been following very closely the detailed research from Crazylegsmurphy. At the end of his thread he mentions that he will be putting out a book soon and I've commented that I would be first in line to make sure he gets the rewards from all his hard work. But he himself has mentioned that he does not want people using his hardware original templates because they are wrong and not screen accurate. I don't look forward to the trial and error that Crazylegsmurphy and yourself had to do to get the buckles "correct", working and the "right" size.


It seems that there is a black hole when it comes to the Han Solo holster and the buckles hardware. Every other part of Star Wars we are given very detailed instructions, for example I can make a extremely detailed and screen accurate DL-44 blaster and the 4 other variations plus the belt greeblies from each of the movies. But when it comes to the holster template or how the buckles are made, there are a few reference photos and a finished belt photo at the end and that's it.


I think for myself I will look up the original movies screen caps and do my own measurements (kinda like Crazylegsmurphy in 2015) and do everything from scratch. I don't want to start from his end point or anyone else's work because I don't want to be accused of stealing their work. But at the end of the project I will post my own detailed holster and buckles templates because they don't exist for some reason...

It does seem weird that no one has accurate plans for the belt and holster given how iconic it is.

My relationship with screen accuracy is inconsistent, so I know I'm definitely not the one to publish detailed drawings. I kind of like accuracy up to a point, but I'm prepared to sacrifice it for what feels right, what's practical and what tools/materials I have available.

So for instance on this build: I'm using 3mm aluminium for the buckles because it's easy to cut. I think I'd infer from the partial shot of the back of the ESB buckle that there are hoops and a post welded to the back of a much thinner buckle on the ANH, but I have no ability to weld and gluing/cold welding wouldn't be strong enough for the post. (I think?!)

So the best option for me is drilling and tapping a hole, then using a bolt for the post. This means my y-piece connector is 3mm off the rear face of the buckle instead of flush with it - in other words, any pattern I produced would automatically be inaccurate purely due to my choice of material/skill level/tool availability!

Another reason for me not posting anything concrete would be my relaxed/slapdash approach to the whole thing. As you'll see in the next update, I buy the wrong materials and then use it anyway just because I'm excited and in a rush! I don't even really record any patterns properly, I either approximate them and just start cutting or else (in this case) I've printed out Crazylegsmurphy's patterns, kept in mind he thinks they're not accurate and then eyeballed any differences I think might suit my build better.

Some of those guesstimates are bound to be LESS accurate than his detailed calculations. Having said that, when I initially worked out where the bars/hoops on the back of the belt must be (one of the few bits of info we can't measure directly from the photos) they corresponded exactly with Crazylegsmurphy's patterns. I know he's worried about people building inaccurate belts off of those patterns, but for me they were easily as accurate as the ones I tried to make for myself ... so I'm comfortable using them as a base.

So I hope you don't think I'm being deliberately awkward or withholding information because in truth I'm really just bumbling my way through this!

Looking forward to seeing your patterns though, really curious to see if you come up with anything different!
 
THE BELT

For the belt itself I started off with a 9-10 oz belt blank, which is perhaps a little too thick compared to the reference photos. It's certainly too thick for the snaps I bought, but at the time it didn't occur to me that I should maybe try and buy some snaps with longer posts or some thinner leather. It didn't even occur to me that longer snaps might exist. So instead I opted to skive the leather to make them fit:

20180813_104958.jpg

I'd already intended to skive the belt where it bends around the rear buckle bars so it just seemed like the logical thing to do. I shaved off a good percentage of the leather and even some of my thumb.

Happily I didn't get any blood on the belt. I call that a win.

Here's what it looked like once I'd hammered the snaps into place:

20180813_154657.jpg

I may have been a little over enthusiastic with the skiving.

I had a proper steel anvil and snap setting tool, but not a hard marble or steel surface to work on. Instead I set them on the blade of a large kitchen knife placed flat against the kitchen worktop. This seemed to work.Trying to set them on the wooden worktop itself result in too much bounce.

Here's what it looks like from the other side:

20180813_154703.jpg

Looking at the ESB belt I can see it only had two snaps on the bent over section, reaching only as far as the first set of snaps. I presume the ANH one is the same and that the reason you can't see the first set of snaps to the left of the buckle is because the folded over bit is actually snapped into the second set of snaps.

01.jpg

I don't know why this was done? Maybe the belt needed to be tighter than it had been designed to be?

Whatever the reason, it wasn't a feature I wanted to replicate and here I happily diverged from screen accurate to a more idealised version. I went for two rows of snaps behind because ... um ... I don't know. Because it's more secure? Because I didn't look closely enough at the reference photos before ploughing ahead? Maybe both of these reasons?

The colour is, of course completely wrong. I bought Tan dye thinking that would be about right.

It isn't.

But I used it anyway because I'm impatient and stupid.

Since then I've bought some dark brown dye and intend to add it over the top to make it more like this:

20180821_064421.jpg

I will then pretend I intended it to look like that all along.

POUCHES:

For the pouches I used 5oz leather a 12" by 9" sheet seemed sufficient. I started with Crazylegsmurphy's patterns again and modified them to suit.

20180813_165513.jpg

Basically I added extra tabs to each end because I wanted the "unsewn" look from ANH. I originally planned to glue and rivet them all, so to that end I modified each pouch to look like this:

20180814_162956.jpg

The reason for the angled edges is so there are no overlapping seams when it's glued to the belt. Unfortunately I seem to have blunted my leather hole punch making the holes too big to use pop rivets. So instead I settled for just gluing them on and seeing how it goes. If they don't hold, I'll revisit it later.

20180813_185822.jpg

I wet-formed the pouches around either the tools themselves or Lego and left them overnight. Above is a rough guess at the placement.You can also see where I riveted the hooks onto the end, slightly further down than the ESB version so they should be hidden behind the buckle. I had to skive the ends a bit to get the rivets to fit.

Once the pouches were dry I glued them down with "Extra strong leather glue" - bought off eBay, it arrived in an unbranded bottle with a homemade label and looks (and smells) suspiciously like standard contact adhesive.

Seemed to work though.

20180814_171433.jpg

I was very happy with this until I compared it to the original:

20180819_105348.jpg

... and noticed the placement of the sparklet cylinder is a little off - that was an easy fix since it was just glued on - but, more annoyingly, the button-down pouch is way too small. I'd assumed it should fit between the grooves and have only just noticed it actually extends to the edges of the belt.

Never mind, I'll redo that next time I'm free.

This is pretty much where I'm up to at the moment. I now need to figure out the pattern for the y-piece and the holster and then order the leather. There are mistakes and inaccuracies (some deliberate, some not) but overall I'm pretty happy.
 
C-CLIP

It turns out my last post isn't quite up to date. I'd forgotten about the c-clip for the droid caller. I was pretty worried about this bit for some reason. I thought it would be difficult to find metal thin enough to bend into a curve whilst being strong enough to hold the caller in place.

Turns out those fears were really silly. It was ludicrously easy and took me about twenty minutes. I just cut the shapes out from the same sheet steel I used for the buckle hooks with snips, sanded them and bent the curved piece around the droid caller.

Looking at this photo* uploaded by Unchartedleather:

george-lucas-star-wars-03.jpg

... the c-clip on the ESB belt seems to have a square section at the bottom of the curve, much more like the kind of clip you'd buy off the shelf. But the ANH one seems to be just a simple curve, so I went with that.

A few (non-accurate) pop rivets later and I had this:

20180821_064402.jpg20180821_064410.jpg

Size-wise I just eyeballed the width, leaving the gap between the edge of the clip and the groove of the belt roughly the same as the gap between the groove and the edge of the belt. The length is roughly the same as the distance from each knurled edge of the droid caller (it's bent to the curve of my waist here, so looks shorter) which is about 10.5 cm.

The c-clip itself is the same length as the securing strip (which was a lucky guess). I opted for a 27mm width by measuring a photo and scaling up based on an assumed belt width of 2 inches.

It seems to work just fine. It grips the caller nicely and holds onto it if I jump around a bit. I probably spent more time debating whether to rivet it over or under the securing strip than constructing it. I decided on over with diagonal rivets holding it in place ... but I couldn't honestly tell you why.

Happy with it though, can't believe I thought it was going to be the hardest thing to do.

That really is the build up to date now. Time to figure out how much leather I need for the holster and drop strap.
 
Hey Guys,

Just got rid of my family and finished a major project that will pay the bills for some time. I think the buckles look great. The option chosen isn't how the actual buckles are created, but it is a really good alternative when you don't have the ability to weld and such.

Looking forward to seeing how this turns out.

One other thing. I'm not concerned with people "stealing" my research. I would rather we all contribute and get the best we can. I would love for people to do their own research and challenge me on my conclusions. That will just lead to more accurate patterns for everyone.

Thanks for all the kind words though and I glad the patterns were of use. It is my opinion though, that you'll want to check out the final ones.

Cheers, man.

I've been following you on YouTube for a while, but only just got round to watching the videos. I see you came to the same conclusion as me regarding the symmetry of the buckle hooks - be interesting to see if you've changed your mind since then. I'm looking forward to your ultimate conclusions, really curious to see what else you've discovered.

Part of the reason I've finally joined theRPF is to contribute to this conversation. I only wish I'd jumped in earlier.

I get what you're saying about multiple research. I did figure out the size of the buckles myself and came up with very similar results to you - since you'd already drawn them out so beautifully it was easier for me to scribble my back-of- buckle designs over yours. That's the main reason I didn't want to post them, it's one thing to use your work, it's another to alter it and post it publicly.

That and the fact I drew over them by hand so don't physically have any patterns of my own!

Looking forward to further updates from you, I think the work you've done so far is exceptional.
 
Finally got round to the next bit of this build. I printed out this familiar photo:

360054336_01d6ac500a_o.jpg

at 100% scale and cut the holster and y-strap (drop strap? What is it called?) out.

2018-09-22 15.27.46.jpg

Which seems to be about right:

2018-09-22 15.32.16.jpg

My plan was to just trace around it, but it wasn't quite as simple as that.

2018-09-22 15.28.23.jpg

I guess part of it is because the straps in the photo are lying at odd angles and the other part is difference in size between Harrison Ford and myself. After a bit of fiddling, I ended up with this shape:

2018-09-22 15.28.32.jpg

Which isn't as sharp an angle on the rear strap as the screen used one appears to be, but either my belt's longer or I'm wearing it differently. Another limiting factor is the size of the leather I bought. I found a 30 x 90 cm off-cut at a reasonable price so can't have it too vertical anyway.

2018-09-22 15.42.18.jpg

I wanted to make sure I left myself some wiggle room for the bits which pass through the buckles. Cut out, a quick run over with the edge groover, dyed and some snaps added leaves me with this:

2018-09-22 18.52.47.jpg

Which makes me happy.

Flushed with success, I turned my attention to the holster ... and screwed it up almost instantly.

I cut the shape out just fine:

2018-09-22 21.56.22.jpg

Or so I thought.

I gave up trying to figure out how to transfer the pattern to the leather and just hacked some bits out so I could wet form it:

2018-09-22 19.18.14.jpg

Which was looking okay ... until I started wondering where the snap for the strap went. At which point I figured out the perfectly straight line from the edge of the sight bracket bar to the the back of the trigger guard wasn't a perfectly straight line at all. Looking at other photos it clearly has a right angle in it - a right angle which was perfectly hidden by the strap on the photo I'd chosen.

This is a fairly consistent theme for me. One day I'll learn to actually look at the reference photos properly before reaching for the knife.

Never mind, it'll do for now. Maybe I'll figure something out? Anyway, this is where I've got to tonight:

2018-09-22 22.26.11.jpg
 
Finally found the spare minutes to finish this off, well ... maybe not finish. Get it to the condition whereby I can put it on display and forget about it whilst the inaccuracies niggle at me and haunt my every waking hour.

For the stitching I mostly followed the tutorial on the Rebel Legion forum by LadySolo http://www.forum.rebellegion.com/forum/viewtopic.php?t=76807 and this video on saddle stitching: https://www.youtube.com/watch?v=lIMrKR6W6d8

And then I ignored all of it and just kind of did my own thing because I was tired and frustrated and kept getting it wrong.

I started out by cutting in a stitching groove, which I had the right tool for.

20180923_121730.jpg

But that's kind of where my right-tool skills ended. In that photo you can see I've half-corrected/fudged the right angle in the holster I'd missed in the last post. It's not right, but it gives the illusion of rightness.

I decided I needed to fit the leg strap before stitching the holster closed. Not sure if that was completely necessary, but it seemed like a good idea at the time. I sized the strap to my leg (which is tricky when you don't know exactly where the holster will hang) and got the snap placement by laying it on the 1:1 blow up.

20180923_121823.jpg20180923_121831.jpg20180923_123312.jpg

It seems like my leg is the same size as Han Solo's. Which is nice. I used two rivets behind to hold it on, even though I suspect the original only had the one. I don't know why I suspect that, it's just a vague feeling ... but I thought that might be a bit too easy to pull the rivet out under stress.

No idea how much stress I thought I was going to put on that leg strap, but that's what I did.

Next up stitching.

Stitching on the end cap was a massive pain. First off, on close inspection of the selection of needles I'd bought, only one of them was a leather needle. The rest are for sails and furniture and who knows what. Needing two for saddle stitching, I picked the closest one ... and almost immediately snapped it.

So I found a large-ish needle in my sewing kit and tried again.

I know the ESB and ROTJ holsters have the end cap sewn outside/below the holster, but I wasn't sure about the ANH one. I've since seen a photo which suggests that one was too, but I didn't know at the time and decided it looked neater if it was fitted into the holster itself. Which was what I did:

20181002_063327.jpg

If you look closely, you can just about make out the blood and the tear stains.

Three times I stitched it in the wrong place and had to unpick it all. First time I stupidly started at the edge. Second time I skipped some holes on the holster but not enough. Third time was looking great ... until the needle snapped again and I had to rush to the shop to buy a new one. Which they didn't have, so I settled for embroidery needles instead.

Fourth time worked. Or at least, good enough. Stitching the rest was relatively easy:

20181002_063356.jpg

I used three rivets to hold the holster to the yoke/y-strap (which is another guess based on the photos I've been looking at - seems right, but maybe it isn't?) and the end result is:

20180930_121925.jpg

Which I'm really happy with. It might not be perfect, but it's my first attempt and I really didn't think I'd make it this far. If anything, I'd say it's an easy build and with a bit of practice I could get something much more accurate. However, for now it suits my purpose of wearing it around the house and staring at myself in mirrors:

20181002_144501.jpg20181002_144542.jpg20181003_104904.jpg

Damn that Denix/DEC blaster is heavy. It totally changes the way the rig fits ... but then I have no idea how I'd measure, cut and fit it with the gun in place. It does the trick though.

So ... niggles: does it hang a little too far forward? It feels like it should be closer to centre of my leg, but this is where my hand naturally falls. Might need to remake the yoke. Might have enough leather to do so.

Secondly: the right angle in the holster cutaway. It's a bodge job, but one that involves remaking the holster with leather I haven't got and am not sure it's worth buying to fix.

Thirdly: the rivets holding the hooks on, they're still a little too visible. I might flatten them, cut some more steel plates and fix them on top.

Fourth niggle: that pouch near the droid caller. It's too small. I have the leather to do that and probably will. For some reason this one bothers me more than anything else.

Lastly: I used pop rivets to hold on the c-clip. I have hammer rivets now, I might swap them out.

Anything else leap out at anyone?

Apart from the colour which, you know, is what it is and probably isn't going to change.
 
Last edited by a moderator:
Just a quickie for anyone thinking of building one of these. I was never really happy with the way the holster hung, it was too far forward on my leg and tended to flap about a bit. I was just about to remake the drop-strap so there was more strap towards the front buckle, when I realised what was wrong:

The front end of the drop-strap (y-shaped piece, whatever it's called?) was fine. The problem was I designed it to fit the gap between the buckles whilst flat:

20180930_121925.jpg


Never for one second wondering why it was always photographed with one side detached:

y-strap.jpg


Well, now I know: bodies aren't shaped like that!

Or at least, mine isn't.

I shortened the left hand leg (arm?) of the 'Y' so it looks more like this:

2018-11-01 09.48.12.jpg


And then wore it all night at a party. It was super comfortable and the blaster hung in just the right place.

I have no idea if this information is new to anyone or anything less than blindingly obvious to everyone who isn't me, but it's something I only just worked out and it meant the difference between the gun hanging properly and flapping around.

Hopefully it'll help someone else.
 

Your message may be considered spam for the following reasons:

If you wish to reply despite these issues, check the box below before replying.
Be aware that malicious compliance may result in more severe penalties.
Back
Top