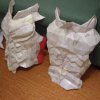
Build Log - Daedric Armor (Plus spear!) [COMPLETE]

halrhyrr

Active Member
It's finished! Here's a pic of the finished build, there are more here

daedricfinal4 (1 of 1)-2.jpg


So this is going to be my first RPF post, first build log, and first costume all in one. At the time of writing I am up to Rondo with my armor but I finally got some spare time so I will be trying to catch this log up to where I am now. I am going to busy with both this project and schoolwork however, so bear with me if updates are slow (and the photos are terrible, my phone camera is terrible. Will get some nice photos of the completed thing though). I'm aiming to finish this by the 29th of September for Oz Comic Con in Sydney.
Onto the build!
---==---
So after making a few other pep helmets I decided I wanted to make a full costume. ZombieGrimm on Deviantart has great files of almost every armor set + weapon in Skyrim. The first thing I made was the helmet. This ended up being too small and I eventually made another one, so I will just use those photos instead. For all my pep I used 210gm paper, I just bought a big ream from Officeworks. For glue I used an acetone based glue. It dries quickly, doesn't stick fingers, and makes a nice strong bond that doesn't come apart after applying resin.


First helmet vs second helmet
IMG_20171112_084130071.jpgIMG_20180621_184429596.jpg
The second one fits way better, as well as the pep being neater. I'm also wearing one of the resined+primed gloves in the photo, but it's not super visible.
Overall the pepakura parts took me about 3 months, however I could only really work on it in small 1-2 hour bursts every few days. Progress has gotten way faster though.
I apologize if the text is all over the place, I keep going back and adding little tidbits. At the very end I'll probably post all the supplies + a budget list. It's difficult to get some things in Aus so hopefully it'll help someone.
 
Last edited:
Re: Build Log - Pepakura Daedric Armor

This post is just going to be a picture dump for all the pep'ed pieces.
IMG_20171220_111433345.jpg
Vambrace

IMG_20180111_172326322.jpgIMG_20180111_172404439.jpg
Front and back

InkedIMG_20171218_111215634_LI.jpg
My lovely friend (Sir Nils Olav, who just made an account! Hi!) modelling the pauldrons and bicep bits (I just learned they are in fact called rerebraces!)

IMG_20180609_135048511.jpg
Boot and toe bits. These bits were actually slightly large but have shrunk slightly after the resin. All the pieces will also have squishy soundproofing foam inside as padding.
 
Last edited:
Re: Build Log - Pepakura Daedric Armor

Next I started doing resin. I ordered a 4kg tin of resin from Trojan Fibreglass, as well as getting the 4kg Turbo Builder's Bog from Bunning (what a tongue twister). This is basically the Aussie equivalent of Bondo. Both are polyester based which is very helpful as I don't have to be as fiddly with the catalyst. Unfortunately most of this had to be done doing winter, so I used way more catalyst than normal and needed to buy more. Oh well.
Each bit had 3 layers of resin on the outside, and 1 of Rondo (or Rog I guess) on the inside.

IMG_20180420_161040114.jpg
The first part I did, somewhat of a test piece, was the bicep, seen here modelled by old man Bruno

IMG_20180421_120758115.jpg
I also tested the Rondo on these, and primed them

IMG_20180422_162643.jpg
I also made the glove. You might notice here that I cut the spike at the front of the vambraces off, and attached it on here instead. It gives me better mobility through the wrist, and I am please with how well the gloves turned out in terms of movement. These are modeled by Gus, who unfortunately died due to old age. I might need to get our new little dudes to model the finished pieces. Carrying on the legacy and all that.

IMG_20180624_091732543.jpg
These are all the bits layed out (minus bicep+gloves) before being resined.

IMG_20180624_143423582.jpg
Pieces drying. Clotheshorses are great for this, especially if you add little wire hooks to hang them with.

IMG_20180627_211149_742.jpg
After the 3 resin layers I cut the torso in half and added some extensions on the sides using thin craft foam. Damn my height (5'2" at sixteen ugh, but then again my dad's only 5'4"), if I made it bigger it would be too long but as it is is was too skinny round the hips for it to sit low enough that I can get the helmet on easily. I later took the red foam off and made some nicer bits. They will be held together with magnets along the seams, with some velcro at key points, over the shoulders, at the very bottom, and under the armpits. I will be posting photos of that when it's done. I'm going to add the straps etc. then do the Rondo. That way they will be held in place nice and strong. I will also probably strap it together once the Rondo starts to gel, so that it cures hard into the right position.
 
Re: Build Log - Pepakura Daedric Armor

As of yesterday I have all the arm pieces as well as the helmet Rondo'd. I've also got the tassets done, but I don't have a photo of them. I will take one and post it once I get home tonight.
IMG_20180724_205745347.jpg
I'm wearing my balaclava underneath. The eyes will eventually be covered with black fabric that I can see through, and I will have LEDs poking through to add a sort of glowing eye look.

InkedIMG_20180724_210805523_LI.jpg
Here is a test fit of the arm armor (armor). The pauldrons are going to be attached to the breastplate eventually, using chicago screws. I forgot to post above that in between all of this I added straps to the bicep bit and detailed both the biceps and gloves. Googly eyes make very good rivets as well as looking absolutely bloody hilarious. All the photos I have of those are also all terrible so I'll get some better ones, again, once I get home.
 
Re: Build Log - Pepakura Daedric Armor

Keep up the good work, can't wait to see this done! Be sure to give it a splendid paintjob. How do you like working with Pepakura? Do you find it easier than other mediums? I have a craptastic printer, so I can't really use it unfortunately.
 
Re: Build Log - Pepakura Daedric Armor

Keep up the good work, can't wait to see this done! Be sure to give it a splendid paintjob. How do you like working with Pepakura? Do you find it easier than other mediums? I have a craptastic printer, so I can't really use it unfortunately.
Thanks hah! I prefer pepakura over foam (I've tried it and and mostly terrible). As someone with not a massive amount of time or space for cosplay, being able to just sit down for 15 minutes and cut+glue paper is so much easier than foam, not every crafting session needs to be long to get even a small amount done. Less setup and pack down too. The resin only took about 7 hours including waiting for it to cure a bit in between layers. And in 5 hours I got half the rondo done. This was actually kind of surprising haha, I thought it would take much longer!
You don't need to template either, which I struggle with. I find it easier to get the basic shapes down with pep, just then adding details/modifications with craft foam too. With the printing, are there any office supply stores or printing stores near you? They will do single sided black and white for super cheap.
I am planning for my next project to include more foam work (Eidolon from Worm, if you've read that) so I can get some experience in different areas.

Hopefully the paint will be good, I'm not that good at painting ugh. But it will be black spray paint, then I will mask areas off and do a dusting of silver on the bits that need to be silver. Hopefully it will stay relatively dark and not get super bright. I will also do some drybrushing on relevant areas as well. I'm hoping to save up for an airbrush at some point too. Any tips for me? Your stuff looks incredible!
 
Re: Build Log - Pepakura Daedric Armor

Thanks hah! I prefer pepakura over foam (I've tried it and and mostly terrible). As someone with not a massive amount of time or space for cosplay, being able to just sit down for 15 minutes and cut+glue paper is so much easier than foam, not every crafting session needs to be long to get even a small amount done. Less setup and pack down too. The resin only took about 7 hours including waiting for it to cure a bit in between layers. And in 5 hours I got half the rondo done. This was actually kind of surprising haha, I thought it would take much longer!
You don't need to template either, which I struggle with. I find it easier to get the basic shapes down with pep, just then adding details/modifications with craft foam too. With the printing, are there any office supply stores or printing stores near you? They will do single sided black and white for super cheap.
I am planning for my next project to include more foam work (Eidolon from Worm, if you've read that) so I can get some experience in different areas.

Hopefully the paint will be good, I'm not that good at painting ugh. But it will be black spray paint, then I will mask areas off and do a dusting of silver on the bits that need to be silver. Hopefully it will stay relatively dark and not get super bright. I will also do some drybrushing on relevant areas as well. I'm hoping to save up for an airbrush at some point too. Any tips for me? Your stuff looks incredible!

I do have those near me, but they usually charge an arm and a leg to do anything. I printed a job application once (35-40 pages) and wanted it faxed and scanned... when done, it totaled about $65 - since then, I kind of avoid places like that. That's just too much money for... paper. And ink. Oh, least we forget ink.
 
Re: Build Log - Pepakura Daedric Armor

I do have those near me, but they usually charge an arm and a leg to do anything. I printed a job application once (35-40 pages) and wanted it faxed and scanned... when done, it totaled about $65 - since then, I kind of avoid places like that. That's just too much money for... paper. And ink. Oh, least we forget ink.
Ughh, that's terrible. If you weren't overseas I'd print stuff for you!
 
Re: Build Log - Pepakura Daedric Armor

So last night I took some better photos of the primed pieces. I also finished off the magnets for the chestplate and took a quick (very blurry) photo. I still need to clean it up around the neck, and I can probably bring the sides in by a couple inches. Once I've refined the fit I'll add the velcro (have I mentioned that yet? I can't remember. I'm going to add velcro at key points). I'll also hopefully start doing some more detail tonight, and finish the Rondo over the weekend.
IMG_20180725_163104179.jpg
IMG_20180725_163203182.jpg
IMG_20180725_163214930.jpg
IMG_20180725_163245336.jpg
IMG_20180725_163338121.jpg
IMG_20180725_194925979.jpg
Helmet sits at the perfect level too. I want to get it as close a fit as possible while still having it sit in that same position.
 
Re: Build Log - Pepakura Daedric Armor

Looking rad! Pity I can't make it to comic-con because I would be coolest looking plebeian standing next to you!

- - - Updated - - -

How do you figure out how to size the pepakura? When you print it out?

- - - Updated - - -

The blue wall really compliments your face colour!

- - - Updated - - -

Next I started doing resin. I ordered a 4kg tin of resin from Trojan Fibreglass, as well as getting the 4kg Turbo Builder's Bog from Bunning (what a tongue twister). This is basically the Aussie equivalent of Bondo. Both are polyester based which is very helpful as I don't have to be as fiddly with the catalyst. Unfortunately most of this had to be done doing winter, so I used way more catalyst than normal and needed to buy more. Oh well.
Each bit had 3 layers of resin on the outside, and 1 of Rondo (or Rog I guess) on the inside.

View attachment 832912
The first part I did, somewhat of a test piece, was the bicep, seen here modelled by old man Bruno

View attachment 832913
I also tested the Rondo on these, and primed them

View attachment 832914
I also made the glove. You might notice here that I cut the spike at the front of the vambraces off, and attached it on here instead. It gives me better mobility through the wrist, and I am please with how well the gloves turned out in terms of movement. These are modeled by Gus, who unfortunately died due to old age. I might need to get our new little dudes to model the finished pieces. Carrying on the legacy and all that.

View attachment 832915
These are all the bits layed out (minus bicep+gloves) before being resined.

View attachment 832916
Pieces drying. Clotheshorses are great for this, especially if you add little wire hooks to hang them with.

View attachment 832917
After the 3 resin layers I cut the torso in half and added some extensions on the sides using thin craft foam. Damn my height (5'2" at sixteen ugh, but then again my dad's only 5'4"), if I made it bigger it would be too long but as it is is was too skinny round the hips for it to sit low enough that I can get the helmet on easily. I later took the red foam off and made some nicer bits. They will be held together with magnets along the seams, with some velcro at key points, over the shoulders, at the very bottom, and under the armpits. I will be posting photos of that when it's done. I'm going to add the straps etc. then do the Rondo. That way they will be held in place nice and strong. I will also probably strap it together once the Rondo starts to gel, so that it cures hard into the right position.
It's gonna have biceps to rival the Cap
 
Re: Build Log - Pepakura Daedric Armor

Looking rad! Pity I can't make it to comic-con because I would be coolest looking plebeian standing next to you!

- - - Updated - - -

How do you figure out how to size the pepakura? When you print it out?

- - - Updated - - -

The blue wall really compliments your face colour!

- - - Updated - - -


It's gonna have biceps to rival the Cap
Thanks dude haha. Can't wait till paint so you can give me a hand!
 
Re: Build Log - Pepakura Daedric Armor

Just a quick update, but I've been working on the torso still. I've put craft foam extenders + magnets on both sides and I'm just trying to get it a good fit now. I should get that finished up tonight, as well as starting on the gauntlet details. I'll probably test fit the entire upper body tonight actually. The magnets I'm using are N45, so about midrange in strength. It all snaps together nice and neat.
I'm going to be using craft foam and velcro on the outside that will help hold it together in case the magnets detach. I'll paint/finish these bits like the metal strips on the helmet and other places (so rivets and stuff) so they look more like part of the costume instead of just a random addition. Under the arms is covered by these hook like pieces, so I will just do the velcro under those.
I'm also considering making a gorget, as there is one on the original, but I might not have very good mobility then. I might just do a super light dusting of silver on the balaclava/undersuit instead... anyone got suggestions? I put a pic of the bit I'm talking about below. The outer part is on the pep model, but the inner part isn't. I could use thin foam but that might flex too much and crack the paint, or not hold its shape properly. And that's not even getting into how I'll get it on. I've got spare magnets I could use, and just have it as a separate underpiece and sit it under the armor instead of attaching it. Might make it more comfy too... If I get time I'll do a bit of a test/mockup tonight. I found an Evil Ted video/templates.
DaedricArmorSK.png
I am kind of just using this thread as somewhere to dump my ideas, so apologies if it's just kind of rambling.
 
Re: Build Log - Daedric Armor (Pic Heavy)

you could put a fine mesh on the hood/under suit then dust spray it

65933-3970813.jpg

you can get nylon and metal, semi chain link effect
 
Re: Build Log - Daedric Armor (Pic Heavy)

Now that the con is getting closer, I've decided I'll stress myself by including a 'days until con' counter.
Days until con: 61

I got a lot done over the weekend. I finished off all the rondo, as well as doing quite a bit of detailing and making a neck piece.
IMG_20180728_105030503_HDR.jpg
Prepping to do rondo, I used painter's tape to create extra barriers around particularly open areas to make it easier for myself. Better than having to do it with my hand, after all.

IMG_20180728_130039588.jpg
I did the back section first, it has less flexible foam and will hold its shape better. Once the rondo started to gel I attached the pieces back together (this is why I did the magnets before doing rondo!) so it would cure in the right shape. I then did the same for the front.

IMG_20180728_130509804.jpg
I peeled off the tape and left the entire thing to properly cure in the sun. Despite the rondo wanting to pool in cracks and corners, I made sure the large flat areas had extra as they are the most prone to flexing and breaking.

IMG_20180728_142751472.jpg
I had run out of primer at this point so I just got as much coverage as I could with the last bits and did the first layer of black right then and there. It's pretty shiny because it was still wet when I took the photo, and its gloss black. I've got a matte spray to seal it with, but I do hope it keeps some of the sihne.

IMG_20180728_150522703_HDR.jpg
I was sick of trying to get things to fit properly, and the neck piece is a kind of complex shape so I used a template from Evil Ted. I did velcro on the back, and it is plenty comfortable (and that's coming from someone who hates wearing even ties). I might add some extended bits around the back as it doesn't quite go all the way under armor.

IMG_20180728_174800147_HDR.jpg
I cut the shape to match the ingame model, and added craft foam and googly eyes to make it look like metal and rivets respectively. (In case you are wondering about the background, it was night and the room with the best light in our house is the bathroom)

IMG_20180728_204000267.jpg
I added fabric over the eyes of the helmet, I just cannibalized some from an old morphsuit that no longer fits me. I've got great vision and the large eye holes give me a wide range too.

IMG_20180729_095723059.jpg
I painted the insides of some LEDs red. Here they look somewhat orange, but in person they are more red/white, think Darth Vader's lightsaber in terms of color. They are little twist on ones, the same kind Punished Props used for their Draugr costumes. I'll be suspending them behind the eyes, then cutting a small hole in the fabric and having the bulb poke through

I also finished of the details on the thighs and am halfway done with the helmet, but no photos of those yet. My old phone is on its last legs, as well as being covered in superglue, so I'll be getting a new one soon with a much better camera. No more blurry and dark photos on this thread!

Also quick question for all you experienced people, how can you get contact cement off of a paintbrush? Most of my brushes are now kind of wrecked...
 
Last edited:
Re: Build Log - Daedric Armor (Pic Heavy)

Days until con: 58
I keep forgetting to take photos, oops. But since the last update I've done the detailing on the helmet, pauldrons, thigh pieces, and toe pieces.
I've sketched out the placement of everything onto a gauntlet as well, which I do actually have a photo of.

IMG_20180801_211448235.jpgIMG_20180801_211437237.jpg
latest?cb=20121014172140.png

It looks kind of confusing, so I guess I'll explain it. Dashes like /// mean craft foam that will be painted to look like the metal of the armor. Crosshatching will also be metal painted craft foam, but it will have the runes/patterns on there. Swirls mean hot glue texturing, and blank means it will just be left plain. On the underside is a kind of special case. It will have overlapping craft foam, but the finish will be the same as the plain bits. Once I've gotten all the craft foam done is when I draw on the positioning for the rivets, but I will be doing all the rivets in one go as I need to score the backs of them then let the contact cement dry for quite a while to get good adhesion. I'll probably rope a friend into helping me.
 
Last edited:
Re: Build Log - Daedric Armor (Pic Heavy)

*Days until con: 55*

Alright so I'll post proper photos of the details tomorrow probably, all I have to finish now is the chestplate, boots, and then do the rivets all over. But I got some boots and decided to try them on with the costume to test the fit. They give me just over an inch of extra height (yay!!) and are a nice flat black. I can walk pretty easily despite the spike on the back of the armor, though I haven't attempted stairs. I do have a plan on how to make a broken spike look like it was intentional when one or both inevitably catch on something and break haha. The legs do look overly large, but that balances out with the rest of the costume, particularly the bulk and spikes of the shoulders/chest.
Also, I got some little chains and marked where they will sit using the power of magnets! Eventually they will be attached using the Chicago screws that hold the pauldrons on (which are currently shipping) and there will be craft foam over them in the middle.
02de873f2e16e3afc4366935546a9ab5.jpg
6b2bf4d0c25da6afa32da251692afbc1.jpg
3d1492a66d419298ee5f4c693e73aee9.jpg


Sent from my moto g(6) using Tapatalk
 
Last edited:
Re: Build Log - Daedric Armor (Pic Heavy)

*Days until con: 54*
So this is going to be somewhat of a picture dump. I've been doing a lot of work and not a lot of updating. I also kept forgetting to take good photos of the in progress detailing. Oh well.

I'm on work experience this week (a requirement for year 10/sophomore students in Australia. Or maybe just NSW. I'm getting sidetracked) and I'm doing prop and model making. What a surprise. The place I am doing it is quite small, just one guy and as he just finished up a big job he's relatively quiet and so is letting me work on this and giving me a bit of a hand. We sanded down of the drips and spiky bits so I won't be stabbed while wearing the costume. I also went and picked up some really nice silver and black enamel paints on his recommendation.
The main body of it has been sprayed and the silver parts are silver (duh) mixed with black to make a darker gunmetal color. I still need to finish the details on the boots and chest before I paint them. Everything is going to be drybrushed with a nice bright silver, and I'll probably do a dark acrylic wash. I'll just see how I go in terms of color. It contrasts quite a lot now, but it should even out. The gloss black looks awesome in the sun, particularly along with the silver.

The cloak and loincloth will be sewn sometime in the next few days, and my Chicago screws will be arriving next week. Once I've gotten it all painted I'll add padding and straps too.
d14bb24262f79106909c7e2c2c13688c.jpg
9e88d738b44f7c747b5181df31795e74.jpg
9bfa6eeefd091c458937301519a5c3a0.jpg
1cc60e2c5a76f6bbe812406288ddf300.jpg
9a7d532748915c6e874d51fd4fac4096.jpg
b68219bb71189ebf3d235b5510345727.jpg
c0be2d1451381aeaab577ac0122464a9.jpg
81b668e0e2e53a7966c7fd781d9519b5.jpg
4c96ea5d03398888eeeb847358a3cf37.jpg
431045bc7350c8e727bc86af5fd99a6f.jpg
86ee2b1f6094028940dbb62b00c1e460.jpg
d7cbc59ee0792cf5e0af228eb7fc3a4b.jpg
57aa15bce51481f876c4845dcd8cdf5e.jpg
3b3f32a67a3626462bd2e89e895c5533.jpg
a7b704b9254d900b8a282723aa70f3f1.jpg


Sent from my moto g(6) using Tapatalk
 
Re: Build Log - Daedric Armor (Pic Heavy)

Days until con: 50
It's the last day of my work experience but I managed to finish the painting of my armor. I did a blackwash and drybrushing to weather it all, as well as starting to add padding and straps. I also added those little hook-like side bits to the torso. I've sewn the loincloths too, but I still need to weather them.
I'm on mobile right now so there will just be a big pic dump at the end of the writing.
I have also been sculpting and moulding some septims with the help of the guy at my work experience (Justin at Watusi Props and Body Casting. Check him out, he does great work!)
They are done with Fastcast and I'll probably hand some out at Comic Con, so if you see me come say hi and grab one.
Justin also had an old mould for some spider fangs, so we cast a few of them. I'll either have them alongside the Amulet of Talos I'm 3D modeling/printing, or around my arm. They will go well as dragon teeth or something.
There is a lot of image spam ahead haha. Once I get the pauldrons attached (still waiting on the Chicago screws) I'll post a test with the whole armor on.
f5d868b49afb643dd99b6cc7f8fc9271.jpg
c50db5dcae5294f715b608fc24f1c140.jpg
bf4ca237772b41f3e7deac7aadb6fd04.jpg
479450401ea9ddd713e6ca2072114dfa.jpg
c6244e55bd1e6b635f9cf7506e1326fb.jpg
5aa3834bec97482fc92389156eb5776f.jpg
546abf8a9336773a72c0b8279400b4e7.jpg
4785e4d23ea6668fc8e4d184c03e0f23.jpg
c710b79bfc0e0327a64c437962f35b46.jpg
a9bb21c696e08a7cfc9d5809b19f8acd.jpg
2b180041f62b9d8ef73e948cdfc554a7.jpg
9819ffd28b67c8474ed389f7d576f492.jpg
e42af7ce9c0864450120f773b0607051.jpg
ad813e35b565cb5d98d46ec4c0770b11.jpg
5ce853d55367db6ce1cb63a85a61c3e4.jpg
0812213fa4cadf3b91011ce904911216.jpg
128b3722bf7da2a20a3213b3d2cf67d5.jpg
d57241fc48162106499857acbdd912be.jpg
a4921263165787cf63c8b05b9adae0a2.jpg
03988fa241dd6ee835c39cb524ef5d6c.jpg
9295a63e4dbbde100333024eb9d29ec8.jpg
7b844eea46baf2824de7ee7e88181295.jpg
ec7730e1422bec5312cd61b291986e33.jpg
be7a5895a0c3ea93aa32eedfb63de215.jpg
07319e348fc082b6d8d2148ec037cfe0.jpg
0c0660d95b0d3f245825a161bc51be9e.jpg
4ed408d108cc34eb6601e9c0e52cb123.jpg
c6dce15a86b74bac3a6d741a25a51778.jpg
0fd1fbf148cdd875b8c7ca43d39cd097.jpg


Sent from my moto g(6) using Tapatalk
 
This thread is more than 5 years old.

Your message may be considered spam for the following reasons:

  1. This thread hasn't been active in some time. A new post in this thread might not contribute constructively to this discussion after so long.
If you wish to reply despite these issues, check the box below before replying.
Be aware that malicious compliance may result in more severe penalties.
Back
Top