Dark Forces: Bryar Pistol (CAD files will be uploaded)

Detreut

Active Member
IMG_20181021_140909.jpg

This has been quite a journey, spanning over 1.5 years.

It all started in december 2016 when I decided to learn how to 3d design. I had never used any CAD-software before and I started out with replicating my old lightsaber-build. I wanted to be able to use 3d-printing to make really accurate stuff, as I already had experience with moldmaking, casting and scratchbuilding. The problem is that I want stuff that is as close to perfect as possible, something that is really hard without 3d-printing or CNS-machining.

I have always loved the Bryar pistol, JK2 Jedi Outcast was one of my favorite games as a kid, and I soon realized that my goal would be to make the best possible version of the blaster pistol. One big problem is that I'm swedish... and we usually don't have any experience regarding real weapons or weapon history due to regulation. This makes reinventing a pistol quite the challenge.

To start off I want to show you my favorite builds, to give you a glimpse of what you can expect from this one. My intention is to make a detailed step by step instruction, walking you through every stage of the build process. All the way from cleaning up the parts to weathering. The lightsaber and A180 (I have posted somewhat of a step by step to that in another thread) is real metal builds, the pistol from the 1313 trailer is a 3d-print in about 30 parts.

16409315_10202454004468519_1866606985_o.jpg
IMG_20180715_150214222.jpg

IMG_20180415_132440.jpg


I have made many versions of the Bryar pistol. And by that I mean many, but I will start by uploading the best reference photos that I have found. These are all different versions as the pistol changes from game to game:

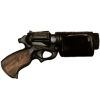
2.jpgBasic Sprites.pngBryar (2).png
Bryar_pistol_JK2JO.jpgDf2_bryarpistol.jpgErik-rading-swbf-erikrading-bryarpistol-resized.jpg
 

Attachments

  • bryar.PNG
    bryar.PNG
    884.5 KB · Views: 1,297
Last edited:
As to my different versions of the Bryar, here is a full list of them all:

Mk1 and Mk1* were my first tries. I relied entirely on the sprites from the first game and actually built this version.

Mk1
Mk1.png
Mk1*
Mk1´.png

Next up was Mk2. This is a modified version of the K-16 which adds symmetry to the BF3 version, which I kind of like but lack a connection with... it is not the same pistol as the Dark Forces or Jedi Knight ones.

Mk2
Mk2.png

Mk3 was my first try to reinvent the pistol. Loving Blade Runner, I gave it a try to add some of that feeling into it, and I don't find it to be a failure at all. But it was'nt what I was aiming for.

Mk3
Mk3.png
Mk3*
Mk3´.png

Flash forward about six months of other builds like the A180. I'm still obsessed with making this work. So I start over and try to source reasonable real gunparts to modify. Finally some success.

Mk4
Mk4.png
Mk4*
Mk4´.png

I am still having problems figuring out how the mechanism would work given the look of the pistol, but I find an old roper shotgun with a really unique mechanism which makes the Bryar possible, or at least mildly plausible. Enter Mk5, the version without the mag.

Mk5
Mk5.png

About this time I stumble across a magnum hairdryer... which matches the original design of the Dark Forces Bryar. It is only a guess... but it is the best match I have found for the basis os the design:

dgssb.png
 
Last edited:
Mk6

I added the mag and the pistol would actually work, with some complications haha

Mk6
Mk6.pngMk6.2.pngMk6.3.png

The modified parts that make up this pistol:

M1 Garand - Muzzle
Enfield - Front grip
Walch Navy - Cylinder
FG42 - Magazine
Rossi Circuit Judge - Frame
Walther P.38 - Back of the cylinder
Ruger GP100 - Grips
K Blaster - Inside of cylinder

The mechanism allows the pistol to use four 9mm rounds. The problem is that one must remove the mag and cock the hammer 4 times to eject all the empty shells, which is kind of retarded... but it is the best working solution I have come up with haha

It feels like it is a "real" weapon, like the props in the original trilogy. It would work and it is made from real parts, given the time I could probably CAD the mechanism and make it work. I'm completely in love with this design and this is, in my opinion, the Dark Forces Bryar pistol brought to life!

What will happen over the upcoming weeks is the process to break it down into parts and make this 3d printable!
 
Last edited:
Dang, that's a lot of iterations! Great job with all that 3D modelling!

In all honesty, of all your interpretations, I think I like the MK I/MK I* the best. To me it feels most like what the designers were going for with this blaster.

I laugh every time I see screenshots of the one from Dark Forces 2. It's just pure ridiculousness, in my opinion. They went completely overboard with the size of the "pistol", if one could even call it that.

The original is far superior, and just plain cool. I think you've captured that coolness with your MK I and MK I*.

You've come a long way with your designs, but I just can't get behind the latest one. The grips and their angle just doesn't do it for me the way your first one does. After all, the Bryar pistol is supposed to be a chopped-down rifle.

But don't get me wrong, they all look great, and you've obviously put a ton of time and effort into this. If you do end up sharing the files, please consider sharing your original design as well!

Sent from my VS996 using Tapatalk
 
Haha I'm totally with you on that! Regarding the accuracy the Mk1* is also my favorite and of course I will share those files, it should even be splitted into printable parts if I remember correctly! What I can't remember is if I fixed the size problem, I think it was a bit big, got to check if the triggerguard measures about 30mm...

The new one is more of a Bryar inspired model so to speak ;)
 
What do you think of this, Dann? Before moving on I wanted to make a Mk7 with your input in mind, I think I might do some more work on the grip to make it follow the frame up, but I'm not sure!

The handle shape is a sawed of mp34.

Bryar Mk7.png
 
Now that's more like it!

I still prefer the look/shape of the grip on the real prop, but that looks much better!

95822a250f2e585bfeef19ecdfffb11c.jpg


I also like the non-tapered barrel of the prop.
 
Last edited:
Is it just me... or have they taken inspiration for the DG-29 grips from the original Bryar?? Either way... I think im going to use that.
bryar grips.png

Now we are going places:

Namnlös3.png
 
Last edited:
Love it! I can relate 100% to your desire to design screen accurate parts. Myself I’m all about the DL-44. Started 5 years ago when all we had was inaccurate parts and only the HERO, BESPIN & GK at that.

It’s become a bit of an obsession but now I have all the parts to build pretty much every DL-44 from the OT and the new films. Even shared some of my designs so people can get them in metal now as well. Long road but well worth it. Hats off to u and ur adventure [emoji106]
a8ae76d17fbe9724e6288678692444c1.jpg
 
Holy manoly! That is a GREAT collection, really inspiring stuff! :D Are you going to make another one with the Solo movie (or do they use a perfect remake of one of the previous models)?
 
Mk8

I removed the mag... again. Because Im doing a remake of the Bryar in general and not a specific one, I can lean on that the Outcast one that does in fact not have the mag. This enables me to have a more reasonable mechanism with a break open, meaning that the forward grip has a function: When sliding the grip forward in the same fashion as a shotgun grip the hinge is freed and the pistol can break open to enable loading of 4 shells from the front of the cylinder (still a riddiculous way of loading it, but some design elements can't be removed)

I also ended up removing the chamfer on the front grip to give it some more weight, the design was a bit back-heavy and I added some detail to balance the design elements out, and I redid the grips. I really like the feel of the DG-29 grips, but I did'nt love the shape... so I replicated and modified the shape of a Thompson SMG. The grip is quite angled, almost as much as the original design, but using a real SMG grip-design adds to the feel that this pistol could potentially have been a rifle of some sorts in the past.

Bryar Mk.8.png
 
Last edited:
I made some last changes while beginning to split the model:

- Reworked the lower barrel to make its inside mechanicly realistic and to enable a nicer buildprocess when printed
- Switched sides on the lever which is supposed to enable the break-open
- Added some screwholes where they were needed
- Added some extra length to the barrel to match the reference sprite more closely
- Added the flashhider from my Mk1, I've always really liked that part and wanted to incorporate it in the final version
- Added the breakopen-hinge. I'm damn pleased with that part (I will post an exploded picture when done so you can see all the internal details)

I think I will leave space in the main body to be able to add a spring from a ballpoint pen to simulatea the trigger in safe-mode. I'm going to cast the trigger in metal either way, so I might as well go the whole nine yards ;) Im playing around with the idea of having a moving trigger, my only consern is if it will scratch up the paintjob.. a workaround would be to add .5mm washers on either side.
Bryar Mk8.png
 
About 70% done with the split! Now you can see what I mean regarding making the construction as realistic as possible (some parts have to be printed in two pieces though). I'll descide if/how to make the trigger and hammer movable when I've stripped away the last parts from the main body :)

When done I'll probably "repair" the pieces in Netfabb to get them ready for printing, apparently something in catia results in wierd errors in the .stl-files, this far I've relied on my printer-guy to do it, but it might be time to make amends on that lack of knowledge haha.

(I'll upload the files for the Mk1* at the same time as these!)

Explode 1.pngExplode 2.png
 
I think I finally managed to work out how to make the trigger and hammer work... it will result in a 30degree/1cm horizontal travel of the hammer, and the same travel of the trigger as a Luger p08. No guarantees that it will work once printed though haha!

Now I can move on to split the remaining parts!

adfed.png

Stage complete:

Färdig breakdown.png
 
Last edited:
Last night I realised that I screwed up haha... the trigger and hammer will not be functional, because the model only has one of the two springs required. But I can live with that, it would take forever to fix it and reprint the handle and all the parts.

The printed parts will be ready for delivery any day now... in the meantime I made a color-test to see how it will look when finished!

bryar.PNG
 
Last edited:
I picked up the parts about one week ago and all in all they came out great!

IMG_20180908_202903.jpg

I love working with PLA, but it certainly does have its disadvantages when printing overhangs. I couldn't figure out a better way to print the barrel-shroud than splitting it into two parts and as a cherry on top the prints had a step in them. To fix them up I first added filler and sanded the inside before glueing them together. I then inserted the barrel with waxed paper wrapped around it and added filler to fix the gap between the barrel and the shroud.

After a lot of sanding and refilling the part was sprayed with several layers of primer. I chose primer instead of filler-primer because the primer tends to dry harder and will soak in and support the filler better and the overspray won't decrease the inner diameter as much.

IMG_20180907_221816.jpgIMG_20180908_192139.jpgIMG_20180915_125057.jpgIMG_20180915_150815.jpg

When dry I sanded the part with 400grit to tooth-up the surface. I used acrylic paint from Citadel, which has really ****ty opacity thesedays, but for this kind of application it works beautifully (it doesn't clump up). I added about 25 thin layers which makes quite a resilient coat and then wet-sanded it with 400grit. This dulled the coat a bit, so I added a couple of more layers. The finish looks like it has been spraypainted/airbrushed at this point, and it is probably the best brush-application of a metallic that I have ever managed.

IMG_20180915_163139.jpg
 
Yesterday I started the same process with the grips. The small channels were cleared with the backside of a drill bit (I have yet to find a needlefile that small haha). The next step will be to glue the inner and outer parts together and give them a coat of matte spraypaint. My plan is to make a silicone caulk-mold with starch and food coloring (I have casted successfully with these in the past, and they are a LOT cheaper to make) and then try to achieve a bakelite-finish.

Does anyone know which color-mediums that are suitable to mix with polyester-resin??

IMG_20180916_165408.jpg
 
Is it just me... or have they taken inspiration for the DG-29 grips from the original Bryar?? Either way... I think im going to use that.
View attachment 831607

Now we are going places:

View attachment 831680

I like the version with the magazine to be honest. It looks like the Bryar from Dark Forces II: Jedi Knight. I would like to point out though that the magazine is on the wrong side of the receiver. Aside from that, it's a good looking blaster. It's my second favorite blaster pistol, the first being Han's DL-44 from ANH.
 
I like the version with the magazine to be honest. It looks like the Bryar from Dark Forces II: Jedi Knight. I would like to point out though that the magazine is on the wrong side of the receiver. Aside from that, it's a good looking blaster. It's my second favorite blaster pistol, the first being Han's DL-44 from ANH.

In DF1 it is located on the left side, in DF2 it is located on the right side :) I'm actually considering printing the magazine and trying it out, piece of cake while I have not made any changes to the cylinder between those versions!
 
In DF1 it is located on the left side, in DF2 it is located on the right side :) I'm actually considering printing the magazine and trying it out, piece of cake while I have not made any changes to the cylinder between those versions!
Are you going to be making this model available for 3D printing?
 

Your message may be considered spam for the following reasons:

If you wish to reply despite these issues, check the box below before replying.
Be aware that malicious compliance may result in more severe penalties.
Back
Top