You are using an out of date browser. It may not display this or other websites correctly.
You should upgrade or use an alternative browser.
You should upgrade or use an alternative browser.
1/72 Cloud City Diorama with PG Falcon and FM Slave 1
- Thread starter korben44
- Start date
JediMichael
Master Member
Looking really good as usual.
And speaking of auto correct. I was reading something the other day where this lady was trying to order a cake for a little girl using her phone. She asked if they could put a little blonde girl on top of it....but auto correct instead said to but a blind girl on top. So sitting on top is this little girl with black glasses and a walking stick.
And speaking of auto correct. I was reading something the other day where this lady was trying to order a cake for a little girl using her phone. She asked if they could put a little blonde girl on top of it....but auto correct instead said to but a blind girl on top. So sitting on top is this little girl with black glasses and a walking stick.
nkg;[URL="tel:4504877" said:4504877[/URL]]Who made the decals?
Bandai... It was from the Y-wing kit, I think.


You’ve probably already figured this out mate , but I’m wondering - considering you’re planning to have the cockpit door ‘ open ‘ to reveal the corridor behind , where are the fibre optic strands going to hidden , or will they ?
:cheersGed
They will be hidden. I'm just going to route them to the side and over top, or alongside, the corridor. You'll never see the backside of the cockpit back wall, so it will be good.


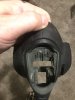
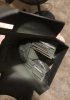


First coat down on the bottom hull of Boba's ship. Lots of nicks and scratches to fill and sand then back at it with more coats. I'll be following up the final base coat with a flat/gloss coat then some hairspray and on to the other colors. That will allow me to add the chipping effects and weathering needed to make this ship shine, so to speak.


That's looking fantastic! Can't say I've heard of the hairspray method, how does that work?
That's looking fantastic! Can't say I've heard of the hairspray method, how does that work?
Thanks! Well, with the hairspray technique, you quite literally spray it on the model. You can use an airbrush for better control, but for convenience and ease of use, I just go straight from the aerosol can. I sprayed it before putting down the pink paint and on top of the main 'underneath' bottom hull paint layer. What this does is add an easily removable layer between the primary hull color and the pink layer. Once that dries, I use a swab dipped in water or saliva (just don't rewet a dirty swab!) and proceed to remove the desired amount of pink paint to give it a chipped effect. You can see an example of this in my previous post where I used the same technique on the loading ramp and rear bottom hull.
I like this technique because it is easy and extremely inexpensive when compared to using liquid masks. It's also more authentic than using the sponge technique. It does take some practice and you need to be careful not to remove the bottom layer. For added protection, you can use a clear coat or clear coat/flat base prior to using the hairspray. I tend to be lazy sometimes and do not use the clear/flat base coat when I actually should.
Hope this helps!
-Kris
Similar threads
- Replies
- 41
- Views
- 3,609
- Replies
- 6
- Views
- 1,582