You are using an out of date browser. It may not display this or other websites correctly.
You should upgrade or use an alternative browser.
You should upgrade or use an alternative browser.
Boba Fett ESB helmet commission
- Thread starter superjedi
- Start date
superjedi
Sr Member
It looks fantastic so far! So from what I gather you are adding the silver on top of the basecoat correct? I just ask because I've seen people use silver as their basecoat and use the subtractive proces as opposed to adding. Just trying to gather info on how others approach this before I start painting mine.
Sent from my SM-G955U using Tapatalk
Thanks, guys!
Yes, I approach these paint jobs topically, so the detail and damage is laid down on top of the overall base color.
superjedi
Sr Member
Time for more pics. 
I just realized I didn't upload the cheek pics. . . but I'll catch them on the next round.
I got the red airbrushed on and have been working on the damage on those portions of the helmet.
The red looks very odd when it's first laid down. But the detailing will fix that. Here it is just after application.
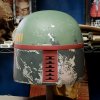
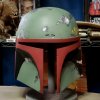
I started the damage with the keyslot area. Working on the red areas allows me to use an additional detail color: a dark maroon/purple shade.
I've never found anything out-of-the-bottle that I like, so I mix up a custom color. Here's the keyslot area.
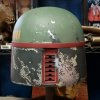
After that, I moved up onto the red band. I work this in three main sections. There are some good color breaks that let me focus on
one area at a time. I start with the center, then work the left and right portions.
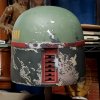


So now everything behind the ear platforms is done! I'll start working on the front next.
I just realized I didn't upload the cheek pics. . . but I'll catch them on the next round.
I got the red airbrushed on and have been working on the damage on those portions of the helmet.
The red looks very odd when it's first laid down. But the detailing will fix that. Here it is just after application.


I started the damage with the keyslot area. Working on the red areas allows me to use an additional detail color: a dark maroon/purple shade.
I've never found anything out-of-the-bottle that I like, so I mix up a custom color. Here's the keyslot area.

After that, I moved up onto the red band. I work this in three main sections. There are some good color breaks that let me focus on
one area at a time. I start with the center, then work the left and right portions.


So now everything behind the ear platforms is done! I'll start working on the front next.
superjedi
Sr Member
The front half of the helmet is coming along. Here are some shots of my work over the last few days.
To begin with, the area at the left corner of the visor opening and the left half of the brow. In these shots
you can see the work on the left cheek as well, since I forgot to post the cheeks when I finished them.


Next is the right half of the brow, as well as the right cheek.

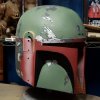
Next I worked on the left mandible. Here are a couple of angles.
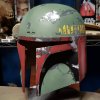

Finally for this update, the upper half of the right mandible. This area is an eye crosser! Lol
I break it up into two main portions, upper and lower.
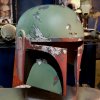
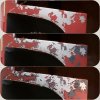
Here's an in-progress collage of the right mandible, showing the stages I go through.
First, the silver. Next is the gray. Finally I add the maroon/purple and base red details.
I'll work on the lower half of the right mandible next. After that, the "basic" painting will be done
and I can begin detail work on the ears.
To begin with, the area at the left corner of the visor opening and the left half of the brow. In these shots
you can see the work on the left cheek as well, since I forgot to post the cheeks when I finished them.


Next is the right half of the brow, as well as the right cheek.


Next I worked on the left mandible. Here are a couple of angles.


Finally for this update, the upper half of the right mandible. This area is an eye crosser! Lol
I break it up into two main portions, upper and lower.

Here's an in-progress collage of the right mandible, showing the stages I go through.
First, the silver. Next is the gray. Finally I add the maroon/purple and base red details.

I'll work on the lower half of the right mandible next. After that, the "basic" painting will be done
and I can begin detail work on the ears.
superjedi
Sr Member
Lots more work done over the past few days.
I completed the remaining parts of the right mandible, which finished the "basic" painting of the helmet.
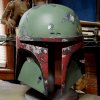
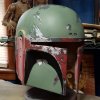
I moved on to doing some of the "effects" next. The pale contrasting gray is scattered around on different
parts of the helmet. The biggest concentration is on the right rear panel, but there's some on the right mandible
and around the dent, too.
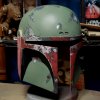
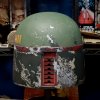
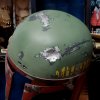
I started working on the ears as well. Here are the stages I went through for the left ear.


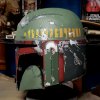
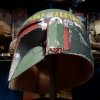
Here are a couple of shots of the beginning of the RF ear parts.

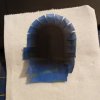

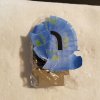
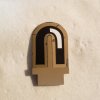
Since these were taken, I've finished up the rest of the RF ear.
The helmet is actually very nearly complete now. I have done an acrylic wash, added some powdered pigment weathering,
done the final clear coat, and now all I need to do is cut and fit the visor and do final assembly of everything!
The next update will include a gallery of final pics.
I completed the remaining parts of the right mandible, which finished the "basic" painting of the helmet.


I moved on to doing some of the "effects" next. The pale contrasting gray is scattered around on different
parts of the helmet. The biggest concentration is on the right rear panel, but there's some on the right mandible
and around the dent, too.


I started working on the ears as well. Here are the stages I went through for the left ear.


Here are a couple of shots of the beginning of the RF ear parts.


Since these were taken, I've finished up the rest of the RF ear.
The helmet is actually very nearly complete now. I have done an acrylic wash, added some powdered pigment weathering,
done the final clear coat, and now all I need to do is cut and fit the visor and do final assembly of everything!
The next update will include a gallery of final pics.
superjedi
Sr Member
Thanks, guys! Blewis, replied to your message.
OK, this is it. . . the reveal! It's been a lot of fun working on this lid and in a couple of days it's going to get packed up and sent out
across the Atlantic. I always hate to send these off, but I know it will go to a good home. Here are some final pics.
Let's start with the front angles.


Next are the rear angles.


We'll finish up with the profile shots.


Thanks to Somerset for letting me add another ESB helmet to my portfolio, and thanks to
everyone who followed along with the progress!
OK, this is it. . . the reveal!
across the Atlantic. I always hate to send these off, but I know it will go to a good home. Here are some final pics.
Let's start with the front angles.


Next are the rear angles.


We'll finish up with the profile shots.


Thanks to Somerset for letting me add another ESB helmet to my portfolio, and thanks to
everyone who followed along with the progress!
Somerset
Sr Member
Wow, now that looks perfect! Big shout out to superjedi for his hard work, great updates and messages throughout the whole commission. It must take huge amounts of skill and patience to get it right. I can't wait for it to arrive (do you have any full-front pictures by any chance?).
I hope some of you have got on the list for some of his work now!
I hope some of you have got on the list for some of his work now!
Last edited by a moderator:
russellsch
Master Member
This was such a joy to follow throughout! Thank you so much for the allowing us to follow it's progress. It is truly a work of art. :cheers
Congrats to Somerset :thumbsup
Congrats to Somerset :thumbsup
Similar threads
- Replies
- 7
- Views
- 448
- Replies
- 10
- Views
- 1,218
