Boba Fett ESB helmet commission

superjedi

Sr Member
Hi all,
I am starting a Boba Fett ESB helmet commission for member Somerset. I've been doing Fett helmets for quite a while now and I generally post over on TDH. Since Somerset mentioned he's more active over here, I figured I'd show the progress here instead.
This helmet is an FPH2 kit, of which I've painted many. It's a really nice kit that's currently produced by Wasted Fett.
I've gotten the prep done and will start painting the main helmet this week.
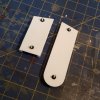
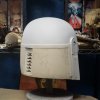
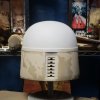
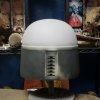
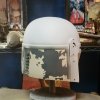
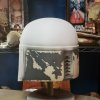
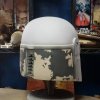
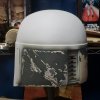
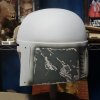
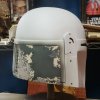
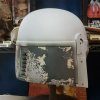
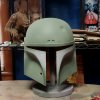
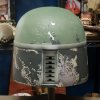
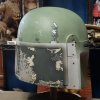
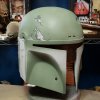
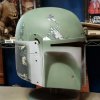
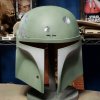
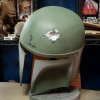
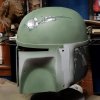
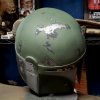
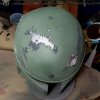
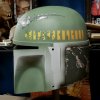
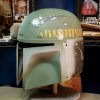
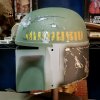
Here are a couple of shots of the helmet in primer, along with a shot of some machine screws epoxied into the ear parts.
The prep is boring, lol, but it'll pick up once I start getting into the painting.

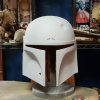
20180701_144953.jpg20180701_145022.jpg20180624_165815.jpg
 
Where am I in the line? ;)

Hi Markus! Looks like you're around #5 now.

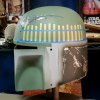
A bit more to show tonight. I got the Concrete airbrushed on the rear panels. This is the easiest stage, just blast some color on, lol.
It gets more complex from this point on. Also including a pic of the magnets installed in the ear cap.
I really like this method. It makes removing and installing the cap super easy.

20180702_190422.jpg20180701_165012.jpg

Dean, my toys keep me company while I'm working! :D
 
Hi Markus! Looks like you're around #5 now.

A bit more to show tonight. I got the Concrete airbrushed on the rear panels. This is the easiest stage, just blast some color on, lol.
It gets more complex from this point on. Also including a pic of the magnets installed in the ear cap.
I really like this method. It makes removing and installing the cap super easy.

View attachment 828251View attachment 828250

Dean, my toys keep me company while I'm working! :D

WHAAAAT...number #5???


jk Eric, all is fine ;)
I have the Casio, brass Borden connector, real chinstrap, the Polaroid viewfinder and a honeywell switch (on its way to me currently) set aside for this project already...

Watching this thread with great interest. :cool
 
Today's Independence Day in the US, so I had lots of time to work on the helmet. :D
These pics show the work that's been done over the past 2 or 3 days.

First, I stenciled on the color breaks on the rear panels. Then I used my Winsor & Newton masking fluid to mask things off.
The dark green was then airbrushed on.
20180703_192425.jpg20180703_192446.jpg20180704_062607.jpg20180704_062646.jpg

After the green was dry, I removed the mask to reveal the damage patterns. These are the "raw" patterns.

20180704_104305.jpg20180704_104330.jpg

I went back with a fine liner brush and tweaked the patterns and added the smaller details.

20180704_123443.jpg20180704_184218.jpg

Now that this stage is done, I can begin adding the gray and silver damage.
 
Thanks, guys! Time for another update. . .

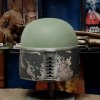
I've gotten quite a bit done over the past few days. To begin with, I laid down the base color on the dome and cheeks and did the first weathering pass.
It serves to modulate the green a bit and make it look uneven. It looks pretty stark at this stage.

20180707_174213.jpg20180707_174137.jpg

Next I started the damage at the rear of the dome. Here are a couple of angles which also show the network of fine scratches.
I do these using a combination of silver applied with a 20/0 liner brush, and a metal scribing tool to physically scratch through the green.

20180708_133724.jpg20180708_181928.jpg

I've been continuing to work my way around the dome, coming next to the cat scratch area. Here are 2 angles.

20180709_174930.jpg20180709_175002.jpg

The turn signal area was next. I also did a quick silver fill for the dent.

20180710_194737.jpg

I then worked on the dent and the "comet's tail" that streaks back from it.

20180711_192901.jpg20180711_162806.jpg20180711_192926.jpg

So that's where things stand as of this evening!
Next up will be the big scrape across the top of the dome, then the killstripes.
 
Man, that looks amazing. This kind of paint work requires SO much patience. I was converting the Hasbro lid a few years ago and shelved it because I couldn't take the tedium.
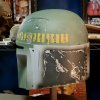
Well done!

SB
 
Thanks! Patience is certainly a factor working on something like this.

Next round of updates. . .

I've finished up work on the dome. I got the big scrape done:

20180714_070237.jpg20180714_070159.jpg

Then I masked and airbrushed the killstripes. Here are the various stages.

20180714_102718.jpg20180714_105021.jpg20180714_141030.jpg

I finished detailing the killstripe side of the helmet, completing the dome.

20180715_101905.jpg20180715_101828.jpg20180715_101758.jpg

Next up will be blocking in the dark outer cheeks and working on the cheek details.
 
Back from holiday now and what load of lovely updates to check out! It's really taking shape and looks amazing!

I always wanted to have a go at painting Boba myself one day, but the level detail that Eric puts in you can see that it would take many years and trials to get to that level!

Really love the cat-scratch and scrape on the top and the steady fade on the kill stripes!
eethan I live in Europe too and while shipping is probably going to be heavy I think it's gonna be worth it!
 
Last edited by a moderator:
It looks fantastic so far! So from what I gather you are adding the silver on top of the basecoat correct? I just ask because I've seen people use silver as their basecoat and use the subtractive proces as opposed to adding. Just trying to gather info on how others approach this before I start painting mine.

Sent from my SM-G955U using Tapatalk
 
This thread is more than 5 years old.

Your message may be considered spam for the following reasons:

  1. This thread hasn't been active in some time. A new post in this thread might not contribute constructively to this discussion after so long.
If you wish to reply despite these issues, check the box below before replying.
Be aware that malicious compliance may result in more severe penalties.
Back
Top