Spider-Verse/Homecoming inspired Spider-Man costume for £30 (hoodie build on a budget

The14thDr

Sr Member
This is something I’ve been working on for the past couple of weeks or so, but I feel I’ve finally made enough progress to be able to post and make myself accountable for. Most of my time up to now has been spent designing and creating mockups of what the finished costume will look like - as well as collecting various pieces to use for the costume.

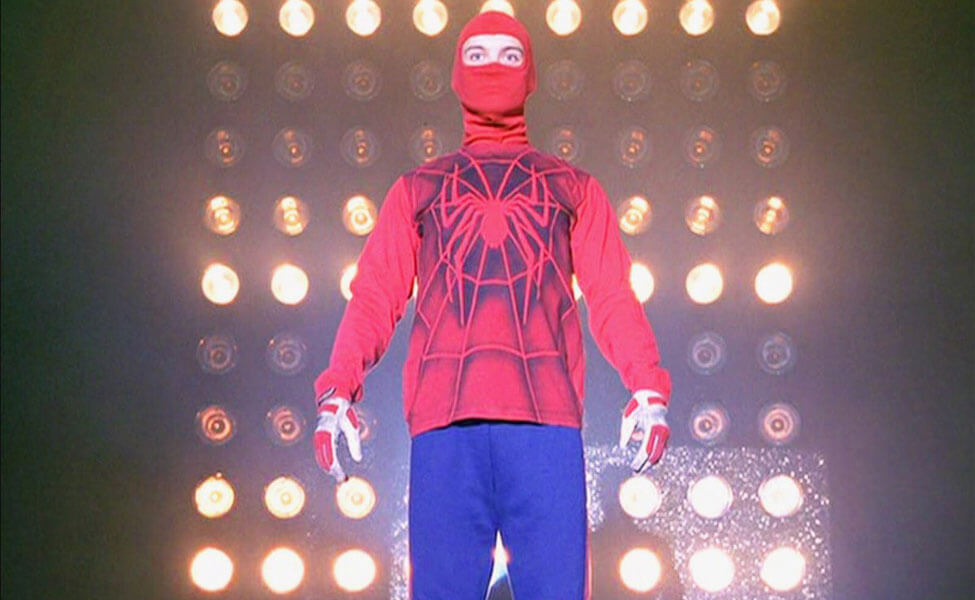
Cosplaying as Spider-Man is something I’ve wanted to do since - well, since forever, basically - and seeing the trailer for the new Into the Spider-Verse movie really inspired me to give it another try. With the budget I have at the moment, a decent-looking spandex costume is out of the picture so I thought it would be fun to create my own take on the costume inspired by what Miles or Peter would have thrown together at the beginning of their careers.

Piece #1 is the sleeveless red hoodie with webs and spider emblem added via the power of digital editing! This should give you some idea of how I want the suit to look.
e902e1cccf3992575da934f3044951d3.jpeg


For the face shell I used gimpee’s awesome Pepakura file (unfolded for foam by JFcustom!) I made the lens frames from scratch, basing the overall shape on the Amazing Spider-Man 2 eyes with overlapping layers added as a nod to the Civil War/Homecoming suit. I gave these 3 coats of cherry red acrylic paint and they are currently awaiting a coat of PVA glue to give them a nice shiny finish.
77abb0288a1745ca3427775eb2b3c850.jpg
 
Last edited:
Time to work on the hoodie. Step number 1: adding the chest spider.

I spent a lot of time looking through various spider symbols on Google, trying to decide which would look best on my costume before settling on the Insomniac Games Spider-Man logo. I believe the logo they used is actually the back spider from the game’s suit.

I traced the image to create a template for one half of the spider, which I fixed to a piece of fabric (in reality just a plain black t-shirt) using masking tape.
e31e06fe1cef4716073890be69812e7f.jpg

The paper and tape help to create a stiff backing that prevents the fabric from moving too much and actually makes it a lot easier to cut.

By a happy accident I discovered that the tape residue temporarily held the fabric onto the paper template even after it had been cut out - this was extremely useful as it prevented the fabric from curling up too much around the edges until I was able to glue it into place. Once the first half of the spider logo had been attached with fabric glue, I repeated for the other side.
3d4efd16e05a9b71c18f0c58581733e2.jpg


You can see where I messed up by not positioning the spider so that it sat right against the zip and in an effort to disguise this I coloured in the gap with fabric marker. Obviously this didn’t work out as well as I’d hoped, but I don’t think it looks too bad.

I’m currently about halfway through sewing around the edges of the spider to really secure it into place. After that I’m hoping to move onto the webbing.
 
Last edited:
Took a break from working on the rest of the costume to finish off my lenses and face shell.

I decided to try something different with my lenses and forego any sort of plastic (in theory this should not only give the mask a unique look, but also prevent fogging and help with breathability). Instead I ordered some stainless steel mesh with a 0.94mm aperture.

One problem I noticed right away seems fairly obvious in hindsight: the stainless steel is super shiny and reflective, so even the smallest amount of direct light will be blasted into your eyes with almost blinding intensity.

If there’s one thing I remember from my physics classes: it’s that black is the best colour at absorbing light. With this in mind, my solution was to paint one layer of mesh to act as a filter and stop any light from being reflected into my eyes - two coats of acrylic paint on each side of the mesh seemed to do the trick. My tip is to use big strokes with a medium sized brush and if paint gets into any of the holes, just keep brushing over it until the hole is cleared.

After this I carried out a bunch of tests to try and find the best combination of silver and black mesh as well as the optimal number of layers that would allow me to see out of the lenses without others being able to see in.

In the end I settled on a layer of black mesh sandwiched between two layers of unpainted:
e3dd543a80e596f1008ca88459015da6.jpg


Once the mesh had been glued into place I made sure the the jagged edges were completely covered by several coats of glue so that they wouldn’t cut my face when wearing the mask. Looking back I probably should have used a finer mesh to completely hide my eyes from view, but 3 layers of this seems to do the trick just as well.

Finally, I painted my face shell and sealed it with PVA glue.
1f915c6b89f4da236ceeb62890d406dd.jpg


I’d love to know what you think. The pure mesh design isn’t really accurate to any of the movies/comic books but the unique finish seems appropriate for a custom suit, and I really like the overall effect.
 
Last edited:
Re: Spider-Verse/Homecoming inspired Spider-Man costume for £30 (hoodie build on a bu

Loving it so far.It's got that 'Scarlet Spider-feel' to it for me.He had to improvise as well to create his own look
 
Loving it so far.It's got that 'Scarlet Spider-feel' to it for me.He had to improvise as well to create his own look
Thanks for the comment! That’s exactly the sort of style I’m going for with this. I have a non-existent budget, next to no sewing experience and I’m working out of my bedroom: i.e. exactly how Peter/Miles/Ben Reilly would have done it with their first costumes!

In other news, the face shell is now more or less complete; I added plenty of breathing holes around the mouth/nose area, and the mesh lenses should help with air flow since there is no solid plastic covering them.
4623bb8c3d0eab6ee99c0068dbc7769c.jpg
 
Last edited:
For the back I originally wanted to go with the classic comic book spider, but then I stumbled on this drawing of the Civil War prototype suit* back spider by redknightz01 on DeviantArt: https://redknightz01.deviantart.com/art/Spider-man-Civil-War-BTS-Prototype-Symbol-719039594
*for those who don’t know, Tom Holland wore a practical suit during the filming of Civil War that looked different to what we eventually saw on screen and was CG’d over in post-production.

After getting the artist’s permission to use his image for my suit, I once again cut the template out of a plain black t-shirt and attached it to the hoodie with fabric glue:
2125e266151a933fe223fa8a14f1ccba.jpg

(I apologise for the tightly-cropped image here. I wanted to show the hoodie in its entirety but for some reason the red looks all faded on camera if I try too wide an angle. Photography never was my forte :rolleyes)

One thing I noticed about the hoodie is how stiff the material is - whenever I crouch or bend forwards even a little, large “bumps” form in the front of the hoodie giving me the appearance of someone with a rather large chest and stomach and the only way to straighten it out is to pull the hoodie back down every so often (and yes, the hoodie was like this when I bought it so it can’t be the result of the fabric glue I used for the spider symbols.) None of my other hoodies do this, and I already tried washing but it doesn’t seem to have made much of a difference.

Any ideas on how to solve this would be greatly appreciated; at the moment it makes crouching, bending and generally anything that doesn’t involve standing with a perfectly straight back almost impossible whilst maintaining a flat chest - and let’s face it, what’s the point in a Spidey cosplay if you can’t even pull a few iconic poses?
 
Last edited:
Re: Spider-Verse/Homecoming inspired Spider-Man costume for £30 (hoodie build on a bu

Never liked hoodies because of that 'bulge-at-the-front' cliche
 
Last edited:
Never liked hoodies because of that 'bulge-at-the-front' cliche
Yeah, although like I said I’ve never experience the problem as badly on any of my other hoodies. Maybe the fabric will naturally soften through wear? Time will tell, it always does!
 
Last edited:
Re: Spider-Verse/Homecoming inspired Spider-Man costume for £30 (hoodie build on a bu

I wouldn't be able to tell you though,sorry
 
I wouldn't be able to tell you though,sorry
No worries! I have an idea for a work-around if I can’t find a way to soften the fabric so it’s all good.

In other news, my mask arrived - a standard black spandex mask with the eye holes already cut out. It fits pretty snugly, although the neck opening was too tight to fit my head through. To fix this I cut the zip from my old red mask and transplanted it onto the new one. After much trial and error I marked out where the lenses should be attached before fixing them into place with some “hi-tack glue” - essentially PVA glue with a modified formula to make it stickier and help take hold more quickly.
5697b7408fc6a03c42a389934c1ed9bc.jpg

5497f1d04152c48aee2bcc1817dbac99.jpg

I’m currently waiting for the glue to dry - the trade off for a faster hold being that the full drying time is extended by a lot! - but expect more photos soon.
 
Last edited:
Re: Spider-Verse/Homecoming inspired Spider-Man costume for £30 (hoodie build on a bu

Not much to report for today.

I finished stitching my front spider then drew the web lines onto the front of the hoodie with a fabric marker, using my mock-up at the top of the page as a guide. I need to leave the ink for around 24 hours to dry fully so that rules out any more progress for tonight.

Let me know what you think. :)
2c388070b78eb39b053b96da6e4f9895.jpg
 
Re: Spider-Verse/Homecoming inspired Spider-Man costume for £30 (hoodie build on a bu

Currently working on the web shooters (full write-up coming soon):
6ddbae84d744e53550ea326d839a3b16.jpg
 
Re: Spider-Verse/Homecoming inspired Spider-Man costume for £30 (hoodie build on a bu

Doc,are you saying that once the neck has been tightened to tuck in the mask up against the chin,you now need a zipper to close your mask?
In that case,I now need to find a local tailor to help me with this :unsure

And what exactly am I looking at here? Are these animatronic webshooters?
 
Doc,are you saying that once the neck has been tightened to tuck in the mask up against the chin,you now need a zipper to close your mask?
In that case,I now need to find a local tailor to help me with this :unsure

Sorry, I should probably have worded that a little better. By neck opening I meant the opening in the bottom of the mask that you put your head through - this mask was a much better fit than the first one I owned so I didn’t need to modify it to make it any tighter. The trade-off for this perfect fit was that I couldn’t get it on my head, hence me adding the zip so that I could open up the back of the mask.
I wouldn’t consider myself an experienced sewer (I only know how to do a basic stitch) and adding the zip was actually pretty simple. Here’s a photo to help demonstrate:
02b8da01047c8c1daa2ab260302bbb4a.jpg

There was a seam on the back of the mask which I cut open and after lining the zip up to the fabric, I used a basic “running stitch” to fix the two together.

I hope I explained this properly (and that at least some of it helps.)


And what exactly am I looking at here? Are these animatronic webshooters?

Not quite (but it does make me happy that you thought those were real electronics [emoji3]) The idea was to create a false circuit board with some added wires that would be visible through a plastic window in the top of the web shooter; I wanted to make them look like real devices that actually did something and the false circuitry helped achieve this look, with the exposed wires adding to the homemade aesthetic of the rest of the costume.

Here’s a photo of the top casing I made:
9d1b58df3483d32201d5816d71dcb0db.jpg


I’m actually working on a full write-up as I type this; I just need to add a couple of finishing touches to the web shooters.
 
Last edited:
What would any good Spider-Man be without his trusty web shooters?!

With this costume inspired partly by Miles Morales’ Spider-Man suit, the obvious starting point for the web shooters were the pair given to Miles by Aunt May in the comic books. As a nod to the Homecoming suit, the removable cartridges are based on the ones from Peter’s homemade web shooters. If you have followed any of my other prop builds you’ll know that my material of choice is typically cereal box card, so that is what I’ll be using for the majority of my shooters.

Rather than create an exact replica of Miles Morales’ web shooters from the comic books, I instead wanted to modify the design to fit in with the cobbled-together, homemade look of the rest of my costume.
89f9dbd15ab4911296297813471301a6.jpg


The faceplates were taken directly from the comic books and made out of three layers of cereal box card. I painted each one a sort-of gunmetal grey with silver accents around the edges to simulate weathering, before adding a window through which some interior detailing/circuitry will be visible.
2b103e6f481056b99d03b2398150c649.jpg


Onto the web fluid cartridges: these were again made using cereal box card, painted and filled with clay to give them a heavier, more solid feel. There are also small (but powerful) magnets inside each cartridge so that they can be slipped into the back of the web shooter and clicked into place. I also made a pair of “sleeves” to be glued to the bottom of each web shooter for the cartridges to fit inside.
c599cafdf153f22834b6071acd03f567.jpg


For the interior I began with a rather elaborate net cut out of cardboard; folded and painted to look like a circuit board (with 3D trace lines to complete the look!) After the addition of some random wires, I attached the top plate and painted/weathered everything to match.
3f1e259c13e78de9cd063fb75db3ef68.jpg

4b511237babbef93522e3d3aecd0a87f.jpg


Finally, I created the spinnerets using some sort of jack plug (I forget the exact name) and plastic tube that leads into the back of the web cartridge.
89f9dbd15ab4911296297813471301a6.jpg


All I need to do now is add the cuff and the trigger.
Thanks for reading. [emoji4]
 
Last edited:
I bought some metallic silver puffy paint and added the web patterns to my mask.
d5aba22b4360a5cc5a50e2b552f51c02.jpg


This would have been a lot easier and neater with a flat pattern rather than a sewn mask, but for my first attempt at puffy painting I’m proud of how this turned out (just try not to look too closely ;))

Is it perfect? No. Are the webs symmetrical? Not in the slightest. Am I proud of the result? Definitely! For me this is what it’s all about; producing something that looks and feels good to me - any imperfections simply add to the homemade look that I’ve been aiming for from the offset.

Thanks for reading. [emoji4]
 
Last edited:
Re: Spider-Verse/Homecoming inspired Spider-Man costume for £30 (hoodie build on a bu

When you wear your suit and move around at a Comic Con,no one's gonna bring their telescope to look at the neatness of the lines ;)
 
Re: Spider-Verse/Homecoming inspired Spider-Man costume for £30 (hoodie build on a bu

When you wear your suit and move around at a Comic Con,no one's gonna bring their telescope to look at the neatness of the lines ;)
Thanks George!

Shout-out to jerzbag in his thread here for the tip on blow drying puffy paint to “activate” it and and eliminate the slight tacky feeling that can sometimes cause the web lines to stick together in storage.
 
Last edited by a moderator:
This thread is more than 5 years old.

Your message may be considered spam for the following reasons:

  1. This thread hasn't been active in some time. A new post in this thread might not contribute constructively to this discussion after so long.
If you wish to reply despite these issues, check the box below before replying.
Be aware that malicious compliance may result in more severe penalties.
Back
Top