1m long Omega Class Destroyer from Babylon 5

I've looked at the Warp kit but being a resin virgin and having read mixed reviews of the wotk involved and quality of the kit, I've been put off.

A 50cm version sounds awesome to me and I'm sure many others would agree.

A few people have said they'd be interested. Guess my printer is going to be getting a work out!
 
How about a explorer ship?

explorer_class_ortho_by_unusualsuspex-d7ferql.jpg
 
Decided i should design something to make the rotating hab section, actually rotate!


I'm going to attach a large inverted gear (teeth on the inside, opposite to a normal gear) to the center support bulkhead in the rotating section. Then clamp/screw a small platform to the central aluminium tube that runs down the centre of the ship for support.


On that platform will sit an Arduino Nano, and a servo modified for continuous rotation. I do have a small stepper motor i could use but i dont think it will have the torque to rotate the whole section, which weighs about 1kg. Will have a small pinion gear on the servo, which will in turn drive the big gear on the bulkhead.


By going small pinion to large rotating gear, and by controlling the servo speed i should be able to get a nice slow rotation.


Also by mounting the servo/arduino on the support tube, they wont actually rotate, so they can be powered externally.


Only problem is that this will make it difficult to light the rotating section, as any wiring to it will also need to rotate. If its connected to the same power, the wire will wrap around the tube and seize up. Only 12 LEDs in that section, may just have to throw a 9V battery in.
 
A quick mockup to see if what i'm thinking of will fit.


This is looking inside the rotating section. The servo would be on a mount that is screwed to the central aluminium tube, so its fixed in place. It has a small pinion gear on its spline, which sits inside an inverted gear which is attached to the bulkhead.
So as the pinion turns, the large gear turns around it, and the rotating section will rotate around the aluminium tube.


I dont even have to worry about gear ratios, pinion to large will already slow it down, and can control the speed of the servo easily.
Most complicated part is modifying the servo to do continuous rotation, and thats just a matter of a couple of resistors.


22.JPG
 
Might want to check out a big NEMA stepper motor for something like this. They can be controlled via something like the SilentStepStick to make perfectly smooth motion without making a sound! I'm surprised I haven't seen more modelers using this approach. :)
 
I looked at stepper motors, but a big NEMA17 or something would be massive overkill. The rotating section isnt that heavy and doesnt need anything like that kind of torque.
 
Most steppers are quite large though, there isnt really enough room to fit one between the support tube and the body. A servo is only about 15mm when laid down, so will fit without issue. Even a cheap budget servo will have several kg of torque, so enough for the rotating section, which i estimate to weigh about 1kg. All up the ship will weight between 3 and 4kg, dont think it needs any extra weight!
 
Have just finished printing and assembling a split ring for the power, and seems to work fine. On this one im using copper tape, not sure how long that will last, might wear down so will have a look for some thin copper sheet to give it a bit more wear.


Also printed the servo mount and gears and that looks like it will work as well, though i need to tweak the small pinion gear to fit the servo better.


I did a count, this ship is up to 418 printed parts! Its a kit!
 
I had to design a rotating space station for a sci-fi film and I also faced the problem of getting power to it. The project got cancelled midway through construction when the director was fired. But, I designed a power transfer mechanism using rotating rings of copper pipe with two spring-loaded copper rods rubbing against them. It was to be lubricated with conductive silver grease. Not cheap stuff! :)
 
I had to design a rotating space station for a sci-fi film and I also faced the problem of getting power to it. The project got cancelled midway through construction when the director was fired. But, I designed a power transfer mechanism using rotating rings of copper pipe with two spring-loaded copper rods rubbing against them. It was to be lubricated with conductive silver grease. Not cheap stuff! :)

Yeah thats basically what i'm doing. 2 fixed interior copper strips/rings, with 2 rotating sprung connectors against them. I'm just going to use some dielectric grease from an auto parts store.
 
For the points of light on the rotating section you could fibre optic strands to one LED. And connect the power the same way star-Art has suggested.
 
Last edited:
For the points of light on the rotating section you could fibre optic strands to one LED. And connect the power the same way star-Art has suggested.

Actually as far as i can tell, the whole rotating section only has 12 lights. 4 of those will be 3mm red leds, and the rest will either be rectangular leds, or more likely, smd leds.
Its not a brightly lit ship.
 
Actually as far as i can tell, the whole rotating section only has 12 lights. 4 of those will be 3mm red leds, and the rest will either be rectangular leds, or more likely, smd leds.
Its not a brightly lit ship.

yes you are right the ship is not that bright in the show but when having it on display or displaying it a model show you need to have it brighter than you would in the show as they are in the darkness of space and we will be showing models off in a well lit room or hall.
 
Havent done a lot on the big Omega in the last few weeks, been a bit time poor. plus waiting for some LEDs and fibre optic cable to arrive for it. Mostly just sanding and puttying of the rotating sction, but hoping to have that primed and read y in a week or 2.


In the meantime i've also resized and printed a fair part of the main superstructure for a smaller 50cm version.
Its not as simple as just resizing 50% and hitting print, as many parts have screw holes that need to be changed, or screw clearances changed. And some parts have detail thats already at the printable limit of small details, so have had to edit a bunch of parts, either thickening or changing some detail. In some cases i'm able to simplify construction by combining some parts, in other cases i have to go from screw assembly to just glue. The blast shields at the front for example are 3 layered, and at this scale work out at 0.75mm, 0.5mm, and 0.75mm, and dont work being screwed together.
The detail panels for the rotating section had very small fine lines, am having to change those a lot.


But its getting there. This is my prototype, so as i print and assemble i'm seeing things that need changing, so the CAD model has updated parts that i havent re-printed yet.



h.jpg
 
3d printing can do a lot, but it's not so great at small details, and certainly cant print the kind of detail you get from using styrene rods or wires to do things like piping on parts.


But since i designed the ship with lots of detail panels, i started adding styrene to them. Many of the panels were designed with specific details in mind, so i broke out my styrene stash and started adding it all in. In some places where i wanted complex shapes i used wire instead, but am nearly done on these parts. There are still others to do, and i'll get to them all eventually. I could go horrendously overboard given the size of the ship, but i'm trying to keep it mild.


j.jpg


k.jpg


l.jpg


m.jpg
 
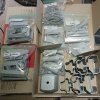
So a few people have asked if i'm going to kit this ship, and the answer is yes :D
In fact a while ago another RPF member who happens to live near me contacted me and asked for one, and it finished printing today.
Ended up being 3312gm of plastic, and 283 hours and 24 mins of printing!

For scale, each bag in the pic below is 22x25cm.
kit.JPG
 
This thread is more than 4 years old.

Your message may be considered spam for the following reasons:

  1. This thread hasn't been active in some time. A new post in this thread might not contribute constructively to this discussion after so long.
If you wish to reply despite these issues, check the box below before replying.
Be aware that malicious compliance may result in more severe penalties.
Back
Top