Erebor Dwarf Build

NathanLange

New Member
Tony and Dave Cosplay Photographers.jpg
With My Dwarf build V1 over, this is a thread to go over how i went about putting this together.

Above all i started off with finding tons of Reference, Be it the Fantastic Chronicles books from WETA, browsing around online, or others on the RPF who had made there own threads.
TDOS Dwarf Helmet - Prod Diary 11.png8578045373_698a4b0be2.jpg8578046123_69c85c7e48_b.jpg8579148572_0ce8566d90_b.jpgattachment-3.jpgErebor_Army_Heavy_Armor.pngshield.jpgthe-hobbit-dos-dwarf-armour-erebor.jpguJEz2Cz.jpgwDGYx2G - Imgur.jpg
With it being my first full Foam build, i thought i better start off with the Shield and helmet to get used to working with the foam and figuring out how im going to do the detailing.
I went through the few scenes the Moria Dwarves appeared and found the shot in Mora when Thorin has one of the shields, making it possible to compare his height to mine and scale it up to match me. Ended up being about 75cm across at first. I initially thought getting the base Hex Shape would be simple but once i tossed in the fact its domed/pyramid, it threw off my measurements.
ww.PNGwww.PNG
So i Bought one big piece of 5mm EVA foam, measured out the Hex flat and cut out the 8 triangles, laying them all out with the outer tips butting together. I then placed them on top of a Dome i had that gave it the subtle 3d shape i needed and taped the pieces together on one side. I found some Wood patterned Contact paper at my local hardware that i could use for the inside of the Shield.
To keep the gaps between the Armour still, I glued in Some foam core strips along each seam, These wouldn't be painted later but they pretty much wouldn't be seen so it wasn't so bad.

I next had to get the intricate, uniform Embossed (inside) and De-bossed (outside) designs on the shield. These would be incredible hard to do by hand so i talked to a contact i met at a medieval fair who had a Laser cutter to cut the strips out of MDF from a design i made, so they could be crisp and be a bit of a spine for the shield.
The pieces had sooty etch lines from the cutter, so i had to go through with needle files to scrape them all out and sand it back smooth. Then it was a matter of Gluing them either side of the Shield..
wwww.PNGttt.PNGrr.PNGere.PNGew.PNGdhd.PNGdhf.PNG
I then added Screw threads into the foam from the front, so the handle which i bent out of Aluminum, would have an anchor, which was then sandwiched between another layer of foam, so the edges would have the Step down which was in the reference.
ed.PNGhgfc.PNG
I then went about adding a 10m foam edge around the entire shield, and triangles to cover the seams that had little details sliced in and opened with heat, Filled the seams, Added the tiny little triangles and began working on patterning the Face details from 2mm foam after drawing them up in photoshop with best of my ability.
hdgfd.PNG
This is a side by side after Plasti-dipping, with the Reference Photo.
hngc.PNG
 
Last edited:
With some of the detailing elements Figured out, i went on to work on the Helmet. Beginning with a base skullcap i had made form Evil Ted Smith's Helmet pattern. I cut off the side faces and began building up the Crown X on top.

3.PNG7.PNG1.PNG5.PNG6.PNG4.PNG
I had no idea at first, how to cut the crown X to fit over the Helm, but i found these curve tools that could replicate the shape to then trace onto paper.
I printed out a ton of Reference photos scaled to the size i thought was right on my head to get the shape and face panels right.
2.PNG9.PNG8.PNG
From there i bought some Squeeze bottles to put Contact Cement in and started finely adding the details.Most of it was just Cutting strips with a knife and gluing them on, the front brow had some burns added with a hot knife to get the wide engravings. and i used a laser cutter once again to cut long strips of foam Knot work that i could glue on.
wq.PNG1.PNG3.PNGert.PNG
With most of the details completed on the helm, I went through with a heatknife to separate the little segments in the knot-work to match the reference, instead of long solid strips. I added some Air Dry putty to fill in some of the areas to sand smooth, but most of it i used Sealant from a caulk gun to fill in seams.
5.PNG2.PNG7.PNG6.PNG
 
Last edited:
Now with the helmet and Shield ready to paint it was time to move to the rest of the Armour. After learning so much from doing those parts, it made the rest much quicker, just repeating the same techniques on the base Armour
I First sketched out how many panels i might need to make the Armour, but i ended up simplifying it to closer match the references hard seams.
hdf.PNGht.PNGtr.PNGjytd.PNGcvm.PNGjnuf.PNG

Most of it was just breaking down those simple shapes on one side, Mirroring and making sure the seams match. Thanks to Wetas great designs, it was easy to figure out each panels shape.
vjj,.PNG

For the plates i had to make sure i got the scale of a Dwarf right, could of easily made it slim like Human Armour, so i adjusted my concepts to be more chunky on a photo of me.
vm.PNGhvcfxb.PNGnvcb.PNG
cxv.PNGvxcb.PNGvcxbb.PNGbvxcb.PNG
For the Boots i needed something that wouldnt flex to much and was bulky, so I used the Motocross boots i wore previously for a Warlock cosutme. Just make Boot Covers for them that slip on.
hcgbn.PNGbvxzcb.PNG
For the Buckle and Shoulder Boars, I Modeled them in Maya then Had a mate Print them off, afterwards i sanded and finished the pieces.
urt.PNGujk.PNGvcb.PNG
 
For the paint i Coated everything in Plasti-dip, Then sprayed a layer of Bronze before Going in by hand adding tons of Black oil paints then wiping it off where needed.
erg.PNG20180523_202825.jpgvbxe.PNGhgfd.PNGdfb.PNGvxcbb.PNG
Reference above, my Shield Below.
xbcvbx.PNG
The color ended up being a bit to brown due to the many references changing in color due to lighting. Due to the color being off, my initial plan to go with blue/grey under Armour and cape didn't work so well, so i left it just with the tunic for now and will later add the White beard, and blue Tabbard as planned.

I spotted tiny little clasps on the side of the Armour which gave me the idea of using Puse buckles to hold the torso together, as it puts less tress then tension ones. It also means i can get in and out without any help form others, which is a massive Plus!
vbx.PNGsdfb.PNG
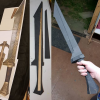
During this build i had many ideas for what weapons to use but i wanted to test my ability to do a 1 Day prop build, so i use the larp method and made a Foam Sword around a wood core. Another Idea i had was to put a hidden hook on the back of the Armour to hold my shield when not in use, it did work, but with it all assembled i left it out for now. Will probobly try again when i upgrade the rest.
bvxcbt.PNGpokj.PNG
 
Last edited:
Over all i really liked working with Foam, Had a lot of things to learn over the past few months, but it held together all day, tool minimal damage and was super light.
In the next few weeks im taking breaks from Costume making but will end up giving the Armour a more Silver wash to bring out those grey tones needed, then add a Flame burned cape as if it was post Smaug, and go back to a grey beard.
fghf.PNGdfg.PNG

After these upgrades, my Next build Im thinking about might be Thrains Armour, which is based on the same design but heavily embellished for royalty.
35489478_10156417732819134_7016555627568693248_n.jpg35547533_10156417732969134_5231722972045115392_n.jpg.

Thanks for checking out my Build, Please let me know if you have any questions.
Here are some shots of the full costume from the con and before it won Best Craftmanship in the Cosplay comp.
Jean Yves Sibert.jpgLei (1).jpgSammy Hanson.jpgSteven Sang.jpgtactical Chef.jpg
 
I can see how you won... outstanding work! [emoji106]

Also, thanks for the in-depth write-up... that helps us fledgling foamsmiths get a handle on how things are done! [emoji16]

Rob
 
This thread is more than 5 years old.

Your message may be considered spam for the following reasons:

  1. This thread hasn't been active in some time. A new post in this thread might not contribute constructively to this discussion after so long.
If you wish to reply despite these issues, check the box below before replying.
Be aware that malicious compliance may result in more severe penalties.
Back
Top