Re: V2 SUPER MOD - 1st Alu Test Cast

it is usually a good thing getting someones approval before putting their thing in a mold. The easiest way to think of it (for me) is that they created that piece from scratch. doing pulls involves talents in the casting area of props but the product is just a duplicate of the original sculpt.


I think its really cool that you managed an aluminum pull of this saber. Maybe hold off on doing any runs until you sculpt one yourself?
 
Re: V2 SUPER MOD - 1st Alu Test Cast

I don’t think he was talking about using dans for his run,from what I read he started by doing a cast of dans just for himself to make it less fx and more like the original prop,then he had the idea of making his own saber,to match the wooden lightsabers used to casts the originals,that I think doesn’t have any connection to dans other then he got the idea while doing the mod on his v2.

:thumbsup

I guess there's some confusion for some going on but this is exactly what my intention is and what is currently going on.

...Maybe hold off on doing any runs until you sculpt one yourself?

This is my intention. Well, my idea for now, anyway.
 
Re: V2 SUPER MOD - 1st Alu Test Cast

Well, i´m no native english speaker - and even for me there was always clear due to his postings that this is a test stage, just doing it to see if he can do it, same if he would make a mold for lost wax casting. Just using now what he has in hand to figure the details out.

As he mentioned, for a run the replica of the wooden buck would be needed some percentage bigger, to be at least halfway accurate. Pulls of Dans saber can´t ever be accurate for this use as they are already machined down to end size - not what is needed for the raw alu cast.
 
Re: V2 SUPER MOD - 1st Alu Test Cast

Got bit by the "bug" last night and said, "To Hell with sleep!" and modeled this up instead. Grabbed the only two photos of the thing and started getting to work reconstructing it.

Not bad for a first time attempt. Everything's there and it's been re-sized accordingly, in relation the cast, to account for the shrinkage. Also added the flange to connect the pommel to the booster/body to cut down on the work. Dunno if this hypothetical run will ever happen but this exercise has shown a lot of possibilities. After a day's rest, I'll get back to it to see if it needs tweaking and then consider sending if off to Shapeways.

Coincidentally, about 10+ years ago, when I first got my hands on CAD software, I tried modeling Ben Kenobi's lightsaber (poorly, too). How fitting it's come full circle, now.
Woodbuck ANH WIP.png

Woodbuck ANH WIP 2.png
 
Re: V2 SUPER MOD - 1st Alu Test Cast

Nice work! What do you think the weird flange was on the OT original metal cast pommel end?
 
Re: V2 SUPER MOD - 1st Alu Test Cast

I honestly think that's for the lathe to grip around. I think that metal cast was an extra in case they needed another hilt if one got messed up. I'm also under the belief that, originally, the stunts were made from two separate pulls: one cast for the hilt, another for the pommel. As the pommel is on the buck, the only way for the thing to slot into the body is if a portion of the booster was chopped off with it. So they make two and piece them together. It's a lot of work, but a lot about how these stunts were put together don't make much sense.
 
Last edited:
Re: Living "History" - Sand Cast Alu ANH Stunts

So to catch this thread up with what's happened since, here's a few scant pics I took along the way.

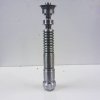
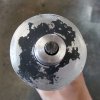
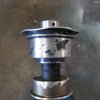
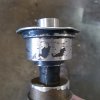
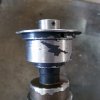
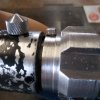
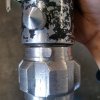
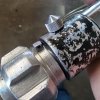
The pic on the left is the buck fresh from Shapeways, unfortunately slightly misshapen for the exorbitant price (one half it ever so slightly smaller from shrinkage), and to the right of that is my first test cast to practice machining. I've not properly machined anything since middle school so this is one hell of an exercise. I should also mention it was no small task to just get this cast; a whole heaping lot of trial and error.
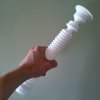
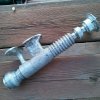
20180609_130303_HDR.jpg 20180724_200938_HDR_2.jpg

After getting my frustrations out on the first test cast, I thought I'd put what I've learned to use on the second test cast.
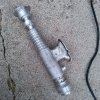
IMG_20180804_184641_571.jpg

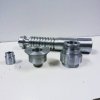
After much more trial and error later, I've finally finished my final prototype tonight.
IMG_20180815_213058_292.jpg IMG_20180815_213058_294.jpg

Mind the gap on the clamp section, it's the result of the new steady-rest for my mini-lathe. It's got fresh ball bearings with sharp edges on it and it took a helluva big bite out the soft composite aluminum the cast is made from. Now, it's not completely the steady-rest's fault. I'd like to share some of my findings having followed the original methodology the prop-makers must've/would've/could've done.

First thing's first: This thing is wonky as all hell. I mean wonky, and it starts with the wood buck. Having worked from the one image we have of the buck (that half of it anyway), I immediately found that upon completion of the model that it isn't a completely straight, cylindrical shape. It actually lilts to the right by a few degrees and starts immediately drifting off center going past the emitter. The emitter plate/face is also off center. This leads me to believe that the original wood buck was lathed out of a piece of angled lumber, like from a folding chair or table leg, where the top of the piece isn't in line with the bottom. In all of my casts, the center of the emitter, and the center of the body, and that of the pommel do not line up.

Because of the awkwardness of the hilt, machining the piece on-center is a trick; one end is always going to angle off the center-line, creating a wobble as it spins in the lathe chuck. As it's machined down, one side is always going to have more shaved off than the other. If I hadn't compensated for this in the size of the buck, and the subsequent alu casts, the diameter of the hilt would be way too small once the surface is completely machined and cleaned up. I've been looking at brushed RC motors that would've been used then in the 70's, modern equivalents are still around today, and they should fit inside the chamber in the handle all right. The boring was a real job but there's enough length inside to fit a motor (and possibly a small rig to hold the steel rod) and to also fit screws to mount the motor, as per Brandon Alinger's description, and despite how rough machined the boring for the chamber is (another detail mentioned), it should be no problem once it's all set up.

Tomorrow, further clean up, and then fitting the pieces together. Then painting. There's a bit more to go now but it's been a helluva trip thus far.
 
Re: Living "History" - Foundry Cast 4-Piece ANH Kenobi Stunts

First pass of paint applied tonight, along with fitting! Colors are what I believe to have decorated the hilt in 1976 during production. The photo is a bit bright but the windvane/neck section is actually a darker brass than shown here. Tomorrow: V2 weathering and additions.

20180816_211406_HDR.jpg

EDIT:

IMG_7148.JPG
 
Last edited:
Re: Living "History" - Foundry Cast 4-Piece ANH Kenobi Stunts

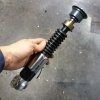
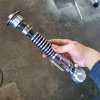
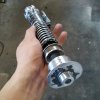
Today will be a day long remembered---until I forget it---the piece is done! Aped a few grub screws from the Starkiller kit I've abandoned as well as the transcriptor knob. Otherwise, same ol', same ol' for everything else: WannaWanga D-ring (added after these photos were taken) and lever, Roman's clamp, Slothfurnace card. Only new addition here is the leather stamp I've been saving since I posted about my ideas about it on the V2 thread proper, just for this project. Gotta say, if it isn't the mystery chunk, it's a damn convincing argument to make otherwise.

20180817_163547_HDR.jpg

20180817_164006_HDR.jpg 20180817_163830_HDR.jpg 20180817_163817_HDR.jpg 20180817_163808_HDR.jpg

20180817_163753_HDR.jpg 20180817_163921_HDR.jpg 20180817_163724_HDR.jpg 20180817_163704_HDR.jpg

20180817_164303_HDR.jpg

20180817_163704_HDR.jpg


20180817_163547_HDR.jpg


20180817_163724_HDR.jpg


20180817_163753_HDR.jpg


20180817_163808_HDR.jpg


20180817_163817_HDR.jpg


20180817_163830_HDR.jpg


20180817_163921_HDR.jpg


20180817_164006_HDR.jpg


20180817_164303_HDR.jpg
 
Re: Living "History" - Foundry Cast 4-Piece ANH Kenobi Stunts BUILD COMPLETE

this is amzing, thank you for sharing photos. the machined cast metal has such a different look and patina...
 
Re: Living "History" - Foundry Cast 4-Piece ANH Kenobi Stunts BUILD COMPLETE

this is amzing, thank you for sharing photos. the machined cast metal has such a different look and patina...

It really does. Even in its current state, the metal is shiny but has a more gray hue than silver. Also, because the metal is so soft, it takes any detail to it a lot more vigorously. Another note worth mentioning is because of the metal's structure, after cleaning it up, it has this subtle, orange-peel ripple on the surface (something you can get a hint of in pics of the V3). The real excitement will come when the surface fully oxidizes and takes on a duller, darker sheen. My first test cast had this while I was figuring things out and I'm really anticipating how it'll look on this V2.

Speaking of, I've been meaning to share my findings from the first test cast, going for a V3 at the time, about what I believe to be true about the V3. Seeing as I won't be able to find a better time than now to do it, here it goes:

The V3, I believe, is essentially a raw cast from the molds and only just cleaned up. The insides are bored out similar to the V2, but externally, much of the cleaning process came later when it was redressed around RotJ. Comparing what I pulled out of the sand and what I later machined to photos of the V3, the actual prop has almost all of the features seen on the metal cast; most noticably, the wart on the underside of the windvane. Following from there, one can see just how much the V2 was actually machined down in relation to the raw cast and V3. That means the V3 is and would be larger in diameter to the V2, closer to the original raw cast, and has just enough done to touch up the surface. It is also looks a little bit longer because of the length body and booster would have due to the misalignment of the two halves while molding. My V2 here actually has a variation of this detail because my 2nd test cast came out of alignment towards the bottom end of the clamp section and top of the booster (explaining the extra 2mm of space above my clamp).
 
Re: Living "History" - Foundry Cast 4-Piece ANH Kenobi Stunts BUILD COMPLETE

That's absolutely beautiful. I wish I could fit this in my budget right now.
 
Re: Living "History" - Foundry Cast 4-Piece ANH Kenobi Stunts BUILD COMPLETE

Following, with my card out.. This is amazing!


Sent from my iPhone using Tapatalk
 
Re: Living "History" - Foundry Cast 4-Piece ANH Kenobi Stunts BUILD COMPLETE

Following, with my card out.. This is amazing!


Sent from my iPhone using Tapatalk

If you're seriously interested, please check out the active run in the Project Runs section.
 
Re: Living "History" - Foundry Cast 4-Piece ANH Kenobi Stunts BUILD COMPLETE

I've been looking for motors for some time now to fit inside both the Graflex (it was needed first for the production) and the fencing stunt. I figured it had to have been an RC motor of some sort, readily available at the time, fit inside the Graflex and had enough torque to spin the fencing dowl/rod assembly. I figured that whatever method they settled on had to have been carried over the stunt hilts, as well: high torque, compact fit, and something readily available.

I settled on it having to be a truck motor and went to my local hobby store, actually owned and managed by die-hard enthusiasts, and the first thing I told them when they asked "What are you looking for?" was, "An RC motor, something readily available in the 70's, with high torque, high speed, and roughly the size of a D battery." Without missing a beat, one of the proprietors asked if I was working on an old Tamiya RC truck. I quietly considered my suspicions validated before I replied, "Yes."

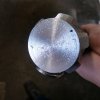
They pointed me to this and said the only difference between this motor and the one then would've been the lack of the sticker. It fits the Graflex like a dream (give it a few hidden screws to mount the motor inside) and I could see just how easily it would've been to whip up the Luke ANH stunt. It's a 12T 550 brushed RC truck motor, if anyone is thinking about making an ANH stunt.

20180827_132617_HDR.jpg

My test cast was machined before I had a motor in hand and I was really surprised just how close I got to getting a perfect fit. The motor, I think, could take a few love taps to get it inside the hilt chamber but if I just shave off something like a quarter of a millimeter from the inside, the motor would be able to slide in and out. Put two or four grub screws under the clamp to mount the motor and I'm positive this would be bang on to the real prop.

Since I'm going with "like original" parts, I tried to see if this would work on my Starkiller V2. It was a resounding no. Although, I did spot modern, brushless equivalents that were smaller and those might put out enough power to spin the rod assembly, should anybody be so willing to try making a V2 fencing stunt.
 
Last edited:

Your message may be considered spam for the following reasons:

If you wish to reply despite these issues, check the box below before replying.
Be aware that malicious compliance may result in more severe penalties.
Back
Top