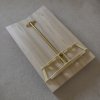
3DImpact's Cooper ISD build

3DImpact

Sr Member
RPF PREMIUM MEMBER
Okay, jumping in! My Randy Cooper ISD Version 2 kit arrived a couple weeks ago and I've been slowly working up to getting going on it.

I made a bit of actual progress today so I thought I'd start a build thread to document as I start out on this long journey. It's going to be a long process with spurts of progress and some periods with a lot of time between posts, but I love watching other folks' build threads and I'm hoping that if anyone else is building this kit here that we can help each other along at times.

First order of business, of course, is just to lay everything out and inventory parts.

5D3_5501_small.jpg5D3_5547_small.jpg

Everything looks to be in very good shape, with no significant issues (nothing broken, no serious casting flaws, etc.). It really is a beautiful kit with wonderful detail.

Common in resin kits (so I hear, this is my very first one!) is a little warping of some parts here and there. I saw that 3 of the 4 inner frame pieces had a little wiggle/warp here and there. Since the inner framework will be my first assembly I decided to do what I could to straighten them out, since I didn't want to take the chance that the slight warping in those pieces might propagate into some significant structural misalignment later on as I start to attach everything to it. Randy recommends just warming the pieces in boiling water to soften them up a bit and then cooling them while held in the proper shape. Since these pieces are large and flat I used a large no-stick baking tray on the stove top:

5D3_5543_small.jpg

Straight out of the water I placed the pieces on some small wooden blocks that I cut to fit the flat areas of each frame piece between the connect points for the bracing between frames:

5D3_5540_small.jpg5D3_5541_small.jpg

Worked like a charm and all the frame pieces are now nice and straight, so everything ought to line up nicely:

5D3_5531_5544_small.jpg

There is some remnant sprue here and there on a couple pieces, so the next step is the belt sander to clean those up...

5D3_5527_small.jpg5D3_5528_small.jpg

Dan
 
Last edited:
Okay, jumping in! My Randy Cooper ISD Version 2 kit arrived a couple weeks ago and I've been slowly working up to getting going on it.

I made a bit of actual progress today so I thought I'd start a build thread to document as I start out on this long journey. It's going to be a long process with spurts of progress and some periods with a lot of time between posts, but I love watching other folks' build threads and I'm hoping that if anyone else is building this kit here that we can help each other along at times.

First order of business, of course, is just to lay everything out and inventory parts.

View attachment 811546View attachment 811547

Everything looks to be in very good shape, with no significant issues (nothing broken, no serious casting flaws, etc.). It really is a beautiful kit with wonderful detail.

Common in resin kits (so I hear, this is my very first one!) is a little warping of some parts here and there. I saw that 3 of the 4 inner frame pieces had a little wiggle/warp here and there. Since the inner framework will be my first assembly I decided to do what I could to straighten them out, since I didn't want to take the chance that the slight warping in those pieces might propagate into some significant structural misalignment later on as I start to attach everything to it. Randy recommends just warming the pieces in boiling water to soften them up a bit and then cooling them while held in the proper shape. Since these pieces are large and flat I used a large no-stick baking tray on the stove top:

View attachment 811548

Straight out of the water I placed the pieces on some small wooden blocks that I cut to fit the flat areas of each frame piece between the connect points for the bracing between frames:

View attachment 811549View attachment 811550

Worked like a charm and all the frame pieces are now nice and straight, so everything ought to line up nicely:
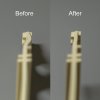
View attachment 811551

There is some remnant sprue here and there on a couple pieces, so the next step is the belt sander to clean those up...

View attachment 811552View attachment 811553

Dan

Following this one, will keep you posted on my progress as well Dan (it hasn’t arrived yet, but should be soon...excited!)


Sent from my iPad using Tapatalk
 
A little more progress today, still mostly 'getting ready' stuff.

Randy suggests making a couple of building jigs to help support the various pieces of the model in position as construction proceeds. There are two needed: one with a convex bend to support the outer skins of the superstructure and another with a concave bend to support the superstructure itself. Randy shows images of foam core jigs assembled with hot melt glue and that's what I did for the convex one since it won't need to take much weight. That said, it's quite sturdy. I decided to make the concave one out of wood, though, as I can see this see this thing getting upwards of 50 pounds or so as it comes together.

5D3_5559_small.jpg5D3_5560_small.jpg5D3_5561_small.jpg5D3_5562_small.jpg

Most of the other work was simple clean up of the interior framework pieces on the belt sander. One thing I did do was purchase the central metal tube as suggested:

01_small.jpg

Unfortunately, the local Home Depot didn't have this on the shelf so I had to order it. But the rod that came is a different brand, perhaps a new/replacement supplier, and the central rod was way too small a diameter to snugly fit down the central holes of the interior framework pieces (even the outer tube is too small). So, I went to another local hardware store and purchased a 1-1/8-inch outside diameter brass tube that fits just about exactly. I had to do just a tiny bit of sanding inside with an impromptu sanding dowel I made and the tube slides in very nicely.

5D3_5557_small.jpg5D3_5556_01.jpg

The other thing I did was to look ahead to how the rear engine assembly will attach to the interior superstructure framework. All three of the feed-throughs for the main engines have a tiny central fiducial hole cast into them:

5D3_5549_small.jpg

Since the center engine will then lie along the exact central axis of the ship I decided to use that as a lock down point for mounting the rear engine assembly. I used a needle on the drill press to poke that fiducial hole through to the other side where I then used a compass to mark the circumference of the central brass tube as a guide.

5D3_5550_small.jpg

Tomorrow I'll use a 1-1/8-inch holesaw on the drill press to scribe an 1/8-inch deep channel to take the end of the brass tube (I don't want it to go all the way through) and lock in that central positioning of the rear section. More on that as I get to it for real...

Dan
 
Last edited:
More progress today, with the superstructure inner framework all assembled. I started by temporarily securing the largest, rear frame piece to a thick and very straight piece of wood in order to keep that rear end as square and true as I could as the other pieces were added on. The idea here was to form a baseline from which the rest of the form would build forward. It seems to have worked as planned - the whole frame rests very snugly along the building jig, with no rocking anywhere. All the pieces were secured with CA glue; I'll go back and beef up all those joints with some generous applications of two-part epoxy.

5D3_5564_small.jpg5D3_5567_small.jpg5D3_5568_small.jpg5D3_5569_small.jpg5D3_5570_small.jpg

I'll start keeping a running tally of my estimated time spent on this as well. As of this posting I estimate something like 12 hours, counting trips to the hardware store for miscellaneous bits like the brass tube.

Dan
 
I want to thank you for starting this, and hope the restrained response up till now won't deter you from regular updates.

I recently sent Randy my payment. There are still 20 people ahead of me so I'm not expecting my stuff to arrive till the middle of June at the earliest.

Like yourself, I don't have any experience with resin kits, so I'm expecting this will be quite a challenge.

My biggest concern is getting enough prep work done on it in July, as that is the only month until November that I'll be free. I'd like to have the interior support structure, as well as all (or most) of the sanding and drilling done before winter makes it impossible to work outside anymore. That way I can concentrate on assembly and patching and running the FO (yeah, I'm gonna run those in conjunction with the strip LEDs) indoors, then about this time next year take it back outside and do a little more sanding, scribing and finally paint it. That's the plan anyway. I'm just hoping that storage in a cold basement this winter isn't going to severely mess it up.

I've been enjoying the Revell/Zvesda build quite a bit, and size wise it is certainly a more comfortable build than I expect Randy's will be.

The problem is though, the size just doesn't leave a big impression. An ISD is as close to a grail vehicle as it comes for me, and it's a ship whose whole vibe is based on the impact from it's size.

Of course there's a good possibility this might end up being for me when all is said and done. :$
 
3DImpact, I see you're getting ready for the Denver Comic Con. Have you been able to do much more work on the SD since the last post?

This week, I'd like to start compiling some materials in advance of getting the kit.

Lowes has a 72" x 1 1/25" curtain rod that Rossi is recommending here. I guess the internal rod is 1 1/8".

Also I'll probably use the 1/2" foam board that he's using, also from Lowes. $15 for a 4'x8' sheet, which should be enough to supply all the necessary pieces.
 
Last edited by a moderator:
Received my package from Randy today, totally out of the blue. I don't know if he normally doesn't give a heads up via email or if it was just that I forgot to provide it with payment and had to message him afterwards with it.

In any case, I'm happy to have gotten while I still have a few weeks to dabble with it before work dominates my existence till late fall.

After this post I probably should start a separate build thread as I don't expect the OP will appreciate me horning in on his.

This is my first resin kit too, and while I don't have any prior experience with them, I think I can already see some unfortunate issues in this pile of resin.
While I haven't done an inventory of all the pieces, just looking at the main ones I can see warpage on many/most of them- from relatively minor to one major hull piece that might end up being an insurmountable problem.

Along with a few bubbles, I'm also seeing breakage of the fragile lips to the trench pieces. I guess I'll have to make further trims and then rebuild those pieces from scratch. Disappointing to see as the detail Randy built in was wonderful and I hate to lose it. In the grand scheme of things they are fairly minor areas and patching them should be among the least of my problems with this kit.

Depending on the weather, I hope to get started on this next week with a good wash - followed by construction of the jig and assembly of the support structure.

Still have to pick up a glue gun and a respirator mask.

BTW, for anyone else who has gotten this kit- did Randy include an instruction DVD or any documentation at all? He mentions instructions in a few of his vids, but there was nothing in my package at all.
 
Just now back from a month of travel that started after Denver Comic Con, so I've been able to make some very minor progress. Thinking through the next steps in the assembly process after getting the main superstructure inner framework put together I realized that I'm going to have to get all the fiber optic holes drilled in the trench pieces before I get them fastened on. (I've opted to run the fiber for this one rather than use the translucent parts that Randy designed - it's my first major build like this and I want the experience so I can commiserate with all those who have gone before.) I want to be able to work on those holes with the trench pieces flat on a sturdy surface rather than wrestling with the entire structure as I'm maneuvering to drill all those hundreds and hundreds of holes.

Scoping out the drilling process it became clear that the thicker sections within the trench were going to present a problem to drill through - the fragility of those tiny pin vice drill bits isn't very conducive to drilling though more than a few millimeters of resin. So I decided to mill out the bits of resin behind those sections to thin the areas behind. I used a milling tool on my dremel tool, itself mounted sturdily in its drill press work station.

5D3_5882_small.jpg5D3_5883_small.jpg5D3_6435_6436_small.jpg

That milling work is now complete and I made the first several test holes for the 0.25 mm fiber using a 0.3 mm drill bit. All works well on that front except for the fact that my pin vice tool is going to have a problem allowing access to the deeper parts of the trenches using the standard drill bits. So I've placed an order for a bunch of shanked bits that will extend the reach of the pin vice just enough to get through the deeply recessed main parts of the trench pieces. It's going to take a few weeks for those to arrive so I'm stalled out again for a while...

5D3_6440_small.jpg5D3_6442_small.jpg5D3_6443_small.jpg02_small.jpg


Total project time to date: 20 hours.

Miles - no worries! Looking forward to watching your progress as well.

Dan
 
Last edited:
This thread is more than 5 years old.

Your message may be considered spam for the following reasons:

  1. This thread hasn't been active in some time. A new post in this thread might not contribute constructively to this discussion after so long.
If you wish to reply despite these issues, check the box below before replying.
Be aware that malicious compliance may result in more severe penalties.
Back
Top