Modified Legacy Millennium Falcon!

The Robosapien

New Member
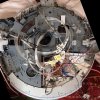
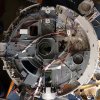
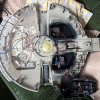
Hi everyone. Well, I’ve never contributed to any forums or sites like this before, so this is a first for me! It’s been many years since I did any model making and I was mediocre then to say the least but anyway, lets go. Here is my version of the Legacy Millennium Falcon (I do love Star Wars). I managed to find this one on Ebay, complete except for the chess pieces! I knew what I wanted to do with it, I wanted to take it apart, paint more detail inside and fit some Fibre Optics, so this is a diary of our journey together; off we go!
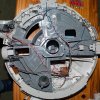
I guess everyone has seen this model before but, just for the comparison, here is an image of ‘The before’!

_DSC1525-rpf.jpg

Untitled-rpf.jpg

This is the top of the model showing all the included electronics.

_DSC2605-2.jpg

And the inside.

I took the model apart and removed the electronics and all of the interior walls for priming. The Gun Well was a nightmare! It is made of ‘oily plastic’ and wouldn’t take paint to well at all, I found out the hard way after putting some masking tape on, and it taking the paint off! I had to remove all the primer I had already put on and start again, I used ‘car bumper’ primer this time (it worked for me!).

_DSC2565-rpf.jpg
 
Most of the inside walls come with these stickers that peel off and look horrible. I took them off and fitted my own ‘greeblies’ I kind of like it what do you guys think?

Image18.jpg

For the astute amongst you, you will see a heater control from a 1:12 Tamiya Mini, a radio, dash pod and oil cooler from the same and also a Foot from an AMT cutaway Millennium Falcon!


DSCN2230.jpg

DSCN2233.jpg

- - - Updated - - -

DSCN2270-2.jpg
 
The original cockpit had those horrible stickers in too, I didn’t put any greeblies in here but instead made my own stickers and hand painted the detail.
Some before and after images here.


Image6_t-2.jpg


_DSC2614_t.jpg


Two of my homemade stickers in this one, seeing what they look like. You can also see that I added a central control panel to the cockpit, not originally in the ship. I also put in a false front floor, this is to hide the fibre optics going to the front control panel (you can see them exiting in the bottom left of the image).

IMG_0241.jpg
 
G’day ,

Thanks for sharing this project .
Not familiar with this version of the Falcon at all , but I did want to say , I appreciate the work going into modifying it . Especially the painting of various ( originally blank - not painted ? ) interior sections , the paint work and modding of the landing gear is terrific . Also the additional detailing ( adding of greeblies ) look cool too !

:cheersGed
 
Last edited:
G’day ,

Thanks for sharing this project .
Not familiar with this version of the Falcon at all , but I did want to say , I appreciate the work going into modifying it . Especially the painting of various ( originally blank - not painted ? ) interior sections , the paint work and modding of the landing gear is terrific . Also the additional detailing ( adding of greeblies ) look cool too !

:cheersGed

Thanks for your encouragement Ged. Here is a full size image of the Falcon (before modification) for you, it's the one with the 'oversized cockpit' which I think puts some people off. I, however, like all the Millennium Falcons!

Image10.jpg

Here are a few more images. This time the front control panel after painting, but before fibre optics and home made stickers!

DSCN2244.jpg

DSCN2247.jpg
 
Last edited:
To fit the fibre optics, they needed routing in very tight spaces. I wanted to keep the original electronics if I could. I know it doesn't look like it, but there are 160 metres of fibre optics here, yes, no typo 160 metres!! If you want to glue the optics then use epoxy resin as a lot of other glues will melt them! (again, something else I found out the hard way)!

IMG_0178-2.jpg


‘Spaghetti Junction’ This is where all the fibre optics end up (the only place in the model with room for them!) the ends are glued together and put into some aquatic air pipe before being hot glued to the LED’s. The silver background is some sticky foil tape I found in my local craft shop, this is for light blocking and it does an amazing job of it! The letters relate to the colours of the LED’s that that particular fibre optic is going to, R = red, B = blue etc. The size of the fibre optics in this model is 0.75mm.

IMG_0232.jpg
 
Last edited:
All the fibre optics, LED’s etc. are actually in the top of the model ! In the bottom are the smugglers hatch and engineering bay, in here I decided to put some more scratch built greeblies, (you wont be able to see the wires in the finished project) I think it brightens up an otherwise ‘wasted area’! Landing lights also wired and working! (You can see more of the 'foil tape' for light blocking here, really easy to apply and excellent for light blocking!)

Image1.jpg

IMG_0239.jpg

IMG_0240.jpg
 
Last edited:
Wow ! That was an understatement when you said you’re planning to add ‘ some ‘ FO as well :lol - 160 ft !?
Things seem to be progressing really well , and at a cracking pace . At this rate , she’ll be done and dusted in no time !

:cheersGed
 
Wow ! That was an understatement when you said you’re planning to add ‘ some ‘ FO as well :lol - 160 ft !?
Things seem to be progressing really well , and at a cracking pace . At this rate , she’ll be done and dusted in no time !

:cheersGed

160 Yards Ged, not feet!!

Ship primed and painted, red and dark grey panels painted, light grey panels, some detailing and weathering to go.I did some work on the fans, these again are scratch built from bits and pieces I had lying around. I had no intention of making this ‘screen correct’ instead, putting my own take on the model.

IMG_0253.jpg

Before and after images.

_DSC1524-2.jpg

DSCN2288-2.jpg
 
Last edited:
I stand corrected . 160 yards/metres of fibre optic strands !? ... still seems a lot !

Can’t wait to see your pics of her all lit up . Like what you did with the exhaust fans too :thumbsup


:cheersGed
 
Very nice mods. I've been wanting to mod my Legacy Falcon as well. I was wondering, how are you making your custom stickers? Are they in any way accurate to the panels in the Falcon sets? Same question when it comes to painting and lighting. Are you striving for accuracy or making it up as you go along? Please let me know. Thanks.
 
This thread is more than 6 years old.

Your message may be considered spam for the following reasons:

  1. This thread hasn't been active in some time. A new post in this thread might not contribute constructively to this discussion after so long.
If you wish to reply despite these issues, check the box below before replying.
Be aware that malicious compliance may result in more severe penalties.
Back
Top