Evil Dead Chainsaw(s) Build... Groovy Part 2! DONE!!

Beeb89

Sr Member
RPF PREMIUM MEMBER
I've been thinking about revisiting this project for a bit now, (check out my original thread here: https://www.therpf.com/showthread.php?t=250122&highlight=evil+dead+chainsaw ), and recently had someone contact me to build on for them... Talk about timing! So, why build just one when you can build 2! I don't know if there would be any interest here in ANOTHER chainsaw hand build but I thought I'd post the progress pic anyway. ;)

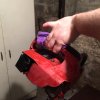
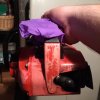
Starting by taking the saws apart and doing an initial cleanup. I've cut the sections out as well removing the handle and making an opening for your hand to fit in the back. I'll be soaking these in Dawn tonight to further help with the cleaning process.

Thanks for looking!
-B89!

IMG_6897.JPGIMG_6898.JPGIMG_6899.JPGIMG_6900.JPGIMG_6901.JPG
 
Last edited:
Re: Evil Dead Chainsaw(s) Build... Groovy Part 2!

I'm always down for an ED Chainsaw thread! If anything, it'll hopefully motivate me to getting around to finishing my own chainsaw.
 
Re: Evil Dead Chainsaw(s) Build... Groovy Part 2!

I'm always down for an ED Chainsaw thread! If anything, it'll hopefully motivate me to getting around to finishing my own chainsaw.

I hope it does!... These are such a cool looking piece and a blast to build!

Started making the paper templates for the metal plate that fits over the saw today. More pics to come!

-B89!
 
Re: Evil Dead Chainsaw(s) Build... Groovy Part 2!

I just had to share... Out of all the things that can pose a challenge with this build, one of the things that I would have never thought might be the biggest was the fuel and oil caps! Finding those suckers, the correct ones anyway, is getting harder... much more so than I would have thought! But perseverance and clean livin' prevailed! ;)

Screen Shot 2018-02-07 at 10.36.50 AM.png
-B89!
 
Re: Evil Dead Chainsaw(s) Build... Groovy Part 2!

I got kinda lucky with those. There's not a lot of old Homelites for sale in NZ, so I settled for an aluminium body with incorrect caps. Well, what should happen but another one pops up for sale, plastic body with correct caps! Well... I guess I'm just going to have to make 2 of them.
 
Re: Evil Dead Chainsaw(s) Build... Groovy Part 2!

You'd be surprised how much work, (for me anyways), goes into getting the piece of aluminum cut needed for the base the new handle attached to. Worth it!

IMG_6950.JPGIMG_6951.JPGIMG_6955.JPG

-B89!
 
Re: Evil Dead Chainsaw(s) Build... Groovy Part 2!

Thanks! I've been working on templates for the aluminum bar for the handle... More pics to come soon!

-B89!
 
Re: Evil Dead Chainsaw(s) Build... Groovy Part 2!

Very cool! I've had this same project on a shelf for over a year now. This makes me want to return to mine as well! Mines at the same stage as yours, but I have made the top handle already. I'm just missing some parts and not sure of what I need.
 
Re: Evil Dead Chainsaw(s) Build... Groovy Part 2!

I think you should and feel free to post pics here as well! ;) What parts are you missing, btw?

I'll be getting medieval on the motor the first of next week! That's going to be fun! More pics to come

-B89!

Very cool! I've had this same project on a shelf for over a year now. This makes me want to return to mine as well! Mines at the same stage as yours, but I have made the top handle already. I'm just missing some parts and not sure of what I need.
 
Re: Evil Dead Chainsaw(s) Build... Groovy Part 2!

I'm missing the entire rear. The clasp, small strips of aluminum, and I can't figure out the best way to hold the motor in for mounting a bar.
 
Re: Evil Dead Chainsaw(s) Build... Groovy Part 2!

Awesome to see you working on some new saws. Your original build thread motivated me to pick up a Homelite, but I got sidetracked and never finished.

I’m looking forward to all the updates!
 
Re: Evil Dead Chainsaw(s) Build... Groovy Part 2!

Always cool to be an inspiration! ;) I'm planning to address the T clamp and the small mods I made to the ones I use today. Also, I'm picking up a new handheld grinder today and I'm planning to break it in on the motor so I'll be showing what I cut away and what I leave that allows it to be bolted into the body of the saw so it's really solid.

-B89!
 
Re: Evil Dead Chainsaw(s) Build... Groovy Part 2!

So, you're having a bad day?... In a bad mood, you say?... Pent up aggression? Then you are ready to start the mods needed for the motor! LOL! Hacksaw and grinders at the ready! Let's begin!

Here's the before and after so you can see what needs to be removed...
IMG_7126.JPG

What I recommend doing here is the start by removing the piston cylinder by cutting up from the bottom of the motor by the screw mount closest to the "wall" of the motor and in from the side just below the screw mounts. Once that main piece is out of the way you can use the grinder to remove the rest. The two top screw mounts and the one left on the bottom is what I use to secure that piece inside the shell. Once bolted in place, it's pretty strong so supporting the bar is not an issue.

This shows the 2 top screw mounts
IMG_7127(1).JPG

And the one on the bottom
IMG_7128(1).JPG

There is no easy way or clever tip I can give to make doing this easier. It is a BEAST to cut out and takes quite a bit of elbow grease and patience to do, so just get your mind right and have at it! The end result is worth the effort!

Now... PLEASE TAKE NOTE OF THIS!!! With all the sawing, grinding and filing PLEASE BE CAREFUL OF THE FILINGS! The motor is made of aluminum I think and with the quite a bit of filings accumulating, while grinding one of the parts in the vice the grinder hit the vice sending off a small shower of sparks and ignited the filings! And let me tell you, it burns REALLY FAST and REALLY HOT! DO NOT BLOW ON IT OR FAN IT! I quickly but calmly set the grinder down on the shop floor and used my heavy duty leather gloves to smother the fire. NOT WITH MY HANDS IN THE GLOVES, mind you! It would burn through it but using it layered one on top of the other I was able to smooth it out. I say all this to stress, PLEASE BE CAREFUL and have a plan in place for accidents!
FullSizeRender(3).jpgIMG_7134(1).JPGIMG_7135.JPG

-B89!


IMG_7126.JPG


IMG_7127(1).JPG


IMG_7128(1).JPG


FullSizeRender(3).jpg


IMG_7134(1).JPG


IMG_7135.JPG
 
Last edited by a moderator:
Re: Evil Dead Chainsaw(s) Build... Groovy Part 2!

Wow, the housing must have some magnesium in it. Very nasty stuff to try to put out,
 
Re: Evil Dead Chainsaw(s) Build... Groovy Part 2!

Wow, the housing must have some magnesium in it. Very nasty stuff to try to put out,

You're telling me! LOL! It was like throwing a match on gun powder!

-B89!
 
Last edited:
Re: Evil Dead Chainsaw(s) Build... Groovy Part 2!

The cuff for the saw is done! It's a standard t clamp... I replaced the locking bolt with a standard bolt and added the styrene strips. I use 2 part epoxy to put them in place.
IMG_7170.JPGIMG_7171.JPG

-B89!
 
Re: Evil Dead Chainsaw(s) Build... Groovy Part 2!

Time for some comparing and contrasting.

Pictured is the Homelite XL I bought a couple of years ago for my saw project. You’ll notice the back of the top handle goes straight down at the back of the casing instead of extending out. The muffler is also different from the screen-used model and the side handle is metal instead of plastic. Those are just the glaring differences. This particular model has “oil” and “gas” written on the side instead of the symbols, which also happens to be the case on the black and red caps, as well.

Basicslly, despite being a Homelite XL from the 80s, it’s totally wrong for a EDII saw build.

I’m bringing all this up, because more people assume this is a fairly easy build, but as with most iconic props the saw has its own unique quarks. Just like there are a lot of different Graflex flashguns out there, but there’s only one truly accurate style used for the Luke Skywalker hero lightsaber, the same goes for Ash’s saw.


163681AA-E924-4192-B961-6F82DC8327D4.jpeg1DF029CC-A657-45EE-AB5D-2A13E182DBC2.jpeg5D7418D6-E090-4C91-B55D-5167B4992591.jpeg
 
This thread is more than 5 years old.

Your message may be considered spam for the following reasons:

  1. This thread hasn't been active in some time. A new post in this thread might not contribute constructively to this discussion after so long.
If you wish to reply despite these issues, check the box below before replying.
Be aware that malicious compliance may result in more severe penalties.
Back
Top