X-wing Fighter 1/72 bandai on the kitchen table

yeah...I did get the ends sort of correct, but I didn't notice until I saw another pic and went back to re-do it. but the decorative ones I didn't see at all...till now :thumbsup thanks brother:cool
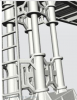
Yes, the triangled railing supports. They also have decorative triangles on the face. But they are not there on the ends were the ladders are.
 
my ladder angles are also wrong :facepalm

The ladders are the same angle as hydraulic legs. There is a support that helps maintain this angle and provides support.
 

Attachments

  • RepairGauntry03.png
    RepairGauntry03.png
    160.5 KB · Views: 205
I think what I'm going to do is correct the ladder angle on this one and leave it alone. I want to build 2 more, or at least one more...I'll make that one more correct and at the forefront of the diorama. Thanks again for providing those excellent images, much better to work from those than stills from the movie :thumbsup
The ladders are the same angle as hydraulic legs. There is a support that helps maintain this angle and provides support.
 
say...that's an excellent question. when I did this one I guessed at it by looking at how close the X-wing skewers were from the ladders, and how far above the nose the catwalk was, which in SW world would be adjustable. perhaps I'll build one that's in full compression as well. not that I'm going to make any drastic changes to this one or subsequent ones, they need to match relatively...but I'm curious as to how close my "guessing" was :lol
@seven Thanks for that info!

By any chance do have measurements for the height and angle of the hydraluic legs as well as the length of the catwalk?
 
Thanks Blakeh!, I think I got lucky with this one. Now my Dad, he was a master. He could look at something for a while, only write down the material he needed and go at it...and BOOM, there it was just like he saw it in his mind. :rolleyes
Your guessing looked pretty close. I would have followed suit as well, but if there are blueprints for it,I'd be interested in the data
 
@seven Thanks for that info!

By any chance do have measurements for the height and angle of the hydraluic legs as well as the length of the catwalk?

The blueprints, put the angle skew at 10 degrees. For a 1:72 scale Gantry, the height from the floor to the bottom of the catwalk is approx. 1-3/4" (plus or minus 1/32) and the catwalk (minus the railings) would be 4-1/2" long. I am not sure how a Bandai kit fits with these numbers as the plans are based on the Full Scale prop. May need to adjust accordingly. Hope this helps.
 
Last edited:
absolutely, thanks Seven. I just stretched a tape out on my desk at work...it seems like I built it taller and wider. but then I was guessing the distance from the wing skewers to the ladder, and from the top of the X-wing nose to the bottom of the walkway. So I worked around the ship. Interesting. I'm sure Blakeh will find this useful as well. :thumbsup
The blueprints, put the angle skew at 10 degrees. For a 1:72 scale Gantry, the height from the floor to the bottom of the catwalk is approx. 1-3/4" (plus or minus 1/32) and the catwalk (minus the railings) would be 4-1/2" long. I am not sure how a Bandai kit fits with these numbers, may need to adjust accordingly. Hope this helps.
 
The blueprints, put the angle skew at 10 degrees. For a 1:72 scale Gantry, the height from the floor to the bottom of the catwalk is approx. 1-3/4" (plus or minus 1/32) and the catwalk (minus the railings) would be 4-1/2" long. I am not sure how a Bandai kit fits with these numbers as the plans are based on the Full Scale prop. May need to adjust accordingly. Hope this helps.

Perfect

Thank You!
 
snow8.jpegsnow9.jpegsnow10.jpegsnow11.jpegsnow12.jpegsnow13.jpegsnow14.jpegsnow15.jpegsnow16.jpeghey fellas, took a few days off work to get some "honey-do's" out of the way, but in the process I manages a few hours here and there to work on my scratch built snow speeder. I know, my proportions are a bit off, but by the time I realized it I decided to just go forward anyway. still have the seating, canopy, lower hull and the rear end to do but overall it's symmetrical to what I was working off of. I had some left over PE that wasn't used on the ISD that came in handy.
 
I said it before , and I’ll say it again Ross ... WOW !!!
For someone who wasn’t comfortable at scratch - building , you’ve certainly taken to it like ‘ water running off a ducks back ‘ !;)

Too Cool :cool

:cheersGed
 
Thanks Ged! :thumbsup I'll say it again, it's off a bit but at least it "looks" like a snow speeder :lol
I said it before , and I’ll say it again Ross ... WOW !!!
For someone who wasn’t comfortable at scratch - building , you’ve certainly taken to it like ‘ water running off a ducks back ‘ !;)

Too Cool :cool

:cheersGed
 
Sure it’s not 100% accurate scale wise , but with the plethora of SW vehicles out there by various manufacturers and licensees - how many are actually !?

Besides , it’s not as if you’re going to be displaying them directly side by side in the diorama right ? There’ll be ice walls or other equipment / props between them ! ,

Anyhoo , no one but the most fastidious ‘ fan ‘ will even notice , heck if you hadn’t posted pics.#1 - 2 , I would’ve sworn you just built a kit Snowspeeder and not scratched one up !

:cheersGed

p.s. were those angles making up the main body hard to measure - especially the front panels ?
 
You're right, won't be side by side with the others...may not use it in the diorama at all. I just wanted to see if I could do it mostly. I have a caliper for measuring but the digital read out is messed up, it won't reset to zero. With things not being flat of course and trying to determine the panel meeting seems is kinda tricky. but I ran fast and loose with it anyway so I'm lucky it came out at all!
Sure it’s not 100% accurate scale wise , but with the plethora of SW vehicles out there by various manufacturers and licensees - how many are actually !?

Besides , it’s not as if you’re going to be displaying them directly side by side in the diorama right ? There’ll be ice walls or other equipment / props between them ! ,

Anyhoo , no one but the most fastidious ‘ fan ‘ will even notice , heck if you hadn’t posted pics.#1 - 2 , I would’ve sworn you just built a kit Snowspeeder and not scratched one up !

:cheersGed

p.s. were those angles making up the main body hard to measure - especially the front panels ?
 
I’d have been well chuffed , if my first attempt at it came out like yours did !

Oh you gotta have it in there with the others Ross . I mean it’s totally up to you of course , but IMHO it’d be a shame if it wasn’t . Besides with paint and weathering it’ll be great :thumbsup
You could have the other ( Snowspeeders ) semi - hidden in their ice alcoves , ala the film . Whilst your scratch built one , all super detailed and lit up as originally intended and more exposed within the area ! ;)

Just my 0.02
 
I'm thinking you're right, light this one well, have it towards the front and not bother with lighting the others at all. Thanks for all the comps and encouragement my friend! :thumbsup
I’d have been well chuffed , if my first attempt at it came out like yours did !

Oh you gotta have it in there with the others Ross . I mean it’s totally up to you of course , but IMHO it’d be a shame if it wasn’t . Besides with paint and weathering it’ll be great :thumbsup
You could have the other ( Snowspeeders ) semi - hidden in their ice alcoves , ala the film . Whilst your scratch built one , all super detailed and lit up as originally intended and more exposed within the area ! ;)

Just my 0.02
 
snow17.JPGthe other two resin slugs showed up from the UK so now I have some individual items to size up. It looks too small now, but the thickness and length is correct. I'll add the small end flanges last. I took a piece of beam stock and added to it top and bottom and filed the corner angles, then took ye' old hobby saw and cut the grooves where the radiant fins will go. I didn't have any .20 sheet last night to start with the fins so I gotta run by the shop today and get some. I'm confident this piece will turn out very well. my worry is the canopy, that's going to be a trick as thin and fragile as it will be. it will of course, be in the open position and I've decided the extent of lighting will be a couple of nano LED's, one front floor and one rear to give the cockpit a good glow. with the speeder pretty much facing forward in the diorama, I don't see the need to light the instruments, but I'll see what the nano's do when I get to that point.
 
This thread is more than 3 years old.

Your message may be considered spam for the following reasons:

  1. This thread hasn't been active in some time. A new post in this thread might not contribute constructively to this discussion after so long.
If you wish to reply despite these issues, check the box below before replying.
Be aware that malicious compliance may result in more severe penalties.
Back
Top