X-wing Fighter 1/72 bandai on the kitchen table

Thanks brother! Yes, everything I'm using is either 3 to 12 or 6 to 12 volts so I think I'll be ok there. Yeah, 3D printed nozzles at the back of the engines, they already come cut out. I started to cut out the kit pieces but it was going to take forever, The ones designed by Tony 308 bits were relatively inexpensive and I was ordering a few pieces for the PG Falcon I'll be using for this project, so I just got those. .
It looks nice:)
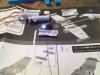
Now that I'm looking at the landing gear lights they seem less bright then I thought.
I solders these mirco SMD myself and they are a pain to solder. But are you making sure you test with the right voltage you are going to use at the end of your project?

And you are talking about 3d printed nozzles. You mean the back of the engine? You are not going to hollow them or yourself?


please don't take me serious I'm crazy :)
 
Not at all Ged, opinions, observations and suggestions are always welcome and yours is a very good one. In this case, since my area is relatively small, 3ft by 2ft by 16 inches, I figured out I wouldn't be able to fill it with a lot of ships, so my thinking was it will be in the moments immediately following the beginning of the Imperial ground attack. Most everything has taken off but one snow speeder one Xwing and the Falcon. The snow speeder will be dormant except for maybe the cockpit lighting, the Xwing warming up and the Falcon to the rear of the hangar trying to get started...in which the Falcon will have it's engines flickering.. The xwing will pretty much be facing away from the Falcon so the engine glow will be noticed against the right side of the Falcon but clear in view will be the landing gear lights and the open cockpit lighting. I realize that this image of itself doesn't exactly represent any image from the actual movie, but it should give one a definite impression of when my fictitious moment in time is occurring. I had originally thought to just do the Falcon by itself with C3PO running towards it and the hangar all a mess as seen right before the Falcon takes off, but I then thought of adding the other ships to add "flavor" to the whole image. I hope it works out in reality as well as it looks in my mind. :confused:lol
G’day Ross ,

Really admire what you’ve accomplished with the lighting so far .
The work @Socrates11 and you’re generously sharing , will certainly help those who have similar ambitions for their builds .

I am wondering , you’re planning to display your x -wing on the ground ( landed position ) right ? , well just a thought / suggestion really , and sincere apologies in advance if not warranted .
Instead of having all four engines lit up - full power like you have now , maybe you could have one ( or more ) flashing / flickering - alluding to the fact that it’s playing up ( in need of maintenance ) , hence giving a reason to have them running on the ground , maybe ?

Anyhoo , whatever the reason - not that you need one for how it’s lit , it’s still going to be gorgeous !

:cheersGed
 
Thanks brother! Yes, everything I'm using is either 3 to 12 or 6 to 12 volts so I think I'll be ok there. Yeah, 3D printed nozzles at the back of the engines, they already come cut out. I started to cut out the kit pieces but it was going to take forever, The ones designed by Tony 308 bits were relatively inexpensive and I was ordering a few pieces for the PG Falcon I'll be using for this project, so I just got those. .
Nice...
All the photoetch and 3d parts are always quit expensive (shipping is already 8 Euro) that's why I never had bought any.. but I would love to use them on my projects.

please don't take me serious I'm crazy :)
 
I can see where that could get expensive...that sucks. The print facility my stuff usually come from is in New York. I think they have a network so wherever the closest one is to you, they send the order there and they print and ship. It's usually never more than 4 bucks or so. And since I was getting other stuff it made sense. I think I have everything available for the MPC Falcon, and, made silicone molds to duplicate most of it that I could because I have a closet full of those. I made a radar dish for Scarecrow Joe once cause he lost the one he had. Sent him an unused kit dish and a duplicate of the correct 3D printed dish so he'd have a choice. It's cheaper than buying a whole new set of stuff every time I build one.
 
I can see where that could get expensive...that sucks. The print facility my stuff usually come from is in New York. I think they have a network so wherever the closest one is to you, they send the order there and they print and ship. It's usually never more than 4 bucks or so. And since I was getting other stuff it made sense. I think I have everything available for the MPC Falcon, and, made silicone molds to duplicate most of it that I could because I have a closet full of those. I made a radar dish for Scarecrow Joe once cause he lost the one he had. Sent him an unused kit dish and a duplicate of the correct 3D printed dish so he'd have a choice. It's cheaper than buying a whole new set of stuff every time I build one.
Silicone molds that's nice.
I also need to make myself a few in the future. But I just started this hobby. This x-why is just the 5th model I ever build and painted ever. So I don't have a lot of previous experience building dioramas.

I should get some silicone so I have it when it could come in handy.

please don't take me serious I'm crazy :)
 
Only the 5th?!?! Geez dude, you're pretty damn good for only the 5th!!:thumbsup I just started again about a year and 1/2 ago. Did a lot of sloppy stuff as a kid and now I'm learning a whole new world of lighting, paint and weathering. I'd say you've got a brilliant future ahead of you with this stuff. I had forgotten how fun it is, and now...with all the things I'm learning, it's 10 times as much fun as it was when I was a kid. I'm a lighting junky now...if I can't put light to it, I'm not interested in building it :lol
Silicone molds that's nice.
I also need to make myself a few in the future. But I just started this hobby. This x-why is just the 5th model I ever build and painted ever. So I don't have a lot of previous experience building dioramas.

I should get some silicone so I have it when it could come in handy.

please don't take me serious I'm crazy :)
 
Only the 5th?!?! Geez dude, you're pretty damn good for only the 5th!!:thumbsup I just started again about a year and 1/2 ago. Did a lot of sloppy stuff as a kid and now I'm learning a whole new world of lighting, paint and weathering. I'd say you've got a brilliant future ahead of you with this stuff. I had forgotten how fun it is, and now...with all the things I'm learning, it's 10 times as much fun as it was when I was a kid. I'm a lighting junky now...if I can't put light to it, I'm not interested in building it [emoji38]
I just learn quick.. but that's what I have with what ever I do... I love to make dioramas. When I was a child I always was fascinated in dioramas because there is do much to see.. and now I do it myself. And I just want to make them always better each time I make it. This I just made last week, it's small but a example.
fd109b73827a53c3dbaf0459d4407f0c.jpg
736d2f230c0eaba78e6b1b23d3b17b74.jpg
f39cde6472c0fc7aa2675458a14d31ab.jpg
6798101f03d67eb72b06fd253cb73986.jpg
96791e226ae0ed47674feb87b973387b.jpg
017ca80208db646bc42a076162ce0093.jpg


please don't take me serious I'm crazy :)
 
Man-o-man...that's incredible!! You cross that kinda work into your modeling and we'll all be at your feet! That's absolutely exquisite work!:thumbsup
I just learn quick.. but that's what I have with what ever I do... I love to make dioramas. When I was a child I always was fascinated in dioramas because there is do much to see.. and now I do it myself. And I just want to make them always better each time I make it. This I just made last week, it's small but a example.
https://uploads.tapatalk-cdn.com/20180211/fd109b73827a53c3dbaf0459d4407f0c.jpghttps://uploads.tapatalk-cdn.com/20180211/736d2f230c0eaba78e6b1b23d3b17b74.jpghttps://uploads.tapatalk-cdn.com/20180211/f39cde6472c0fc7aa2675458a14d31ab.jpghttps://uploads.tapatalk-cdn.com/20180211/6798101f03d67eb72b06fd253cb73986.jpghttps://uploads.tapatalk-cdn.com/20180211/96791e226ae0ed47674feb87b973387b.jpghttps://uploads.tapatalk-cdn.com/20180211/017ca80208db646bc42a076162ce0093.jpg

please don't take me serious I'm crazy :)
 
xwing18.jpegxwing19.jpegxwing20.jpegxwing21.jpegxwing22.jpegxwing23.jpegxwing24.jpegxwing25.jpeg I got the front gear lamp sorted out, trenched the underside of the cockpit housing as Socrates pointed out. ran a separate trench under the seat for the control panel fibers and bundled all together. the wing asm front panel I drilled for the wires and fiber. since my ship will be landed and wings joined, it made it a bit easier to run wires up from the bottom, solder all together, then run one hot and one ground back down below where everything will come together. Have to find the right connector to tie everything together that plugs into one of those wall plug deals and get several for the rest of what will go into my diorama
 

Attachments

  • xwng10.jpeg
    xwng10.jpeg
    106.2 KB · Views: 193
Man-o-man...that's incredible!! You cross that kinda work into your modeling and we'll all be at your feet! That's absolutely exquisite work!:thumbsup
Thanks a lot :)
Are you really serious about that? Or your just being polite?
My first 2 models I combined a little like this. This are some photos I still had on my phone. They are not the best but it gives a impression.

Maybe a strange question, bit I'm thinking of selling some of what I did to finance myself in getting the perfect grade falkon from bandai. You think people would be interested?
9c1a9d5843ad043de447a4afd520cb7c.jpg
e0772ebbab9d11777511ad471bbe9fba.jpg
03bb488a5ec0137c9f5e7c2a71b9fd4c.jpg
f3ee0b62dd53076c024e2c261816b840.jpg
ddc1b267f0c2002f942a6bd5a9a4a9ec.jpg
73071eb58d1d6528bb2144890af8fc4a.jpg
a90238df6e3ec1e1139571ca9c782b67.jpg
0bf1b76d73be678e463e0e6b8593a260.jpg


please don't take me serious I'm crazy :)
 
View attachment 795051View attachment 795052View attachment 795053View attachment 795054View attachment 795055View attachment 795056View attachment 795057View attachment 795058 I got the front gear lamp sorted out, trenched the underside of the cockpit housing as Socrates pointed out. ran a separate trench under the seat for the control panel fibers and bundled all together. the wing asm front panel I drilled for the wires and fiber. since my ship will be landed and wings joined, it made it a bit easier to run wires up from the bottom, solder all together, then run one hot and one ground back down below where everything will come together. Have to find the right connector to tie everything together that plugs into one of those wall plug deals and get several for the rest of what will go into my diorama
If I'm now looking at the fibers you have are they now on the top? And Dos uur stil fit inside work a led?

And I was just thinking about how to get the wires into the diorama your going to make. But maybe you can do that like a fule hose. I think that would work :)

Your cockpit looks awesome :)

please don't take me serious I'm crazy :)
 
I'm quite serious, that's very nice work, you have a talent for this. As far as selling stuff, that can be a tricky thing. you have to advertise in the right places and hope the folks who would be interested, see it. I've had stuff on Ebay, sold a couple things. made good on one, took a bath on the other. All you can do is try. I sold a 31" Disney Nautilus all lit and stuff, to a guy in Austria for 600 bucks, I think by the time it was all said and done I made 250 bucks. Sold an upgraded MPC Falcon last year, lots of nice features, lights, sound module, etc... I think I probably lost on that one. Just depends on who sees it. Can't hurt to try :thumbsup
Thanks a lot :)
Are you really serious about that? Or your just being polite?
My first 2 models I combined a little like this. This are some photos I still had on my phone. They are not the best but it gives a impression.

Maybe a strange question, bit I'm thinking of selling some of what I did to finance myself in getting the perfect grade falkon from bandai. You think people would be interested? https://uploads.tapatalk-cdn.com/20180212/9c1a9d5843ad043de447a4afd520cb7c.jpghttps://uploads.tapatalk-cdn.com/20180212/e0772ebbab9d11777511ad471bbe9fba.jpghttps://uploads.tapatalk-cdn.com/20180212/03bb488a5ec0137c9f5e7c2a71b9fd4c.jpghttps://uploads.tapatalk-cdn.com/20180212/f3ee0b62dd53076c024e2c261816b840.jpghttps://uploads.tapatalk-cdn.com/20180212/ddc1b267f0c2002f942a6bd5a9a4a9ec.jpghttps://uploads.tapatalk-cdn.com/20180212/73071eb58d1d6528bb2144890af8fc4a.jpghttps://uploads.tapatalk-cdn.com/20180212/a90238df6e3ec1e1139571ca9c782b67.jpghttps://uploads.tapatalk-cdn.com/20180212/0bf1b76d73be678e463e0e6b8593a260.jpg

please don't take me serious I'm crazy :)
 
Thanks dude, that's an awful picture of the cockpit, it does look better in person, but not as good as yours. But, this one will do what I need it to do. I thought about that too, maybe having the power go to the rear panel, rather than the spot on the lower where it would go on the stand...I'll think of something. Was just going to go on-line and look for that stuff. I ran my fibers that same way you did, criss-cross grooves underneath. The "dash" panel fibers I made a groove under the seat and split the fibers into two bundles on either side of the joy stick. going to put the LED right behind R2 and under that rear upper panel. I spent about an hour last night cutting down and consolidating my other wires and started tucking them away, hope it goes smooth :confused
If I'm now looking at the fibers you have are they now on the top? And Dos uur stil fit inside work a led?

And I was just thinking about how to get the wires into the diorama your going to make. But maybe you can do that like a fule hose. I think that would work :)

Your cockpit looks awesome :)

please don't take me serious I'm crazy :)
 
I thought they might be weapons, best to leave those alone then. Thanks dude! :thumbsup
I love those spots for indirect lighting.. I did it on my.. and I used warm white. Is I would use it as a wapon they should have been red. With lighting it's just to highlight the model at certain spots.. also not always overthink the lighting is that would be realistic.... Be honest... A lot of thing is Star wars would in no way make any sense in reality.. but it's such a amazing world to drift off in your mind..

f78e757b2a1a7fd97a4a8be52b74b9de.jpg


please don't take me serious I'm crazy :)
 
I can see that point, well then if it's not going to be a chore I'll do that...I love lighting :thumbsup and I agree with your last statement completely :thumbsup that thing looks awesome dude!
I love those spots for indirect lighting.. I did it on my.. and I used warm white. Is I would use it as a wapon they should have been red. With lighting it's just to highlight the model at certain spots.. also not always overthink the lighting is that would be realistic.... Be honest... A lot of thing is Star wars would in no way make any sense in reality.. but it's such a amazing world to drift off in your mind..

https://uploads.tapatalk-cdn.com/20180212/f78e757b2a1a7fd97a4a8be52b74b9de.jpg

please don't take me serious I'm crazy :)
 
I can see that point, well then if it's not going to be a chore I'll do that...I love lighting :thumbsup and I agree with your last statement completely :thumbsup that thing looks awesome dude!
I used on both sides 1x 0.75mm fiber optic witch I mushroomd and drilled into the side so your don't really see it.

please don't take me serious I'm crazy :)
 
This thread is more than 3 years old.

Your message may be considered spam for the following reasons:

  1. This thread hasn't been active in some time. A new post in this thread might not contribute constructively to this discussion after so long.
If you wish to reply despite these issues, check the box below before replying.
Be aware that malicious compliance may result in more severe penalties.
Back
Top