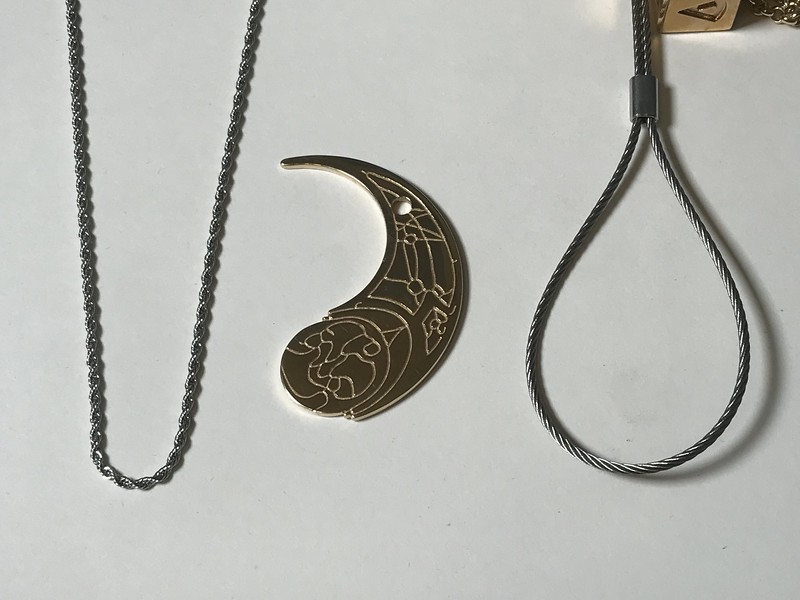
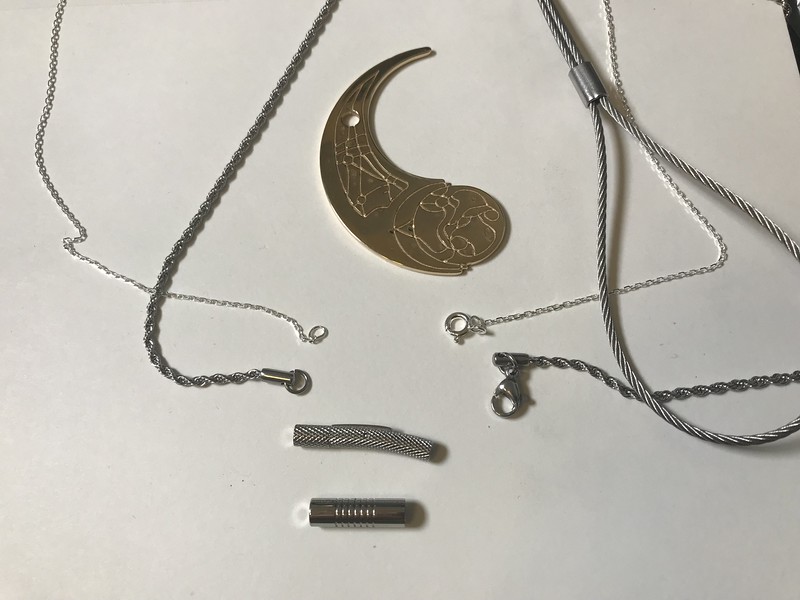
Now available to order. See the Project Run thread for details.
----------------
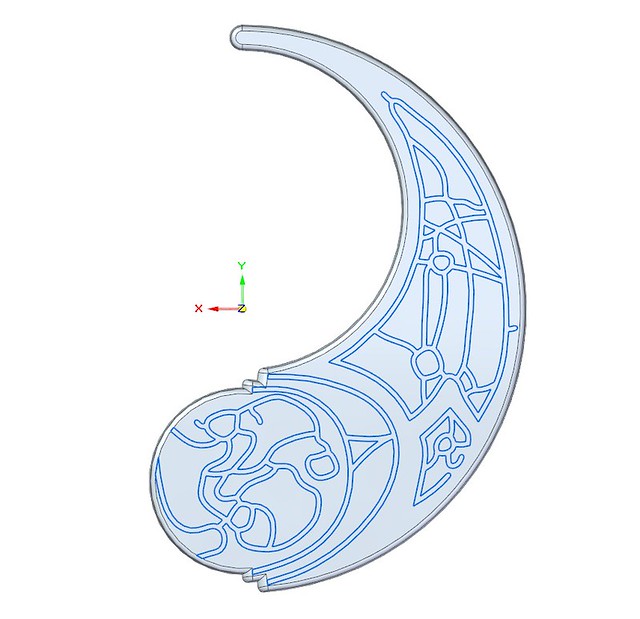
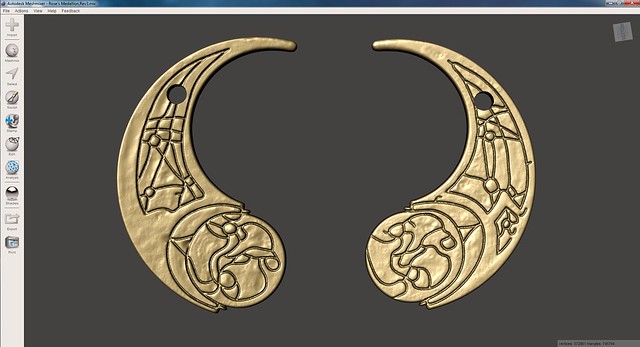
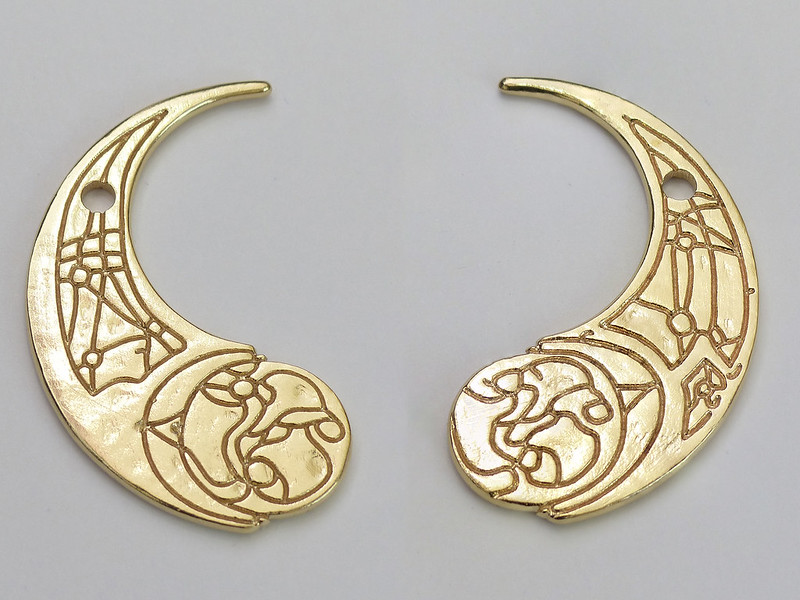
Today I modeled up a double-sided Haysian Ore Medallion
Note Zenix already has started one of these, so check his out also.
For mine I used my favorite CAD software: SolidEdge. It really isn't made for something like this, but it actually has spline tools which are easier to use than Illustrator or CorelDraw. There is one scene in the movie which really gave away that this medallion is double sided. Just before DJ shorts out the circuit, he flips the medallion, revealing the other side.
To that end I have made my medallion double sided. One side is "Paige's Side" and the other is "Rose's side", referencing the side they are looking at in the scenes in which they touch the medallion. There are most likely four unique patterns, but they don't get as much screen time, and so aren't as recognizable.
Along with reference photos of the prop taken at Disneyland, I was able to model both sides.
------------------
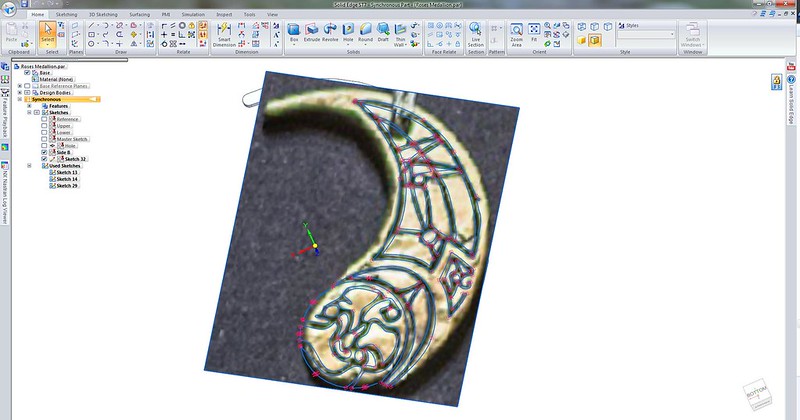
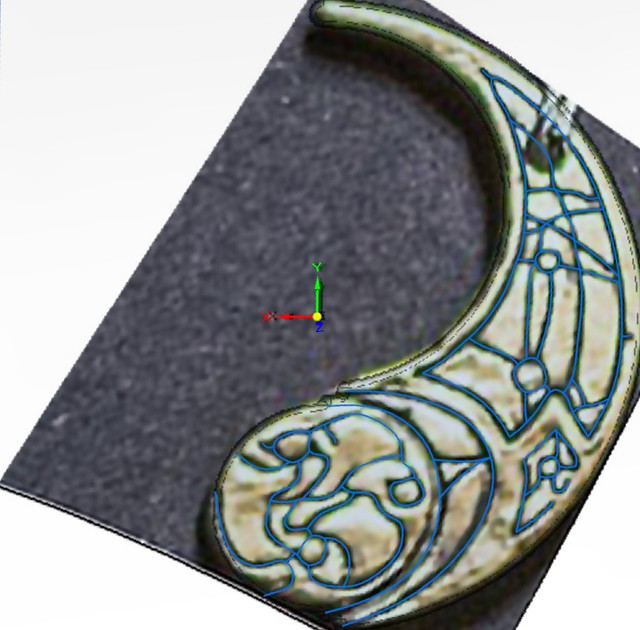
First, I determined scale from the scene in which DJ causes a short circuit. In that scene there is an SMA type RF connector. Something I work with every day. I know they are exactly 8mm wide. Using that as reference, I determined the Medallion is 57mm in Diameter.
I made the outline in CAD, and then hand traced all the various shapes for each side. Each one is a bit rough in order to sell the hand-made look of the object.
-----------------

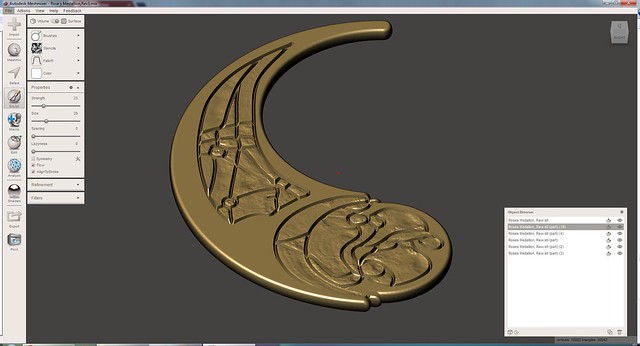
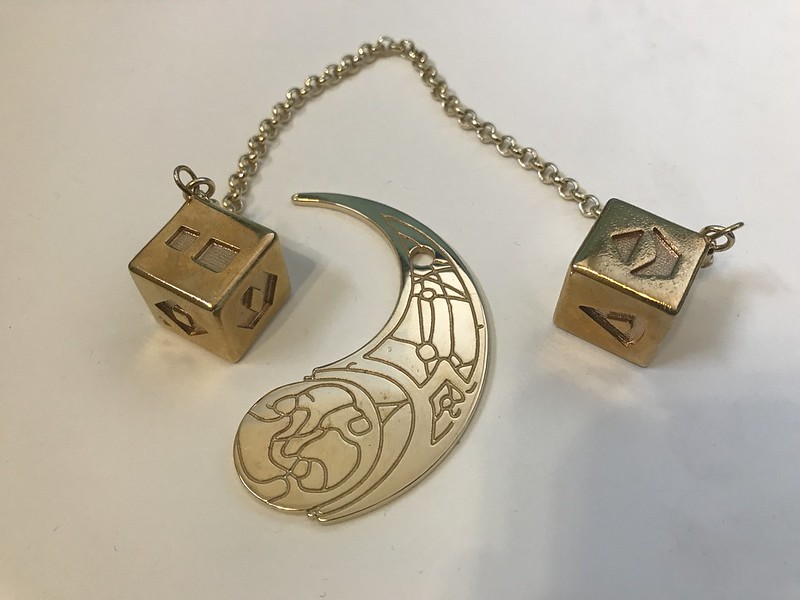
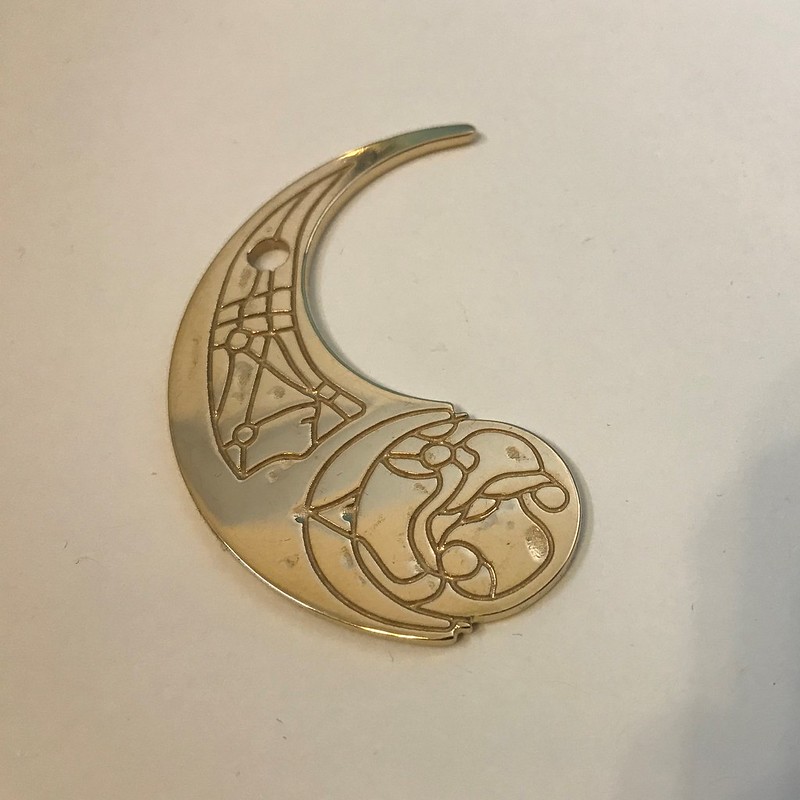
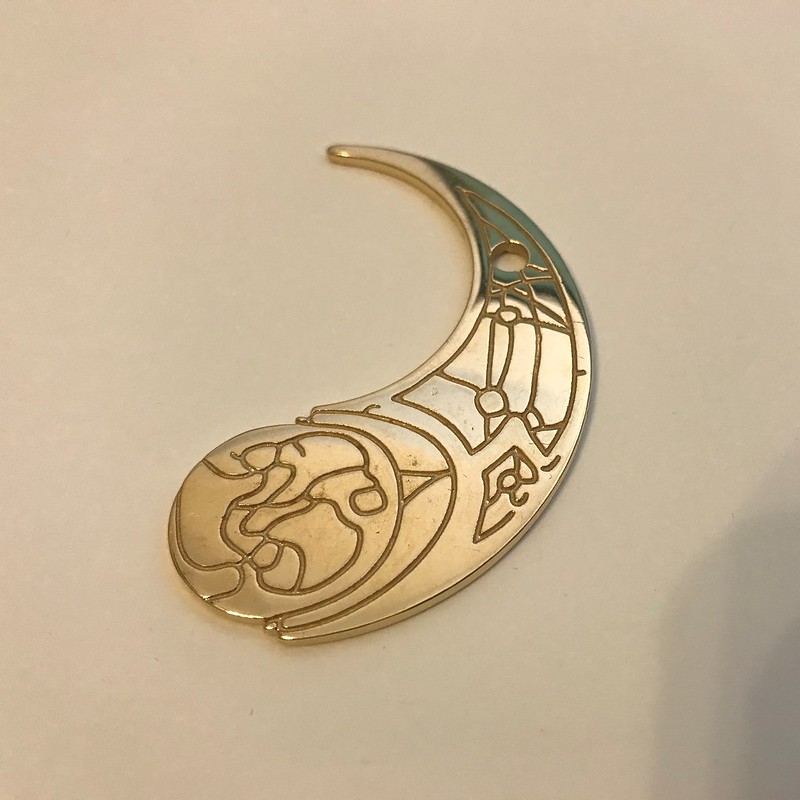
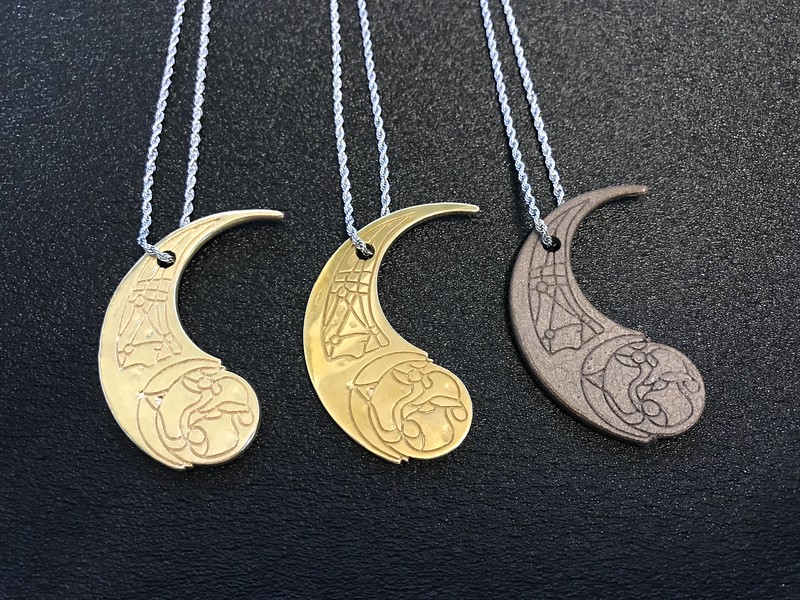
Next I etched the model using the sketches and rounded the edges. I could try to 3D print this, and hope the hand polishing done later would impart some soft effects.
-----------------
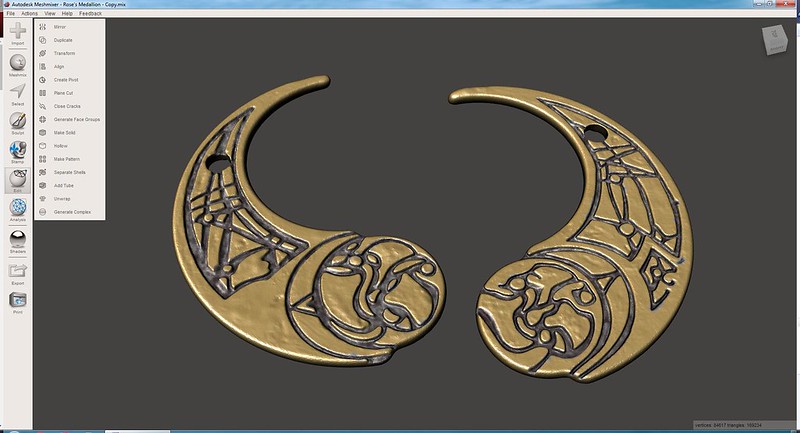
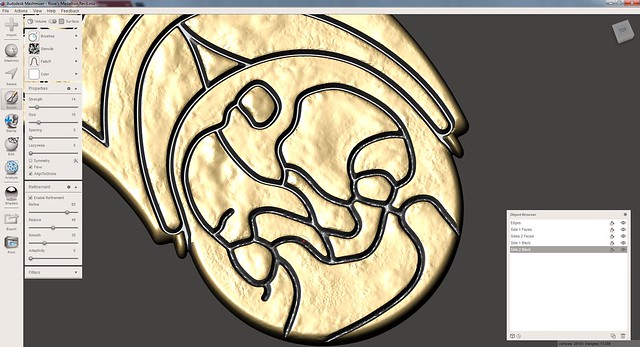
Instead I brought the model into Meshmixer. It has a fairly useful sculpting tool which I used to smooth out the sharp edges, which at the same time adding random rough spots and pitting. Hopefully this will make the final 3D print look authentically handmade.
However, after all this work, arriving at this step, I think I got the black marks spaced a bit to wide apart. Perhaps if I get time in the next week I will go back and re-do the model with tighter lines.
----------------
Today I modeled up a double-sided Haysian Ore Medallion
Note Zenix already has started one of these, so check his out also.
For mine I used my favorite CAD software: SolidEdge. It really isn't made for something like this, but it actually has spline tools which are easier to use than Illustrator or CorelDraw. There is one scene in the movie which really gave away that this medallion is double sided. Just before DJ shorts out the circuit, he flips the medallion, revealing the other side.
To that end I have made my medallion double sided. One side is "Paige's Side" and the other is "Rose's side", referencing the side they are looking at in the scenes in which they touch the medallion. There are most likely four unique patterns, but they don't get as much screen time, and so aren't as recognizable.
Along with reference photos of the prop taken at Disneyland, I was able to model both sides.
------------------
First, I determined scale from the scene in which DJ causes a short circuit. In that scene there is an SMA type RF connector. Something I work with every day. I know they are exactly 8mm wide. Using that as reference, I determined the Medallion is 57mm in Diameter.
I made the outline in CAD, and then hand traced all the various shapes for each side. Each one is a bit rough in order to sell the hand-made look of the object.
-----------------
Next I etched the model using the sketches and rounded the edges. I could try to 3D print this, and hope the hand polishing done later would impart some soft effects.
-----------------
Instead I brought the model into Meshmixer. It has a fairly useful sculpting tool which I used to smooth out the sharp edges, which at the same time adding random rough spots and pitting. Hopefully this will make the final 3D print look authentically handmade.
However, after all this work, arriving at this step, I think I got the black marks spaced a bit to wide apart. Perhaps if I get time in the next week I will go back and re-do the model with tighter lines.
Last edited: