davidvaradyszab
New Member
Hi Guys, I was thinking about sharing my experiences with building my first ever scratchbuilt diorama. I have to tell you I never did anything like this before, so don't be too hard on me ")
It all started with me dropping my jaw during The Force Awakens, when Rey suddently drove the Falcon into the destroyer while looking for cover.

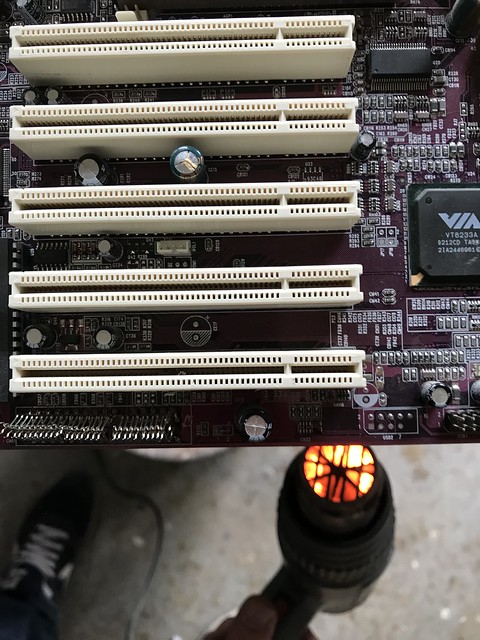
Very striking scene and it was so perfectly executed! I still consider this as one of the most visually exciting scenes of the movie, but I never tought about building it as a diorama (or building any dioramas at all) Then I have seen some very good takes on the same scene from fellow model builders. Then the Palm-sized Bandai Falcon came out and I had to get one. The last drop was finding my old PC motherboards at my parents place. I was staring at the texture of the sockets on them and got an idea which I couldn't get out of my head so I developed it further and further during the next days.
I dediced to give it a go, but -having many model build projects in parallel- I wanted to keep it low budget. Also promised myself not to go nuts about screen accuracy, rather than recreating the overall look-and-feel of the scene. Most of it is motion blur anyways
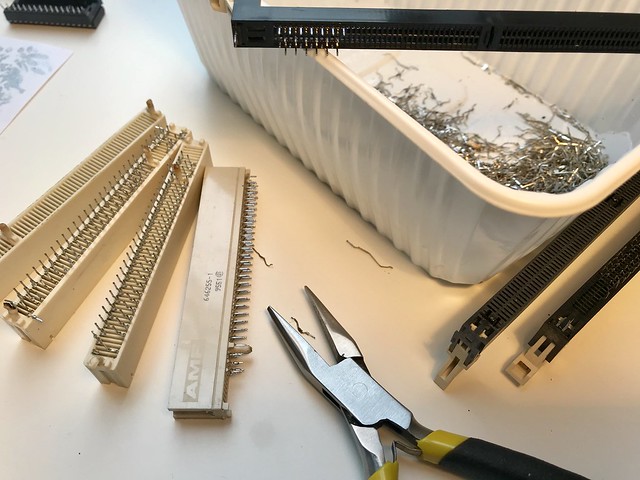
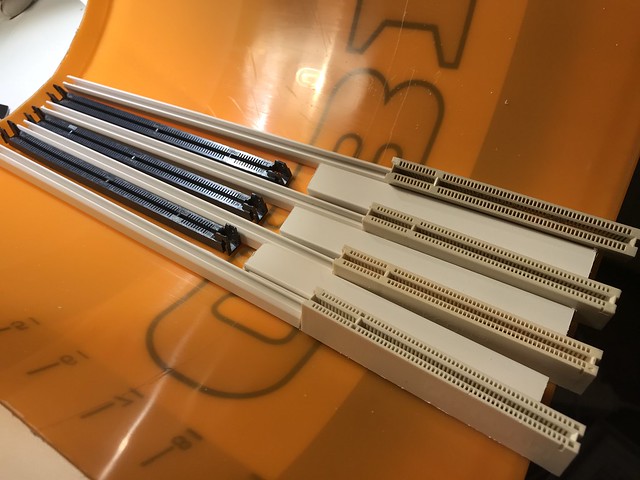
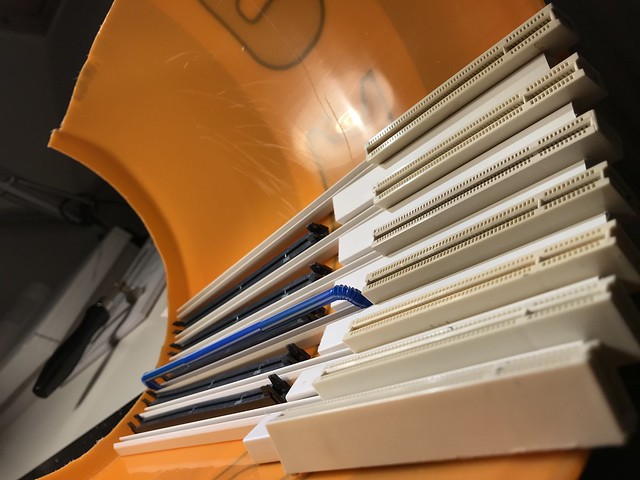
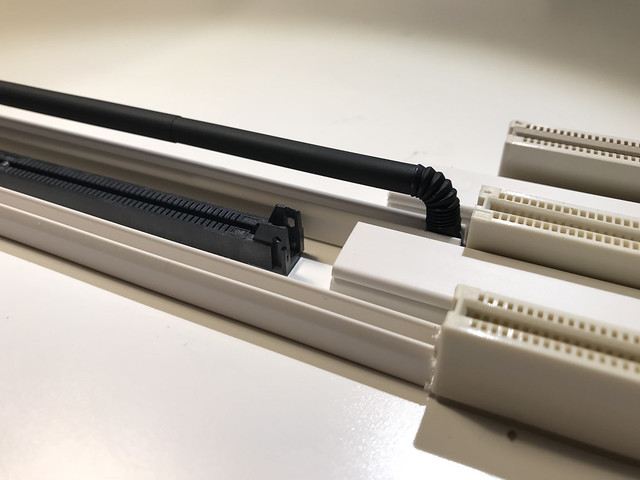
I asked around and quickly got more old PC motherboards from my friends. Removed the PCI and the RAM slots with a heat gun. Then I removed the THOUSANDS of pins from the bottom of the things so finally I ended up with a nice box of empty sockets.

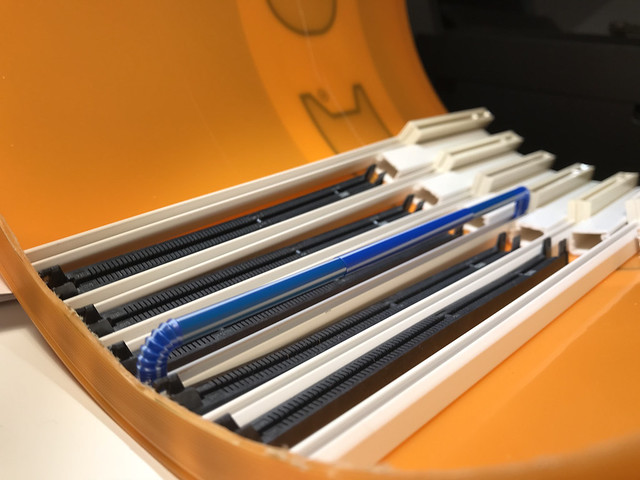
Then I bought different wire channels in the nearby DIY store and - most importantly - a BUCKET.

I sawed the bucket in half. Divided the surface to equal stripes and started to superglue the parts on it. (the first shot is "brainstorming" only. No parts are actually glued yet, just messing around with the look)

I am planning to add more piping made of straws to make the inner surface look more busy. First I was afraid that they are too recognizable. But then I tested it and found out that a simple layer of base coat magically turns them into pipes - I decided to include them in the final design.
So this is where I stand now ( beer can for scale )
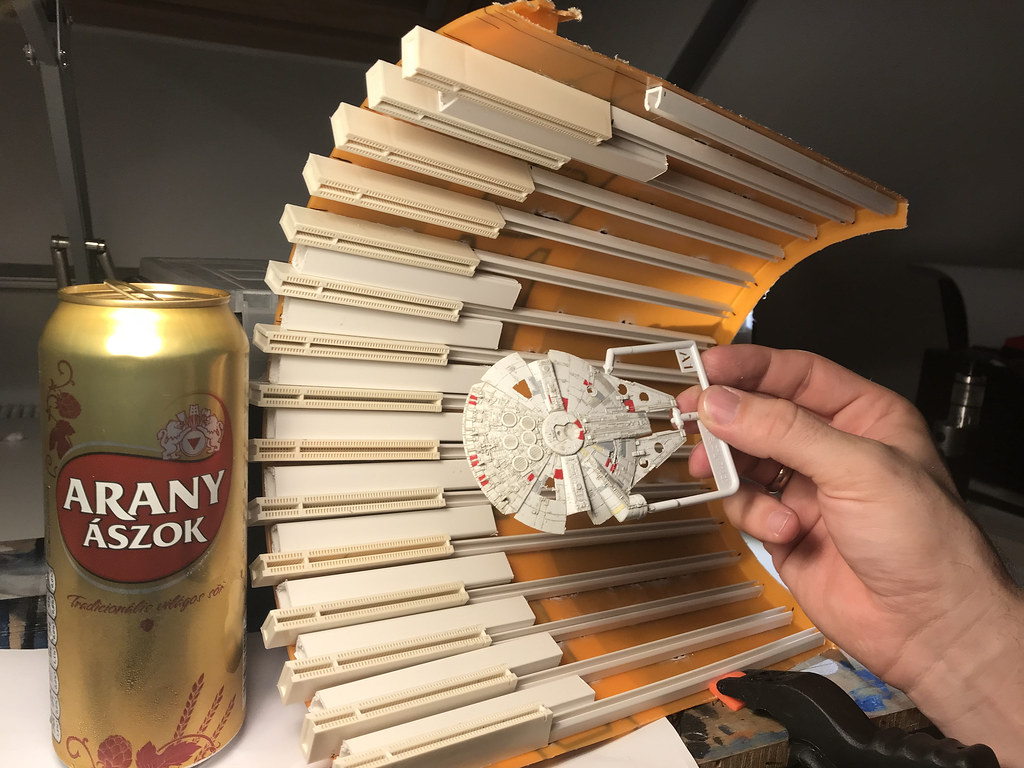
Can wait to have everything glued to give it a nice coat of paint finally.
It all started with me dropping my jaw during The Force Awakens, when Rey suddently drove the Falcon into the destroyer while looking for cover.
Very striking scene and it was so perfectly executed! I still consider this as one of the most visually exciting scenes of the movie, but I never tought about building it as a diorama (or building any dioramas at all) Then I have seen some very good takes on the same scene from fellow model builders. Then the Palm-sized Bandai Falcon came out and I had to get one. The last drop was finding my old PC motherboards at my parents place. I was staring at the texture of the sockets on them and got an idea which I couldn't get out of my head so I developed it further and further during the next days.
I dediced to give it a go, but -having many model build projects in parallel- I wanted to keep it low budget. Also promised myself not to go nuts about screen accuracy, rather than recreating the overall look-and-feel of the scene. Most of it is motion blur anyways
I asked around and quickly got more old PC motherboards from my friends. Removed the PCI and the RAM slots with a heat gun. Then I removed the THOUSANDS of pins from the bottom of the things so finally I ended up with a nice box of empty sockets.
Then I bought different wire channels in the nearby DIY store and - most importantly - a BUCKET.
I sawed the bucket in half. Divided the surface to equal stripes and started to superglue the parts on it. (the first shot is "brainstorming" only. No parts are actually glued yet, just messing around with the look)
I am planning to add more piping made of straws to make the inner surface look more busy. First I was afraid that they are too recognizable. But then I tested it and found out that a simple layer of base coat magically turns them into pipes - I decided to include them in the final design.
So this is where I stand now ( beer can for scale
)
Can wait to have everything glued to give it a nice coat of paint finally.