Blade Runner 2049 Baseline Test

Looking great! Closer indeed.

Though we have no better view of the left side, I think the surfaces may be angled back further than you have currently.
View attachment 789141

I noticed the brighter values as well and was trying to figure out why that is, but there is a problem. In order for such a tall plane to be just as steep if not steeper than the blue plane they would need to be tilted all the way back past the thickness of the panel or at least past the current back layer

tilted.png

also in the behind the scenes screenshots we have you can see that the top edge of the left side looks to be the same thickness as the middle area of the right side which is where i currently have it:


tilited 2.png


the only other way it could be tilted back that steep is if the flat areas of the triangles were significantly taller than what we currently have, which is possible (just look what happened with the vertical bar lol) but i would still be hesitant to say they are taller than the higher planes of the right side panel. If they were that much taller i would think they would be casting longer shadows on the bottom as well, but the shadows under the left side are actually shorter than the shadows on the right


It is still very weird though, maybe just something with the paint job and the lighting arrangement makes those areas look brighter?
 
I noticed the brighter values as well and was trying to figure out why that is, but there is a problem. In order for such a tall plane to be just as steep if not steeper than the blue plane they would need to be tilted all the way back past the thickness of the panel or at least past the current back layer

View attachment 789278

also in the behind the scenes screenshots we have you can see that the top edge of the left side looks to be the same thickness as the middle area of the right side which is where i currently have it:


View attachment 789279


the only other way it could be tilted back that steep is if the flat areas of the triangles were significantly taller than what we currently have, which is possible (just look what happened with the vertical bar lol) but i would still be hesitant to say they are taller than the higher planes of the right side panel. If they were that much taller i would think they would be casting longer shadows on the bottom as well, but the shadows under the left side are actually shorter than the shadows on the right


It is still very weird though, maybe just something with the paint job and the lighting arrangement makes those areas look brighter?

I think we should reconsider the left side's construction and geometry. They may indeed be thicker then we originally assumed. It could still give us the edge thickness we see in that side view.

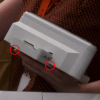
I am seeing a seam or gap between the right edge of the upper piece and the back panel.. There is a fillet around the edge, but there's something more. I think they may be separate pieces.
SeamOrGap_01.jpg
 
Relooking at those lens panels, I noticed that the top one is not flush with the base.

I have noticed the overhang before but I believe its not actually sticking out, its just that its a raised area so the perspective makes it look larger. Consider that it also sticks out in all my renders, yet i have it flush with the edge:


to be or not to be flush.png

granted its not as extreme on the top edge, (especially after making it slope down in that direction) but I would be hesitant to make it overhang without knowing for sure, we dont even know what lenses they were using for these specific shots so who knows how it may be distorted. Man it would be nice to get more images of this thing haha you mentioned emailing various people from the art department earlier in the thread correct? Wonder if there is anybody else we could try, even just one more image of the left side from a different angle could help a ton


I think we should reconsider the left side's construction and geometry. They may indeed be thicker then we originally assumed. It could still give us the edge thickness we see in that side view.


hmmm maybe, I just feel like it seems strange for them to not be the same height as the right side panel, though maybe i'm just biased since iv'e been modeling it that way since the start lol again just one more image could clear any doubt as to what its actually shaped like

[QUOTEI am seeing a seam or gap between the right edge of the upper piece and the back panel.. There is a fillet around the edge, but there's something more. I think they may be separate pieces.][/QUOTE]

Yeah looks like they were separate parts that were attached later, they probably had inset areas on the back panel for the triangles to fit in. Since i am printing in one large piece (minus some detail parts) I will probably not include that gap (same as with the gap between the vertical bar and the back panel) But who knows, i might change my mind and add or i might add it if more photos prove that gap to be more significant then first thought
 
I asked George Hull, Mike Hill, and one other conceptual art contributor who I can't recall right now. None seemed to know who did it, and thought Dennis Gassner might know.

Yes, a good shot from another angle would clear up a lot. We had to wait months for this breakthrough, maybe another is close at hand?

It is a pleasure dissecting/exploring this with you, mrcarkeys42 (and everyone else here too). Would you mind posting wireframes of the top and side views of your current model? I want to be able to see though it, without perspective distortions.
 
Last edited:
It is a pleasure dissecting/exploring this with you, mrcarkeys42 (and everyone else here too). Would you mind posting wireframes of the top and side views of your current model? I want to be able to see though it, without perspective distortions.


same to you lunadude!

and yeah no problem, this is the wire frame as is. keep in mind the rails are not present, neither is the weird slit thing inside of the black bar. All the open spaces in the back also muddies it a bit, let me know if you want me to get the wire frame without these areas

I also changed the programs FOV from 35 degrees to 1 degree, so there is almost no perspective distortion

View attachment wire frame v2.png

View attachment wire frame v3.png

View attachment wire frame v4.png

View attachment wire frame v5.png

- - - Updated - - -

also i am beginning to come around to the idea of it overhanging, i had almost forgotten this useful photo:

scene20077.jpg

dont look at it much since its a wide, but its actually looking slightly from the left, and you can just make out the edge of the panel
 

Attachments

  • wire frame 1.png
    634.3 KB · Views: 120
  • wire frame 2.png
    364.2 KB · Views: 114
Hey guys sorry for such a long hiatus, just been busy with school is all and was maybe hoping for some more images to surface haha

Rest assured, ill be back with updates soon!
 
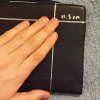
Okay so I think i am just having trouble determining the scale of it which has been partially preventing me from moving forward, especially since i need to get lenses of a specific size which depends on the overall scale. Now on my last iteration, the height of the back panel was 11.5 cm tall. I think that this picture may throw that off:

finger scale.png

Okay, so notice that her thumb is flush against the back panel and is also still obscured by the vertical bar panel. However, the tip of her index finger is in light indicating that it is not obscured by the vertical bar panel and is also overhanging the back panel. This means that from the base of her thumb to the tip of her index finger is long enough to cross the back panel, not just straight across but at a significant angle.


my hand scale.png


substituting with my own hand (keep in mind i have fairly small hands for a dude, don't look into that lol) with my index finger at the proper angle to pass the tip of my thump, my finger is nowhere close to reaching 11.5cm.

if my assumptions are correct that would make the height of the back panel closer to 9cm.


Another problem this creates though is the size of the linear rails. User Karstein messaged me and gave me the idea of using the railing to scale the rest of the piece. However most linear rails I have seen online would be too large for what the previously established scale would indicate. He had tried scaling a model to a 12mm wide rail (8mm thick) which is fairly common. scaling the rest of it to that railing size would make the back panel 18cm tall, even taller than what i had originally had. If the scale of my previous model were correct, the railing would be 5mm thick which is already smaller than i am able to find online. If my hand scale estimate were correct that would make the railing even smaller, so i honestly am just not sure at this point lol


EDIT: 9cm, not 6cm my bad
 
Last edited:
Good to see you back on the case again!

I poked around on the geometry and didn't get very far. Cranking the contrast a little and rotating the image, did yield some info. Take it for what it is worth.


ScannerSIde_03.png
 
Last edited by a moderator:
Another problem this creates though is the size of the linear rails. User Karstein messaged me and gave me the idea of using the railing to scale the rest of the piece. However most linear rails I have seen online would be too large for what the previously established scale would indicate. He had tried scaling a model to a 12mm wide rail (8mm thick) which is fairly common. scaling the rest of it to that railing size would make the back panel 18cm tall, even taller than what i had originally had. If the scale of my previous model were correct, the railing would be 5mm thick which is already smaller than i am able to find online. If my hand scale estimate were correct that would make the railing even smaller, so i honestly am just not sure at this point lol
EDIT: 9cm, not 6cm my bad

https://www.mcmaster.com/#linear-motion-carriages/ and then "Ball Bearing Carriages and Guide Rails" and you should get a list on the left of various sizes, 5mm (and smaller) is available. McMaster have 3D models available so you can grab them and scale your reference image, (in Fusion 360 you can do this using the Calibrate Canvas option).


On a rough attempt to scale the flattest reference image

5mm rail gives a derived height of 70mm ish (Based on a 3.7mm height spec)
7mm rail gives a derived height of 105mm ish (Based on a 5mm height spec) <--- this is your guy- I''d guess a 120cm rail
10mm isn't worth trying because if you look at the aspect ratio of width:height its visibly wrong.

Edit: Does this help?

BaselineTest MKII v2.jpg


Another edit: I extrapolated a little more based on the assumed dimensions of a 7mm rail and came up with this:
BaselineTest Render.jpgBaselineTest RENDER2.png

I think there is some perspective distortion in the head-on reference image. Although the top left corner looks like its overhanging I'm not convinced it actually does - you'd think you'd see some indication in the pictures lunadude posted.
 
Last edited:
I'm sorry for double posting; I did a print of the model. Whats interesting (to me anyway) is how the top corner looks. It was almost impossible to line up the camera so it DIDN'T look like it overhangs despite the fairly modest offset.

Hopefully you find it useful mrcarkeys42


Baseline3.JPG

Baseline4.jpg
 
I still think the badge is a better object to measure from. Hands very in size, and it is an oblique angle.


good point! my only concern is that its hard to tell how far back the id card is compared to the prop, but i guess thats still better than using the hands haha


https://www.mcmaster.com/#linear-motion-carriages/ and then "Ball Bearing Carriages and Guide Rails" and you should get a list on the left of various sizes, 5mm (and smaller) is available. McMaster have 3D models available so you can grab them and scale your reference image, (in Fusion 360 you can do this using the Calibrate Canvas option).


On a rough attempt to scale the flattest reference image

5mm rail gives a derived height of 70mm ish (Based on a 3.7mm height spec)
7mm rail gives a derived height of 105mm ish (Based on a 5mm height spec) <--- this is your guy- I''d guess a 120cm rail
10mm isn't worth trying because if you look at the aspect ratio of width:height its visibly wrong.

Edit: Does this help?

View attachment 799675


Another edit: I extrapolated a little more based on the assumed dimensions of a 7mm rail and came up with this:
View attachment 799745View attachment 799755

This is a huge help, thank you! I will have to to scale my model to that railing tonight and see how it turns out!


I think there is some perspective distortion in the head-on reference image. Although the top left corner looks like its overhanging I'm not convinced it actually does - you'd think you'd see some indication in the pictures lunadude posted.


This was my initial thought as well, which is why i did not model the overhang into any of my versions so far. However, my opinion is now slightly swayed because of this image:

scene20077.jpg

Its not the closest shot which is why its not looked at often, however this shot is ever so slightly to the left of center, making the left side of both the vertical bar and the back panel slightly visible. Even at this angle, the overhang is still present


proof of overhang.png


also the print looks great! that looks very close in size, so i think i am in agreement that the 7mm railing is the one (though i probably will not be purchasing them since 100 dollars is a bit much for me, ill print the railings for mine)

though i am pretty sure the middle/lowest section of the right side is still taller than the lowest sections of the left side
 
Also what 3d program do you use? Im only experienced with sketchup and i dont think i can use any of the 3d file options they have without converting them somehow
 
also the print looks great! that looks very close in size, so i think i am in agreement that the 7mm railing is the one (though i probably will not be purchasing them since 100 dollars is a bit much for me, ill print the railings for mine)
Luckily, other retailers are available

I use Fusion360, which is free for hobbyists and pretty easy to get to grips with.

Here's a quick experiment: Both are from the same viewpoint, slightly left of center like the reference photo.
Left is with a 200mm focal length, the right is 35mm. (Like doing a dolly zoom)

BaselineTestRender6.jpg BaselineTestRender7.png

Cool eh? I mean, it could overhang but its possible that it doesn't and still appear that way in a photo.
 

Your message may be considered spam for the following reasons:

If you wish to reply despite these issues, check the box below before replying.
Be aware that malicious compliance may result in more severe penalties.
Back
Top