Blade Runner 2049 Baseline Test

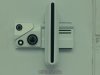
also as far as i know this is the only shot that has something to compare size, and due to the angle i cant tell distance at all so its pretty useless. hopefully my estimate is in the ballpark lol

View attachment 782986

This looks like a pretty small room. I'm assuming that the device is mounted on a door, which would make it about a foot and a half wide? Just guessing here.
 
I am also unsure what the third, smallest circle is. It is very hard to tell from the movie. Like you said, either a light or reflective surface. I think a light could be a nice accent, perhaps a power on light? For when the test is running? Just a thought. I may add one to mine when I make one.
 
This is looking amazing! I hope to build one myself in the next few months. Great work and info! Thanks for sharing all of this.


I am also unsure what the third, smallest circle is. It is very hard to tell from the movie. Like you said, either a light or reflective surface. I think a light could be a nice accent, perhaps a power on light? For when the test is running? Just a thought. I may add one to mine when I make one.


Thanks! Ill happily share my 3D files when I am done if you want!

and yeah right now i am strongly leaning towards it being a light. when scaled with all of the other parts, the circular shape (excluding what looks to be a metal ring around it) has the same exact diameter as one of these standard indicator light caps, 1.5875cm or 0.625in (they come in all sorts of styles, just using this one as an example)

https://www.alliedelec.com/vcc-visual-communications-company-25p-626c/70152560/


baseline light.png

the area highlighted in red would be the light, the area in blue would be the metal ring. As far the larger black circle around it, im not sure if it is proud or recessed, its pretty damn hard to tell. looks like it has some sort of topography to it though, its not just a flat black ring

for the two lenses i modeled them assuming the black areas were recessed but in all honesty i have no clue, unless more images surface later on there is no way to tell lol

baseline light.png
 
Last edited by a moderator:
I'm just so glad someone is pursuing this. I haven't found much on this scanner. I've asked a number of the film's designers, and nobody on the team seems to know exactly who came up with it.

I made it in Adobe Fireworks (Illustrators younger brother). I took a couple photos with my phone, in the theater. Then I made the piece by tracing and cleaning up the lines.

I decided that the vertical offset we see in the 'scanner' bar's shapes, are because the angle is from below the center of the object. Therefore I centered all the parts, making it more like a plan view than a perspective render.


Im not sure who came up with the final prop, but the machine exists in the storyboards and its pretty damn close to the final design, so I imagine either Denis Villeneuve or Roger Deakins came up with the design while they were story boarding

story 3.jpg


I disagree about the scanner bar though, I think if it were at that low of an angle you would be able to see the bottom edges of the other panel parts

also its very hard to tell so i could be wrong, but in one of the two wider shots it seems the camera is very slightly to the left, and you can see where the larger "oval" end and the smaller "oval" continues (im not sure what else to call them lol)

oval 1.png

oval 2.png


This looks like a pretty small room. I'm assuming that the device is mounted on a door, which would make it about a foot and a half wide? Just guessing here.


yeah thats about right, it came to 44cm long in the model so just a hair under 1.5'
 
Oh, I hadn't seen the two shot angles (I'm waiting for the Blu-ray). I agree that the vertical elements are off center and do seem to go back to the wall. Good eyes, my friend.
 
Wow. Nice catch. It does appear that the vertical piece does indeed slide from left to right. I imagine it scans the face vertically much like joshi's face was scanned in order for Luv to break into the LAPD tracker to locate officer K. However this photo from its wikia page might also indicate that more than one baseline test was created, as this version's vertical double slide lines don't extend as far to the left as the final film version. Also the wikia version's slide lines are not rounded at the right. Maybe the wiki version is a prototype or concept drawing?
IMG_3204.JPG

I applaud you making this. It is one of my favorite things in BR2049.

This was my take on the device. It is only 2D, so I don't have other views.
I feel like the vertical piece slides left/right along rails. Could be wrong.
View attachment 783143
 
Last edited:
...However this photo from its wikia page might also indicate that more than one baseline test was created, as this version's vertical double slide lines do they extend as far to the left. Also the wikia version's slide lines are not rounded at the right. Maybe the wiki version is a prototype or concept drawing?
View attachment 783288

I think I ran across this image on Reddit months ago. It's fan art created in Blender. (now I'm digging back through the /bladerunner in reddit...)
Found it: https://www.reddit.com/r/blender/comments/76epig/cells_interlinked/
 
Last edited:
Wow. Nice catch. It does appear that the vertical piece does indeed slide from left to right. I imagine it scans the face vertically much like joshi's face was scanned in order for Luv to break into the LAPD tracker to locate officer K. However this photo from its wikia page might also indicate that more than one baseline test was created, as this version's vertical double slide lines do they extend as far to the left. Also the wikia version's slide lines are not rounded at the right. Maybe the wiki version is a prototype or concept drawing?
View attachment 783288


I've seen that pic around, I forget who made it exactly but if I recall correctly its just a fan rendering from after they saw the movie. Since no official pictures were released until now that image has just been used everywhere instead (like YouTube videos of people reading the baseline test etc.) so as far as i know its not official and the wikia page should probably be updated lol
 
okay it took longer then I thought but i finally finished the exterior of the newest model. I started from scratch this time based on the new pictures and its the most accurate by far. There are a lot of finer detailed I had to guesstimate and use some imagination for, so those areas are probably not that accurate but unless someone can get a hold of the real thing there is not much more I can do lol

Let me know if there is anything you guys would change

cells 1 2d.png

cells 1 3d.png

cells 2 2d.png

cells 2 3d.png

cells 3 2d.png

cells 3 3d.png

cells 4 2d.png

cells 4 3d.png

cells 5 2d.png

cells 5 3d.png

cells 6 2d.png

cells 6 3d.png

cells 8 2d.png

cells 8 3d.png

cells 7 2d.png

cells 7 3d.png

cells 10 2d.png

cells 10 3d.png

cells 11 2d.png

cells 11 3d.png


so a few things i added but am unsure about:

The geometry in all the black areas, both in the 3 rings and in the vertical bar is hard to distinguish. I gave my best guesstimate for what these areas are shaped like, if anybody things they would be different than how I modeled them let me know


the thin outer silver rings around the two lenses. Im not entirely sure if those outer rings are even there, but it looks like there is a thin rim of grey/silver between the white body and the black ring. this thin rim is absent from the light which is why there is none there. maybe this is just shading? hard to tell but im guessing its a thin outer ring


and lastly the metal rails on the top and bottom. In my original model i had them as simply beveled, but looking closer at the new images, its hard to tell but it looks "stepped" to me. again hard to tell with these few references, but thats what i went with lol


and finally here is a side by side:

cells compare 2.png
 
Looking pretty good. I have a few notes.
1. I think the lenses are mounted 'on' the surface, not 'in'. Shadows suggest they are not flush mounted.
2. There appears to be a undercut along the horizontal right side.
3. Are we seeing rails top/bottom, or is is an inset panel on the door behind the device?
4. The triangular lens panels need some filets on the edges to soften them.

cells compare 2_notes.jpg cells 5_undercutNotes.jpg
 
The baseline test scenes have been uploaded to YouTube if anybody wants to watch them again


Looking pretty good. I have a few notes.
1. I think the lenses are mounted 'on' the surface, not 'in'. Shadows suggest they are not flush mounted.
2. There appears to be a undercut along the horizontal right side.
3. Are we seeing rails top/bottom, or is is an inset panel on the door behind the device?
4. The triangular lens panels need some filets on the edges to soften them.

View attachment 783392 View attachment 783393

Thanks for the input! some of these i can respond to, others i will get working on

1. I agree and they are in my model though it may be hard to tell from the images. The silver rings are raised 2mm above the panel surface, ive adjusted the shadows in my renderer so that difference is more clear:

longer shadows.png


2: yeah I noticed that dark strip of shadow but wasn't sure what caused it, I think you are right though and will add the undercut

3. there is no way of knowing for sure but im am pretty sure its not an inset because going back to this closeup, you can see the big oval sort of going behind it:

oval 1.png

4. yeah for some reason i just cant get the filet edges on that shape it was driving me crazy to be honest, ill keep trying though


there are some other issues I noticed on my own with the proportions where some things are just slightly off, Ill do the best I can to fix them

i also think the whole thing needs to be a bit deeper/thicker. looking at the shadows in the crack between the triangle piece and the right side, it seems everything protrudes a but further than i thought
 
Last edited by a moderator:
1 & 2: - Go back to your lighting rig and render settings that emulate the scene. I really think that'll be key to getting depths right. Tricky stuff.

3: I can see what you mean. The back edge of the vertical bar does seem to protrude beyond the shape. I'm sold.

4: Interesting how some basic shapes are a pain to filet. Good luck.

The proportion thing is interesting. I ran across that when I did the 2D image. I traced it off the image I had, and still felt the need to massage the parts. There is some internal order and proportion indications that I tweaked.

Thanks for posting the video link!

BTW, now that I watch the video, I am reconsidering the size of the device.
I'll assume the room is maybe 6' x 8':
- The door is behind K on one of the short walls, with his chair aligned with the long side of the room
- K's sitting 4' to 5' from the wall and device
- K's neck eclipses the entire panel/device at the beginning of the shot
- This would make the panel 18' tops, and the scanner would be maybe 10"?
- Then it becomes the size of a Blu-ray player or Voight-Kampff machine, much more believable tech size

What do you think?
 
Last edited by a moderator:
Looking great! I'd definitely want to print one of these and put it on my wall! It'd be neat to make a tile backer for it to hang on that looks similar to the tile in the baseline room, like a shadowbox or something.
 

Your message may be considered spam for the following reasons:

If you wish to reply despite these issues, check the box below before replying.
Be aware that malicious compliance may result in more severe penalties.
Back
Top